D Splitting Jobs Using Multiple EDQ Servers
Note:
These steps are applicable only if you plan to use multiple EDQ servers for customer screening. If you want to use the default setup, that is, only a single EDQ server, see Scheduling the Customer Screening Run Job.- If one server is used to process the watch lists and another server is used to process the entity names.
- If one server is used to process data of individuals and another server is used
to process data of entities during different times of day.
Note:
- Provide the EDQ user name and password in the
cs_appln_paramstable. - Run the
select * from cs_edq_serversquery in your SQL query tool to verify the server details.
- Provide the EDQ user name and password in the
- Navigate to the
FIC_DB_HOME/bindirectory. - Execute
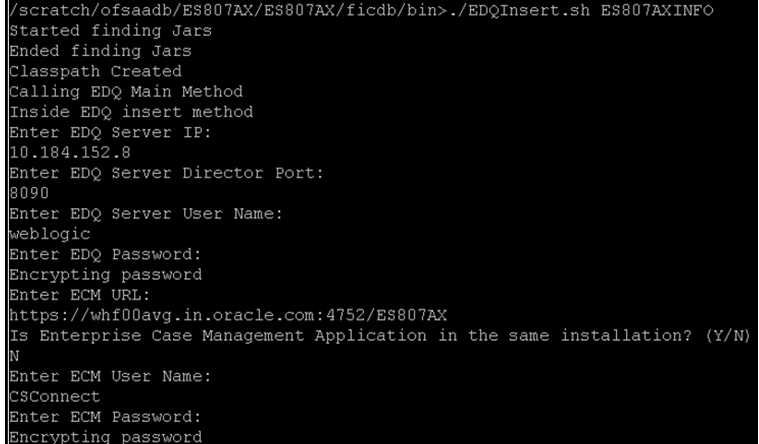
./EDQServerInsert.sh <INFODOM NAME>. This step is used to register the EDQ server details. You must replace theINFODOM NAMEplaceholder with your domain name. - Enter the following details in the console where the command is
run:
- EDQ Server Name
- EDQ server IP
- Enter EDQ Base URL (for example - http://xxx.mm.nn:yyyy/)
- EDQ Server Direct Port number (JMX port number). This value must be 8090.
- EDQ Server User Name
- EDQ Password details
Note:
If any of the authentication details entered is incorrect, the system displays error message.Figure D-1 EDQ Details
- Duplicate the
CS_Data_Load_Event_Generationbatch in the Run page. To do this, copy theCS_Data_Load_Event_Generationbatch and create another batch.Follow these steps to access the Run page:- Login as the administrator. The Financial Services
Analytical Applications Customer Screening home page
appears.
Figure D-2 Financial Services Analytical Applications Customer Screening Home Page

- Click the hamburger
 icon to view the Application Navigation List.
Figure D-3 Application Navigation List
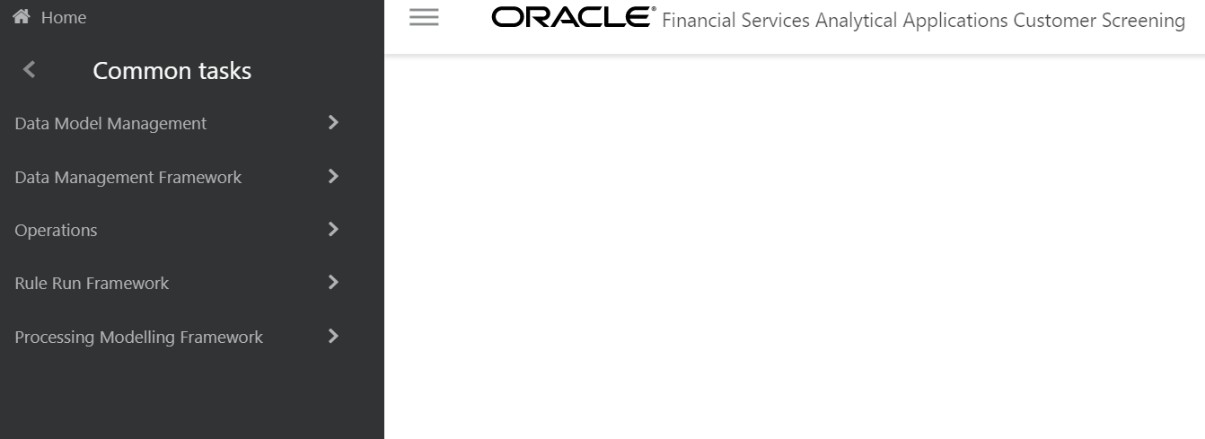
- From the Application Navigation List, select Common Tasks, then select Rule Run Framework, and then select Run. The Run page appears.
- Login as the administrator. The Financial Services
Analytical Applications Customer Screening home page
appears.
- In the Run page, follow these steps to create a duplicate
batch:
- Select the
CS_Data_Load_Event_Generationrun and click Copy. The Run page opens in copy mode.Note:
You must select the segment folder for the Sanctions pack in the Folder field to proceed.Figure D-4 Run Page in Copy Mode
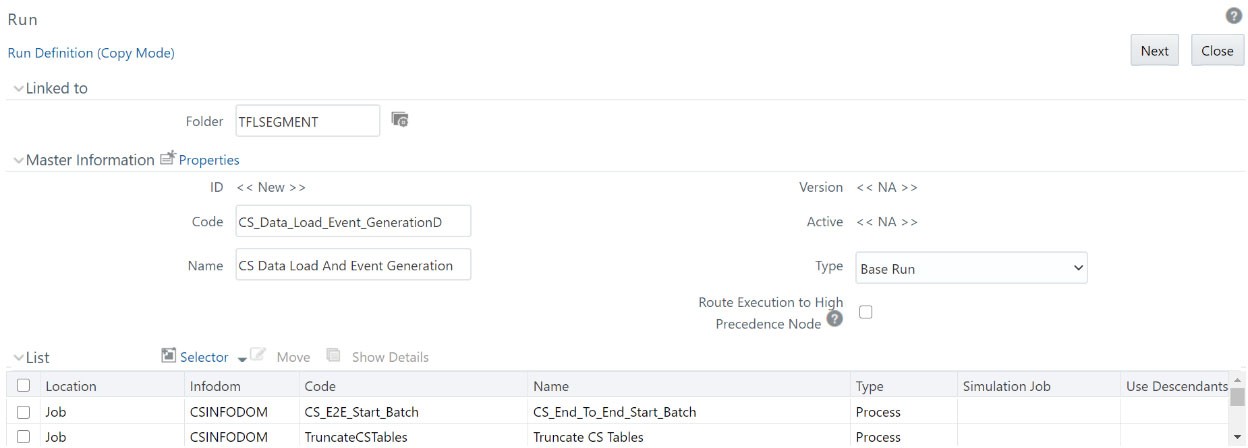
- Enter a new run code or alter the existing value in the
Code field. For example, code can be
CS_Data_Load_Event_GenerationD. - Enter a new run name or alter the existing value in the Code field. For
example, name can be
CS Data Load And Event Generation.Note:
The run name and run code values can be the same. - Click Next to go to the next page and confirm the name.
- Click Save.
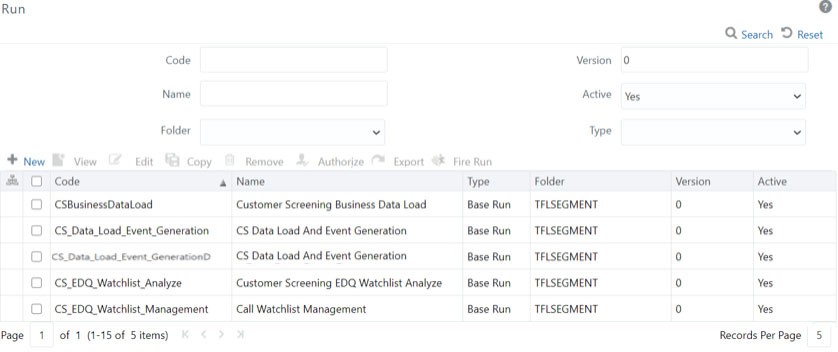
After you click Save, the new run name appears in the Run page.
Figure D-5 New Run Name in Run Page
- Select the
- Duplicate the
CS_E2E_Start_Batch, CS_Call_Customer_Screening, andCS_E2E_End_Batchprocesses in the Process page.Figure D-6 Process Page
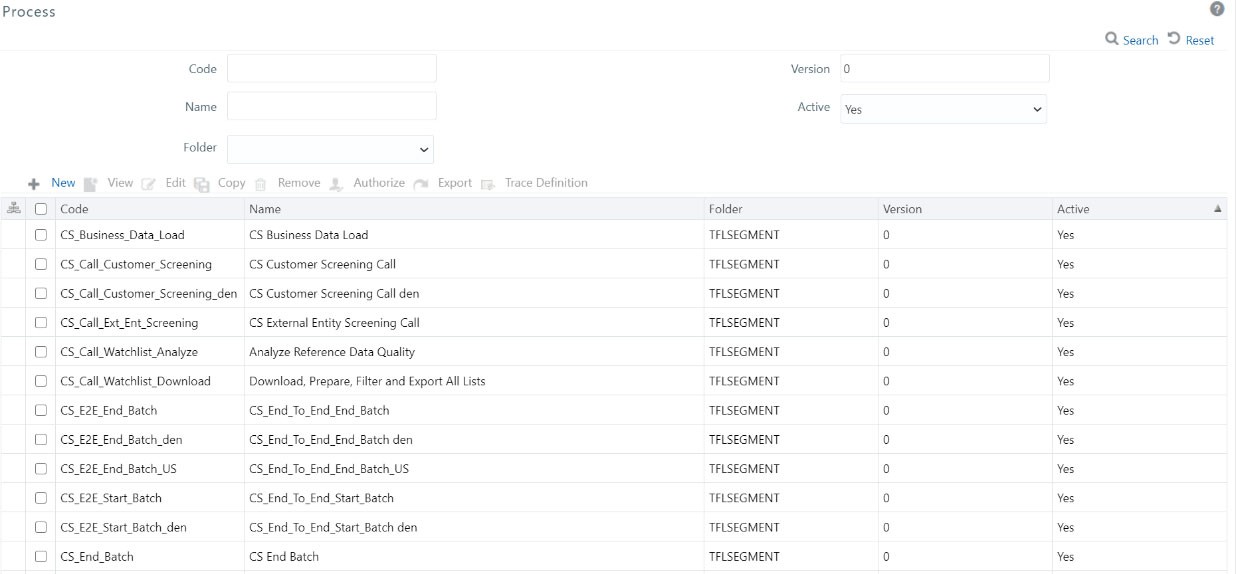
- Follow these steps to access the Process page:
- Login as the administrator. The Financial Services Analytical
Applications Customer Screening home page appears.
Figure D-7 Financial Services Analytical Applications Customer Screening Home Page

- Click the hamburger
 icon to view the Application Navigation List.
Figure D-8 Application Navigation List

- From the Application Navigation List, select Common Tasks, then select Rule Run Framework, and then select Process. The Process page appears.
- Login as the administrator. The Financial Services Analytical
Applications Customer Screening home page appears.
- To duplicate each process, follow these steps:
- For the
CS_E2E_Start_Batchprocess:- In the Process page, select
CS_E2E_Start_Batchand click Copy. The Process page opens in copy mode.Note:
You must select the segment folder for the Sanctions pack in the Folder field to proceed. - Enter a new process code in the Code
field and a new process name in the Name
field. You can also alter the existing process code or name. For
example,
CS_E2E_Start_Batch_den. - Click Save.
- In the Process page, select
- For the
CS_Call_Customer_Screeningprocess:- In the Process page, select
CS_Call_Customer_Screeningand click Copy. The Process page opens in copy mode. - Enter a new process code in the Code
field and a new process name in the Name
field. You can also alter the existing process code or name. For
example,
CS_Call_Customer_Screening_den. - Click Save.
- In the Process page, select
- For the
CS_E2E_End_Batchprocess:- In the Process page, select
CS_E2E_End_Batchand click Copy. The Process page opens in copy mode. - Enter a new process code in the Code
field and a new process name in the Name
field. You can also alter the existing process code or name. For
example,
CS_E2E_End_Batch_den. - Click Save.
After you click Save, the new process names appear in the Process page.Figure D-9 New Process Names in Process Page
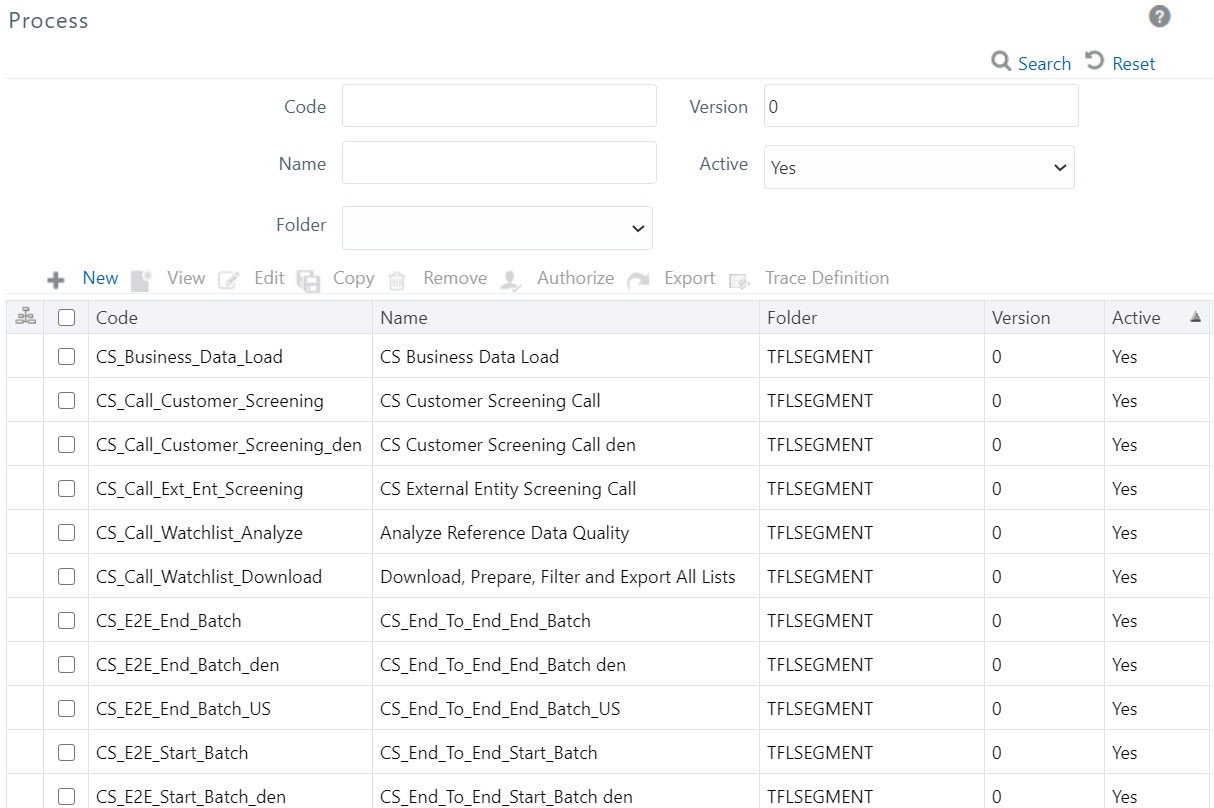
- In the Process page, select
- For the
- Update the group name for the
CS_E2E_Start_Batch_denandCS_E2E_End_Batch_denprocesses. To do this, run the following query:select * from cs_processing_group - Change the parameter for the
CS_E2E_Start_Batch_denprocess. To do this, follow these steps:- Select the duplicated process created in the earlier step and click Edit. The Process page opens in edit mode.
- Click Component. The Component Selector window appears.
- Click the drop-down list in line with the
F_CS_BATCH_RUN task. The
Parameters window appears.
Figure D-10 Parameter for the CS_E2E_Start_Batch Process
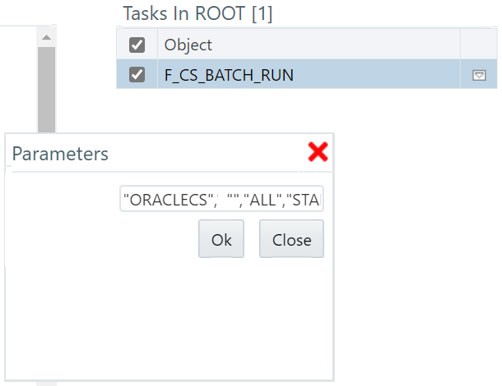
- Change the
ORACLECSparameter to the applicable data origin or processing name.
- Change the parameter for the
CS_E2E_End_Batch_denprocess. To do this, follow these steps:- Select the duplicated process created in the earlier step and click Edit. The Process page opens in edit mode.
- Click Component. The Component Selector window appears.
- Select the drop-down list in line with the
F_CS_BATCH_RUN task. The
Parameters window appears.
Figure D-11 Parameter for the CS_E2E_End_Batch Process
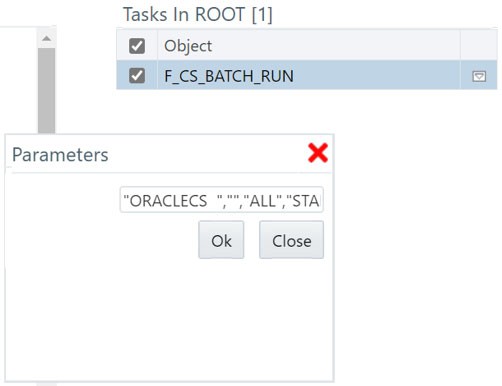
- Change the
ORACLECSparameter to the data origin or processing name.
- To change the parameters for the
CS_Call_Customer_Screening_denprocess, follow these steps:- Select the duplicated process created in the earlier step and click Edit. The Process page opens in edit mode.
- Click Component. The Component Selector window appears.
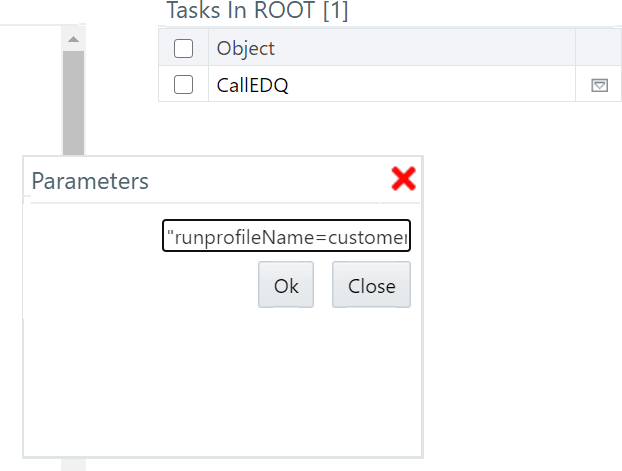
- Select the drop-down list in line with the
CallEDQ task. The
Parameters window appears with the following
values:
"runprofileName=customer-screening1.properties","RunLabel=customerscreening","
JobName=MAIN","ProjectName=Customer-
Screening","edqServerName=SERVER_2","condition=and AGE_YR_CT>20 and
BIRTH_DT <= @$~20 June 1972@$~"
Figure D-12 Parameters for the CS_Call_Customer_Screening_den Process
- Change the following parameters:
- Run profile name
Example:
runprofileName=customer-screening1.properties" - EDQ server name. If you do not change the server name, it is
replaced with the server name in the
cs_appln_paramstable.Example:
"edqServerName=SERVER_2" - Condition. By default, a single condition is provided. Use and
to give more than one condition.
Example:
"condition=and AGE_YR_CT>20 and BIRTH_DT <=
                                            @$~20 June 1972@$~"
- Run profile name
Note:
- It is not mandatory to provide a condition.
- Provide the expression
@$~to use alphanumeric characters for fields such as customer birth date. For example,"condition=and AGE_YR_CT>20 and BIRTH_DT <= @$~20 June 1972@$~".
- Replace the new batches in the Run page. To do this,
follow these steps:
- Select
CS_Data_L_Event_Generation_Denand click Edit. The Run page opens in edit mode. - Click the Selector drop-down list and select
Job. The Component Selector
window appears.
Figure D-13 Parameters for the CS_Call_Customer_Screening_den Process
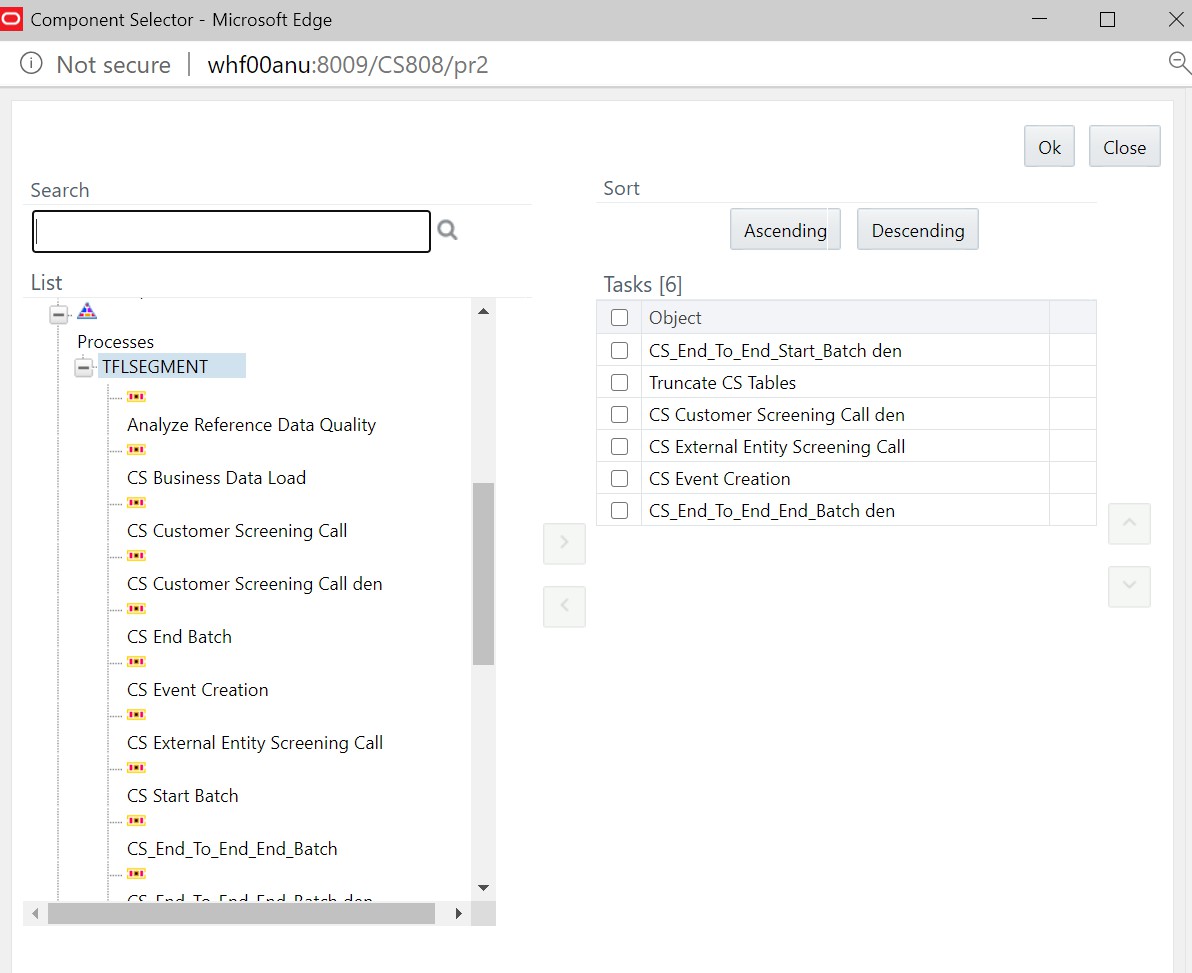
- In the List hierarchy window, expand the Transformation Rules node.
- Expand the Processes node and then the TFLSEGMENT node.
- In the Tasks table, select the original
processes, which are
 CS_End_To_End_Start_Batch, CS Customer
                                Screening Call
, andCS_End_To_End_End_Batch. These processes must be selected one at a time. - Click Move
 . The selected batches are displayed in the
TFLSEGMENT node.
- In the List table, select the new processes,
which are
CS_End_To_End_Start_Batch_den, CS Customer Screening
                                Call den
, andCS_End_To_End_End_Batch_den. - Click Remove
 . The selected batches are displayed in the Tasks table.
- Click OK.
- Select
The duplicate jobs are now split across servers using the
CS_End_To_End_Start_Batch, CS Customer Screening
Call, and CS_End_To_End_End_Batch batches.