9.2.3 Workspace Creation
The Workspace creation requires entry of the source of dataset, validation, and deployment.
- Navigate to Workspace Summary page. The page displays workspace records in a table.
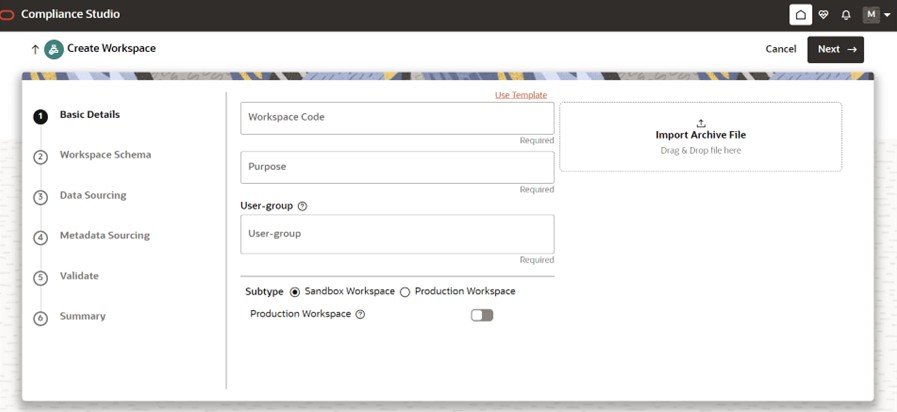
- Click Add Workspace. The Create
Workspace page is displayed.
Figure 9-8 Create Workspace

Note:
The window displays a progress indicator at the left that indicates the active window where you are entering details. Click Previous to go back a step and click Next to go to the next step.
Use the pre-configured template to load the data base and metadata objects to the workspace.
- Click Use template. Use template pop up window is displayed.
- Select
CSWorkspaceTemplate.zipfrom the library drop-down. The Update schema mapping is displayed. - Select the following target schema field details:
- New Data Schema: Enter/select the newly created schema ID.
- New Data Source Name: Enter/select the production data source name.
- Click Update to load the pre-configured template. Click
Cancel to close the window.
The following steps show the various phases from workspace creation to deployment:
- Configuring Basic Details
- Configuring Workspace Schema
- Configuring Metadata Sourcing
- Validating Workspace
- Displaying Summary
Configuring Basic Details
- Enter the value for the fields displayed in the Basic Details table.
- Click Next to open the next page.
Note:
The field drop down values are populated based on the registration in the OFSAA Environment and the template.Table 9-3 Basic Details
Fields Description Workspace Code Enter the code of the workspace. This field is limited to 20 characters. Purpose Enter he purpose of the creation of the Workspace. User group Click the user group field to display a list of User-group values. Select the required value.
- Modeling Approver
- Modeling Reviewer
- Modeling User
Type Select the type of Workspace as Modeling or Simulation. Sub Type If you have selected Modeling, select the subtype of Workspace as Sandbox Workspace or Production Workspace. Application Type Select Customer Screening Production The CS Production drop down value will be populated as a result of registering the OFSAA Environment Details. Simulation The CS Simulation drop down value will be populated as a result of registering the OFSAA Environment Details. Simulation Infodom Enter Infodom name ( <<Simulation Infodom>>).Simulation User Group Code Enter the User Group Code. This field is limited to 20 characters. Simulation User ID Enter the User ID. This field is limited to 20 characters. Simulation User Password Enter the User Password. Simulation DB Server Enter the Simulation fic server IP address. Simulation DB Schema name Enter simulation Schema name ( <NEW SCHEMA>).Simulation DB Password Enter the password ( <NEWSCHEMA PASS- WORD>).Simulation Jdbc Connection String Enter the connection Sting (Example: <oracle- driver>@<hostipadress>:<dbport>/<servicen- ame>).Figure 9-9 Create Workspace

Configuring Workspace Schema
Select the schema operation and enter connection details. No configuration required if you are using the template.
Configuring Data Sourcing
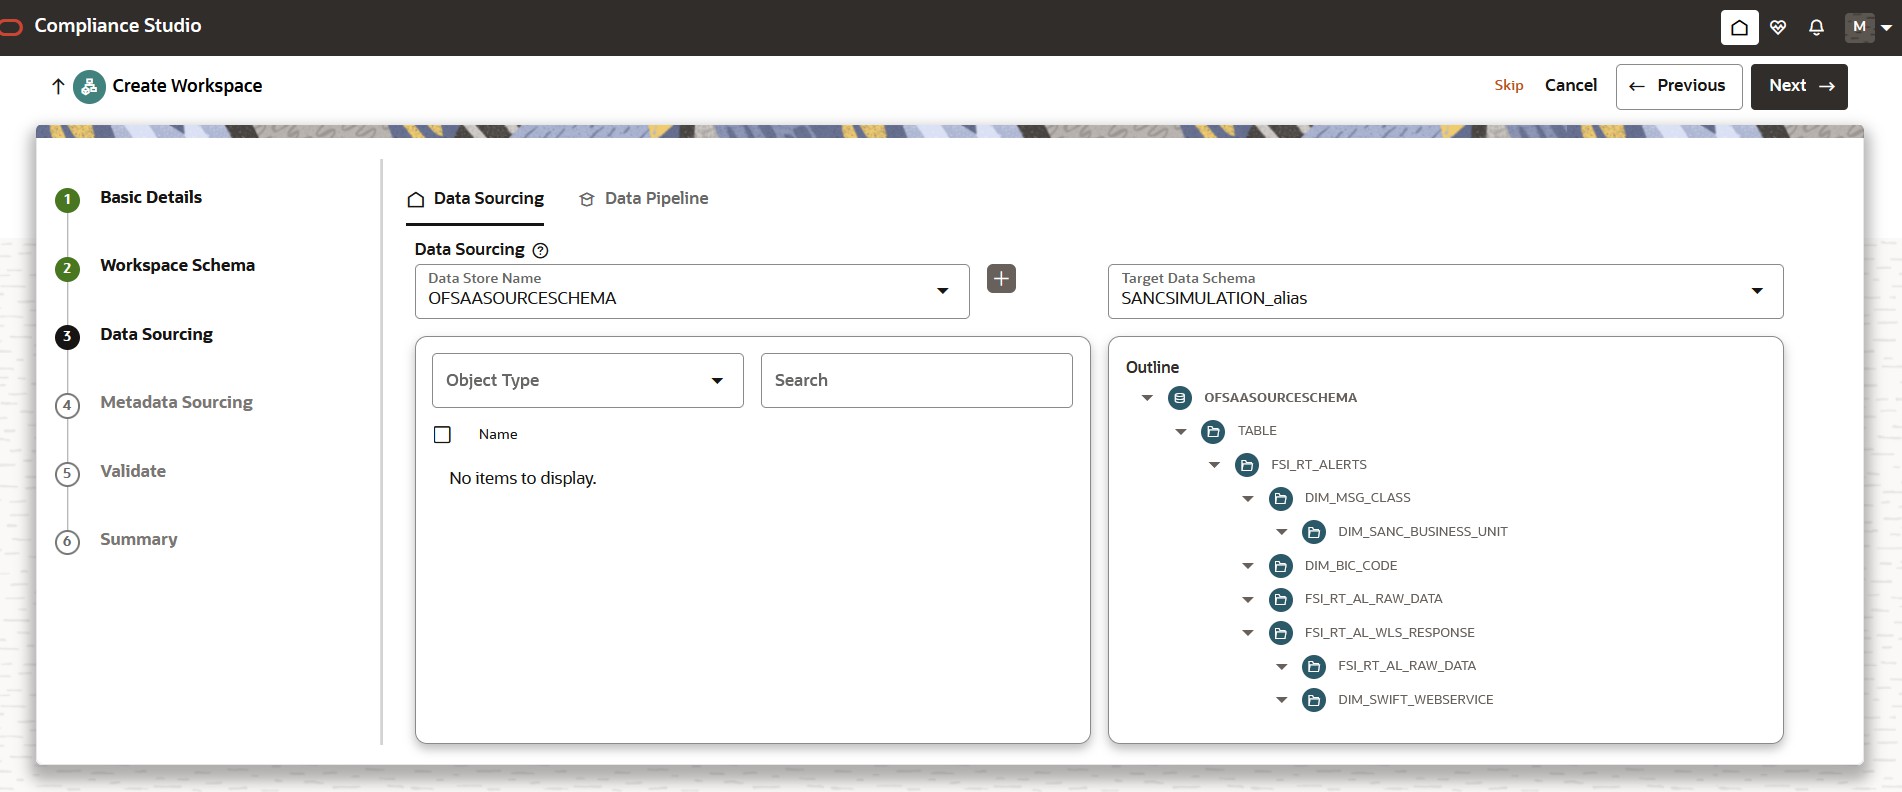
The schema type selected in the previous step requires the definition of database objects to be used for model creation. The data sourcing step of Workspace provisioning allows the select tables from Hive-based data sources from which data has to be pulled into the Oracle-based Workspace data schema.
In case any of the selected tables are not present in the target schema, those tables are included in the failed objects count in the workspace provisioning summary.
As a part of using the template, all the CS specific data sourcing objects are available by default.
- Select a Data Source from the Data Source Name drop-down list.
- Select the Target Data Schema.
- Select the object type and corresponding object names from the drop down list.
- Click Previous to go back a step and click
Next to go to the next step.
Figure 9-10 Data Sourcing

Configuring Metadata Sourcing
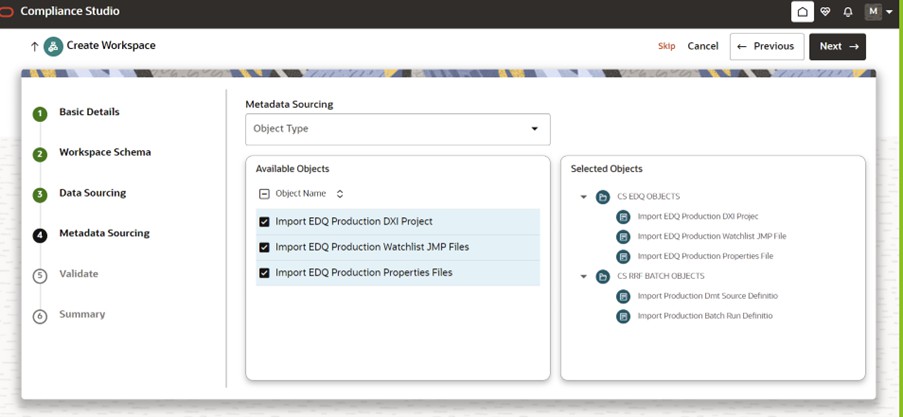
The Metadata Sourcing is a stage during Workspace provisioning to allow seeding of metadata like scheduler batches at the time of workspace provisioning.
To configure Metadata Sourcing, select the CS specific schema from the Object Type drop-down list and corresponding available objects.
As a part of using the template, all the CS specific metadata sourcing objects are available by default.
If you are not using the template, following the Metadata Sourcing Object Type and Names table and select the metadata objects manually.
Table 9-4 Metadata Sourcing Object Type and Names
| Object Type | Object Name |
|---|---|
| CSEDQ OBJECTS | Import EDQ Production DXI Project |
| - | Import EDQ Production Watchlist JMP Files |
| - | Import EDQ Production Properties Files |
| CSRRF BATCH OBJECTS | Import Production Dmt Source Definition |
| - | Import Production Batch Run Definition |
Figure 9-11 Metadata Sourcing

Once all the meta data objects are successful, perform the Mandatory Configuration for imported EDQ project.
Validating Workspace
The Validate pane displays a preview of the configuration values entered in the previous panes. Click Previous to go back a step and click Next to go to the next step.
Displaying Summary
The Summary pane displays the status of the workspace creation. Click Download to download the deployment report.