29.4.2.1.3 Many-to-One mapping with or without Debit Credit Indicator
To map multiple GL Codes to one Reporting Line Code, use the Mapper Maintenance utility. In this utility, select two or more members in the General Ledger Code for Mgmt Reporting hierarchy, select one member in the Debit Credit Indicator hierarchy with the value Debit or Credit or Missing, and select one member in the Reporting Line Code hierarchy. As a result, during the T2T process, the corresponding data from the Stage GL Data table, for the selected GL Codes, are aggregated and then loaded into the Fact Management Reporting table.
Note:
In the T2T process, in the Stage GL Data table, the GL Code aggregation takes place in all the Measure columns that are associated with the Primary Keys. The conditions for the Debit Credit Indicator column values in the Stage GL Data table are:- The value must be M, when you map GL Code to the Missing (MSG) member. If nothing is mapped, the system automatically sets value to M.
- The value must be D, when you map GL Code to the Debit member.
- The value must be C, when you map GL Code to the Credit member.
To perform Many-to-One mapping with or without Debit Credit Indicator, follow these steps:
- In the Mapper Maintenance page, in the Member combinations section, click Add.
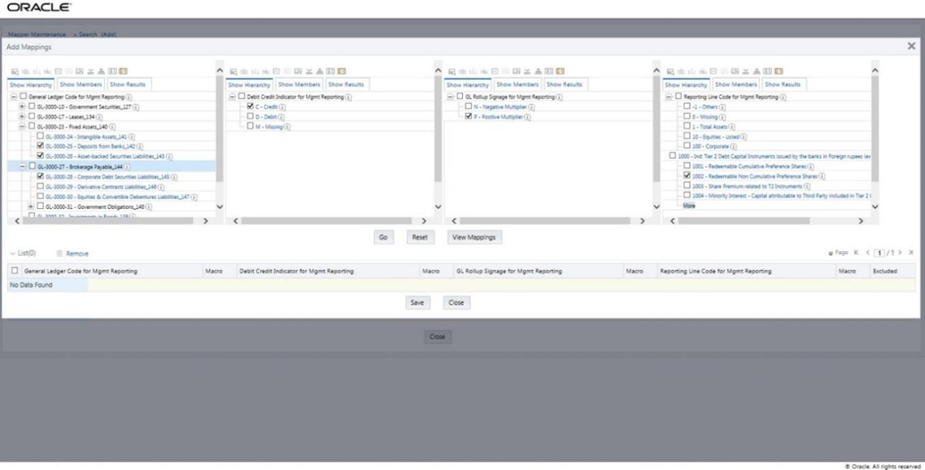
- The Add Mappings page is displayed. For illustration, select
the child members of the General Ledger Code for Mgmt Reporting hierarchy,
GL-3000-25 - Deposits from Banks_142, GL-3000-26 – Asset-backed Securities
Liabilities_143 and GL-3000-28 - Corporate Debt Securities Liabilities_145, and the
member of the Debit Credit Indicator for Mgmt Reporting hierarchy, C - Credit to map
to the Reporting Line Code hierarchy member 1002 - Redeemable Non Cumulative
Preference Shares with the GL Rollup Signage hierarchy member P - Positive
Multiplier.
Figure 29-11 Add Mappings page for the Many-to-One mapping at child hierarchy level

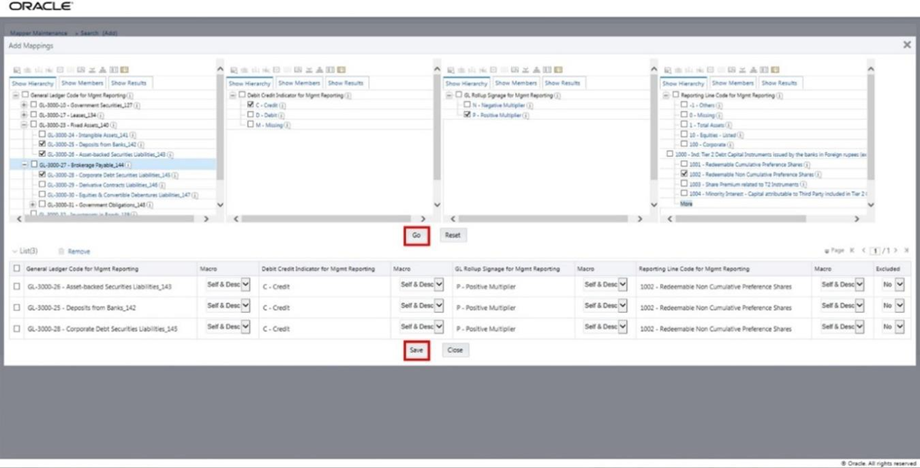
- To map the members, click Go. The list of mapped members
appear at the bottom. To save the mappings, click Save.
Figure 29-12 Map the members and save the mappings

- An acknowledgement message is displayed. To confirm saving the mappings, click Yes.
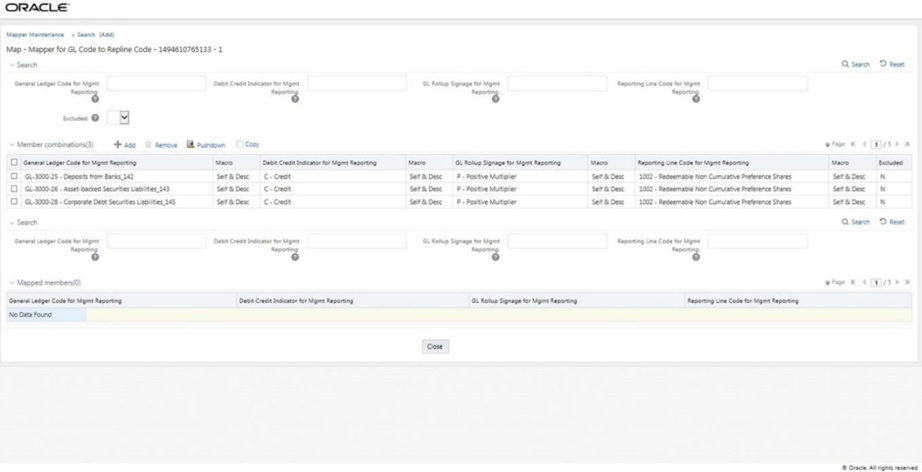
- The mapped member combinations are listed in the Mapper
Maintenance page.
Figure 29-13 Added mappings listed in the Mapper Maintenance page
