Create Data Source
The following steps apply to both config and atomic data source creation.
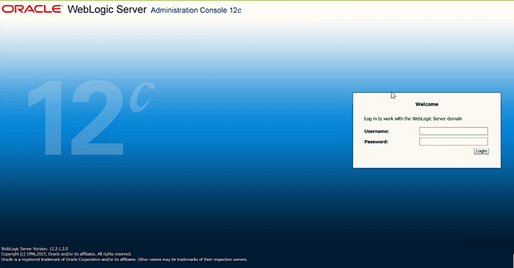
- Open the following URL in the browser window:http://<ipaddress>:<administrative console port>/console. (https, if SSL is enabled). The Welcome window is displayed.
- Log in with the Administrator Username and Password.
Figure 7-26 Welcome
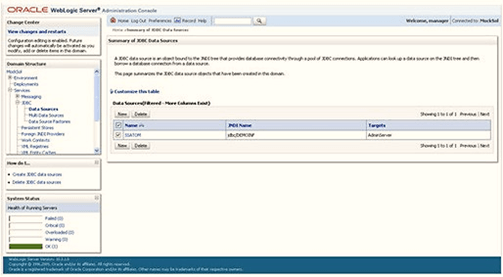
- From the LHS menu (Domain Structure), click Services
> Data Sources to display the Summary of JDBC Data
Sources window.
Figure 7-27 Summary of JDBC Data Sources
- Click New and select Generic Data
Source to display the Create a New JDBC Data Source
window.
Figure 7-28 Create a New JDBC Data Source
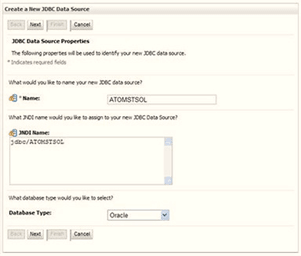 You can also select GridLink Data Source or Multi Data Source while creating a Data Source. For more information, see Create Data Source or Configure Multi Data Sources.
Figure 7-29 JDBC Data Source Properties
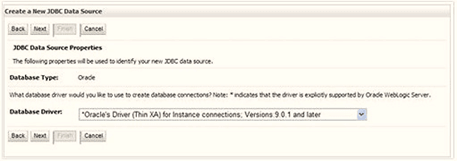
- Enter JDBC data source Name, JNDI Name, and select the Database Type from the drop-down list.
- Ensure the following:
- The JNDI Name field must be in the format jdbc/informationdomain
- The same steps must be followed to create a mandatory data source pointing to the "configuration schema" of infrastructure with jdbc/FICMASTER as JNDI name.
- JNDI Name is the same as mentioned in the web.xml file of OFSAAI Application.
- Required "Database Type" and "Database Driver" must be selected.
Data sources must be created for atomic and atomiccnf schemas following the same steps. - Click Next.
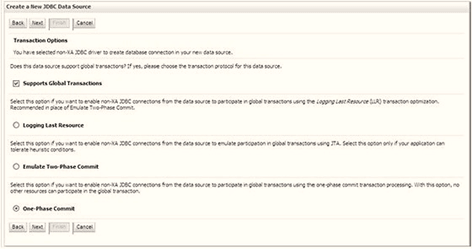
Figure 7-30 Transaction Options
- Select the Database Driver from the drop-down list. You must select the
Database Driver depending on database setup, that is, with or without RAC. Click
Next.
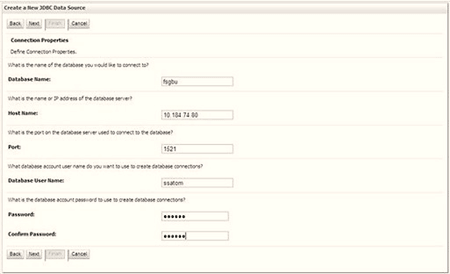
Figure 7-31 Database Name
- Select the Supports Global Transactions check box and the One-Phase Commit option.
- Click Next to display the Connection Properties
window.
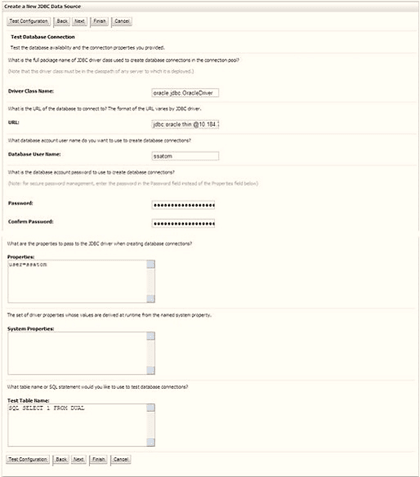
Figure 7-32 Database Details
- Enter the required details such as the Database Name, Host Name, Port, Oracle User Name, Password, and Confirm Password.
- Click Next to display the Test Database Connection
window.
Figure 7-33 Select Targets

- Verify the details and click Test Configuration and test the configuration settings. A confirmation message is displayed stating "Connection test succeeded."
- Click Finish. The created "Data Source" is displayed in
the list of Data Sources.
Note:
- “User ID" is the Oracle user ID that is created for the respective "Information Domain".
- “User ID" specified for a data source with "FICMASTER" as "JNDI" name must be the Oracle user ID created for the "configuration schema".
- Select the new Data Source and click the Targets
tab.
Figure 7-34 Data Source
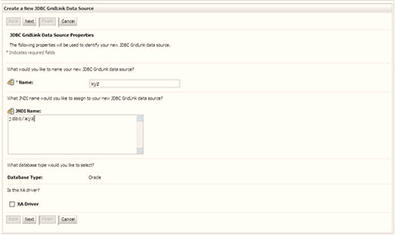
- Select the AdminServer option and click Finish.