15.1.4 Creating a New Target Leaf
Continuing with the typical setup workflow, the following narrative assumes that you have added only one Key Leaf dimension.
To add a Target Leaf, follow these steps:
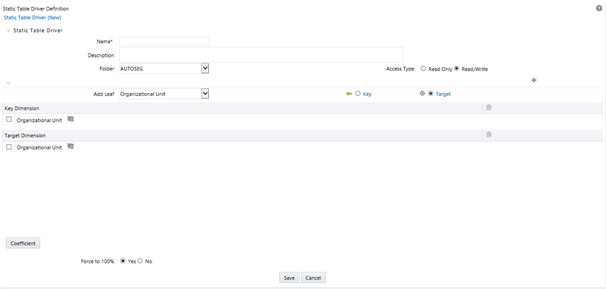
- Select the Dimension you want to define as a Target Leaf from the Add Leaf drop-down list.
- Select Target.
- Click Add.
The Target Leaf dimension is added under the Target Dimension section.
Figure 15-5 Static Table Driver Definition screen

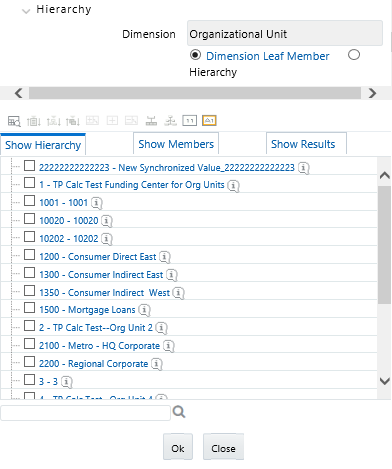
- Click on the Hierarchy Browser ellipses (…) that appear on your Target Leaf.
- Select the Target Leaf values (the selection process is
identical to the process of selecting Key Leaf values described above) from the
Hierarchy Browser and click OK.
Figure 15-6 Hierarchy Selection screen

- After you have clicked OK within the Hierarchy Browser window, that window closes and you are directed back to the Static Table Driver detail screen. However, while the screen still displays your Key Leaf values under the Key Dimension section as rows, it now displays your Target Leaf values under the Target Dimension section as rows.