Copy Employee

If you are using Labor Management, you can add an employee in Simphony Essentials by using a current employee as a template. The name of the new employee, date of birth, and hire date are required. You can also add magnetic card ID and fingerprints, change pay rates, or deactivate employees.

You need valid user credentials for Labor Management to add an employee through Simphony Essentials.

This function is not available on mobile phones and handheld devices.

This feature is not available if you have migrated to People Management. The button will be visible, but if selected, the following message appears:

If you are using People Management, the following message appears: Please use People Management, located in Simphony Home, to perform this operation.

  1. Click Copy Employee.
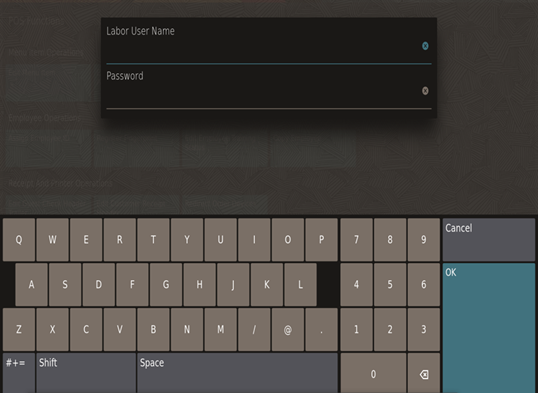
  2. Sign in with your Labor Management User Name and Password, and then click OK.

    Figure 3-10 Copy Employee Sign In Page


    This figure shows the Copy Employee Sign In dialog on the POS client for the workstation or tablet UI.
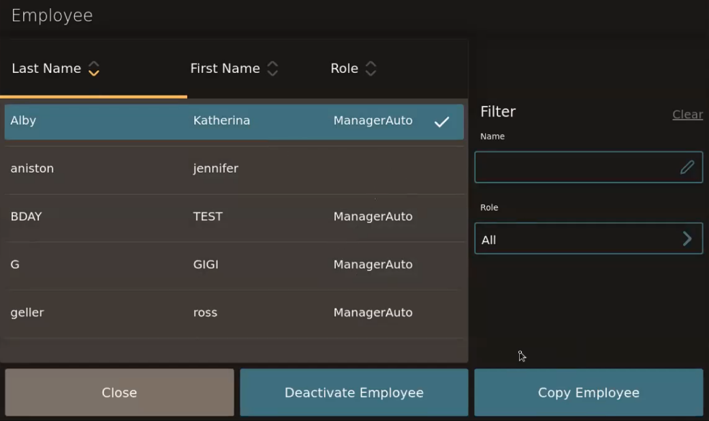
  3. Select an existing employee from the list.
    1. Click Copy Employee.

      Figure 3-11 Copy Employee Button on Employee Page


      This figure shows the Employee dialog, where you can click Copy Employee on the POS client for the workstation or tablet UI.
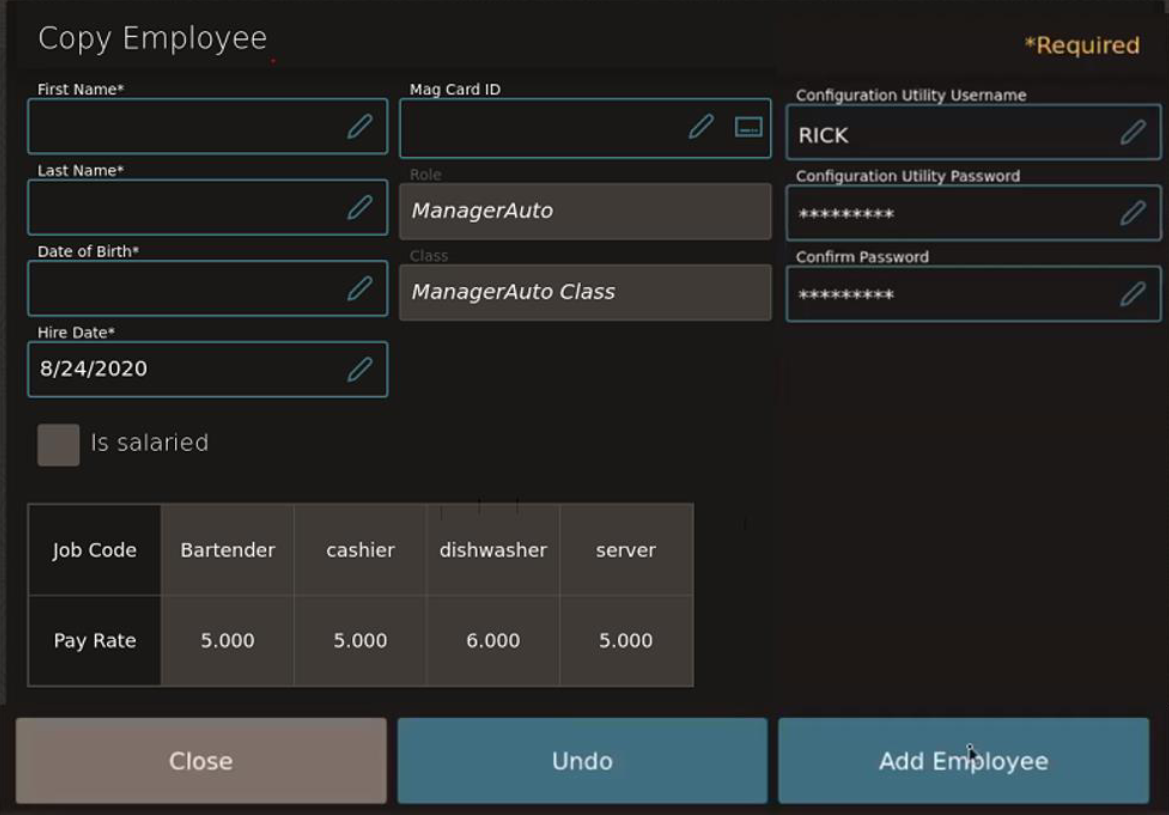
    2. Enter the First and Last Name, Date of Birth, Hire Date, for the new employee.

      Figure 3-12 Copy Employee Page for Employee Information


      This figure shows the Copy Employee dialog, where you can add employee details on the POS client for the workstation or tablet UI.
    3. If the location uses employee ID cards, enter the Mag Card ID number.
    4. If the location uses fingerprint readers, click the fingerprint icon in the Fingerprint field.

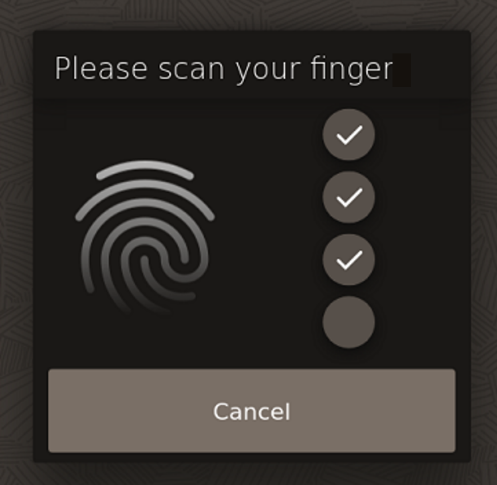
      Follow the prompts to enroll a fingerprint. Place the finger to scan on the fingerprint reader, and then remove it when the scan is complete. Each finger is scanned four times. The scanner flashes while scanning and remains lit after the scan is complete.

      The following status appears when a fingerprint is being scanned:

      Figure 3-13 Scan Fingerprint Dialog


      This figure shows the scan fingerprint dialog on the POS client for the workstation or tablet UI.
    5. (Optional) Select or enter other details about the employee as applicable.
    6. Click Add Employee, click Yes to confirm, and then click OK.
  4. To deactivate an employee:
    1. Select the employee.
    2. Click Deactivate Employee.
    3. Click Yes to confirm the deactivation.