Step 1: Assign Partner
As an approval user, you can use the wizard to assign a self-service site to a partner so that reviewers associated with that site can review the associated request details.
To assign a site to a partner:
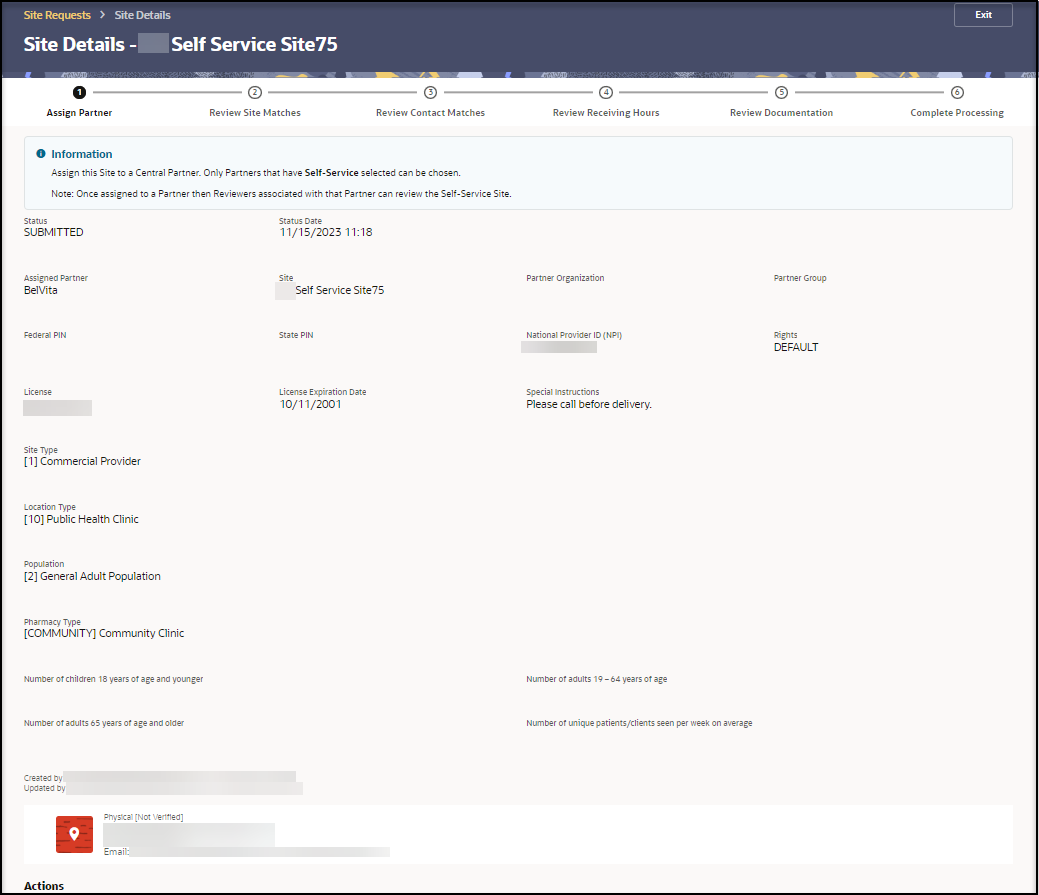
- In the Assign Partner page, review the details entered by the requestor. For example:

Note:
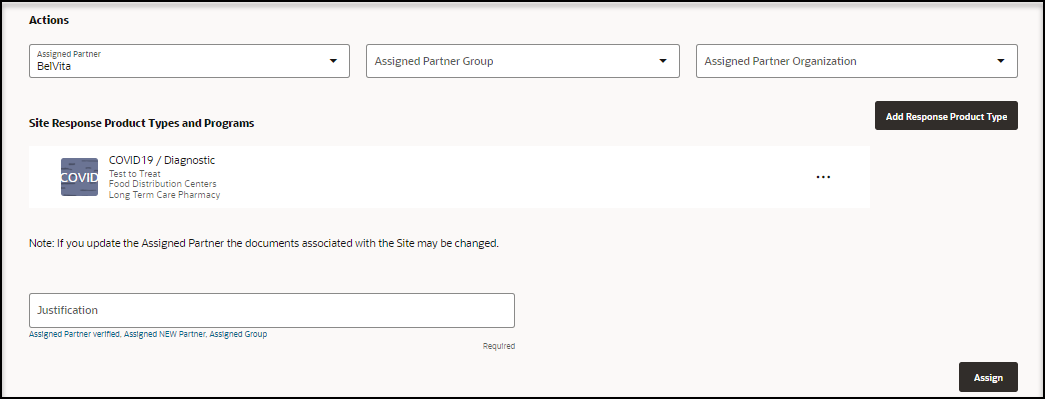
If you need to edit any of the site information, select Exit to leave the wizard and follow the instructions in View and modify the site details for a request. - Scroll to the Actions section. For example:

- Provide the following information:
- Assigned Partner—Required. Select or change the partner to assign to this self-service site. There is typically one partner per state. If you change the partner, the reviewers assigned to the existing partner will no longer see this site request. Also, the documents associated with the site may be changed. The request is added for the newly selected partner.
- Assigned Partner Group—Select or change a partner group, if available. There may be groups within a partner.
- Assigned Partner Organization—Select or change a partner organization, if available.
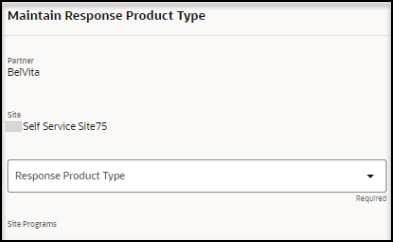
- In the Site Response Product Types and Programs section, select Add Response Product Type to add a response product type for the site. The Maintain Response Product Type panel opens. For example:

- In the Maintain Response Product Type panel, provide the following information:
- Partner—Read-only.
- Site—Read-only.
- Response Product Type—Required.
- Site Programs—Select one or more programs. The options appear after you select a response product type.
- Select Add. The Maintain Response Product Type panel closes. In the Assign Partner page, the response product type you added appears in the Site Response Product Types and Programs section.
- To add another response product type for the site, repeat steps 4 to 5.
- To modify the details for a response product type, find it in the list, and on the right select the Ellipses and then Edit. The Maintain Response Product Type panel opens.
- In the Add Response Product Type panel, update the information as described in step 5.
- Select Save.
- To delete a response product type, find it in the list, and on the right select the Ellipses and then Delete.
- In the required Justification field, enter a description that describes your review of the entries on this page. You can enter text, or select a quick pick link (for example, Assigned Partner verified, Assigned NEW Partner, Assigned Group).
- Select Assign. The wizard automatically advances to the next step.
Parent topic: Review and approve a request with the wizard