Guest Lookup
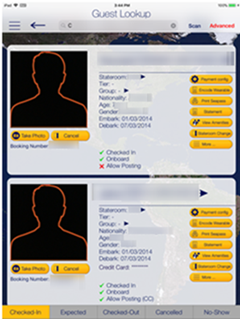
The Guest Lookup function allows you to look up guest information by scanning the Set Sail Pass or by searching for a cabin number, name, or booking number.
-
In the Home screen, press the Guest Lookup button.
-
In the bottom of the Guest Lookup screen, select the type of guest to search.
-
To search guests using a bar code scanner, press the Scan button. This also enables the camera function.
-
To search by name, cabin number, or booking number, enter the information on the Search bar and press the Search button on the keyboard.
-
Use the Advanced button to search by Embarkation Date, Cabin Category, Nationality, VIP Status, or Loyalty Status.
Figure 31-9 Search Results Page

-
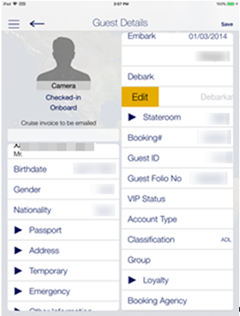
Select a name to open the Guest Details screen. To edit the information, tap or slide to the right of the selected field, and press the Edit button.
Figure 31-10 Guest Details Page

-
Select or enter the new information and press Done.
-
Press the Save button to save the information and return to the previous screen.
-
To delete or clear the field information from the Guest Details screen:
-
Slide to the left and then press the Delete button.
-
Tab on the big X on the top left in the Edit screen to clear the field.
-
Use the keyboard Back button on direct edit fields.
-
Editing Guest Information
-
Repeat steps 1 to 5 of Guest Lookup.
-
In the Guest Lookup list, select from the options on the right, for example Payment Config.
-
To add an item, press the “+” symbol next to the button.
-
To delete an item, press and slide to the left until you see the Delete button.
Invoice Statement/Adding a Posting
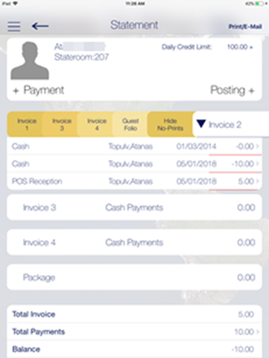
Figure 31-11 Statement Page

-
Repeat steps 1 to 5 of Guest Lookup.
-
In the Guest Lookup list, press the Invoice Statement button.
-
On the Statement screen, press Payment to add a payment or Posting to post a charge.
-
Select the payment method and the invoice, and then insert the amount and press Pay, or Pay & Print, or Post to Account depending on the selection in step 3.
-
To move a payment/posting to another invoice, view the guest folio or hide the posting from printing, press and slide to the right, and select the invoice to move to.
-
Press the arrow next to the invoice to expand the invoice details.
-
Select Print/E-mail to print or email.
Adding Luggage Tag
-
Repeat steps 1 to 5 of Guest Lookup.
-
In the Guest Lookup list, select Luggage from the Services option on the right.
-
Select the luggage tag filter and press Tracking Info or History to view luggage status.
-
Press Add new luggage to scan or input a new tag ID manually.