3 Setting Up SilverWhere Database
There are two options for the SilverWhere database installation:
-
Set up a new SilverWhere 9.2 database, or
-
Upgrade from an existing SilverWhere 8.0.80.x or higher database to SilverWhere 9.2 database.
Since there are two options for the SilverWhere database, you need to understand that:
-
When performing a new installation, there should not be any BKSTG_DINING schema existing on the target machine.
-
By upgrading from an existing SilverWhere 8.80.x database, there could be existing data in the database. Therefore, you need to validate the database to ensure that all data is valid and error-free.
SilverWhere Database Prerequisites
-
Microsoft .NET Framework 4.8 features are enabled on the target machine.
-
Minimum Oracle 12c Database client with ODAC is installed on the target machine. See Oracle Database Client and ODAC Installation
-
SilverWhere 9.2 release package is downloaded and available on the target machine. See SilverWhere Installation File for download instructions.
For the SilverWhere Database upgrade:
Before upgrading the SilverWhere database, you must ensure that the SilverWhere version is at minimum version 8.0.80.0. An upgrade from SilverWhere version 2.x is not supported.
Please reach out to the Consulting team for further guidance.
SilverWhere Database Installation Steps
Follow the steps to set up the SilverWhere database
-
If you are performing a new SilverWhere database 9.2 installation, follow the steps below.
-
If you are upgrading the SilverWhere database from version 8.0.80 or higher to version 9.2, see the topic Upgrading to SilverWhere 9.2 Database
Setting Up SilverWhere Database Connection
For the SilverWhere application clients and SilverWhere web services to connect to the database, you must configure the database TNS name.
-
In the installed Oracle Client home folder, ensure there is a correct database TNS entry in the Oracle tnsnames.ora file. You will need the database TNS name entry created in the tnsnames.ora file so that SilverWhere can locate the correct database when it references the database TNS.
-
The installed Oracle Client folder for SilverWhere is typically
C:/Oracle/product. You may choose to install it in a different folder.Figure 3-1 Tnsnames.ora File Location

-
You will need to create a database TNS entry in the tnsnames.ora file so that the SilverWhere Secure Web Service can locate the database TNS and subsequently, be able to establish a connection to the SilverWhere database.
Table 3-1 Tnsnames.ora fields
Tnsnames Parameters Description <DB_TNS_NAME>
Oracle Database TNS name. By design, SilverWhere applications or web services refers to the Database using the TNS name.
<DB_ADDRESS>
Oracle Database Address. It can be an IP address (for example, 127.0.0.1) or the machine name.
<DB_PORT>
Oracle Database Listener Port for connection.
<DB_NAME>
Oracle Database Service name for Oracle Database Server to identify the Oracle Database instance.
For example:<DB_TNS_NAME> = ( DESCRIPTION = ( ADDRESS_LIST = ( ADDRESS = (PROTOCOL = TCP) (HOST = <DB_ADDRESS>) (PORT = <DB_PORT>) ) ) (CONNECT_DATA = (SERVICE_NAME = <DB_NAME>) ) ) -
You will need to verify that you are able connect to the SilverWhere database using the SQLPlus* tool, which is installed along with the Oracle Database Management System. This step is important so that you can resolve any database related issues.
Installing SilverWhere 9.2 Database
The SilverWhere Database Installer is an installer that creates the SilverWhere database schema called BKSTG_DINING. Follow the instructions below to perform the installation.
-
Install SilverWhere components on the target machine. See topic Installing SilverWhere Client for detailed instructions.
-
Browse to the
C:\Program Files (x86)\OHCSilverWhere\SilverWhere
Client
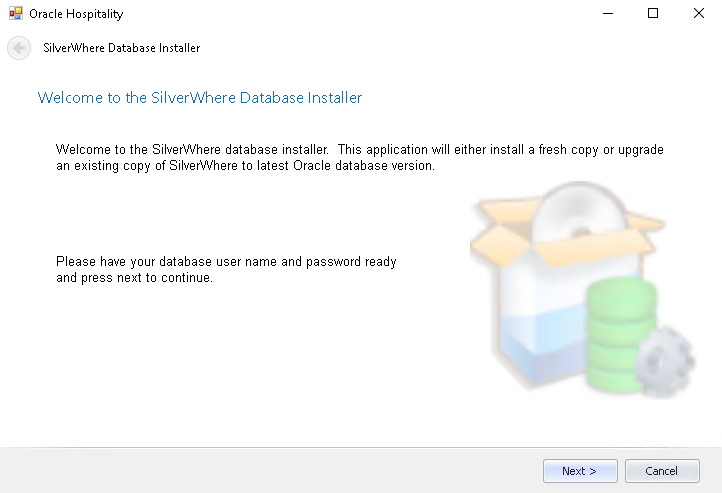
folder and run the SWDatabaseInstaller.exe.Figure 3-2 SilverWhere Database Installer Welcome Screen

-
At the SilverWhere Database Installer Welcome window, click the Next button to navigate to the next screen.
-
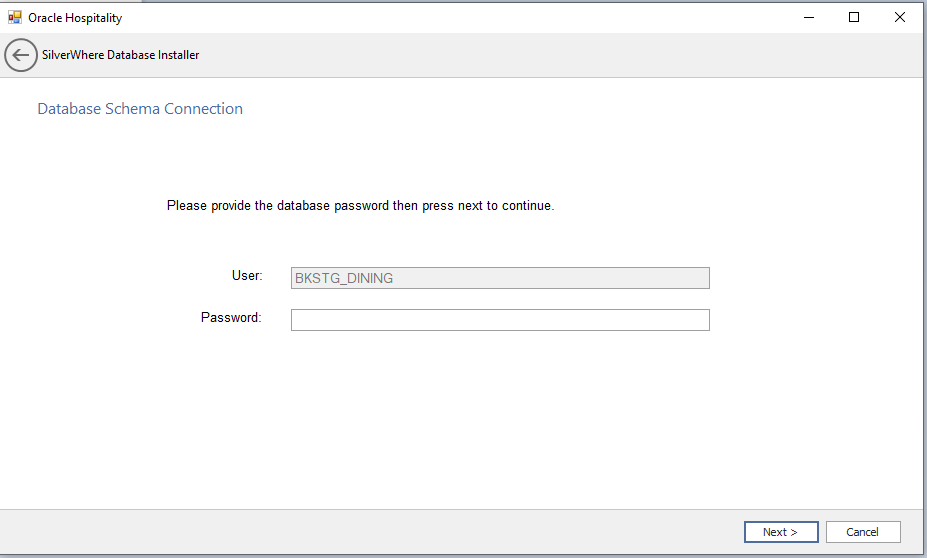
On the Database Schema Connection screen, enter the Database Schema Password for SilverWhere.
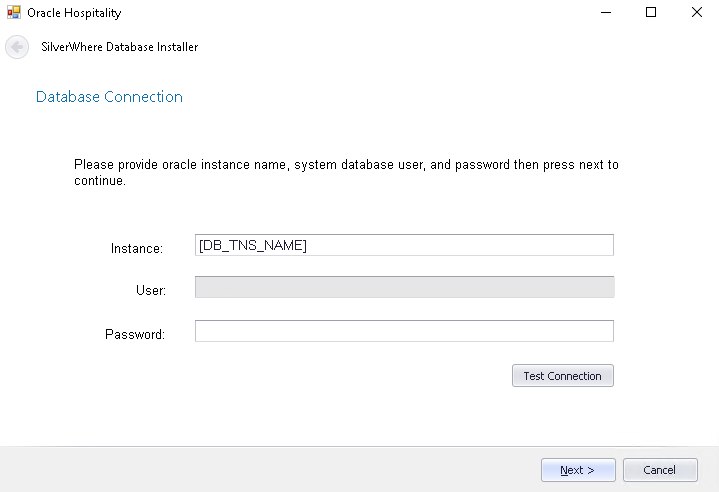
Figure 3-3 Database Connection Instance Selection

Figure 3-4 Database Schema Connection

-
On the Database Connection window, enter the Database TNS name and Database Schema Password for System user.
-
If the Database TNS name or Database Schema password is incorrect, you will receive an error message. Correct the information and retry.
-
To validate the Database connection, click the Test Connection button.
- Click the Next button to proceed to the
Options screen, and select from the below:
-
Mode:
-
Standard: Updates the SilverWhere Database with the required changes.
-
Simulation: Checks and generates a list of changes the system will apply. These changes will not affect the SPMS Database until you run the standard mode.
-
-
Additional options:
-
Reinstall Application Setting (PARAM): Inserts all default values for
LOOK_UP_VALUE = ‘PARAM’. -
Reinstall Application Configuration (LOOK UP): Inserts all default values for the LOOK_UP table (except for
LOOK_UP_VALUE= ‘PARAM’). -
Update Table Columns Only: Checks and updates the database table columns.
-
-
Rights:
-
Remove DBA rights from Bkstg_dining user: Removes the DBA rights from the SilverWhere BKSTG_DINING schema user.
-
-
-
Click the Next button to proceed to Administrator account screen.
-
On the Administrator account screen, enter the ADMIN user credential and click the Next button to continue. This will lead you to the Embedded Module Options screen.
- On the Embedded Module Options screen, select the application
groups that shall be updated
-
SilverWhere .Net client
-
SWMobile client
-
Updater Services
-
Purge each selected Application files and .DLL files before uploading new files: Enable to purge all existing application files and .DLL files from the database.
-
-
Click the Next button to proceed to the Confirmation screen.
-
On the Confirmation screen, click the Next button to start the SilverWhere Database Installation process.
-
The SilverWhere Database Installation process is shown in the Status screen. Upon completion of the installation process, click the Close button to proceed.