Upload a trial protocol

As a user with access to Trials in Planning, you can view all uploaded protocols and add new protocols into Life Sciences AI Agents. You can upload a draft or final protocol or protocol synopsis including the Schedule of Assessments.

Note:

You can upload a different version of the same draft or final protocol or protocol synopsis after the initial upload, if necessary. For more information, see Upload a different version of a trial protocol.
To upload a trial protocol or synopsis:
  1. Select the Trials tab at the bottom of the Life Sciences AI Agents Trials interface window. The Trials list opens. The last view you selected opens (All Trials, Ongoing Trials, Other Trials, or Trials in Planning). For example:
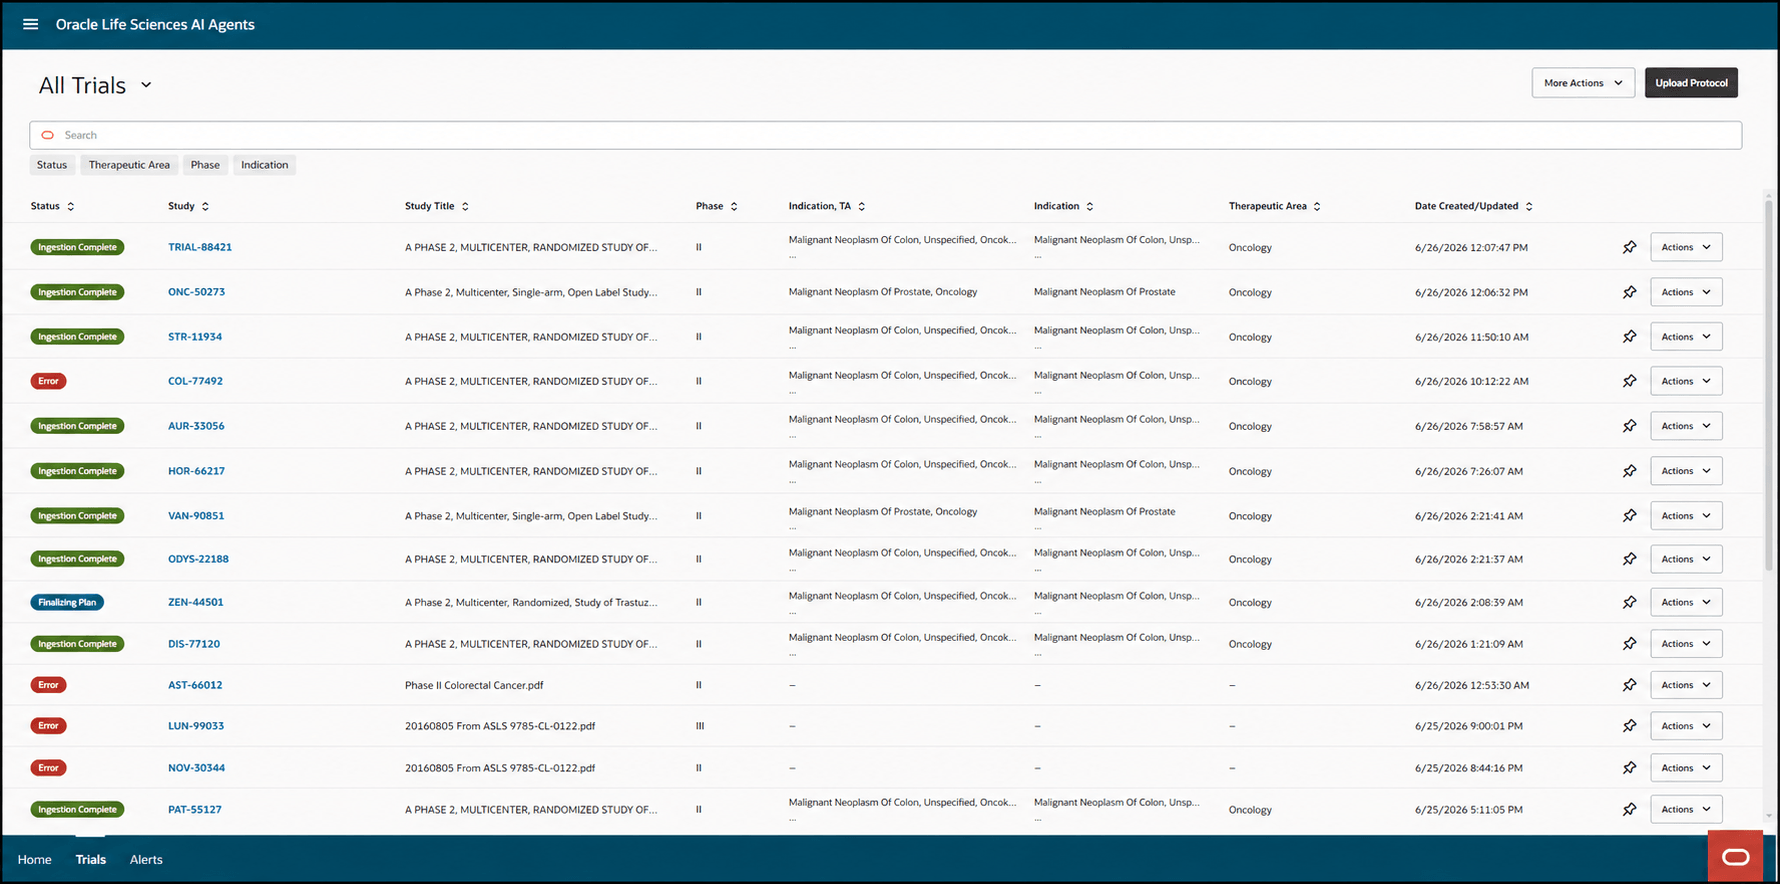
    Trials list - Shows the All Trials list view

  2. At the top right, select Upload Protocol. The Upload Protocol option is available from any Trials list view (All Trials, Ongoing Trials, Other Trials, or Trials in Planning). The Upload Protocol panel opens. For example:
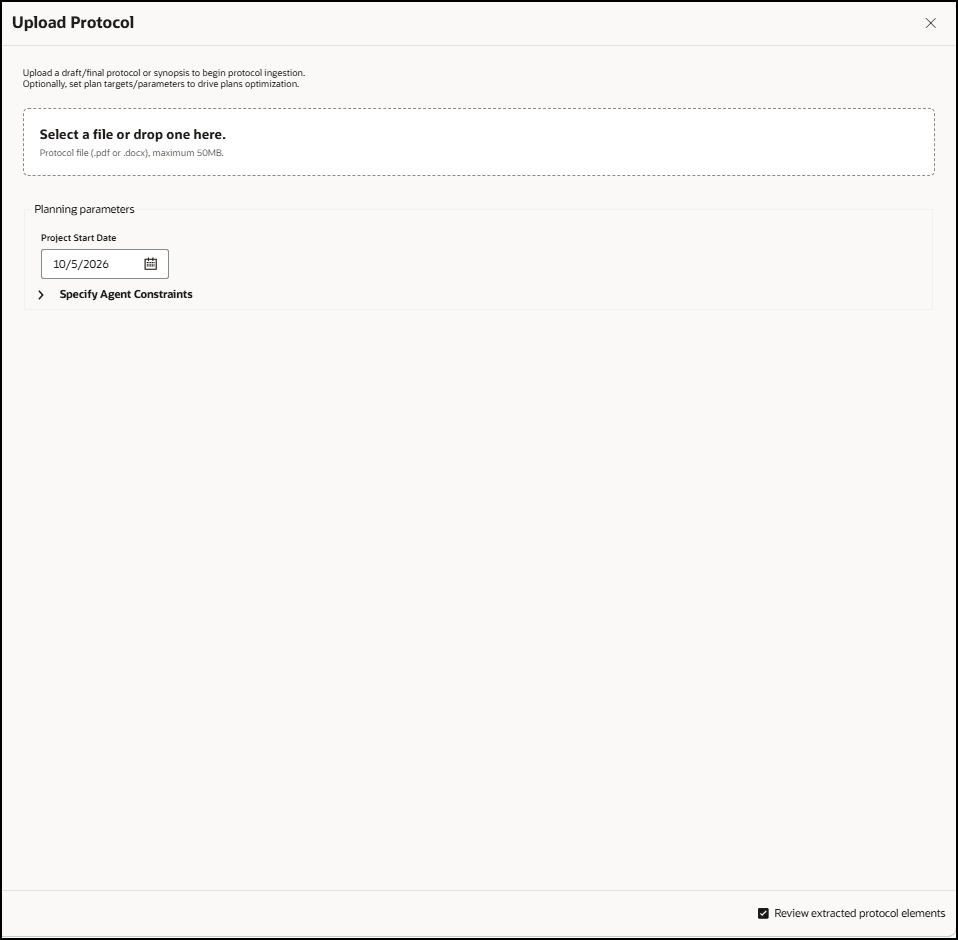
    Upload Protocol panel

  3. In the Upload Protocol panel, add the protocol or synopsis file you want to upload.

    You can navigate to the file or drag and drop the file into the block at the top of the panel. The protocol must be in PDF or DOCX format and be 50 MB or less.

    Note:

    A progress bar opens and shows the status of the protocol extraction (also called ingesting) process. This step may take some time.
  4. In the Project Start Date field, use the Calendar icon to select a date, or enter a date in MM/DD/YYYY format for the date you want costing to begin. If you do not enter a date, the field defaults to the current date.
  5. After the protocol extraction completes, select the right arrow next to the Specify Agent Constraints heading to expand the section so that you can view and edit the parameters as needed. For example:
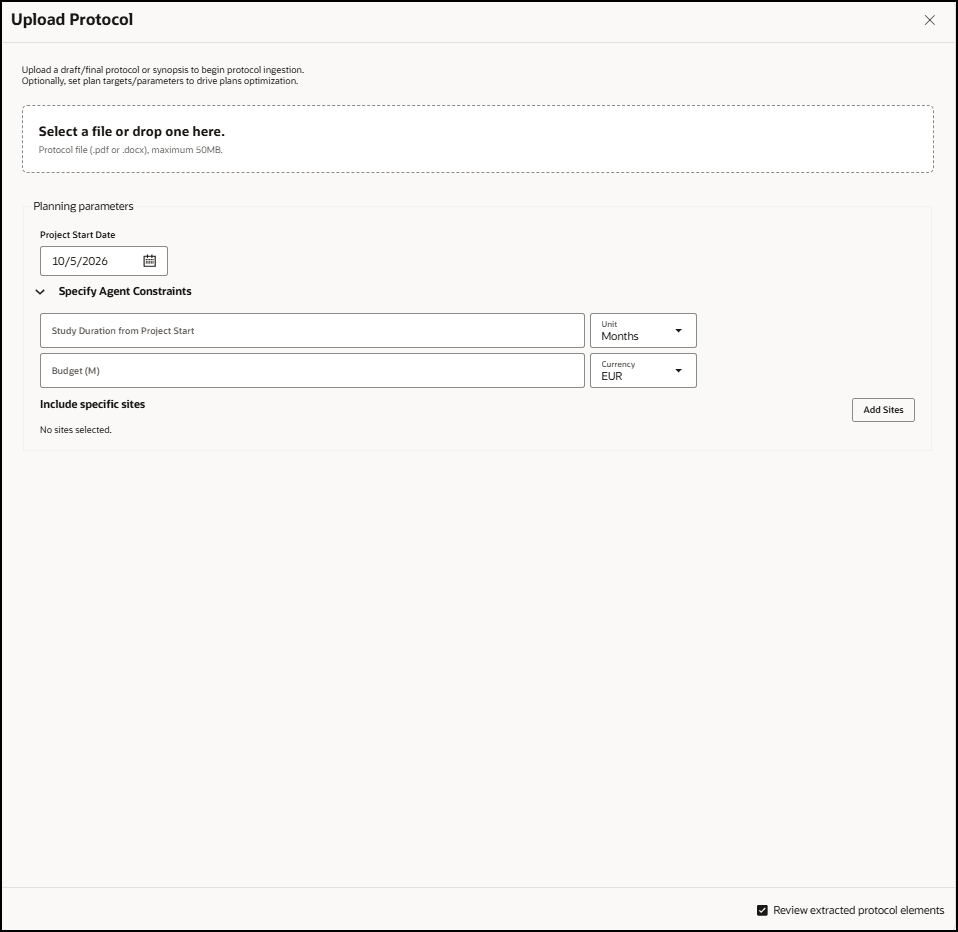

    Upload Protocol panel - Shows the Specify Agent Constraints section expanded

  6. In the Specify Agent Constraints section, provide or update the following information as needed:
    • Study Duration from Project Start—Enter a value for the expected study duration, and in the adjacent Units drop-down menu select Days, Weeks, Months, or Years.
    • Budget ($M)—Enter a value and in the adjacent Currency drop-down menu select EUR or USD. The currency value you select is used for all monetary amounts that appear in the interface.
  7. In the Include specific sites section, select Add Sites on the right. The Add Sites panel, which shows the countries and sites defined in the protocol, opens. For example:
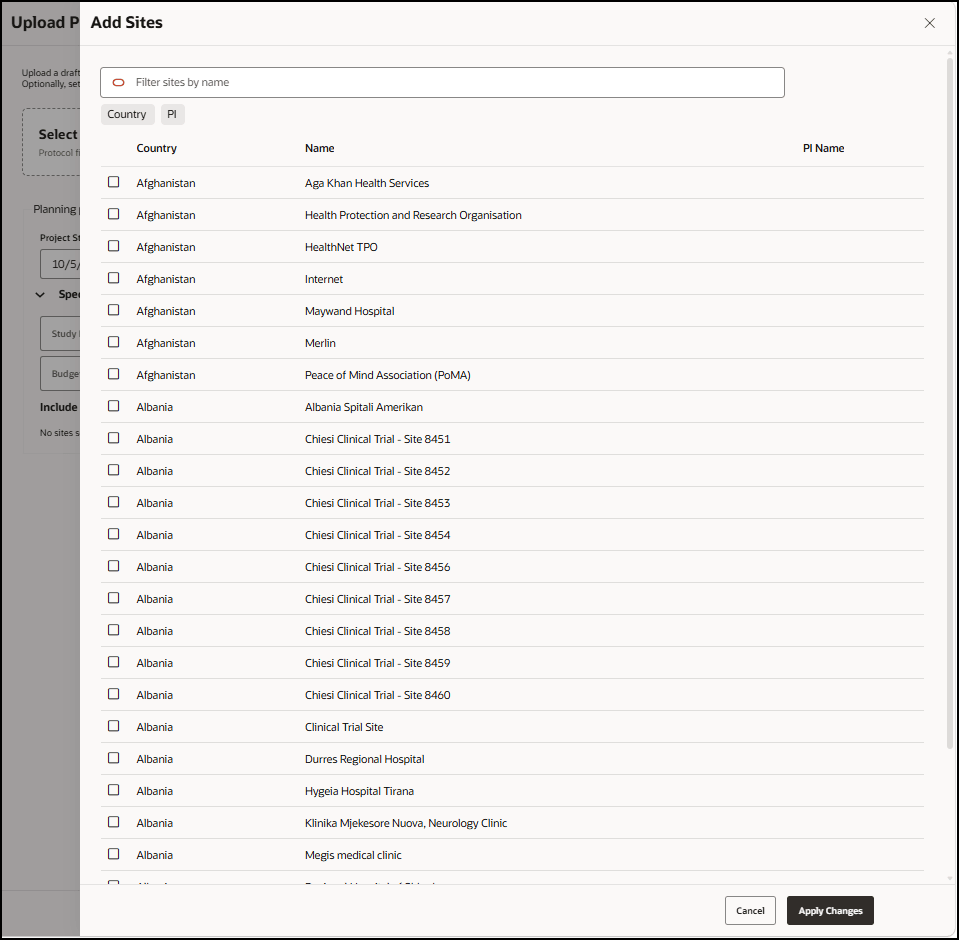

    Add Sites panel

  8. Select the check box next to each country and site you want to add, and select Apply Changes. The Add Sites panel closes and the Upload Protocol panel becomes active again.

    The sites you added appear in the Include specific sites section in the Upload Protocol panel. Select the X on the right to remove a site, as needed.

  9. In the Upload Protocol panel, update the choice for the Review extracted protocol elements checkbox at the bottom right, as needed.
    • Select Review extracted protocol elements (default) if you want to review the protocol extraction after it completes and before the trial plans are generated. You are presented with protocol elements to confirm or to correct misinterpretations, and then you can proceed to the generating plan step. For more information, see Review the uploaded trial protocol and generate the trial plans.
    • Deselect Review extracted protocol elements if you want to skip reviewing the protocol extraction before the trial plans are generated. For more information, see Review the AI-generated trial plans.
  10. In the Upload Protocol panel, select Save Changes.