Creating a Task
Users with the appropriate access level can add a task. To Create a Task:
-
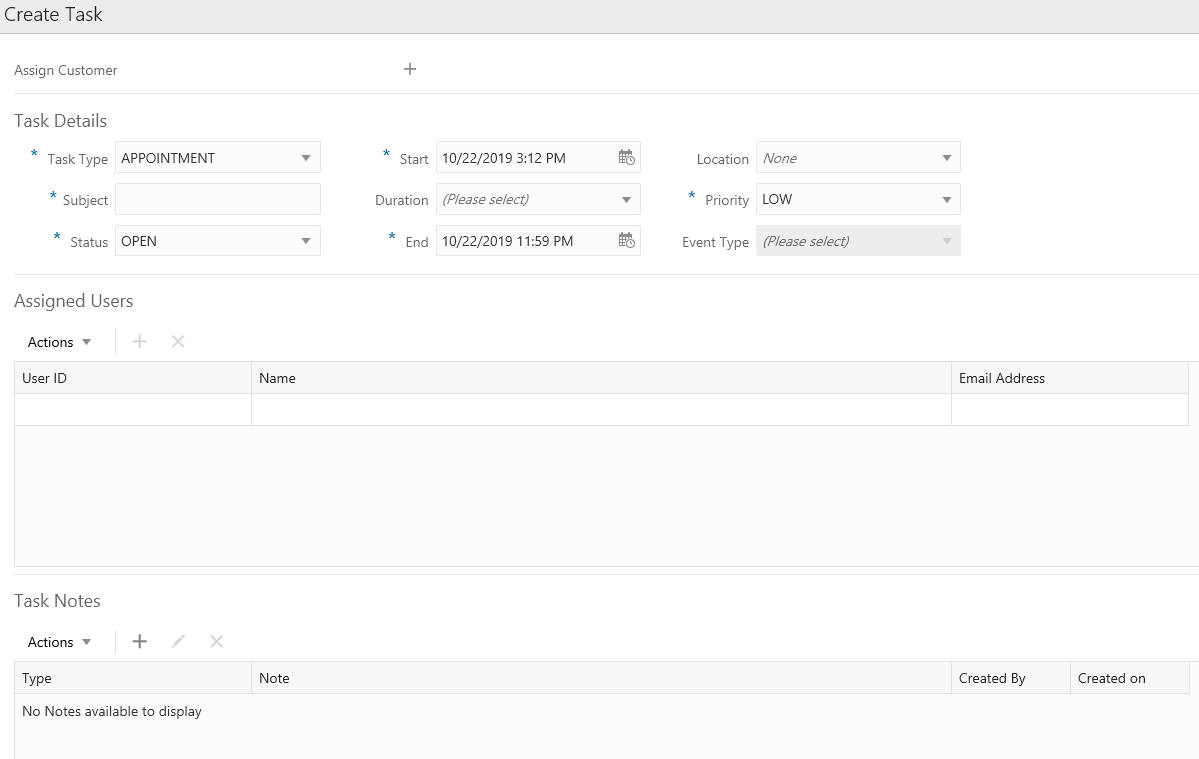
Click the Add (+) icon, or choose Add from the Actions menu. This displays a Create Task window.
Figure 13-82 Create Task

Assigning Customers
To assign Customers, do the following:
-
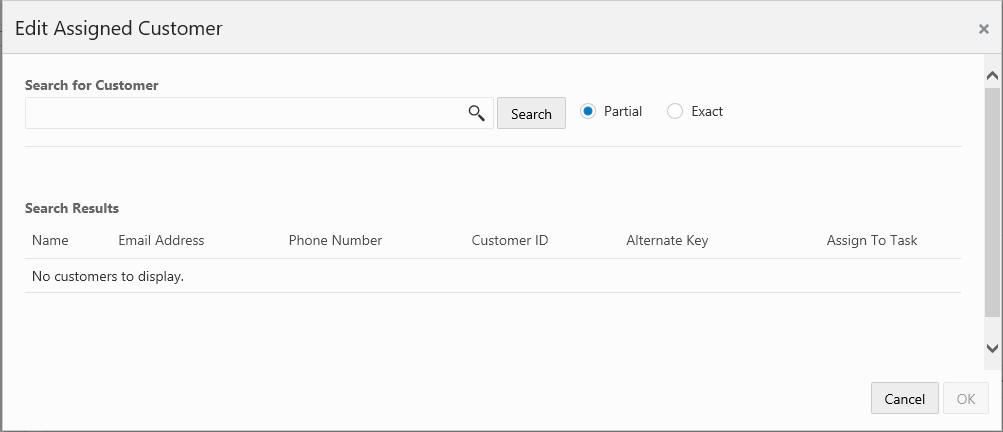
Click the Assign Customer + icon to assign a customer to the Task (optional).
Figure 13-83 Edit Assigned Customer

-
Enter some or all of a customer's name in the Search for Customer field. The user can search by any of the criteria shown in the search results including:
-
Name
-
Email Address
-
Phone Number
-
Customer ID
-
Alternate Key
-
-
Select Partial, if you want to results that match part of what you enter, or select Exact if you only want results that are an exact match.
-
Click Search.
-
Click Assign to assign the customer to the task.
-
Click OK to save the assignment or Cancel to return to the Task Details without saving any customer assignments.
Task Details
Enter the Task Details which include the following fields:
Figure 13-84 Task Details

-
Task Type – Type of task (required field)
-
Subject – The subject of the task (required field)
-
Status – The status of the task (required field)
-
Start – The date and time the task starts (required field)
-
Duration – The duration of the task
-
End – The date and time the task ends (required field)
-
Location – The location of the task
-
Priority – The priority assigned to the task (required field)
-
Event Type – Type of event (only used for Event Type tasks)
Assigning Users
To Assign Users, do the following:
-
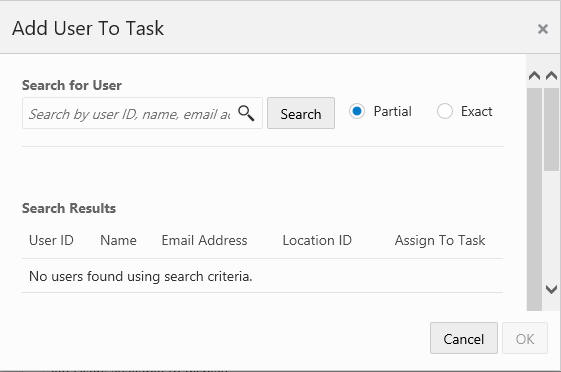
Click the Actions menu and click Add or click the Add (+) icon.
Figure 13-85 Add User to Task

-
Enter some or all of a user's name in the Search for User field. The user can search by any of the criteria shown in the search results including:
-
User ID
-
Name
-
Email Address
-
Location ID
-
-
Select Partial, if you want to results that match part of what you enter, or select Exact if you only want results that are an exact match.
-
Click Search.
-
Click Assign to assign the user to the task.
-
Click OK to save the assignment or Cancel to return to the Task Details without saving any user assignments.
Deleting Users
To delete users, do the following:
-
Highlight a user from the Assigned Users section.
-
Click Remove from the Actions Menu or click the X icon.
Note:
To immediately remove the user, click X.
Task Notes
To add a Task Note, do the following:
-
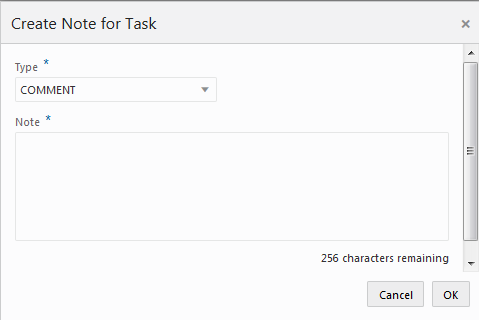
Click Add from the Actions Menu or click the + icon.
Figure 13-86 Create Note for Task

-
Select a note Type (required field).
-
Enter information in the Note field (required field)
-
Click OK.
-
To edit a note, highlight a note in Task Notes section and click Edit from the Actions Menu or click the Edit icon.
-
Edit the note.
-
Click OK to accept the changes or Cancel to close without saving.
-
To delete a note, highlight a note in Tasks Notes section and click Delete from the Actions Menu or click the X icon.
Note:
To immediately remove the user, click X.
Task Confirmation
-
Click OK to create a task or Cancel to close the Create Task window without saving any changes.
Editing a Task
To edit a task use the following steps:
-
Highlight a Task row.
-
Click the Action Menu, and then click Edit, or click the Edit icon.
-
Edit the Task.
-
Click OK to accept the changes or Cancel to close the task without saving.
Viewing a Task
To view a task use the following steps:
-
Highlight a Task row.
-
Click the Action Menu, and then click View, or click the Eyeglasses icon.
-
Click Done to close the window.
Re-Assigning a Task
Users with the appropriate permissions can reassign a task. To reassign a task:
-
Click Menu.
-
Click the Admin Task.
-
Click the Task Management task. The Task Management window displays.
Figure 13-87 Task Management Window

-
Highlight a task you wish to reassign.
-
Click the Actions menu and choose Re-Assign, or select the Person icon from the menu row tool bar. This opens the Re-AssignTask dialog window.
Figure 13-88 Re-Assign Task Window

-
Expand the list of users and from the list of available users, and click Assign to reassign the task.
-
Click OK to assign the task. A Warning window displays notifying that a different user is assigned the task.
-
Click OK to accept ownership of the task. The task is reassigned to another user.