4 Application Dashboard
The Retail Home Application Dashboard allows customer administrators to view application and subscription information, monitor usage, configure usage alerts, and review installed versions and release notes.
Launch: The Application Dashboard can be accessed from:
- Ask Oracle menu → Application Administration
- Legacy UI → Settings → Application Administration
Figure 4-1 Application Dashboard Page
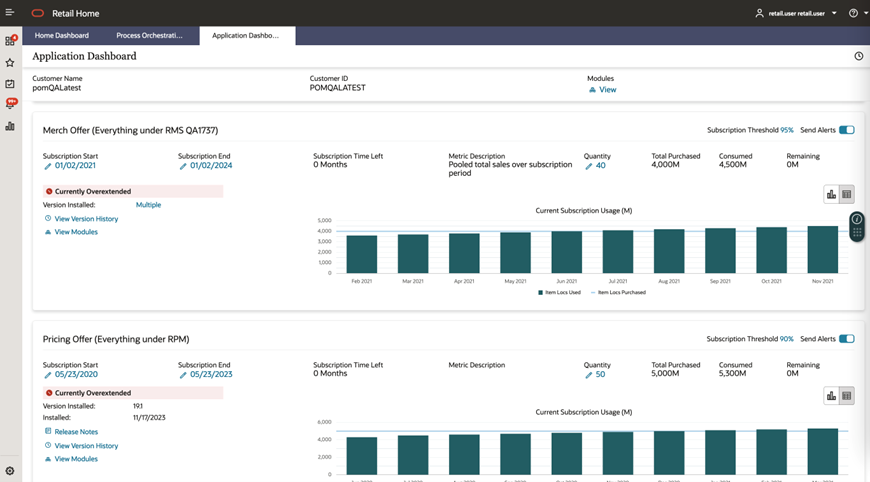
The page displays the Customer Name and Customer ID, followed by cards containing information for individual applications or subscriptions. The information available on each card depends on the application and the data it provides.
Subscription Metrics
Subscription metrics show usage information for the customer’s subscriptions. Where available, each card displays:
- Metric Description: The metric used to measure subscription usage.
- Consumed: The reported usage quantity.
- Current Subscription Usage: A chart showing usage for the available reporting periods and the purchased quantity.
Use the chart and table buttons to switch between graphical and tabular views of subscription usage. Refer to the chart title and legend for the metric, units, and quantities displayed.
Usage information may be unavailable for some applications or subscriptions.
Figure 4-2 Application Dashboard Subscription Metrics - Applications with Subscriptions
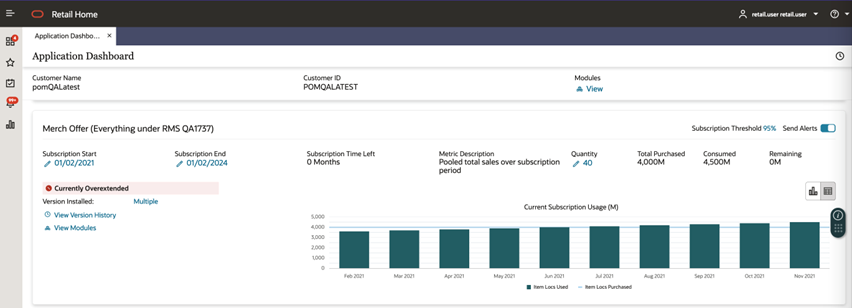
Figure 4-3 Application Dashboard Subscription Metrics - Applications without Subscriptions (Retail Home and POM)
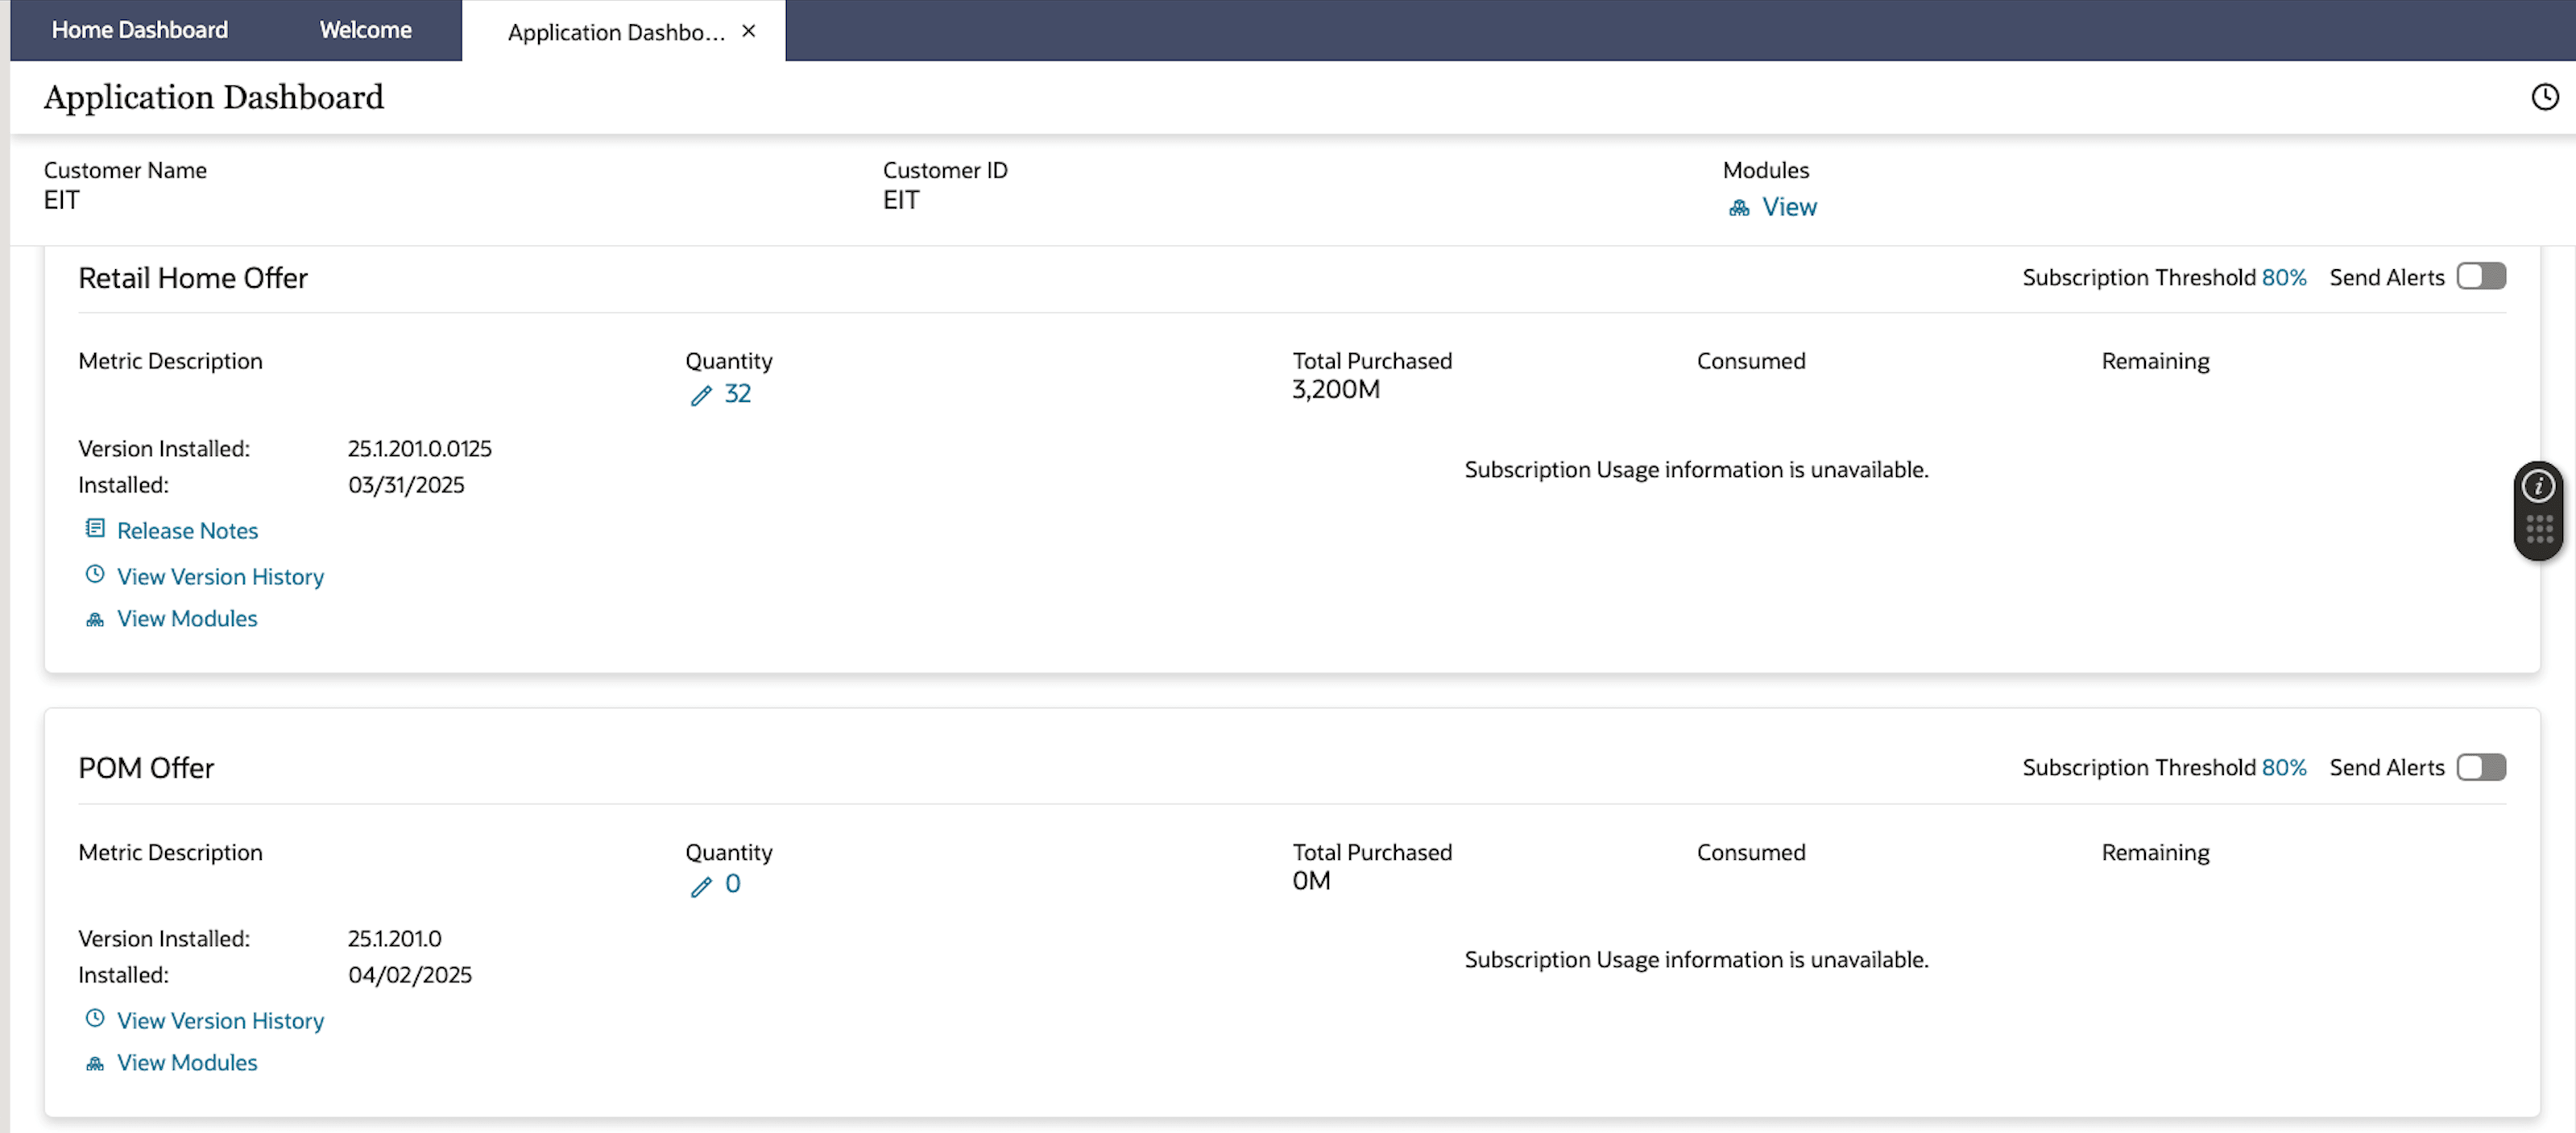
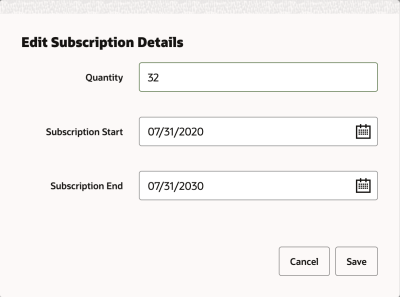
Figure 4-4 Editing Subscription Details
Configuring Usage Alerts
Administrators can set a usage threshold and control whether email alerts are sent for a subscription.
To update the threshold:
- Select the Usage Alert Quantity value on the application or subscription card.
- In the Edit Subscription Details dialog, enter the required quantity.
- Select Save to apply the change or Cancel to discard it.
Use the Send Alerts switch to enable or disable usage alert notifications. When alerts are enabled, the configured Usage Alert Quantity is the threshold used to determine when subscription usage requires an alert.
To receive email alerts, configure the Email Address field for the Alert Created Notifications notification type for the applicable application. See Manage Notifications for details.
Figure 4-5 Application Dashboard Setting Alerts Status

Module Information
The Application Dashboard provides access to module information through the View link under Modules in the page header and the View Modules link on individual application cards.
For information about activating or deactivating provisioned applications and modules, see Customer Module Management.
Version
The Version area shows the currently installed version of the application, and when this version was installed. If multiple versions are present, a Multiple link will be shown. Clicking this link will display the Version history contextual pane that shows details related to previously installed versions, installed date and release notes related to each version. The pane can be accessed by clicking the View Version History link. If the application does not support version reporting, a No version information available message will be displayed.
Figure 4-6 Application Dashboard Version History Contextual Pane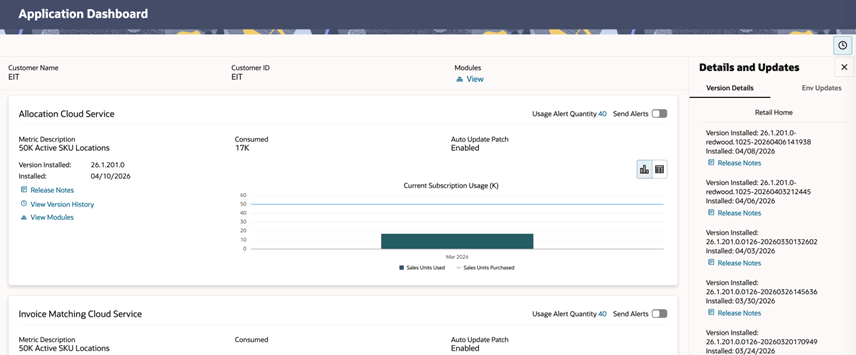
Env Updates
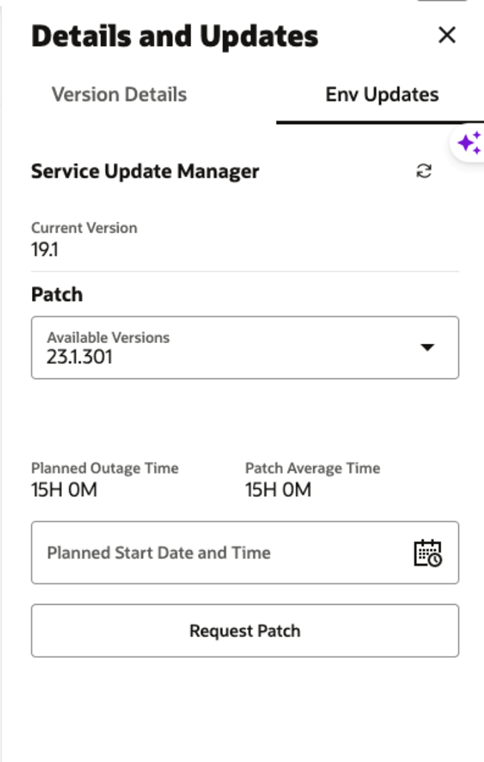
The Env Updates tab is displayed on the Details and Updates contextual pane, which can be accessed by clicking the View Version History link for the applicable cloud service on the Application Dashboard page.
The Env updates tab gives the Retail Home patch administrator the ability to upgrade an
application to a newer version. The Env Updates tab is only visible to users who
have been assigned the RH_PATCH_ADMIN role.
Figure 4-7 Env Updates Tab
Patch Request
The user can request an upgrade to a version that is greater than the one currently installed using the Request Patch button.
The required fields for requesting a patch are:
- Version number (from the Available Versions dropdown)
- Planned Start Date and Time
The Planned Start Date and Time must be set to a value in the future.
Once a patch request is successfully created, the status of the request would be appended to the corresponding version in the Available Versions dropdown. The possible statuses are Accepted, Pending Approval, Rejected, and Scheduled. The Request For Planned Patch button would be disabled at this point and would only be enabled if the patch request is Rejected.
Below are the patch request flows:
- Request Patch - Request Accepted - Request Approved - Patch Scheduled
- Request Patch - Request Accepted - Patch Rejected
- The administrator also can also create a new patch request while the previous one is in Scheduled and Approved status.
- Request Patch - Request Accepted - Request Approved - Patch Scheduled - Reschedule Patch - Reschedule Request Accepted - Reschedule Request Approved - Patch Scheduled
- Request Patch - Request Accepted - Request Approved - Patch Scheduled
- Request Patch - Request Accepted - Request Approved - Patch Scheduled - Reschedule Patch - Reschedule Request Rejected - (Initial) Patch Scheduled
- Request Patch - Request Accepted - Request Approved - Reschedule Patch - Reschedule Request Accepted - Reschedule Request Approved - Patch Scheduled
Figure 4-8 Status Display After Requesting a Patch
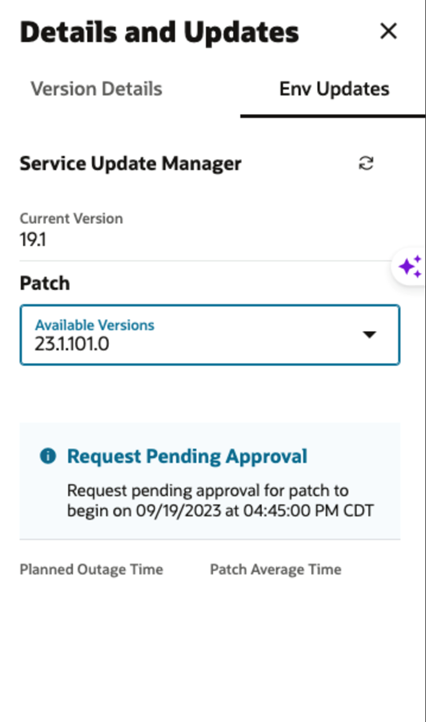
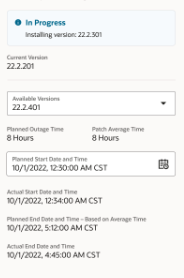
Once the patch run is kicked off, the status will no longer be appended to the version and instead would be displayed in a status bar along with version name.
Figure 4-9 In Progress Patch with Status Bar
The Request Patch button is only be enabled for the version once the patch is completed (with or without errors/warnings).
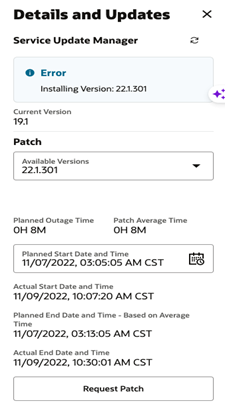
The completed patch run would have the following additional details.
-
Actual Start Date and Time
-
Actual End Date and Time
Figure 4-10 Completed Patch Run with Error Display