5 Create an Average Cost Adjustment
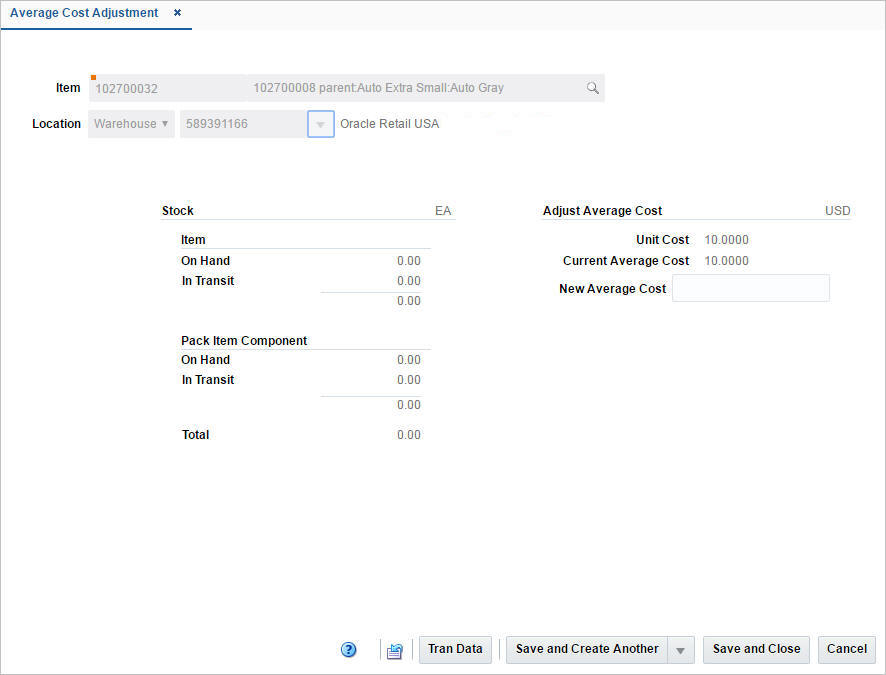
The Average Cost Adjustment page allows you to enter a new average cost for an item at a selected location.
Figure 5-1 Average Cost Adjustment Page

The Average Cost Adjustment Page displays the following fields.
Table 5-1 Average Cost Adjustment - Fields and Description
| Fields | Description |
|---|---|
|
Item |
Enter, or search for the item for which you want to adjust the average cost. |
|
Location |
Select the location type (valid values are store and warehouse). Then enter, select or search for the location for which you want to adjust the average cost. |
|
Stock: |
This section allows you to view the item and pack item component on hand and in transit quantities at a location. Right side of the section header displays the UOM (unit of measure) for the stock quantities shown. |
|
Item - On Hand |
Displays the stock on hand of the item at the selected location. |
|
Item - In Transit |
Displays the stock of the item in transit to the selected location. |
|
Pack Item Component - On Hand |
Displays the stock on hand of the pack item component at the selected location. |
|
Pack Item Component - In Transit |
Displays the stock of the pack item component in transit to the selected location. |
|
Total |
Displays the total stock on hand of the item at the selected location. |
|
Adjust Average Cost: |
This section allows you to view the current costs of an item at a location and allows you to change the average cost. Right side of the section header shows the location currency. |
|
Unit Cost |
Displays the unit cost of the item at the selected location. |
|
Current Average Cost |
Displays the current average cost of the item at the selected location. |
|
New Average Cost |
Enter the new average cost for the selected item/location. |
Average Cost Adjustment Toolbar
The toolbar contains the following button, as well as icons and buttons described in “Screen Level Action - Icons and Buttons" in the Oracle Retail Merchandising Do the Basics User Guide.
Table 5-2 Average Cost Adjustment Toolbar - Icons/Buttons and Description
| Icons/Buttons | Description |
|---|---|
|
Tran Data button |
Opens the Transaction Data page. The item/location information is populated in the search criteria in the Search section. For more information about the Transaction Data page, see the "View Transaction Data" chapter. |
|
Save and Close |
Click Save and Close to save the entered records and close the page. |
|
Save and Create Another |
Click Save and Create Another to save the entered records and create a new average cost adjustment. The menu contains the following options. In both cases, the new average cost field is reset and the user has to enter a new value.
|
Adjust the Average Cost for an Item/Location
To adjust the average cost for an item at a selected location, follow the steps below.
-
From the Tasks menu, select Finance > Average Cost Adjustment. The Average Cost Adjustment page appears.
-
In the Item field, enter, or search for the item.
-
In the Location field, select the location type from the list. Then enter, select or search for the location.
-
In the New Average Cost field, enter the new cost for the item at the selected location.
-
Then choose one of the saving options. For more information about the available options, see the Average Cost Adjustment Toolbar section.
Upload Average Cost Adjustments from a Spreadsheet
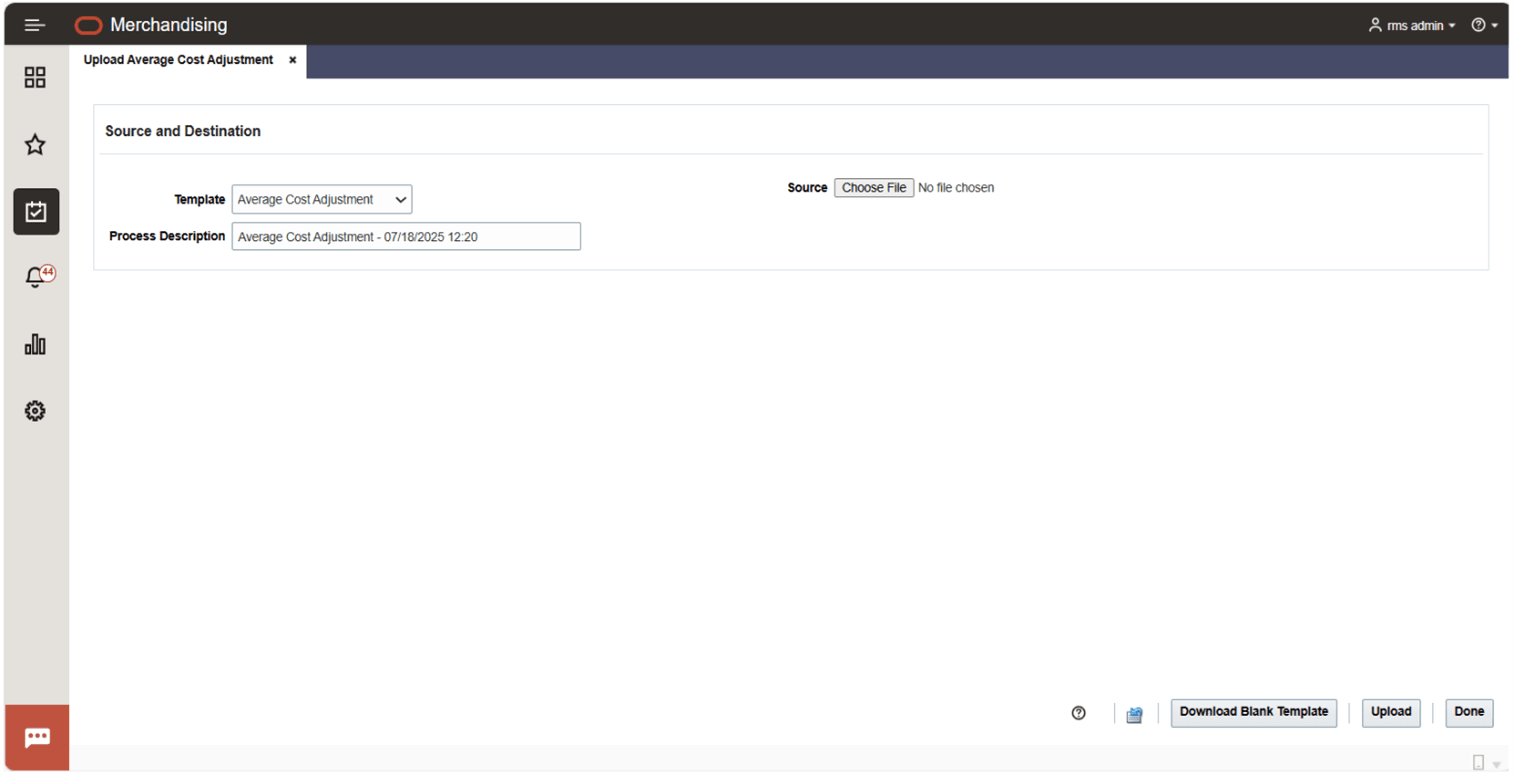
Merchandising supports managing average cost updates through the spreadsheet download and upload processes. This can be accessed under Financials > Upload Average Cost Adjustment in the main Merchandising task list.
To perform updates, download a blank template, provide the necessary adjustments, and then upload the updated spreadsheet with the new WAC for the desired item-locations.
A blank template for inputting item-location adjustments can be downloaded by navigating to Data Loading > Download Blank Template and then selecting Type as Average Cost Adjustment to download the template. Alternatively, you can download a blank template using the Download Blank Template button in the Upload Average Cost Adjustment screen.
Once the new WAC details for specific item-locations have been added to the downloaded template, you can upload the spreadsheet to get these updates applied in Merchandising.

To review the status of the upload and check whether any errors have occurred, select the Foundation Data >Review Status task from the main task list.
For more information about uploading data through a spreadsheet, see “DataUpload" in the Oracle Retail Merchandising Do the Basics User Guide.