Create New Purchase Orders using the UI
If given permission, users are able to create new Purchase Orders in Suppy Chain Hub.

To create purchase orders:
- From the side menu, choose Procure to Pay.
- In the Purchase Orders tab, click Create PO.
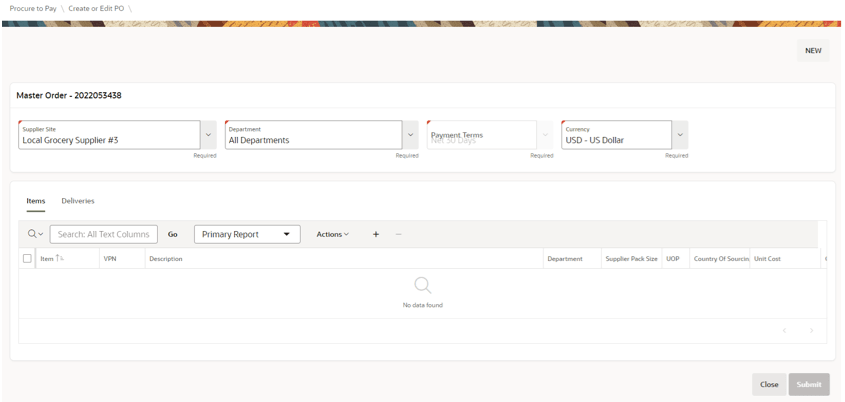
- In the Create or Edit PO screen, complete the following information:
- Select Supplier Site (only Supplier Sites associated with the user are shown).
- Select Department (if PO is associated with a single department).
- Payment Terms/Currency/Exchange Rate will default but can be amended.
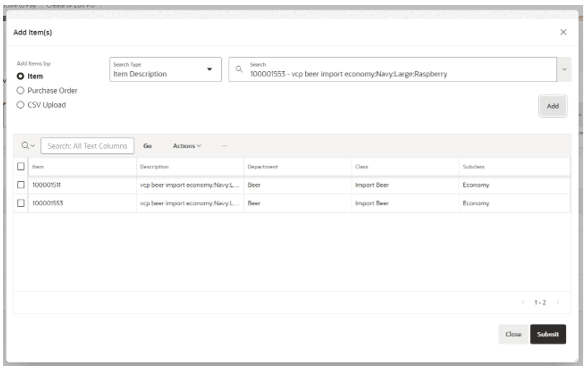
- In the Items tab, add the items. The following options are available to add items:
- Item (using Style/SKU ID, description, VPN, and Barcode)
- Purchase Order (copy items from another order)
- CSV upload (select file containing a list of items)

- Review and complete the item information:
- Supplier Pack Size (defaulted)
- Unit Cost (defaulted)
- Quantity (needs to be entered)
- In the Deliveries tab, click the + icon.
- Add the PO specific information:
- Location
- Not Before Date / Not After Date / Delivery Date
- Add the quantity for the delivery:
- Item by Item
- Using the Distribute Outstanding button
- Add additional deliveries if required (repeat Steps 6-8).
- Click Submit. If the user has approval permissions, it will be automatically moved to Approve status; otherwise, it will go to New status, to be approved by a user with approval permissions.