Balance Letter Sample
This example shows how data is inserted into a form layout using form fields from an XML data file.
-
Open the sample template from the Windows start menu by clicking Start / All Programs / Oracle BI Publisher Desktop / Samples, then select RTF Templates / Balance Letter / Balance Letter Start.rtf.
Alternatively, the file can be opened directly from the Samples folder where Template Builder was installed, such as: C:/Program Files (x86)/Oracle/BI Publisher/BI Publisher Desktop/Template Builder for Word/samples
-
Load the XML data to be used with the template by clicking Load Data / Sample XML within the BI Publisher ribbon.
Locate the Balance.xml file in the same location as the template; click Open. You should receive a Data loaded successfully message.
-
Insert the data bookmarks into the form by clicking Insert / Field and selecting the required field.
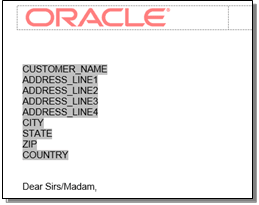
Start by placing the cursor at the <INSERT_ADDRESS_HERE> placeholder in the form and replace it by selecting the Customer Name and related Address fields from the dialog box, clicking Insert (or by dragging the field) to add each one individually.
The form should then look like Figure B-2. Continue inserting the AS_OF_DATE, TRX_CURRENCY_CODETRX_CURRENCY_CODE, and C_INV_OPEN_BALANCE fields at their placeholders.
Figure B-2 Balance Letter Fields Added
-
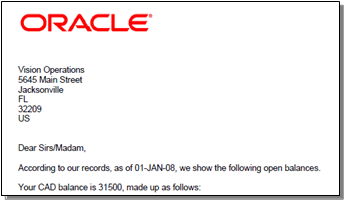
The form can now be previewed as a PDF file by clicking Preview / PDF, or as any of the other formats. The preview presents the form with sample data from the selected XML file inserted into the form fields.
Figure B-3 Balance Letter Preview
-
A table of data can now be added to show a list of invoices.
To select the data to show in the table, click Insert / Table Wizard, select Table as the report format and click Next. Then select the //ARXCOBLX/G_CUSTOMER/G_CURRENCY/G_INVOICES data set.
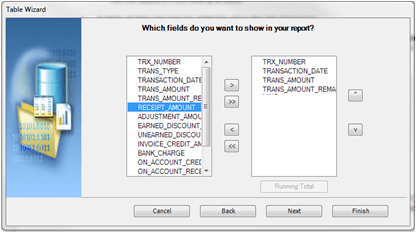
Clicking Next presents the list of available fields to appear as column in the table. Individually select Trx Number, Transaction Date, Trans Amount, and Trans Amount Remaining in the left hand pane, clicking > to add them to the right hand pane (the order of the selected columns can be changed using the up and down buttons).
Figure B-4 Table Wizard Dialog Box
-
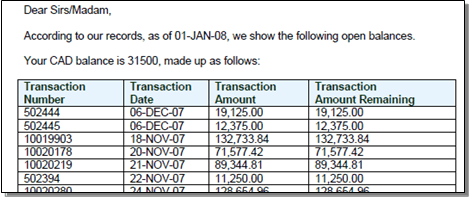
Click Finish (clicking Next will present advanced grouping or sorting options). The table appears in the form per Figure B-5.
Figure B-5 Balance Letter Table

Note that F and E appear at the start and end of the row respectively to indicate a repeating section. The order of the columns may be edited directly in Word, however the F and E must always remain in the first and last columns.
-
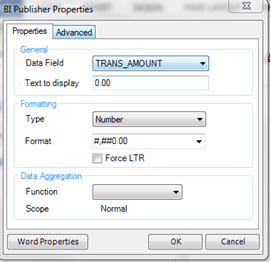
The table may be formatted using the Word options for changing font, size, position, bold/underline, color, and so forth. Fields may be further formatted by selecting the field, right-clicking, and selecting BI Publisher / Properties. The Properties dialog box allows the field to be specified as a Text, Number, or Date type (which can show the Current Date or Current Time), with formatting options appropriate to the field type.
Set the TRANS_AMOUNT column to be a Number with #,##0.00 formatting, appropriate to showing the value as a currency amount. A default value can be entered in the Text to display field.
Figure B-6 BI Publisher Properties Dialog Box
-
Click OK to apply the formatting. The field name in the table will be replaced with the formatted value, but can be seen in the Properties dialog box, or in the column heading. The column heading may be edited to be more descriptive.
Set the Transaction Date, Transaction Amount, and Transaction Amount Remaining columns to the appropriate data type, with formatting, and edit the column headings, for the table to appear in the form per Figure B-7.
Figure B-7 Balance Letter Properties Dialog Box

-
Preview the form again to see the table, populated with data, and then save a local copy of the completed RTF template.
Figure B-8 Balance Letter Preview
