Printing a Gift Receipt
This function may also be available at the Register Login screen.
-
With the transaction record selected, select the Gift Receipt option.
Oracle Retail Xstore Point of Service displays a list of items in the transaction that are eligible for a gift receipt. Use the up and down arrow keys to select an item and then press the Spacebar to mark it for a gift receipt. You may use the Select All option to print gift receipts for all the listed items.
Note:
If there are multiple items that have been labeled as requiring a gift receipt, you may be prompted whether the items should be grouped on separate gift receipts. For example, 2 items on one receipt, and 3 items on another receipt.
-
Press Enter to continue. Oracle Retail Xstore Point of Service prints the gift receipt(s) for the selected item(s).
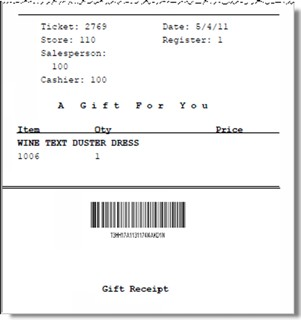
Figure 15-7 Gift Receipt

The items that you issued a gift receipt for are now labeled with the Gift icon.
Note:
If gift receipts are not permitted for the transaction type you selected, Oracle Retail Xstore Point of Service prompts with a message indicating that gift receipts are not allowed. You must press Enter to acknowledge the message to return to the Electronic Journal screen.
Multiple Gift Items - Grouping Items for Gift Receipts
If prompted whether you want to group the gift receipt items, you have the following options:
-
To group the items, select Yes, and continue with To Group Gift Items below.
-
If you do not want to group the items, select No and continue with To Continue without Grouping Gift Items.
To Group Gift Items
After selecting Yes at the Multiple Gift Receipts prompt, the system displays the list of items requiring gift receipts. Press the Spacebar to highlight and select the gift items for the first gift receipt, then select one of the following options:
Finish and Print Option
-
Select Finish and Print to print a gift receipt with the grouped items you selected.
-
If there are at least two or more gift items still available after setting up the grouping, you are prompted whether you want to print a separate gift receipt for each remaining gift item:
-
When prompted, select Yes to print a separate gift receipt for each remaining gift item.
<OR>
-
Select No to print the remaining gift items on a single gift receipt.
-
If only one gift item is still available after setting up the grouping, the system automatically prints that gift item on a separate gift receipt.
-
Add Grouping Option
-
Select Add Grouping to create multiple grouped gift receipts, beginning with the first group of gift items you selected.
-
The system then displays the gift item list again showing only the items that are still available for grouping. Select the next gift receipt items.
-
You can continue grouping the items using the Add Grouping option as long as there are at least 2 remaining items in the list.
-
When only 1 item remains in the list, the Add Grouping option no longer is available. Select Finish and Print to create a gift receipt for the remaining gift item.
To Continue without Grouping Gift Items
-
After selecting No at the Multiple Gift Receipts prompt, the system prompts whether you want to print a separate gift receipt for each gift item. Select one the following options:
-
Select Yes to print one gift receipt per gift item.
-
Select No to print a single gift receipt with all gift items.
-