Creating a New Receiving Document
Receiving Documents are usually downloaded from the home office; however, you can also create a Receiving Document in your store if a shipment arrives without one. Use the following process to create a new Receiving Document so that you can receive the shipment and update inventory.
-
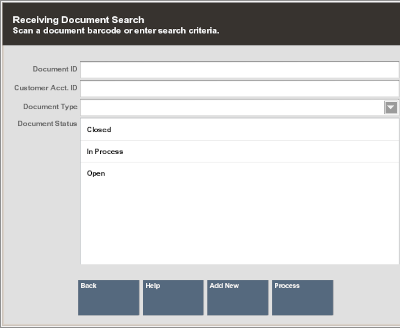
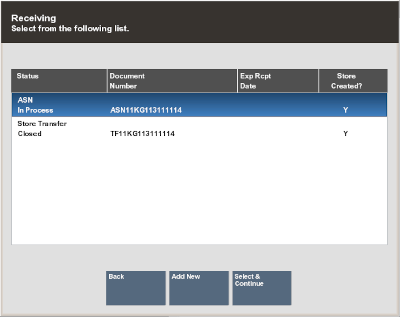
At the Receiving Document Search form or the Receiving search results form, select the Add New option to create a new Receiving Document.
Figure 2-16 Receiving Document Search Form

Figure 2-17 Receiving Document Search Results Form

-
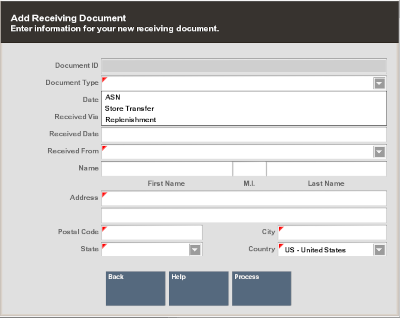
Xstore Classic displays the Add Receiving Document form:
Figure 2-18 Add Receiving Document Form

Enter the information as required:
-
Document ID: Depending upon your system's configuration, Xstore may generate this number automatically.
-
Document Type (REQUIRED): Select the Receiving Document type from the list.
-
Date: The date the Receiving Document was created. The default is today's date.
-
Received Via: Select the method by which the shipment was received (for example, UPS, FedEx, and so on).
-
Track #: Enter the Tracking Number found on the shipment, if it is known.
-
Received Date: Enter the date the shipment was received in your store.
-
Received From (REQUIRED): Select the location from which the shipment was shipped.
-
Name: Enter the name.
-
Address (REQUIRED) fields: Enter the address information.
-
-
When you have entered all the information for this new Receiving Document, select the Process option.
-
Xstore Classic prompts for the carton and item information. Refer to Adding a New Carton to a Receiving Document for procedural information.