Receiving Exception Report
This report shows a document-by-document list of items that were received but had a difference between the expected quantity and the actual quantity. The report includes the total number of items in each carton (expected and actual), for each Receiving Document number.
This report allows you to query by Date, Document ID Number, Carton Number and Document Type. The report can be viewed on the screen and printed.
This report includes the following information:
-
Date
-
Item ID
-
Serial Number
-
Description
-
Expected Amount
-
Received Amount
-
Difference Between Expected and Received
-
Document ID
-
Carton #
-
Document Total
-
Carton Total
Running the Receiving Exception Report
-
After logging in to the Back Office, select and enter Reporting, Inventory Reports, then Receiving Exception Report.
-
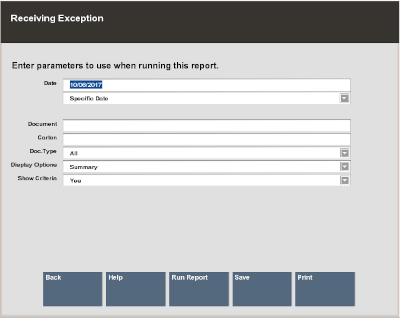
The Receiving Exception Report parameters form displays. Enter your criteria to generate the report:
Figure 2-22 Receiving Exception Report Form

-
A specific start date (as shown in Figure 2-22 above)
<OR>
-
A relative date option from the list. For example, yesterday or today.
Figure 2-23 List of Relative Dates

-
Receiving Document#
-
Carton Number
-
Document Type (list below)
Figure 2-24 List of Document Types

-
-
Select one of these options to finish your report:
-
Run Report: Execute the report and display the results on the screen.
-
Print: Execute the report and send the results to a printer.
-
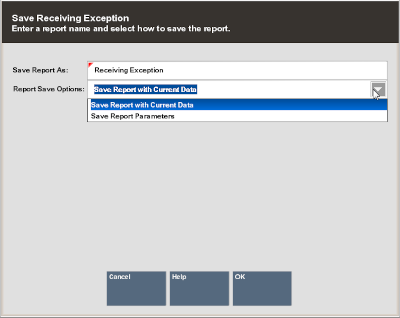
Save: You can save this report with the current data or save only the report parameters to run this specific report with these parameters again.
If you save the report, assign a name to it so it can be viewed whenever needed. Xstore Classic suggests a name, but you may type in the Save Report As field and change it.
Figure 2-25 Save Report Options

-
-
Choose one of the options in the Report Save Options list:
-
Save Report with Current Data - To save the report with the current values.
-
Save Report Parameters - To save only the parameters to use these parameters as a template to generate a new report later.
-
-
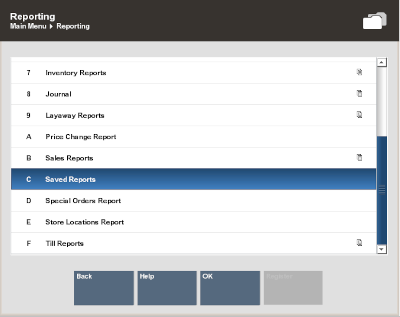
Select OK to save the report. Reports are saved to your personal report area and can be retrieved from the Reporting Saved Reports menu option and press Enter.
Figure 2-26 Reporting Menu

Note:
Refer to the Oracle Retail Xstore Point of Service Reports Guide for more information about setting up and running reports.
Figure 2-27 Receiving Exception Report

Note:
In this example, the expected count is zero for all items. User-created receiving documents always have an expected item count of zero. Only documents downloaded from the home office or generated automatically by the Order process, show an expected item count.