Clock In and Clock Out
Depending upon your store policy, you may be required to clock in before logging in. You may also be required to clock in and out for meal breaks. If meal break clock-out and clock-in is enforced, you cannot clock back in after a meal break until a specified period has elapsed.
For your timecard to accurately reflect the number of hours worked, you must clock in and out by performing the following procedures:
-
Clock In - Clocking in at the start of a shift.
-
Clock Out - Clocking out at the end of a shift.
-
Change Work Code - Changing the work code onto which you are logging time.
-
Clocking In and Clocking Out for Meal Breaks - Clocking out to start a meal break.
Clock In
Figure 22-1 Register Screen Login

To clock in:
-
Click Clock In/Clock Out at the Register Login screen.
Xstore Point of Service knows whether you are currently clocked in or clocked out and will perform the appropriate action automatically.
Note:
Touch-screen users swipe the clock area to clock in or clock out.

Xstore Point of Service prompts for your user ID.
Figure 22-2 Clock In Employee ID Prompt

-
Scan or enter your employee ID at the Clock In/Out prompt and press Enter.
Xstore Point of Service prompts for your password.
Figure 22-3 Clock In Employee Password Prompt

-
Enter your password and press Enter.
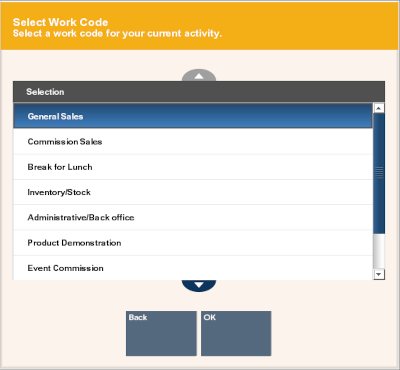
Figure 22-4 Work Code List

-
If necessary, select a work code for your current activity:
-
Click the work code.
-
Use the up and down arrow keys to highlight the appropriate work code, then press the Spacebar.
-
-
Click OK if necessary.
You are now clocked in.
Clock Out
To clock out:
-
Click Clock In/Clock Out at the Register Login screen. See Figure 22-1
Xstore Point of Service knows whether you are currently clocked in or clocked out and will perform the appropriate action automatically.
Note:
Touch-screen users swipe the clock area to clock in or clock out.
Xstore Point of Service prompts for your user ID. See Figure 22-2.
-
Scan or enter your employee ID at the Clock In/Out prompt and press Enter.
Xstore Point of Service prompts for your password. See Figure 22-3.
-
Enter your password and press Enter.
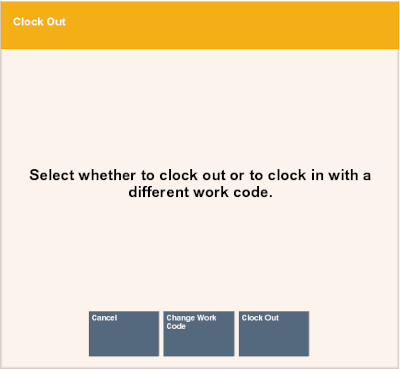
Figure 22-5 Clock Out Prompt

-
Click Clock Out if you are prompted whether to clock out or clock in under a different work code.
You are clocked out. Xstore Point of Service may print a receipt with your clock-out information.
Change Work Code
To change the work code you are using for your clock in:
-
Click Clock In/Clock Out at the Register Login screen. See Figure 22-1.
Xstore Point of Service knows whether you are currently clocked in or clocked out and will perform the appropriate action automatically.
Note:
Touch-screen users swipe the clock area to clock in or clock out.
Xstore Point of Service prompts for your user ID. See Figure 22-2.
-
Scan or enter your employee ID at the Clock In/Out prompt and press Enter.
Xstore Point of Service prompts for your password. See Figure 22-3.
-
Enter your password and press Enter.
You are prompted whether to clock out or clock in under a different work code. See Figure 22-5.
-
Click Change Work Code.
You are prompted for a new work code.
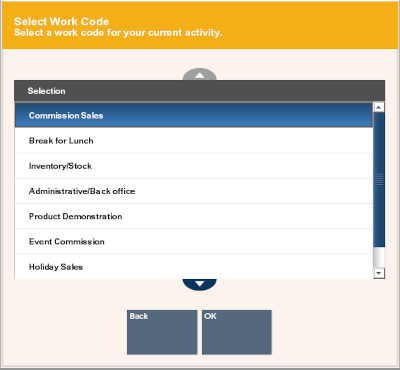
Figure 22-6 Change Work Code List

-
Select a work code for your current activity:
-
Click the work code.
-
Use the up and down arrow keys to highlight the appropriate work code, then press the Spacebar.
-
-
Click OK if necessary.
You are now clocked in under a new work code.
Clocking In and Clocking Out for Meal Breaks
If your store policy enforces meal break clock-out and clock-in, you cannot clock back in after a meal break until a specified period has elapsed.
If a minimum clocked-in time interval is used.
If your store policy requires a minimum clocked-in time interval for a Meal Break work code (for example, 30 minutes), you cannot clock out early from your meal break. An override is allowed with a manager's permission.
To clock out for a meal break:
-
Click Clock In/Clock Out at the Register Login screen. See Figure 22-1.
Note:
Touch-screen users swipe the clock area to clock in or clock out.
Xstore Point of Service prompts for your user ID. See Figure 22-2.
-
Scan or enter your employee ID at the Clock In/Out prompt and press Enter.
Xstore Point of Service prompts for your password. See Figure 22-3.
-
Enter your password and press Enter.
You are prompted whether to clock out or clock in under a different work code. See Figure 22-5.
-
Click Change Work Code.
You are prompted for a new work code.
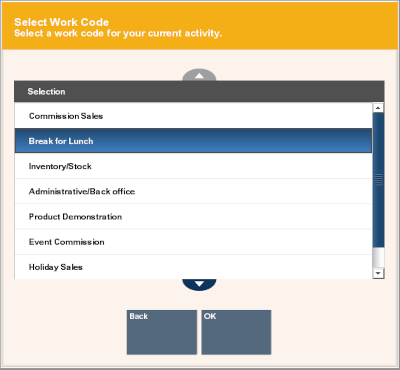
Figure 22-7 Work Code List

-
Select the meal break option (for example, Break For Lunch or Meal Break:
-
Click the meal break option.
-
Use the up and down arrow keys to highlight the meal break option, then press the Spacebar.
-
-
Click OK if necessary.
You are now clocked out for a meal.
If your store policy is set up for a minimum clocked-out time interval for a break (for example, 30 minutes), you cannot clock back in early.
This means that once you have clocked out during your shift, you cannot clock back in again for at least 30 minutes.
An override is allowed with a manager's permission.