Run the Flash Sales Summary Report
To run the Flash Sales Summary Report from the Register Login screen:
Figure 24-1 Register Login Screen

-
Click Flash Sales in the Register Login screen.
The Flash Sales criteria window opens.
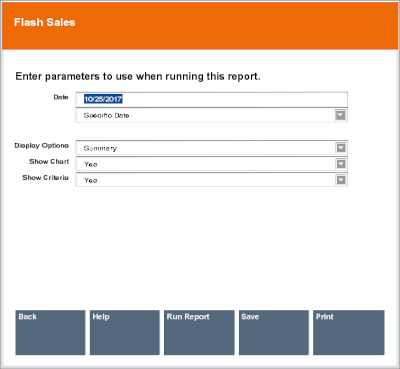
Figure 24-2 Criteria Entry Form for Flash Sales Summary Report

-
Enter the report criteria:
-
Start Date/Specific Date - Enter a date on the top line or select a relative date from the drop-down list.
-
Display Options - Select how the report will display data:
-
Summary - Display a summary of all data.
-
By Department - Organize the data by the item department.
-
By Employee - Organize the data by the employee who performed the sale.
-
By Hour - Organize the data by the hour at which the sales were made.
-
-
Show Chart - Select Yes to display a chart or No to only show data.
-
Show Criteria - Select Yes to display the criteria used when creating the report or No to only show the results.
-
-
Finish the report:
-
Click Run Report to execute the report and display the results on the screen.
-
Click Print to execute the report and send the results to a printer.
-
Click Save to keep the report with the current data or save only the report parameters to run this specific report with these parameters again. See Save a Report or Report Parameters for more information.
-
Save a Report or Report Parameters
To save a report or the parameters for a report:
-
Click Save in the Flash Sales report criteria window.
A Save Flash Sales Summary window opens.
Figure 24-3 Save Report Options

-
Enter the save file information:
-
Save Report As - Name of the save file.
-
Report Save Options - The information to be saved:
-
Save Report with Current Data - To save the report with the current values.
-
Save Report Parameters - To save only the parameters to use these parameters as a template to generate a new report at another time.
-
-
-
Select OK.
The report is saved to your personal report area and can be retrieved from the Back Office Main Menu by selecting Reports, then the Saved Reports option.
Note:
Refer to the Oracle Retail Xstore Point of Service Reports Guide for more information about setting up and running reports.
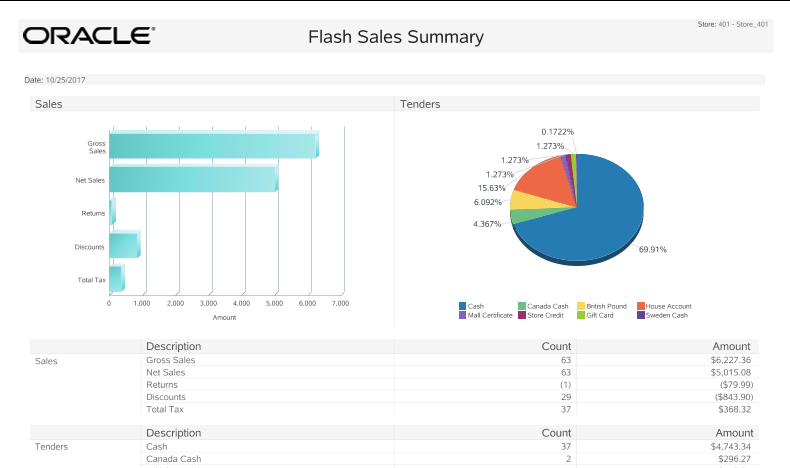
Figure 24-4 Flash Sales Summary Report

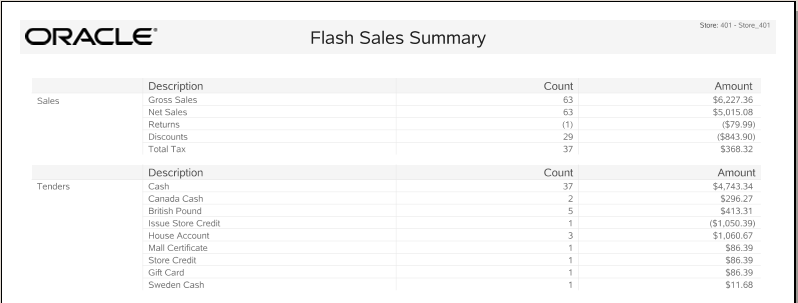
Figure 24-5 Flash Sales Summary Report - No Graph
