3 Associate Functions
Occasionally a customer issue needs resolving at the register during a sale. This may be to verify the sale of age restricted items, change price to match a competitor, to cancel an item or sale, or to suspend a transaction.
The associate function is also required when reprinting a receipt, opening/closing and activating/deactivating the Self Checkout register.
The options displayed on the Associate menu, when logging on, depends on whether the Self Checkout is already in the middle of a transaction.
Scanning of items to add to cart are not supported from this menu - only upon performing an item lookup can an item be added by an associate.
Figure 3-1 Associate Menu During Transaction
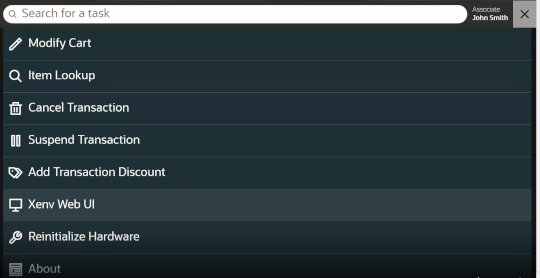
Selecting the X in the top right corner, exits the associate menu and returns the Self Checkout to the customer view.
The following section describes the functions and options available with associate access:
Associate Login
To gain access to the associate functions, login is required.
-
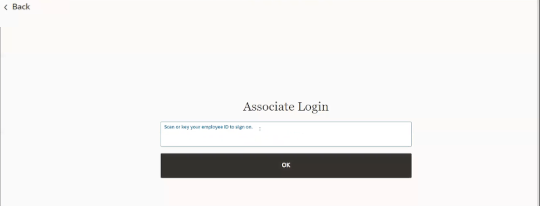
Select Associate Login.
Figure 3-2 Associate Login
-
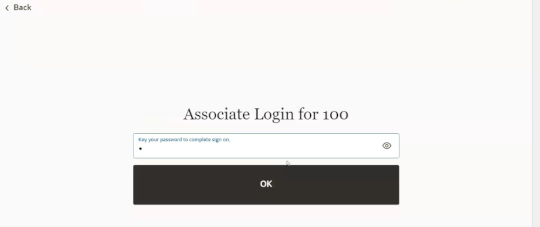
Scan your badge or enter your employee ID and select OK.
Figure 3-3 Associate Login Password
-
Enter your Password.
-
Select Process.
The Associate menu is displayed and the logged in associate's name displays in the upper right corner.
Figure 3-4 Associate Menu
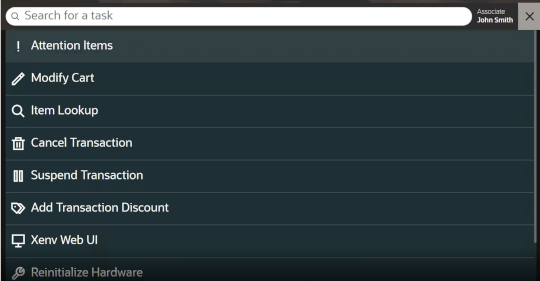
Selecting the X in the upper right hand corner exits this menu to return to the customer shopping cart.
The menu options displayed depend on if you accessed these functions during a transaction and permissions of the logged in associate. Select an option from the menu or type in the search field to search for a task.
Age Restricted Items
Certain items, such as alcohol, medicines, glues and solvents, and so on, that are age restricted cannot be purchased until the age of the customer is verified by an associate. When an age restricted item is scanned, a warning message is displayed, and the associate alerted.
Figure 3-5 Age Verification Prompt
The associate must log in to verify the date of birth of the customer. The customer can keep scanning items but they will not be allowed to checkout until their age is verified.
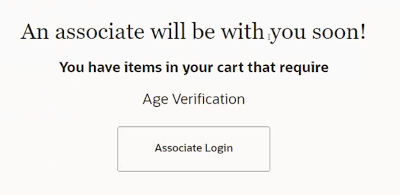
If the Finish and Pay button is pressed, the following message is shown:
Figure 3-6 Age Verification Prompt at Checkout
-
Log in as an associate. See Associate Login.
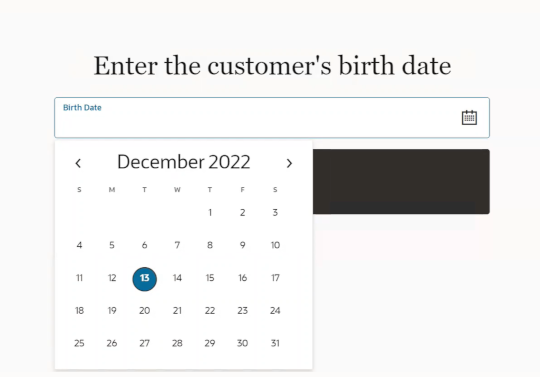
Figure 3-7 Customer Age Verification
-
Enter the customer’s birth date using the date picker and select OK.
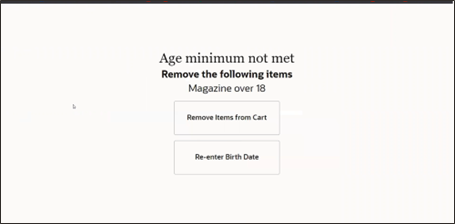
If the age requirement is not met, a prompt appears with two choices:Figure 3-8 Age Minimum Not Met
-
Re-Enter Birth Date - Click to re-enter the birth date if an incorrect date is entered on the first attempt.
-
Remove Items from Cart - Click Remove Items from Cart if the minimum age is not met, the items must be removed from the cart.
-
If the age requirement is met further age restricted items that require same age or less, are automatically added to the basket.
A warning message is displayed if the items are removed from the cart.
Figure 3-9 Items Removed Prompt
Warrantied Items
A warranty (also known as a service plan) is a promise made by a manufacturer or seller to support a product after its purchase. Typically, this involves the purchase of a contract that covers the costs of parts and service on an item beyond the manufacturer's original warranty period.
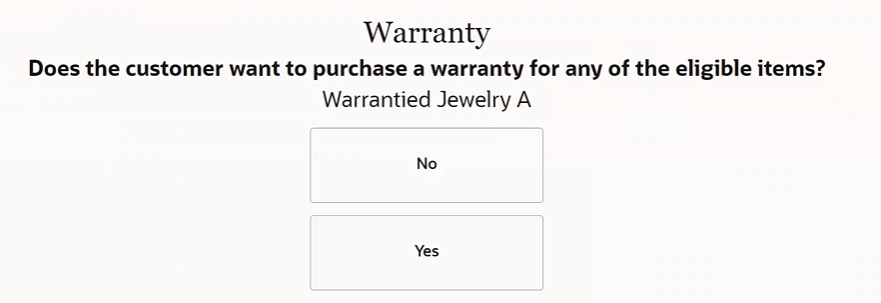
When you sell an item that is eligible for a warranty or service plan, the system requires an associate to intervene.
Warranties are available from a traditional register. The self checkout system will require an associate to confirm with the customer if they would like to purchase a warranty from a traditional register or continue on the Self Checkout without a warranty.
Figure 3-10 Warranty Item
Maximum Quantity Items
Certain items such as medicines are restricted in the quantity permitted to be sold. When a customer tries to exceed the maximum quantity for an item, the associate is alerted. The associate must log in to clear the message before the customer can continue with the sale without the additional items.
Unrecognized Items
If Self Checkout detects that the barcode scanned is invalid and does not exist, it displays an error message that the item cannot be found and alerts an associate. An associate may be able to add the item details (name and price) manually or cancel the item.
Non Purchaseable Items
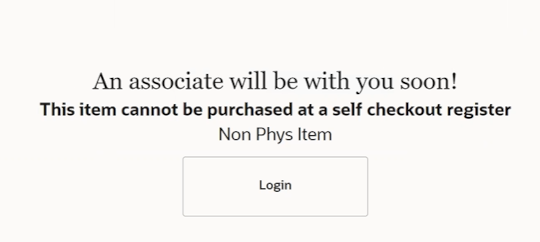
A retailer may configure items that cannot be sold at a Self Checkout for example lottery tickets.
Figure 3-11 Non Purchaseable Item
Log in as an associate. See Associate Login.
Explain the reason why the item cannot be sold and remove the item from the shopping cart.
Serial Number Items
In Self Checkout, either the customer is required to enter a serial number when prompted or an associate is required to enter the serial number prior to the customer tendering. If the Self Checkout is configured such that the associate is required to enter a product serial number, when the customer selects Finish and Pay and the serial number has not been entered by the associate the system prompts the customer that help is on the way to enter a serial number. An associate does not need to wait for the customer to select Finish and Pay as the associate may see that the customer has an item that requires a serial number and they can select Associate Login and the system will prompt them to enter the serial number.
Log in as an associate. See Associate Login.
Scan or manually enter the serial number and select OK.
Exit the associate menu and the serial number is shown on the list of items in the shopping cart.
Figure 3-12 Serial Number Item

Modify Cart
Associates can change certain elements about the items in a cart such as quantity or price or add a discount or void an item.
The associate view of the customer shopping cart allows an associate to modify the items in the cart. To scan more items into the customer cart or to tender the transaction the associate must return to the menu and exit the menu to return customer's view of the shopping cart where additional items can be scanned and tendering can take place.
To access the associate view of the shopping cart, from the Associate Menu select Modify Cart.
Figure 3-13 Associate Menu During Transaction

Figure 3-14 Associate View of Cart

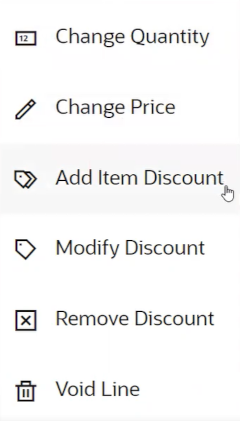
Figure 3-15 Modify Item Menu
An associate cannot begin the tendering process whilst in the Associate mode.
For tendering, select Back to return to the Associate menu. From the Associate menu, close it to get back to the customer's shopping cart.
Change Quantity
-
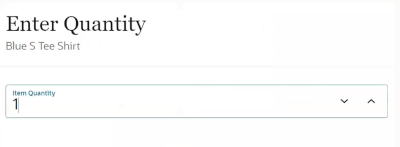
From the Line Item menu, select Change Quantity.
Figure 3-16 Enter Item Quantity
-
Use the arrows to enter a new quantity and click OK.
The quantity and price fields are updated.
Note:
Multiple items are shown on one line.
Change Price
-
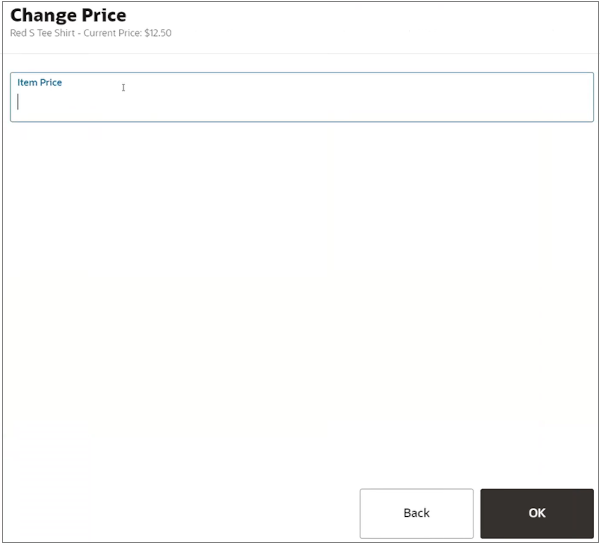
From the Modify Item menu, select Change Price.
Figure 3-17 Change Item Price
-
Enter a new price and click OK.
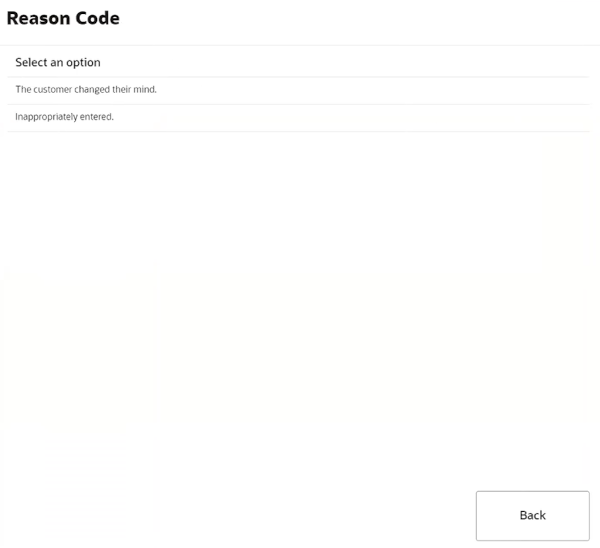
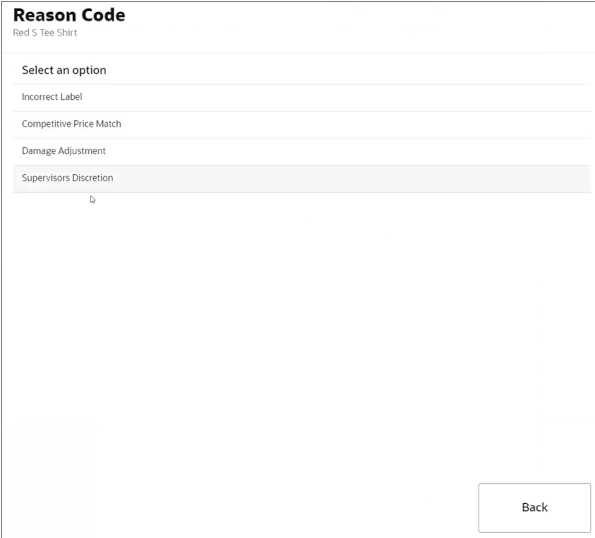
Figure 3-18 Change Price Reason Code
-
Select a reason code for the price change.
Add Item Discount
An associate can apply a discount to a single line item or multiple line items. Discounts may be specified as either an amount (for example, $5.00 off) or a percentage (for example, 10% off) for item discounts. If an associate wants to perform a transaction discount (on all items in the cart) they would need to go to the menu and select Add Transaction Discount.
Note:
An item discount will need to be done one item at a time not multiple lines at one time.
-
From the Modify Item menu for the desired item, select Add Item Discount.
Figure 3-19 Discount Type Options
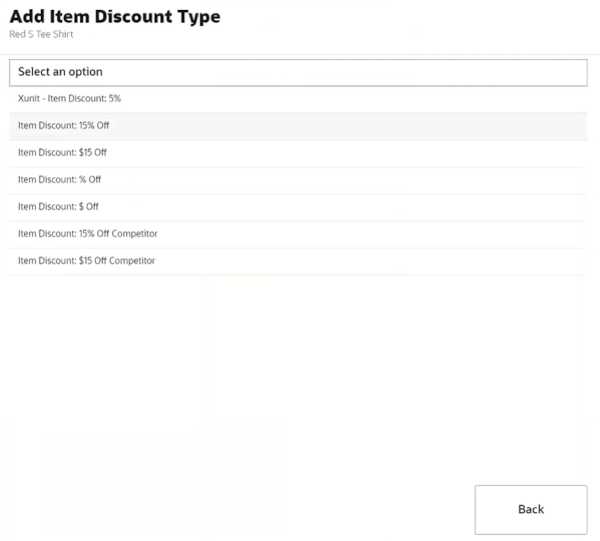
A list of discount types is shown.
Note:
The discounts available depend upon the configuration of your system.
If necessary, enter the discount information:
-
Percent Discount - Enter the percentage of the discount.
-
Amount Discount - Enter the amount of the discount.
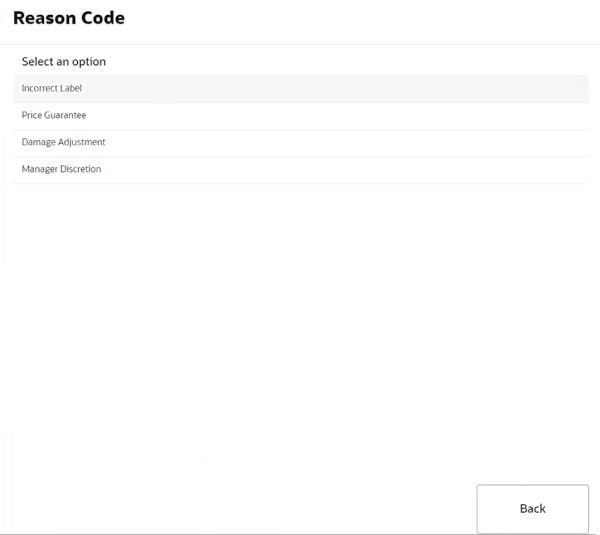
Figure 3-20 Discount Reason Code
-
-
Select a reason.
-
The discount is applied to the item and badge showing the discount is shown underneath the unit price for the line item.
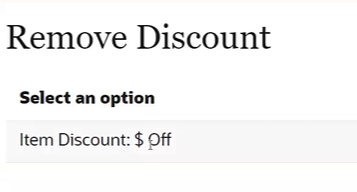
Modify Discount
-
From the Line Item menu, select Modify Discount.
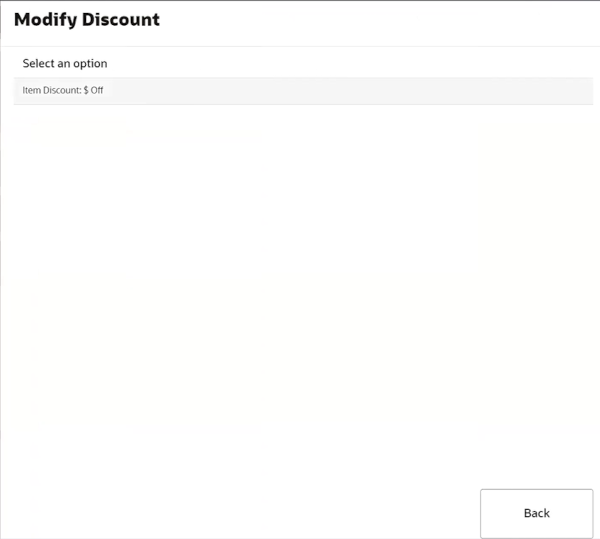
Figure 3-21 Modify Discount
-
Select the discount to modify.
-
Select an alternative discount type.
-
Select a reason code.
-
Back will take the associate to the associate view of the shopping cart.
Item Lookup
Item Lookup is available for logged in associates to quickly find an item that may be failing to scan, or the barcode is missing. Although the customer can perform an item lookup by an item ID, the associate has an additional description field to find the item.
-
Log in as an associate. See Associate Login.
-
From the associate menu, select Item Lookup.
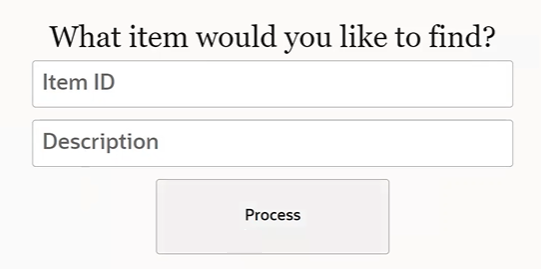
Figure 3-24 Associate Item Lookup
-
Enter search criteria (item ID or description) and select Process to search for items.
-
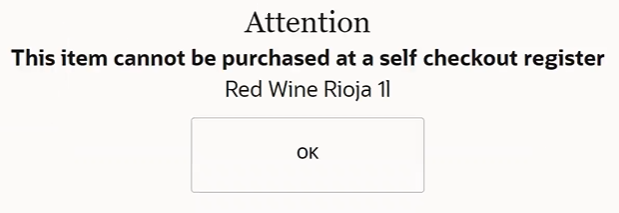
Select item from the results list and the item is added to the basket. Items that are not available for Self Checkout cannot be added to the basket.
Note:
A retailer configures items that they do not want to sell on a Self Checkout.
Figure 3-25 Items Not Available to Purchase Message
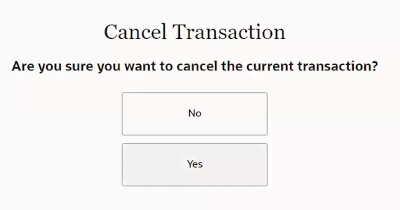
Cancel Transaction
The Self Checkout sale may need to be cancelled if the customer changes their mind about their purchase.
To cancel a sale:
-
Log in as an associate. See Associate Login.
-
From the Associate menu, select Cancel Transaction.
Figure 3-26 Cancel Transaction
-
Select Yes.
Self Checkout cancels the transaction and returns to the main Self Checkout start screen.
Suspend Transaction
A sale on the Self Checkout register may be suspended and picked up on a manned register when a customer, for example, cannot pay at the Self Checkout or specific items cannot be checked out on the Self Checkout. This may occur when a customer does not have a card, or money on the account, or if additional items, which are not available in Self Checkout mode, (such as cigarettes), are to be included in the transaction.
To suspend a sale:
-
Log in as an associate. See Associate Login.
-
From the Associatemenu, select Suspend Transaction.
A suspend receipt prints, Self Checkout clears the transaction and returns to the main Self Checkout home screen. The suspended sale can be resumed and completed on a standard Xstore register or another Self Checkout register.
Resume Transaction
Transactions suspended at a Self Checkout can be resumed at a Self Checkout.
Transactions suspended at an Xstore POS cannot be resumed at a Self Checkout
A transaction can be resumed by either scanning the suspend receipt from the shopping cart screen or through the associate menu by selecting Resume Transaction
To resume a sale from the suspend receipt:
-
Scan a suspend receipt.
-
Log in as an associate. See Associate Login.
After login the transaction displays in the customer's view of the shopping cart.
-
From the Associatemenu, select Suspend Transaction.
A suspend receipt prints, Self Checkout clears the transaction and returns to the main Self Checkout home screen. The suspended sale can be resumed and completed on a standard Xstore register or another Self Checkout register.
To resume a sale from the associate menu:
-
Log in as an associate. See Associate Login.
-
From the Associate menu, select Resume Transaction.
If required, select from the list of suspended transactions. Upon selecting the transaction from the list the customer view of the shopping cart displays.
Alternatively, scan the suspend receipt and the transaction displays in the customer's view of the shopping cart.
Reprint Last Receipt
The receipt for the last sale only can be printed again. This is useful in cases where the receipt failed to print correctly the first time
If a receipt needs reprinting for Self Checkout sales prior to the last Self Checkout sale, then the customer will need to go to a manned register, and the cashier will use the Reprint Receipt option in the Electronic Journal. Refer to the Oracle Retail Xstore Point of Service User Guide for more details.
To reprint the last receipt:
-
Log in as an associate. See Associate Login.
-
Self Checkout displays the Associate menu. Select Reprint Last Receipt.
Self Checkout prints the receipt for the last Self Checkout transaction on that register.
-
Select OK to clear the message prompt that the receipt has printed.
-
Depending on your system configuration, select Back to return to normal Self Checkout sale mode.
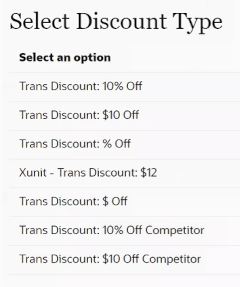
Add Transaction Discount
A transaction discount is applied equally to each eligible item in the transaction. Discounts may be specified as either amount (for example, $5.00 off) or percentages (for example, 10% off) for transaction discounts.
-
Select Add Transaction Discount from the associate menu.
Figure 3-27 Transaction Discount Type
Note:
Because each Self Checkout POS menu is configurable, the discount options shown on your system may be different than the options shown here.
-
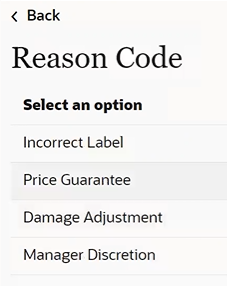
Select the discount to apply.
Figure 3-28 Transaction Discount Reason Code
-
Select the reason for applying the discount.
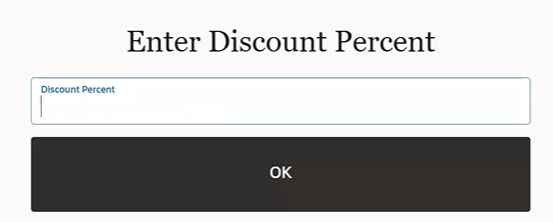
Figure 3-29 Transaction Discount Percent
-
If the discount is not fixed, enter the amount or percentage of the discount.
-
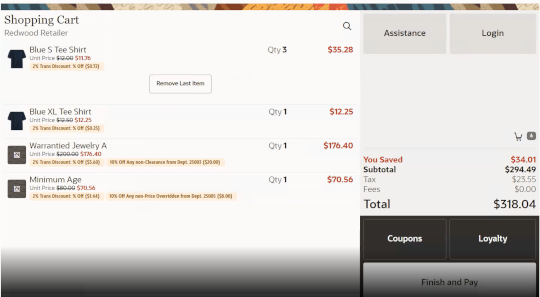
Select OK. The discount is applied to the transaction. Return to the sale screen.
Figure 3-30 Transaction Discount Applied
Outside of Sale Mode
When not in a transaction, the register in Self Checkout mode can be used to:
Open Register
Figure 3-31 Activate Register

To open a Self Checkout register for customer use:
-
An associate needs to press Activate Register button.
-
Scan your badge or enter your employee ID and selectOK.
-
The Register Open prompt is displayed.
Figure 3-32 Open Register Prompt

Note:
There is no cash taken on the Self Checkout so no need for a count process for opening a Self Checkout register.
- Select Yes to open the register.
The Self Checkout opens to the Home screen ready for use.
Figure 3-33 Self Checkout HomeScreen
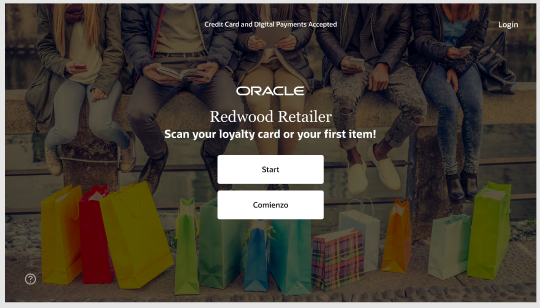
Activate Register
Figure 3-34 Activate Register

To unlock a Self Checkout register for use:
-
An associate needs to press Activate Register button.
-
Scan your badge or enter your employee ID and select OK.
-
The Self Checkout register opens to the Home screen and ready for use.
Figure 3-35 Self Checkout HomeScreen

Deactivate Register
A Self Checkout register can be deactivated (locked) so that it is not available for customers to use. This may be due to the self checkout lane not being ready for customers due to requiring cleaning or no bags available, issues with the Self Checkout printer or payment terminal, quiet times, or the store just wants customers to use manned Self Checkout registers for a period. The register cannot be locked when in a Self Checkout sale.
This process can only be done by an associate, and not a customer.
To deactivate a register from customer use:
-
Log in as an associate. See Associate Login.
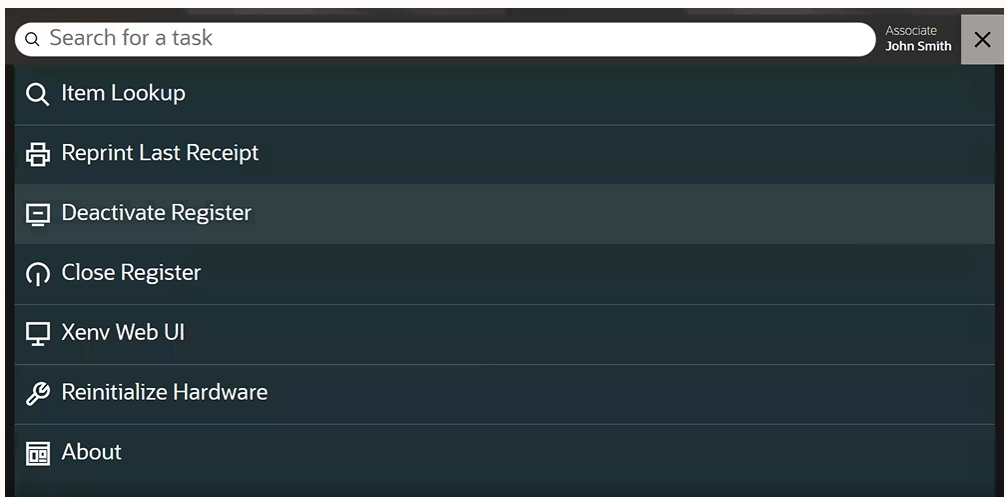
Figure 3-36 Deactivate Register
-
Select Deactivate Register from the associate menu. The Self Checkout closes and returns to the Activate Register screen
Figure 3-37 Activate Register

A message regarding the register is unavailable is shown to the customer.
Close Register
Figure 3-38 Close Register

To close a register:
-
Log in as an associate. See Associate Login.
-
Select Close Register from the associate menu.
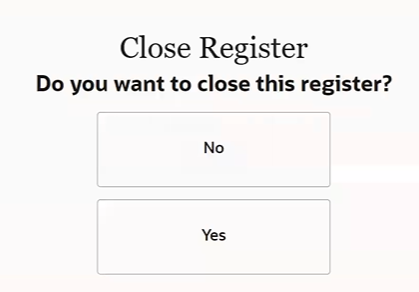
Figure 3-39 Close Register
-
Select Yes. The Self Checkout closes and returns to the Activate Register screen. The Self Checkout register is closed for use until the register is opened again.
Figure 3-40 Activate Register

Note:
There is no manual tender reconciliation required on the Self Checkout at the close of a register
Xenv Web UI
-
Log in as an associate. See Associate Login.
Figure 3-41 Associate Menu

-
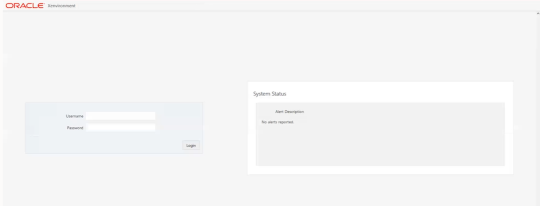
Select Xenv Web UI from the associate menu to launch the Xenvironment web User Interface (UI).
Figure 3-42 Xenv Web UI
Reintialize Hardware
Occasionally, the peripheral hardware devices must be reset.
-
Log in as an associate. See Associate Login.
-
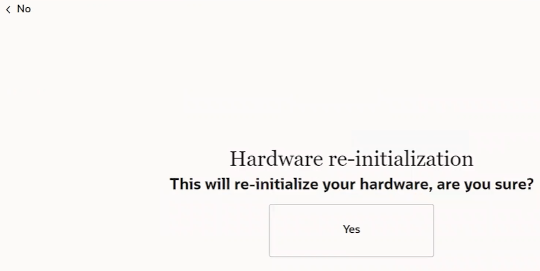
Select Reintialize Hardware from the associate menu.
Figure 3-43 Reinitialize Hardware
-
Select Yes. When complete, the associate menu is shown.
About
The About screen displays the copyright, the version, and legal disclaimer of Self Checkout being used.
To view this information:
-
Log in as an associate. See Associate Login.
-
Select About from the associate menu.
Figure 3-44 About Page

-
Select Back to return to the associate menu.
