Migration Steps
This section describes the steps for migrating from the legacy GIS integration to the modern Oracle Integration Cloud-based GIS integration.
Preparation
Before beginning the migration, complete the following preparation activities.
Disabling the Existing GIS Integration
Set the ESRI Integration On/Off parameter to “Off” in the ESRI WAM Integration Master Configuration.
Extracting the Data for Assets and Locations (Optional)
To review the assets and locations currently synchronized in Oracle Utilities Work and Asset Cloud Service, run the GIS Asset Location Extract (W1GISALX) batch process. This batch is available in Oracle Utilities Work and Asset Cloud Service V26.4 and later.
Note: Access to the GIS Asset Location Data Export (W1GISALX) application service is required to run this batch process.
The batch generates the following files:
File Type | Prefix | Description | Example File Name |
|---|---|---|---|
Single Asset | SA | Asset locations with a single asset installed. It reflects the current WACS and ESRI synchronization state. | SA_WACS_W1GISALX_0005_00_001.jsonl |
No Asset | NA | Asset locations with no installed asset. These are locations created without associated tracked assets. | NA_WACS_W1GISALX_0005_00_001.jsonl |
Multiple Assets | MA | Asset locations with multiple installed assets. This scenario is not supported out of the box and is provided for customers with custom solutions. | MA_WACS_W1GISALX_0005_00_001.jsonl |
Sample SA_WACS_W1GISALX_0005_00_001.jsonl file:
Sample NA_WACS_W1GISALX_0005_00_001.jsonl file:
Sample MA_WACS_W1GISALX_0005_00_001.jsonl file: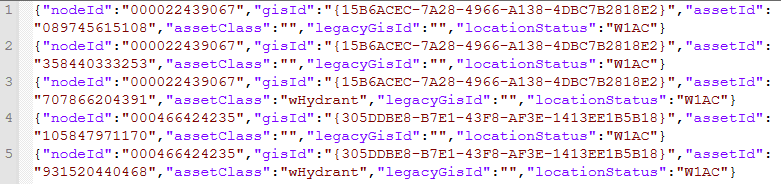
Extracting the Data for Work Locations (Optional)
To review synchronized work locations in Oracle Utilities Work and Asset Cloud Service:
1. Navigate to the Work Location Identifier search screen.
2. Select “GIS ID” as the Identifier Type.
3. Enter “%” in the Identifier Value field.
4. Run the search to list all synchronized work locations.
5. Export the search results to a file.
Note: By default, only 300 records are retrieved at a time.
To increase the number of records:
1. Navigate to the “W1-WRKLOCQ2” Work Location Identifier zone.
2. Increase Number of Rows to Display.
3. Increase Number of Rows to Retrieve for SQL 1 and SQL 2.
Preserve Global IDs
In the legacy integration, Global ID is the primary synchronization key between Oracle Utilities Work and Asset Cloud Service and ESRI ArcGIS.
Before upgrading ArcGIS, copy all existing ESRI ArcGIS Global IDs into a new GUID-type attribute in the ESRI schema.
Important! ArcGIS upgrades, including upgrades to the Utility Network Model, may replace existing Global IDs. Preserving the original Global IDs is essential to maintain synchronization continuity and prevent duplicate records after migration.
Perform the ESRI ArcGIS Upgrade
Upgrade ESRI ArcGIS to version 11.3 or later by following ESRI’s standard upgrade procedures and best practices.
Before starting the upgrade, ensure that:
• Database backups are complete.
• Integration configuration backups are complete.
Configure Oracle Integration Cloud
Configure the required Oracle Integration Cloud integrations, connections, lookups, and storage details for the new GIS integration.
For detailed configuration instructions, refer to the following:
• GIS Integration via Oracle Integration Cloud (OIC) section of the Administrative User Guide.
• ESRI ArcGIS Integration to Oracle Utilities Work and Asset Cloud Service Configuration Guide
The ESRI ArcGIS Integration to Oracle Utilities Work and Asset Cloud Service documentation is available on the Oracle Utilities Integrations page on Oracle Help Center.
Oracle Utilities Work and Asset Cloud Service Migration Activities
After the ESRI ArcGIS upgrade and Oracle Integration Cloud setup are complete, perform the following migration activities in Oracle Utilities Work and Asset Cloud Service.
Update Global IDs
After ESRI ArcGIS upgrade, update the Global IDs stored in Oracle Utilities Work and Asset Cloud Service if the Global IDs were replaced or changed in ESRI.
This step is critical to prevent duplicate records and ensures data integrity between Oracle Utilities Work and Asset Cloud Service and ESRI systems.
Prepare the Mapping File
Create a newline-delimited JSON file using the .jsonl extension. Each entry in the file should map the old global ID to the new global ID.
Use the file name that contains only letters, numbers, and underscores (“_”). Do not use spaces, dashes, or other special characters in the file name.
Sample mapping file:
Split Large Mapping Files
To split large mapping files, use the File Split Template (F1FSPLIT) batch control. Set the numberRecords parameter based on the desired split size.
Example: To create files with 1,000 records each, set numberRecords to “2000”.
After the split process completes, a .PROCESSED suffix is added to the original file name.
Note: Access to the Batch Template (F1-PDB) application service is required to run this batch process.
Run the GIS ID Update Process
Run the GIS ID Update (W1GISIDU) batch process available in Oracle Utilities Work and Asset Cloud Service V26.4 and later. It updates the Oracle Utilities Work and Asset Cloud Service asset location and work location records with the new ESRI Global IDs.
After the batch runs, review the Batch Run > Errors tab for errors and warnings. Resolve any data issues and resubmit the batch if needed. The Errors tab also provides processing information, including the number of records processed.
Note: To run this batch job, users must have access to the legacy GIS ID Update (W1GISIDU) application service.
Performance Optimization Tips
For better performance, split large mapping files into smaller files and run the GIS ID Update process using multiple threads.
As a reference, in a Oracle Utilities Work and Asset Management development environment, processing 300,000 records split into 100 files of 3,000 records each using 5 threads, is completed in approximately four hours.
The actual performance may vary depending on:
• Server hardware
• Database performance
• Network bandwidth
• System load
• Configuration settings
Validate Global ID Update
After running the GIS ID Update (W1GISIDU) batch, validate that the Global IDs were updated correctly:
1. Rerun the GIS Asset Location Extract (W1GISALX) batch control.
2. The files generated include the Legacy GIS ID which represent the original global IDs stored in Oracle Utilities Work and Asset Cloud Service. Use this information to confirm that records were updated as expected.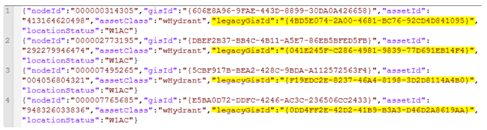
3. Use the Work Location Identifier search to review updated work location records and confirm that the new GIS IDs are associated correctly.
Configure Asset and Location Inbound Synchronization
Review the GIS to WAM Sync Mapping extendable lookup “W1-GISToWAMSyncMapping”.
To review the mapping:
1. Navigate to Extendable Lookup Query.
2. Search for “W1-GISToWAMSyncMapping”.
3. Review the Extendable Lookup Value List.
• If the GIS data model is unchanged, continue using the existing GIS Asset Class extendable lookup records.
• If the GIS Data Model changed or was upgraded to UNM, add new GIS Asset Class records as required. Assets will be updated with the new GIS Asset Class during the next synchronization.
Note: The Skip column and Filter Statement Builder are not used in the file-based integration. Filtering is now handled in the Oracle Integration Cloud accelerator lookup for each asset class.
For more information, refer to the documentation available on Oracle Help Center.
Configure Asset Outbound Synchronization
Review the WAM to GIS Sync Mapping extendable lookup “W1-WAMToGISSyncMapping”.
To review the mapping:
1. Navigate to Extendable Lookup Query.
2. Search for “W1-WAMToGISSyncMapping”.
3. Review the Extendable Lookup Value List.
• If the GIS data model is unchanged, continue using the existing extendable lookup records.
• If the GIS Data Model changed or was upgraded to UNM, update the extendable lookup entries to reflect the new GIS Asset Class records created for file-based inbound synchronization.
4. In the ESRI WAM Integration Master Configuration, update the Outbound Process Option parameter to “File Based”.
For more information, refer to the documentation available on Oracle Help Center.
Configure Work Location Synchronization
To enable work location synchronization through the modern real-time messaging flow:
1. Configure a new JSON Message Sender with the required context details for sending messages to Oracle Integration Cloud.
2. Add the new Work Location Outbound Message Type (W1-WLOUTMSGT) and the new Message Sender to the applicable External System.
3. Navigate to ESRI WAM Integration Master Configuration.
4. In the Supplemental WAM Locations for ESRI section, update the Outbound Message Type parameter to “Work Location Outbound Message Type (W1-WLOUTMSGT)”.
For detailed instructions, refer to the documentation available on Oracle Help Center.
Remove Legacy Batch Processes
Remove all legacy GIS synchronization batch jobs from the scheduler before enabling the modern integration.
Step | Batch Control | Batch Name / Purpose | Parameters |
|---|---|---|---|
1 | W1–GISID | Retrieve GIS IDs | |
2 | W1–PRGIS | Process GIS Data | |
3 | W1-CMSYN | Composite Sync Request | State: PENDING BO: W1-CompositeSyncReqGISAsset |
4 | F1-SYSRQ | Sync Request Monitor (Deferred) | State: PENDING BO: W1-InitialSyncRequestLocation |
5 | F1-SAKRQ | Sync Request Allocate Keys Monitor | State: DATA-TRANSFD BO: W1-InitialSyncRequestLocation |
6 | W1-SIKSP | Initial Sync Request - Resolve Keys Loc | State: KEY-ALLOCATD BO: W1-InitialSyncRequestLocation |
7 | W1-SILSP | Initial Sync Request - Load Data Location | State: KEYS-RESOLVD BO: W1-InitialSyncRequestLocation |
8 | W1-SILDD | Initial Sync Request - Loaded | State: LOADED BO: W1-InitialSyncRequestLocation |
9 | F1-SYSRQ | Sync Request Monitor (Deferred) | State: PENDING BO: W1-InitialSyncRequestAsset |
10 | F1-SAKRQ | Sync Request Allocate Keys Monitor | State: DATA-TRANSFD BO: W1-InitialSyncRequestAsset |
11 | W1-SIKAS | Initial Sync Request - Resolve Keys Asset | State: KEY-ALLOCATD BO: W1-InitialSyncRequestAsset |
12 | W1-SILAS | Initial Sync Request - Load Data Asset | State: KEYS-RESOLVD BO: W1-InitialSyncRequestAsset |
13 | W1-SILDD | Initial Sync Request - Loaded | State: LOADED BO: W1-InitialSyncRequestAsset |
14 | W1-DELVR | GIS Delete Version |
Ongoing Synchronization Batch Controls
Step | Batch Control | Batch Name/Purpose |
|---|---|---|
1 | W1–GISID | Retrieve GIS IDs |
2 | W1–PRGIS | Process GIS Data |
3 | W1-DELVR | GIS Delete Version |
Add New Batch Controls
Add the new batch controls required for file-based integration. Refer to Required Batch Processes for more information.
Enable the New Integration
After all migration and configuration steps are complete, re-enable the GIS integration. Set the ESRI Integration On/Off parameter to “On” in the ESRI WAM Integration Master Configuration.
Functional Validation & Testing
Perform the functional validation before returning the integration to normal operations.
Recommended validation activities include:
• Update a small sample data set in ArcGIS and verify that the changes synchronize into Oracle Utilities Work and Asset Cloud Service.
• Update a small sample of asset records in Oracle Utilities Work and Asset Cloud Service and verify that the changes synchronize into ArcGIS.
• Create sample work locations in the Oracle Utilities Work and Asset Cloud Service map viewer to verify end-to-end messaging.
Additional Planning Considerations
To reduce risk during the migration, consider the following planning activities:
• Schedule the migration during an approved maintenance window.
• Communicate the migration schedule to business and technical users.
• Document asset update procedures for the migration event.