Moving Data Between Components without Using Global Variables
Test data can be linked/moved from the response of one component to the input test data field of a subsequent or a later component without using global variables. You can directly select and map the component data fields so the corresponding values are mapped.
To invoke the GUI that supports this mapping feature, click the Search icon next to the input test data fields in the Flow Test Data page.
The following sections include steps to map the test data between components without variables.
Example: Mapping personId from the response for C1-PersonAdd component to the personId field in C1-AccountAdd component.
To map to non-list elements in a response:
- Navigate to the Create/Update Flow Structure for the test flow.
- Navigate to the Flow Test Data page of the component into which test data should be linked to. Click the downward arrow corresponding to the test data field to show the drop-down list.
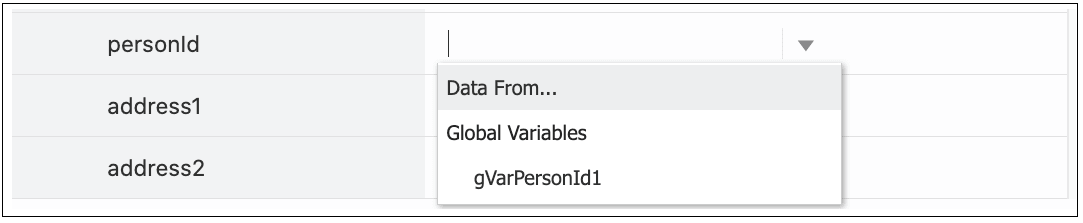
- From the list, select Data From...
In the example, the test data page corresponds to C1-AccountAdd component in the flow, which has C1-PersonAdd component preceding the C1-AccountAdd component.
The flow tree structure up to the preceding component of the current component is displayed.Figure 8-12 Test Data Value Source Options
- Click the component from whose response the value should to be mapped. The corresponding elements in the component is displayed.
Figure 8-13 Selecting a component response value
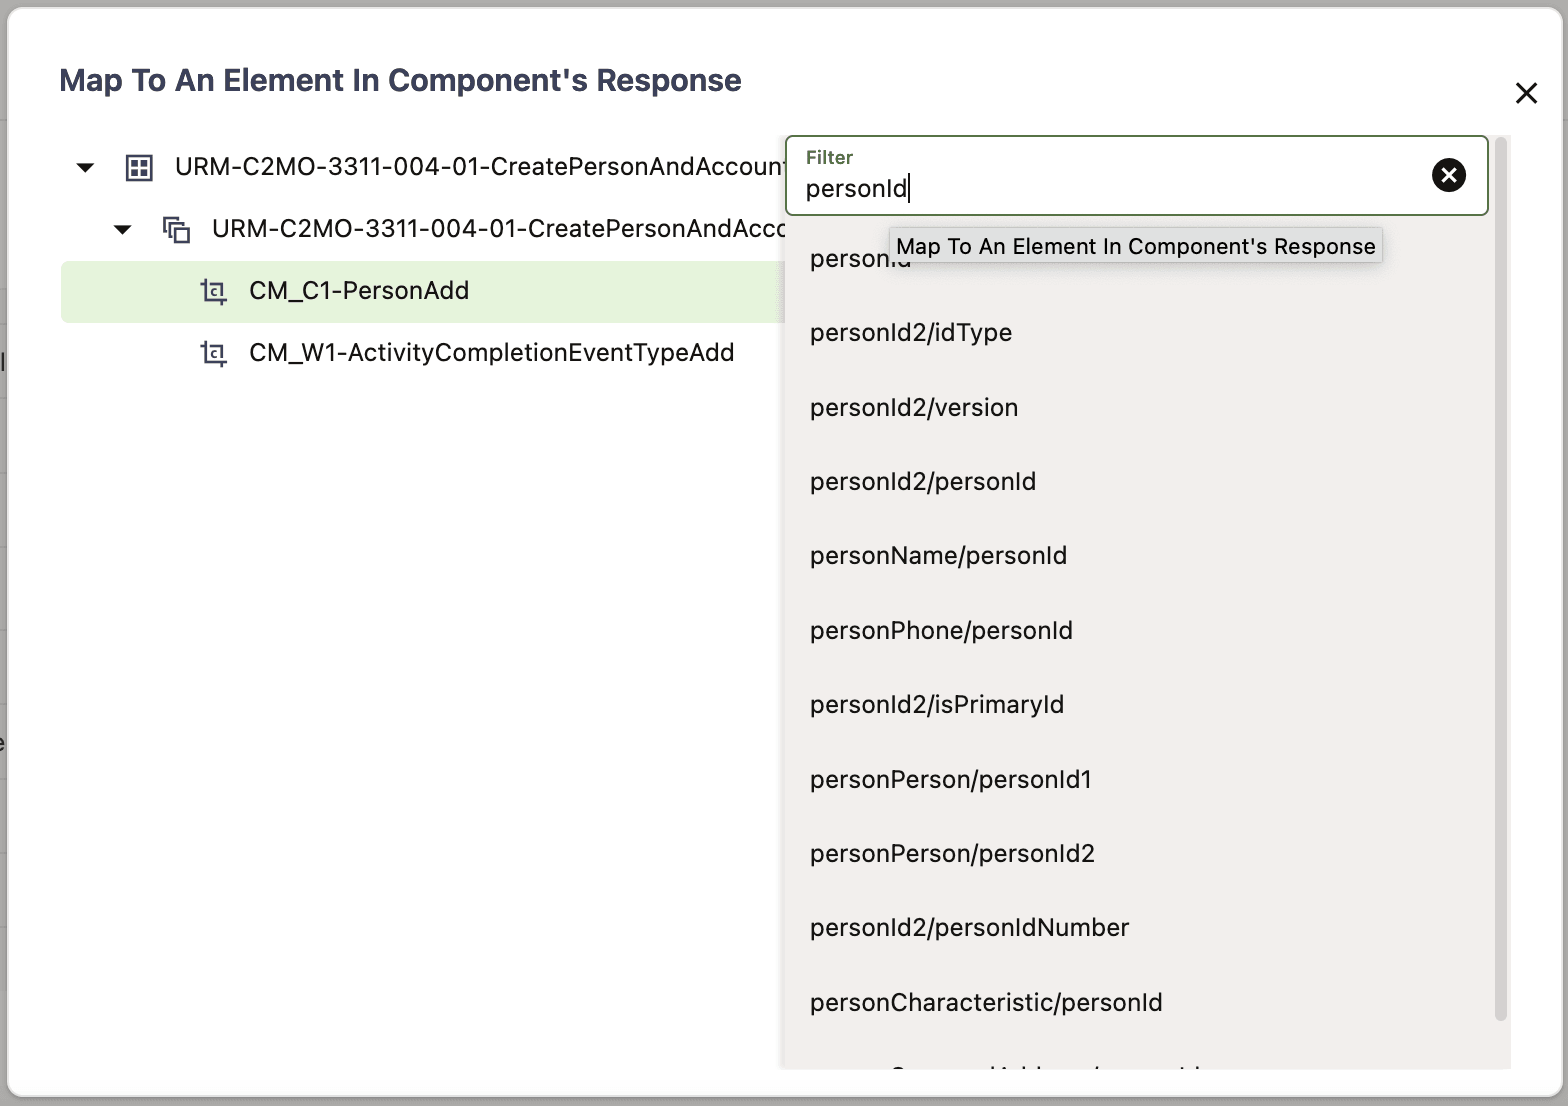
- Select the element from the component’s response whose value needs to be mapped to this field in the current component. The filter at the top of the xpath attributes can be used to quickly find the xpath that is needed.
In the case of the example, select the personId field from the C1-PersonAdd component.
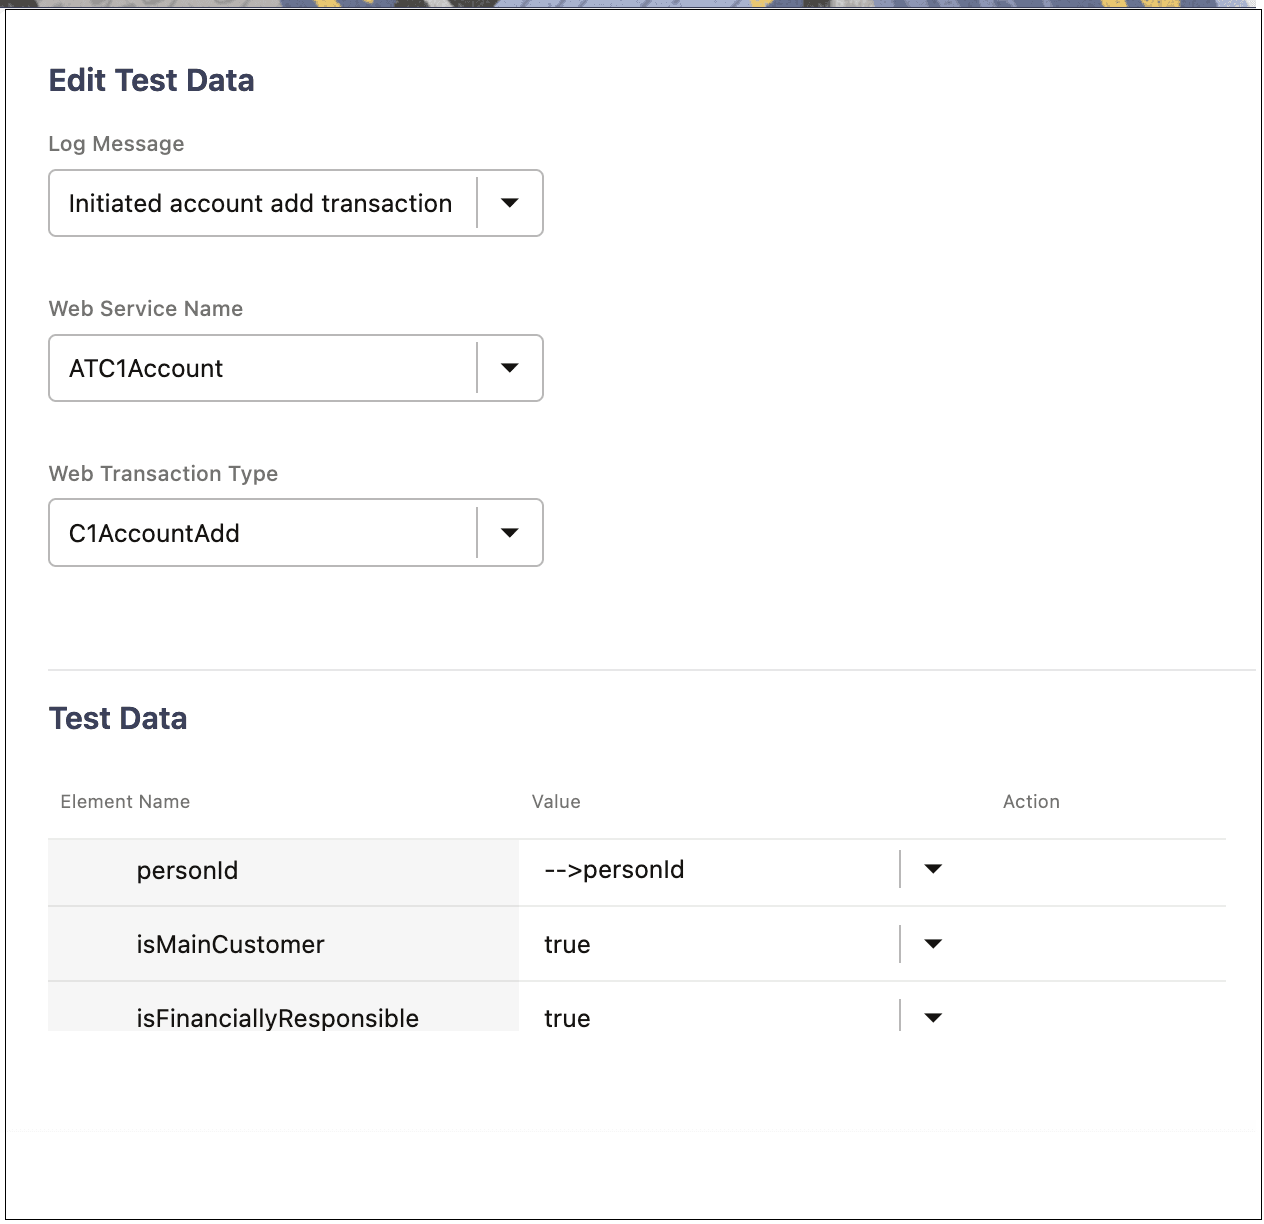
The test data field is populated with the selected element. “-->” is prefixed to the selected element name to differentiate it from the global variables and static test data.
The following figure shows the selected personId field mapped between the components.Figure 8-14 Person ID Mapped from a Component Response
- To view/update an existing mapping, click the Test Data drop-down list and select Data From. The Map To An Element In Component's Response screen highlights the existing mapping.
Note:
- The mapping feature extracts the value from the web service response of the component used in the mapping and provides it as test data to the test data field to which it is mapped.
- This feature can also be used in the Pre-validations and Post-validations sections to map a response value from the prior component as input to base or custom functions.
To map to list elements in a response:
- Navigate to the Create/Update Flow Structure for the test flow.
- Navigate to the Flow Test Data page of the component into which test data should be linked to. Click the downward arrow corresponding to the test data field to show the drop-down list.
- From the list, select Data From...
In the example, the test data page corresponds to C1-AccountAdd component in the flow, which has C1-PersonAdd component preceding the C1-AccountAdd component.
The flow tree structure up to the preceding component of the current component is displayed.Figure 8-15 Test Data Value Source Options
- Click the component from whose response the value should to be mapped. The corresponding elements in the component is displayed.
Figure 8-16 Selecting a Component Response Value
- Select the element from the component’s response whose value needs to be mapped to this field in the current component.
- If a specific occurrence of the list element is already known, the xpath value can be updated to point to that specific occurrence of that list.
Example: personName[2]/personId will map the personId from second occurrence of the personName list
- If the specific occurrence is not known, conditions may be applied on one or more of the list elements to find the required value from the list.
In the above example: To find the personId corresponding to the person with the name “John”, the first condition can be enabled and the condition can be specified in the condition filter.
Figure 8-17 Selecting a list occurrence with XPath conditions
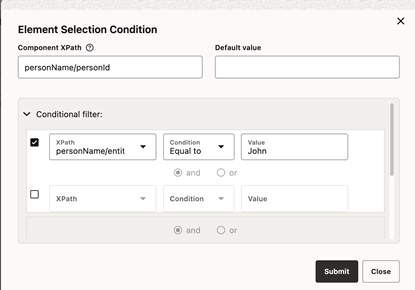
The list element on which the condition needs to be specified should be selected in the xpath field and a condition type can selected from the condition drop down. Based on the condition type, the value can be provided.
The supported conditions are:
- “Less than”, “Less than or equal to”, “Greater than”, “Greater than or equal to”: These are applicable only to value type Number.
- “Equal to”, “Not equal to”, “contains”: These are applicable to value type String.
- “Equal to” and “Not equal to” condition types as applicable to value type Number as well.
- “Starts with” and “Ends with” condition types are applicable to value type String.
- “Not null” and “Is null” is used to check if the value exists or not, in the response. In case Not null or Is null option is selected, the Value field should be left blank.
If more than one condition needs to be specified, the appropriate conditions may be added by enabling succeeding condition filters. The corresponding join type also needs to be selected for multiple filters. The support join types are “And” and “Or”.
If a list/group that matches the conditions does not exist in the response, the value specified under the Default value gets populated in the corresponding test data field of the component. This can be left blank if the default value has to be populated.
- After specifying all conditions, click Submit to save the conditions for mapping.
- To review or update the conditions, click the Test Data drop-down list corresponding to this field and then select Data From option. The Map to Xpath window is displayed with the current conditions.