Note:
- This tutorial requires access to Oracle Cloud. To sign up for a free account, see Get started with Oracle Cloud Infrastructure Free Tier.
- It uses example values for Oracle Cloud Infrastructure credentials, tenancy, and compartments. When completing your lab, substitute these values with ones specific to your cloud environment.
Manage container workloads on OCI using the Container Instances service
Introduction
Container Instances in Oracle Cloud Infrastructure (OCI) offers a new and streamlined way of running application containers. It is a serverless compute service that enables you to instantly run containers without managing any infrastructure.
Container Instances offer a simple and secure way to quickly launch container workloads on OCI without the need to plan and manage servers or other infrastructure. The service manages the provisioning, lifecycle management, patching and upgrades for the infrastructure, allowing users to focus on application development. A Container Instance is an OCI resource, offered by the service that can be used to run one or more containers.
The experience for creating a container instance is simple, allowing the user to pick the number of CPU cores and memory along with the container images that the user wishes to run inside a container instance. There are also advanced controls to throttle individual containers within a container instance to prevent some containers from monopolizing resources, manage graceful container termination and to provide environment variables and override parameters for the containers users wish to run. Container images can be pulled from any container image registry including OCI Container Image Registry (OCIR), and 3rd party registries like ghcr, quay.io, dockerhub or other private registries. Once a container instance is launched, they can be allocated public or private IP addresses and the application can be exposed to users. The Container Instance service also provides logging and monitoring capabilities out of the box. All infrastructure management, including patching and upgrades are handled by the service transparently without any burden on the user or the workload.
This tutorial takes a close look at how to get started with the Container Instances service, and its various controls to quickly and easily launch and manage container workloads on Oracle Cloud Infrastructure.
Objective
- Learn how to use the container instances service in OCI.
- Launch a container workload on the container instances service.
- Learn about the container management features and how to efficiently manage and monitor your workloads on the service.
Prerequisites
- Sign up or Sign in to your Oracle Cloud account
Task 1: Create and configure a Container Instance
In this tutorial, we shall create a fully functional WordPress site, by running both WordPress and MySQL containers in the container instance.
-
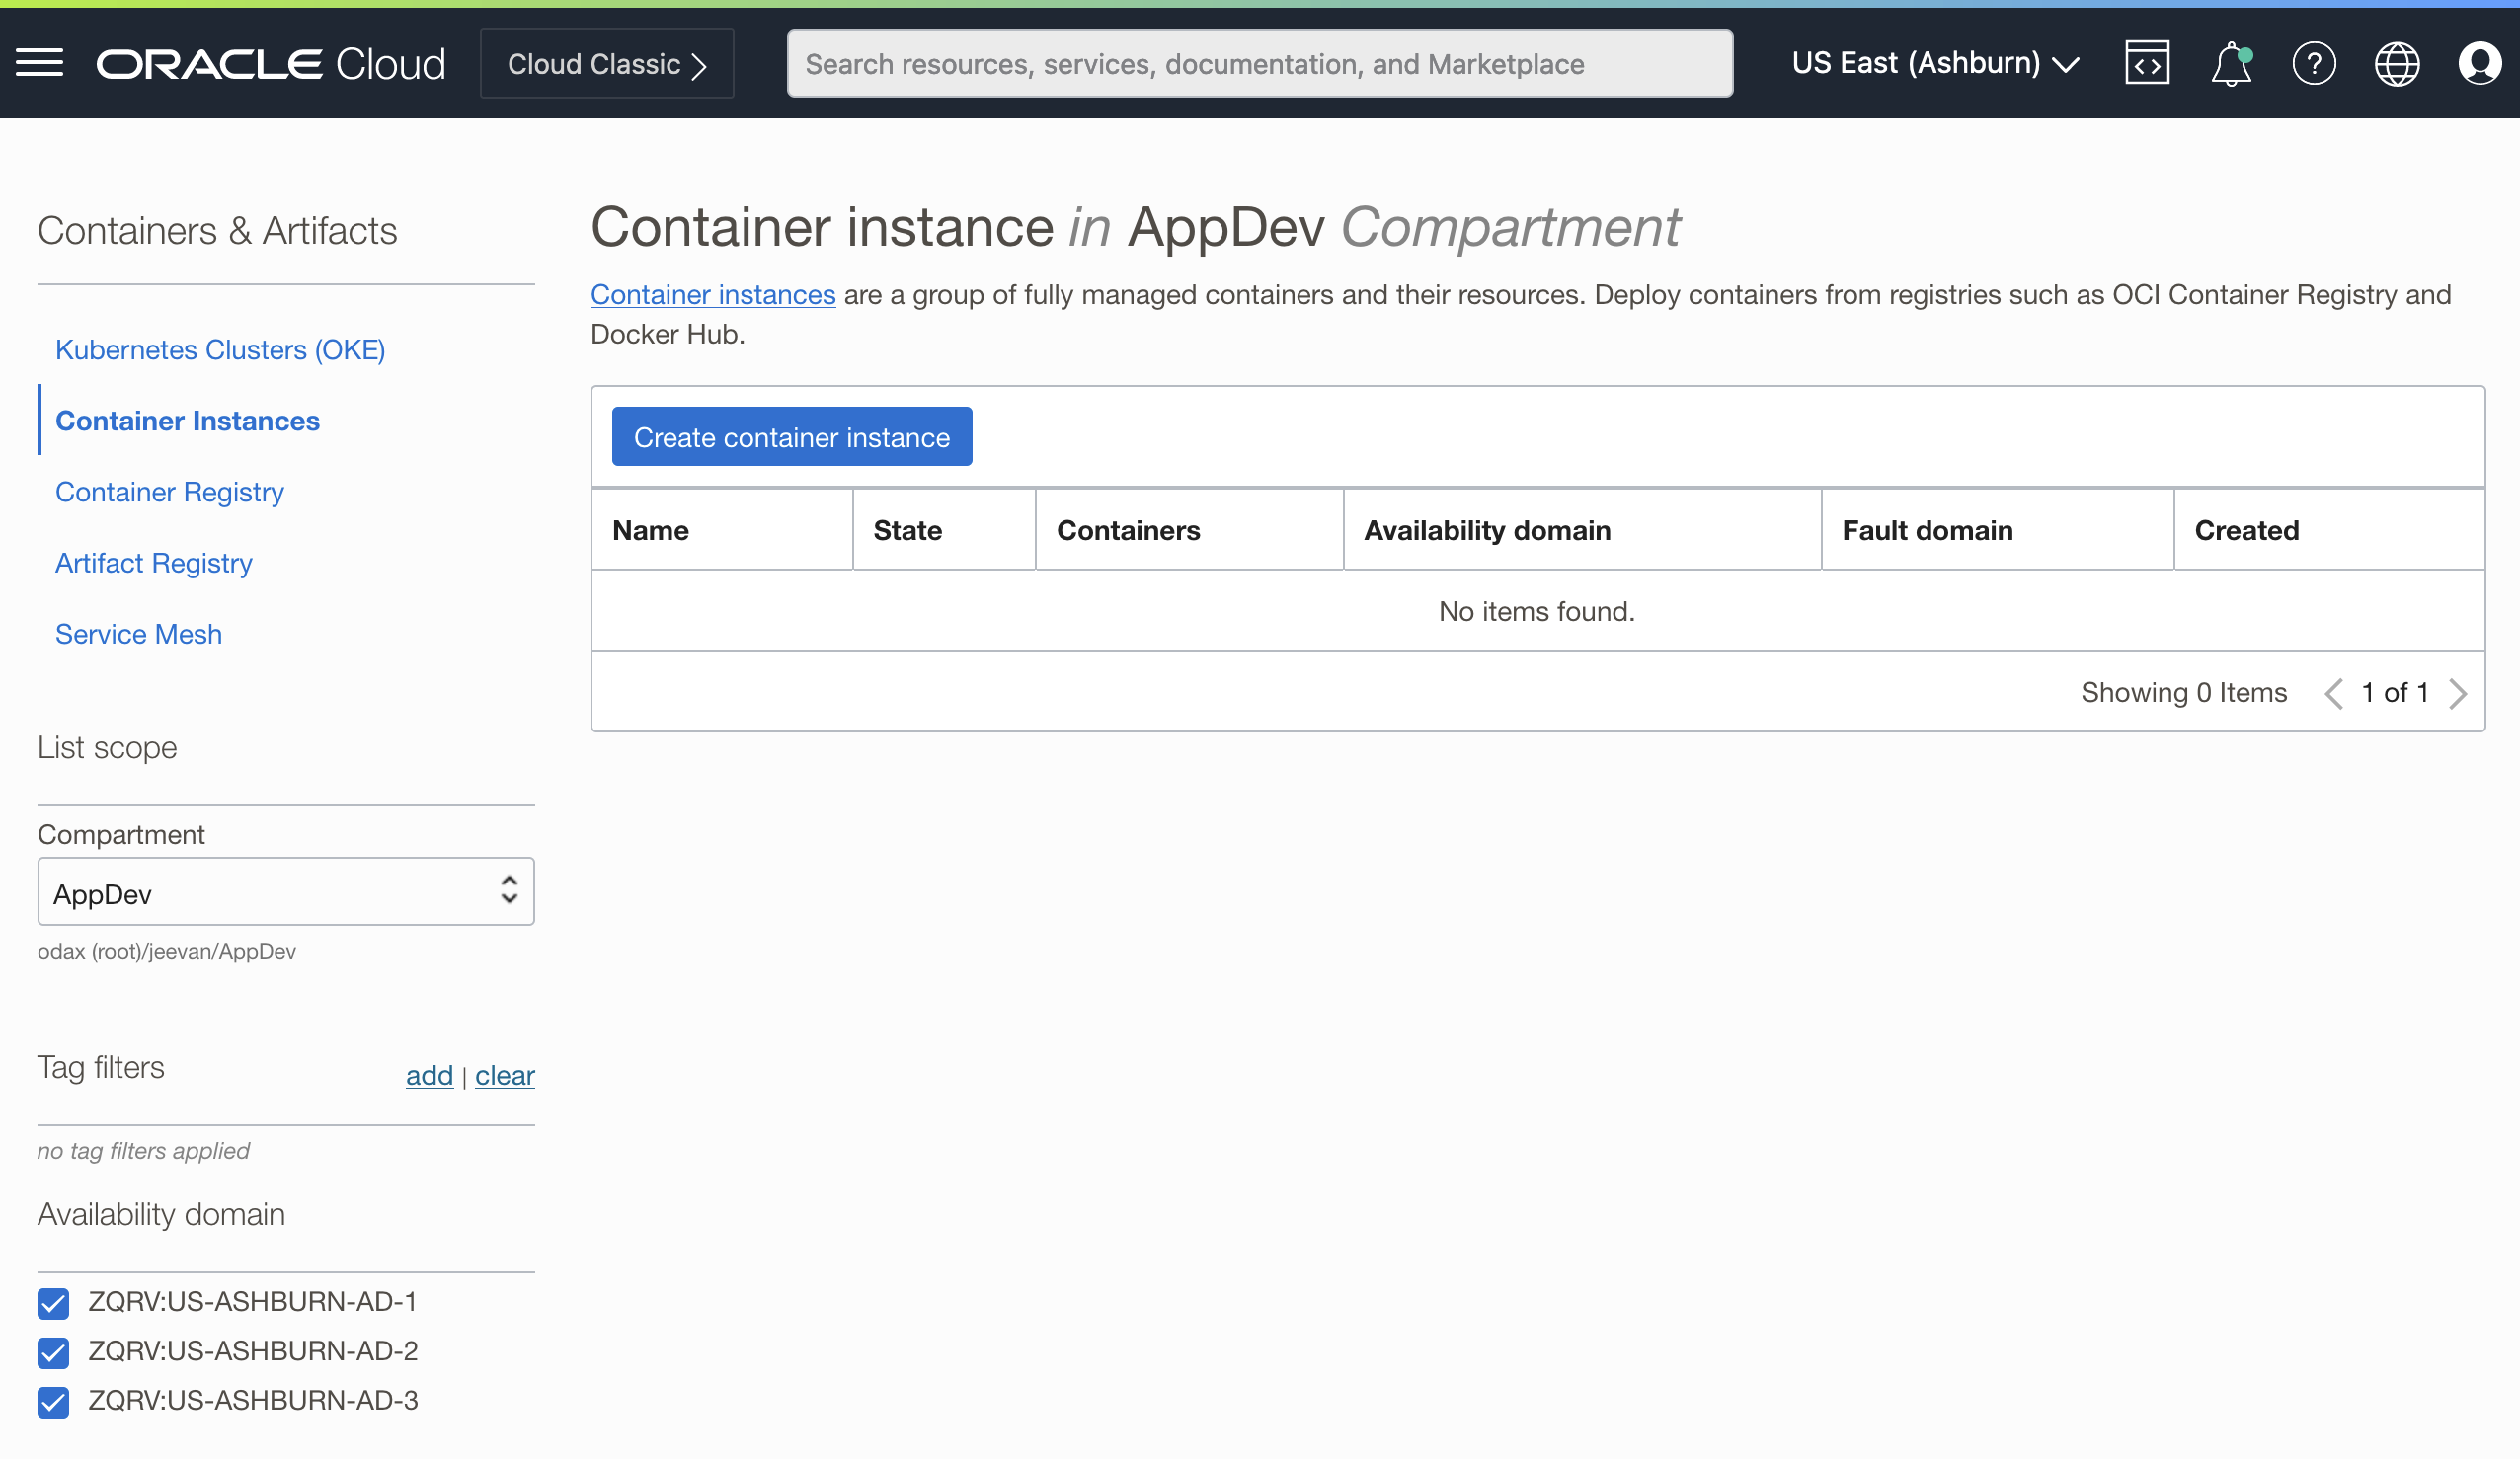
Navigate to Developer Services, Containers & Artifacts, Container Instances.
The container instances service page, shown below, displays your currently running container instances and you can create a new container instance from here as well.
-
Click Create container instance to open the container instance creation wizard.
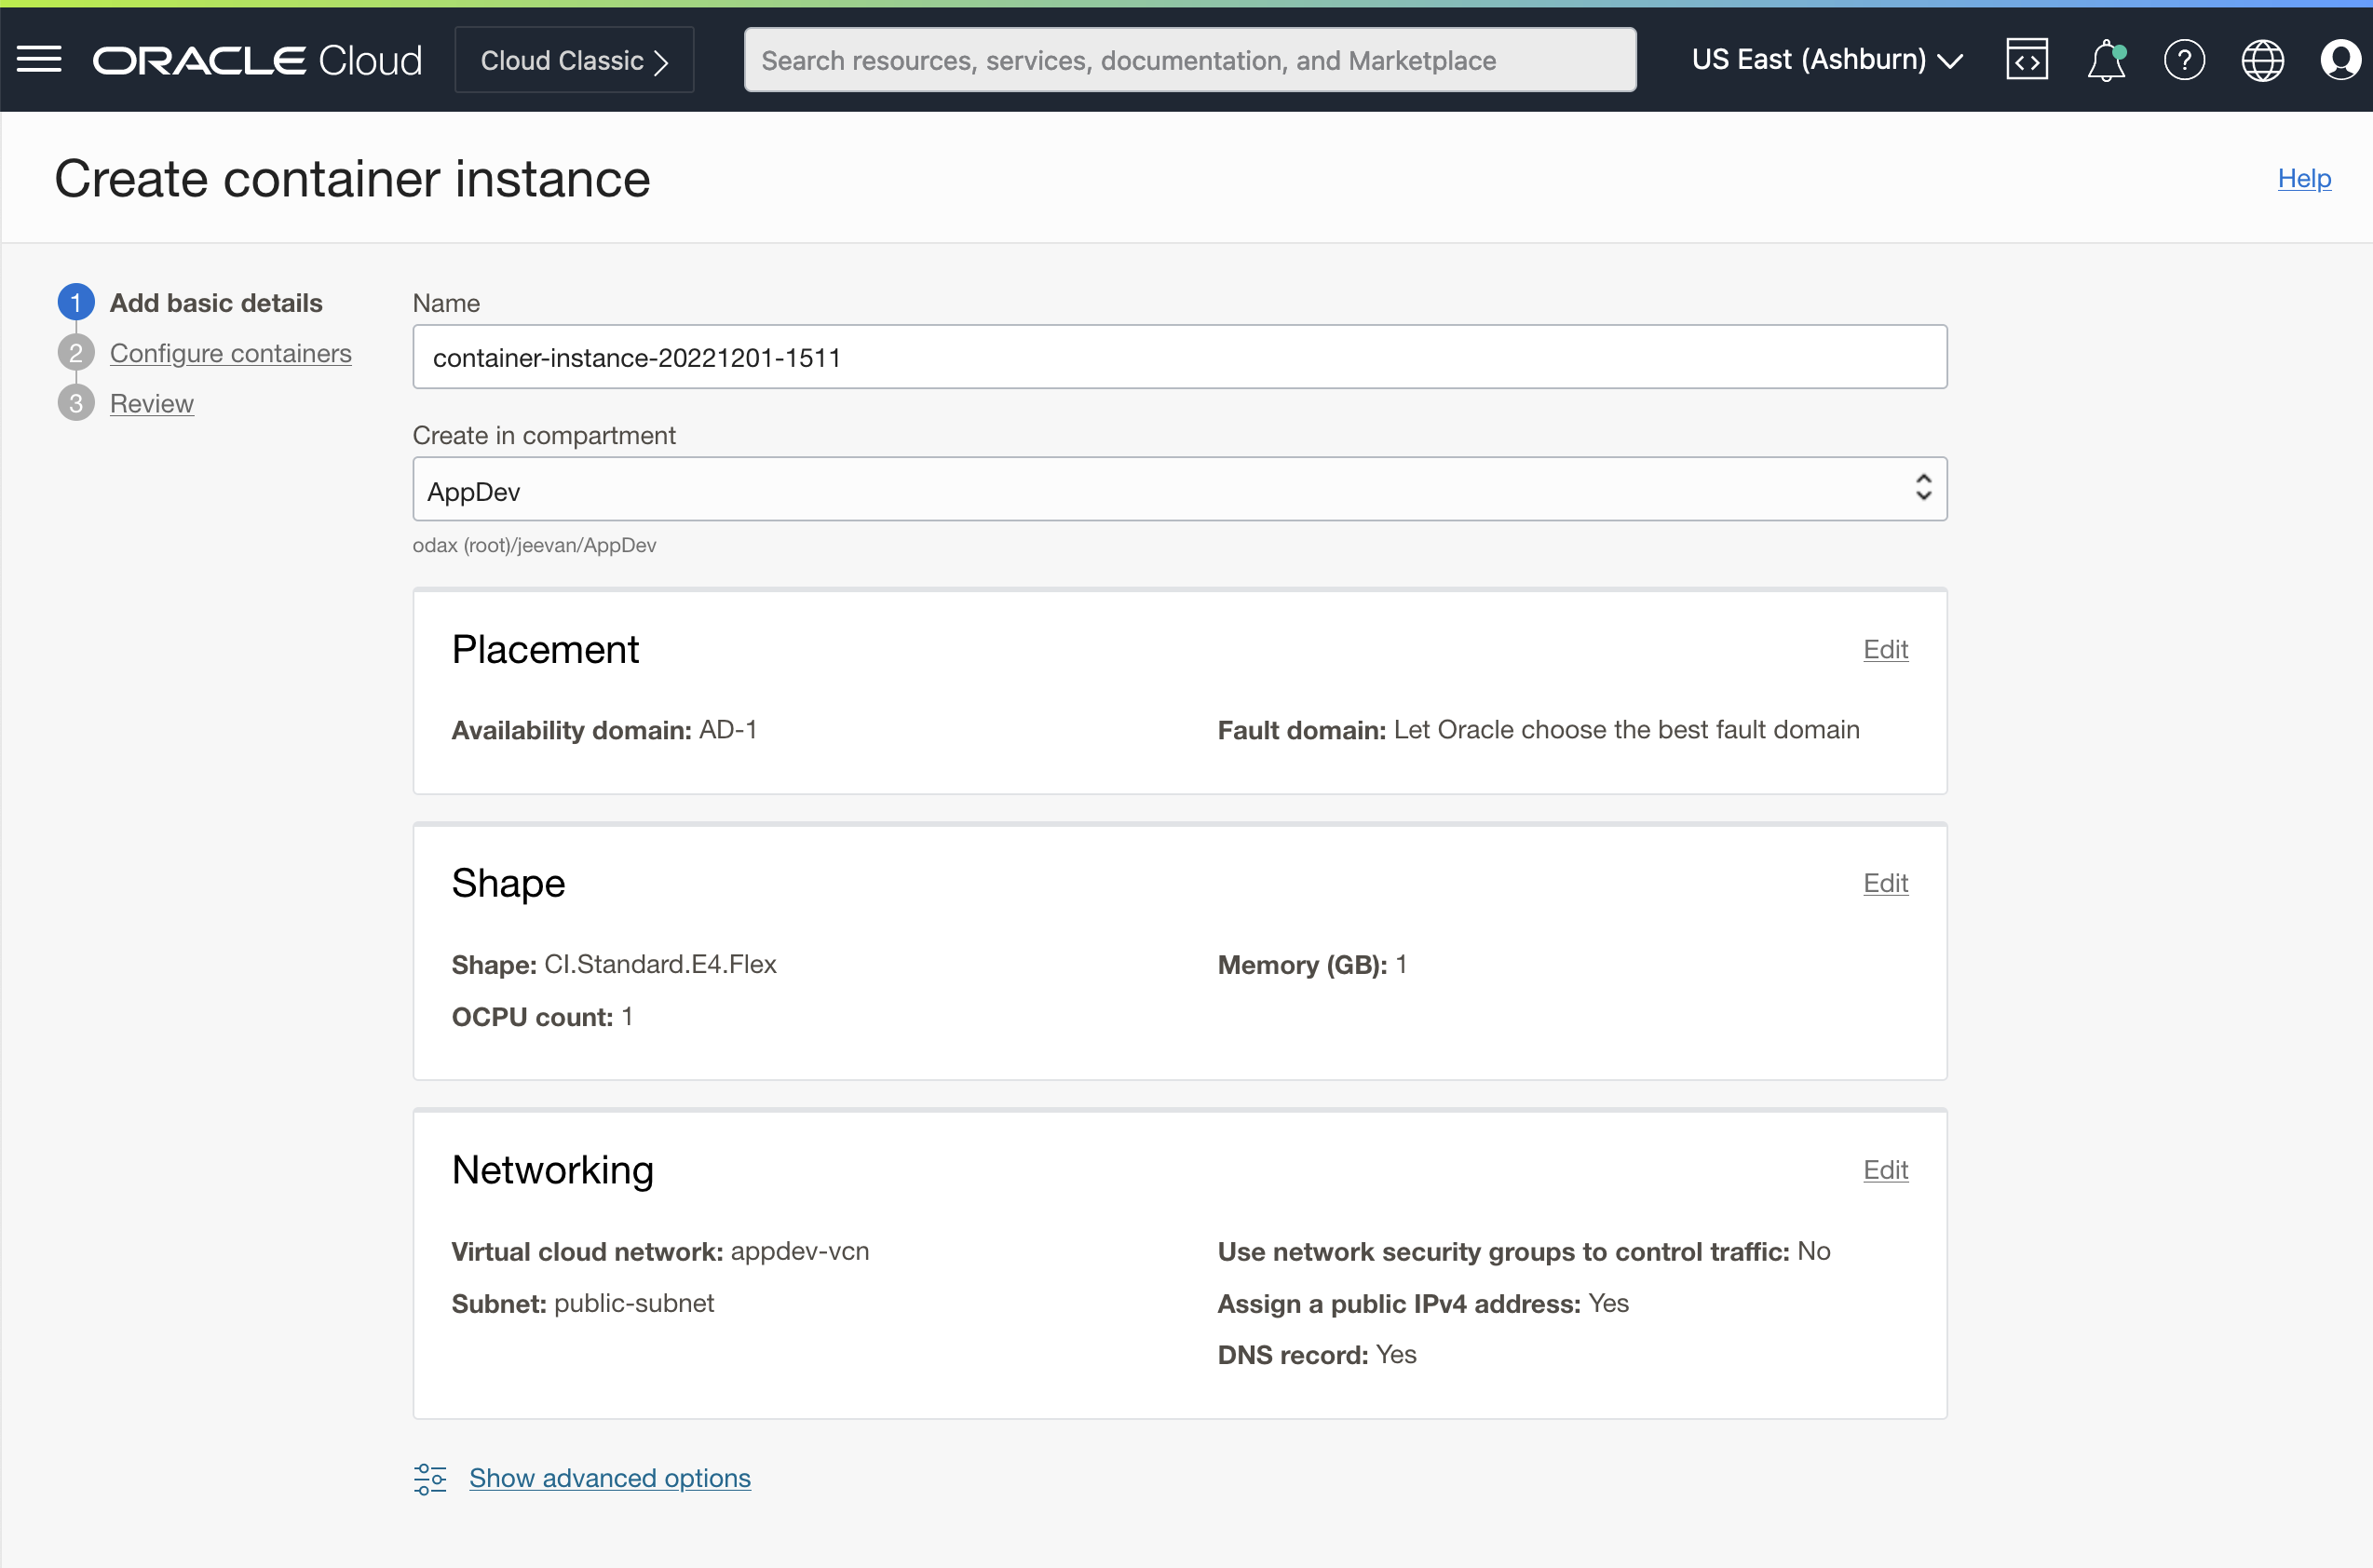
Note: When creating a container instance, you first set some basic parameters such as placement, shape, and networking options. Then you choose one or more containers to launch inside the container instance and optionally set parameters for your containers.
-
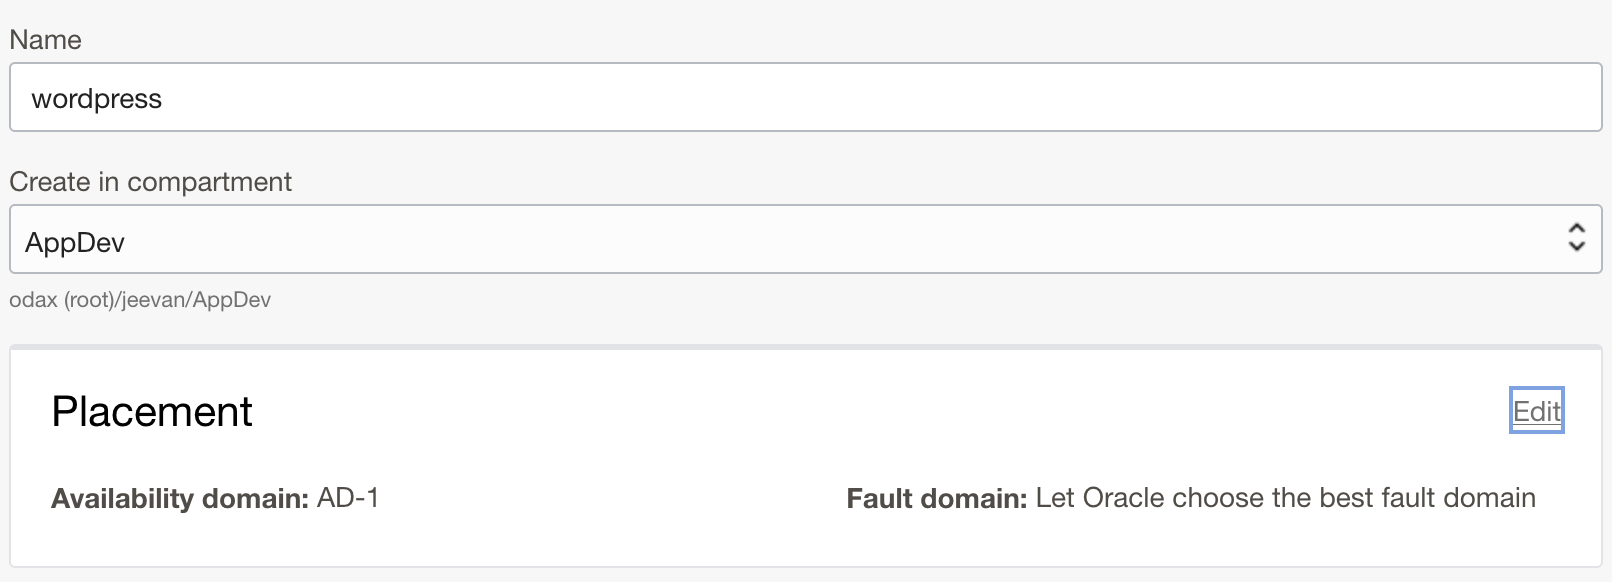
First let’s name this container instance and choose a compartment for it. In this example, let’s name the container instance Wordpress.
-
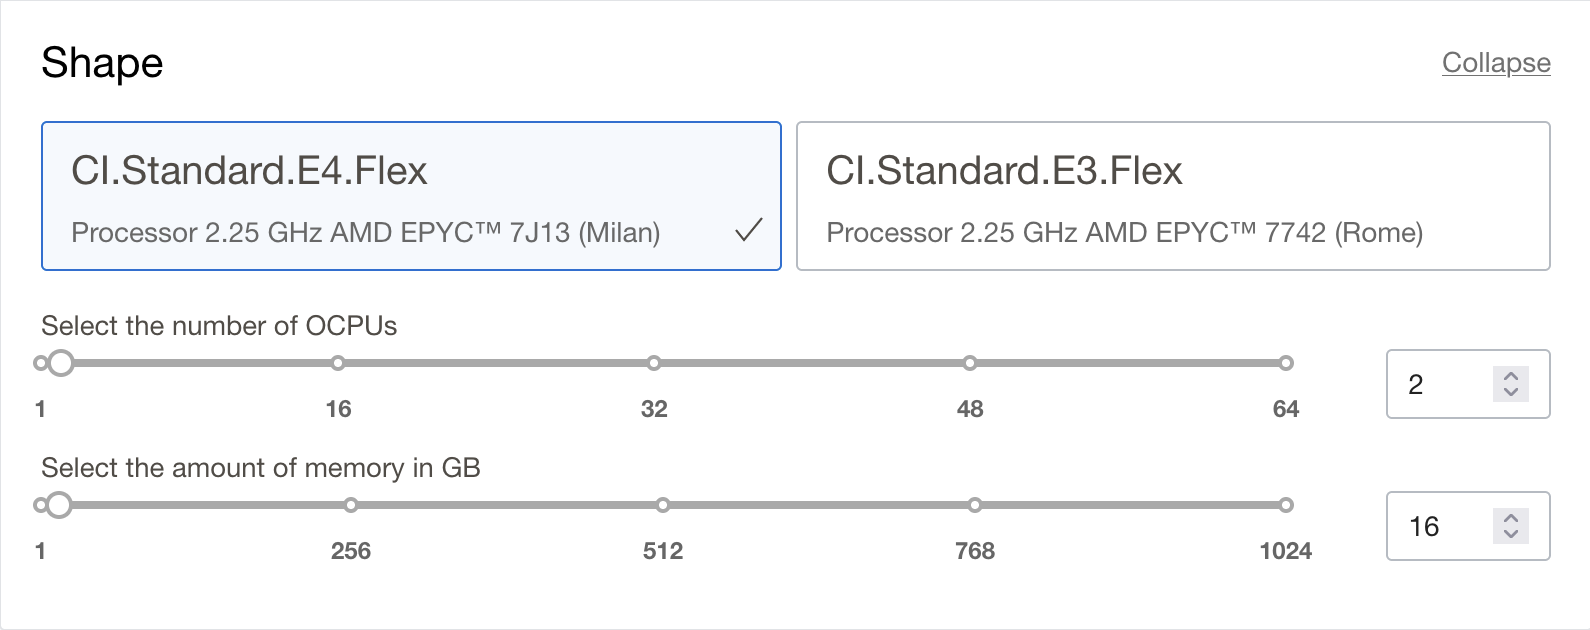
The placement options include the availability domain you would like to place the container instance in, as well as the option to choose a fault domain of your choice. The shape selection offers the supported compute platforms and you can choose the amount of CPU cores and memory that you need for your containers. This ability offers the flexibility to size your container instances for CPU bound or memory bound workloads while optimizing for cost. Choose 2 OCPUs and 16GB of memory.
-
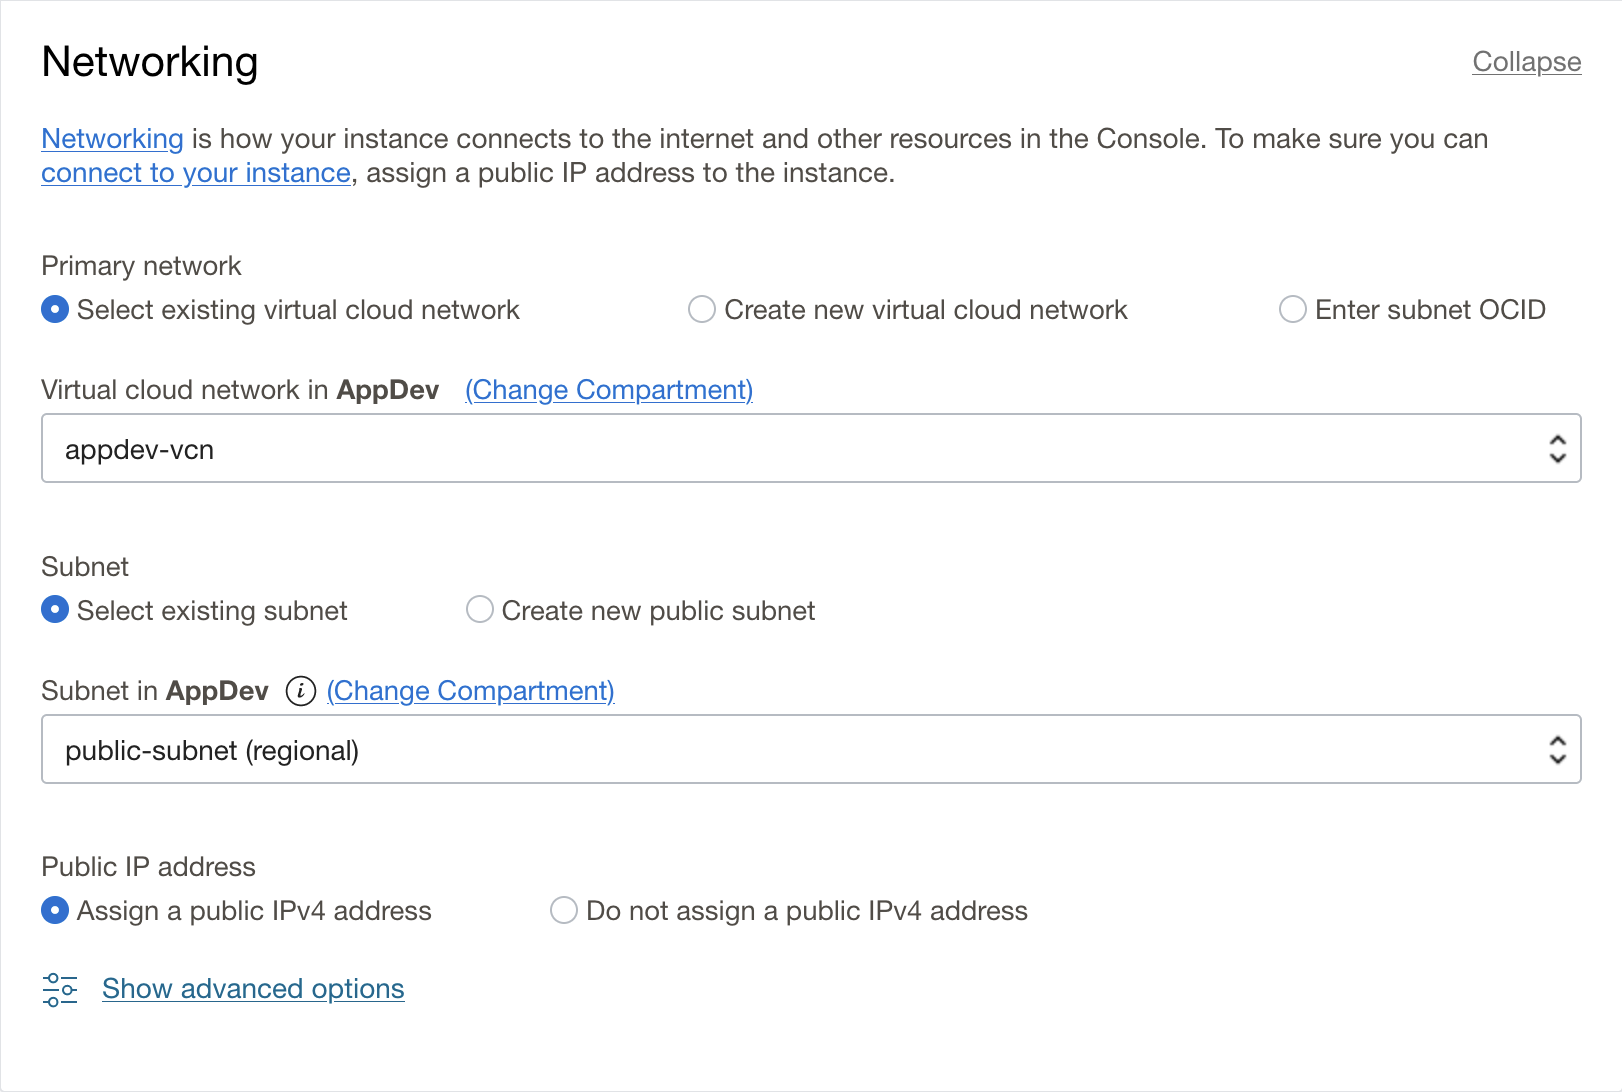
The networking configuration lets you choose the networking options like the VCN, and subnet you want your container instance to be on. You can also optionally assign a public IP address to your container instance to expose your applications publicly. Note that the ports that your applications listen on need to be allowed on the subnet’s security list or Network Security Group (NSG) for your instance to be able to receive connections.
-
The advanced options lets you set a graceful shutdown timeout, which is the time given to the containers within a container instance to gracefully exit when that container instance is terminated. You can also set a container restart policy, to automatically restart containers that exit/terminate or base the restart policy of the exit status of the container.

-
-
Click Next. The next step is to choose and configure the containers you want to run in your container instance.
-
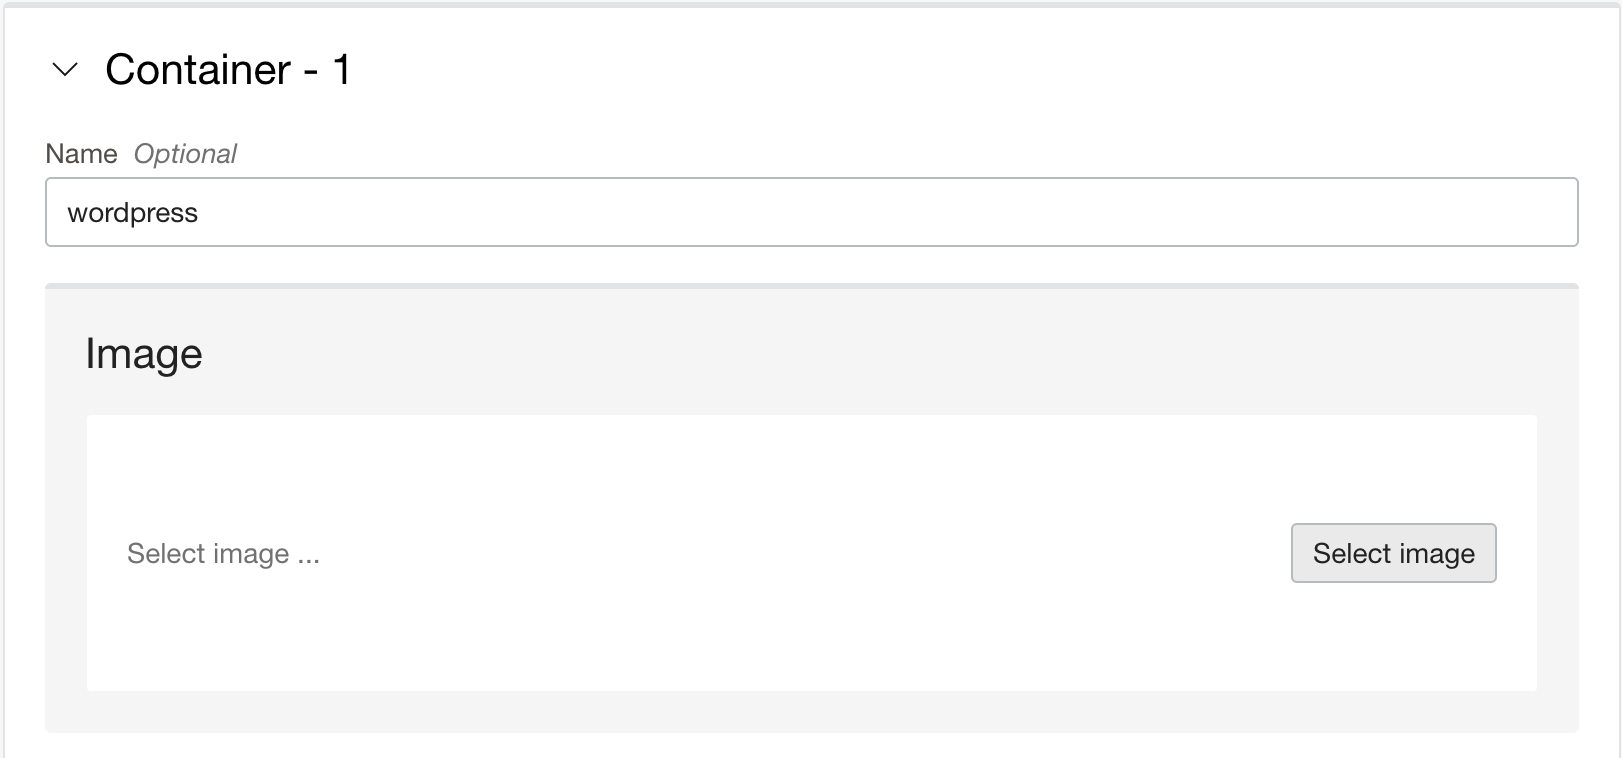
Start by defining the first container in the container configuration section. In this example, lets start with the WordPress container. Name the container wordpress.
-
Click Select Image to open the image selection dialog.
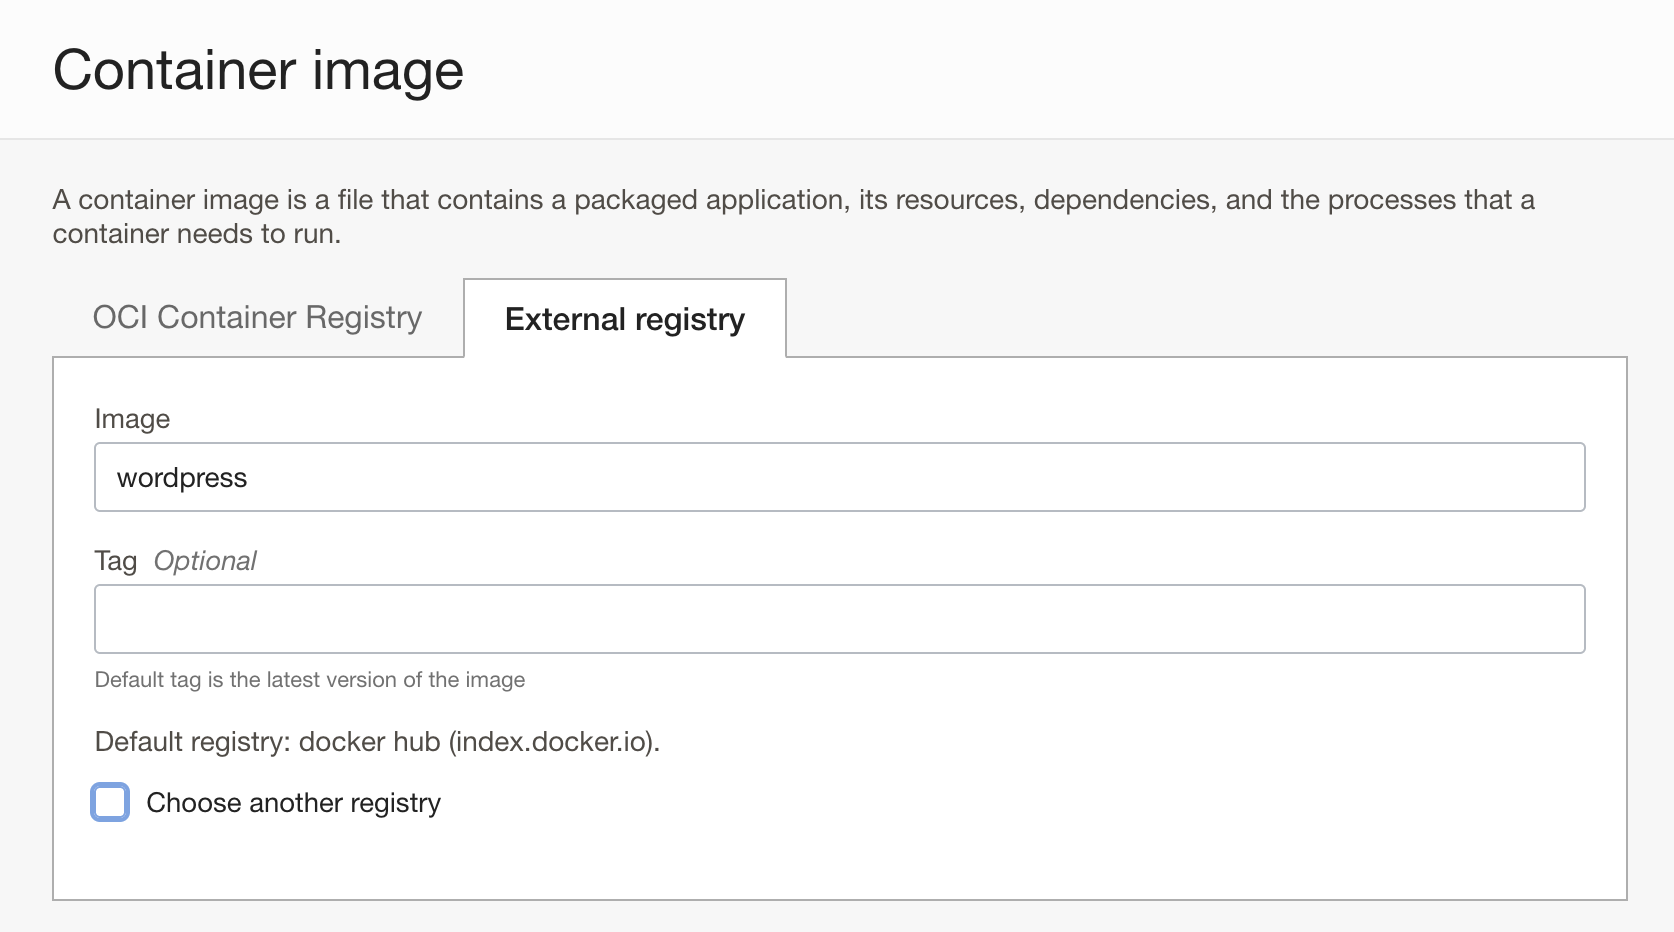
The image selection dialog has options to choose images from OCIR, or from an external registry. The official images for WordPress are published on DockerHub, and DockerHub is the default external registry. So select the external registry tab and type in wordpress for the image name. The image tag is optional and defaults to
latest. In this case we need the latest wordpress image, so we leave that blank and the service will default it tolatest.You can also see other external registries, to which you can provide teh URL and authentication information for. As long as the registry URL is reachable, the container instance service can pull images from any Open Container Initiative (OCI) compliant registry.
-
Next, let us set up some environment variables, as described in the How to use this image section on the documentation for the image. The following variables and values are set.
variable value WORDPRESS_DB_HOST 127.0.0.1 WORDPRESS_DB_USER wordpress WORDPRESS_DB_PASSWORD wordpress WORDPRESS_DB_NAME wordpress 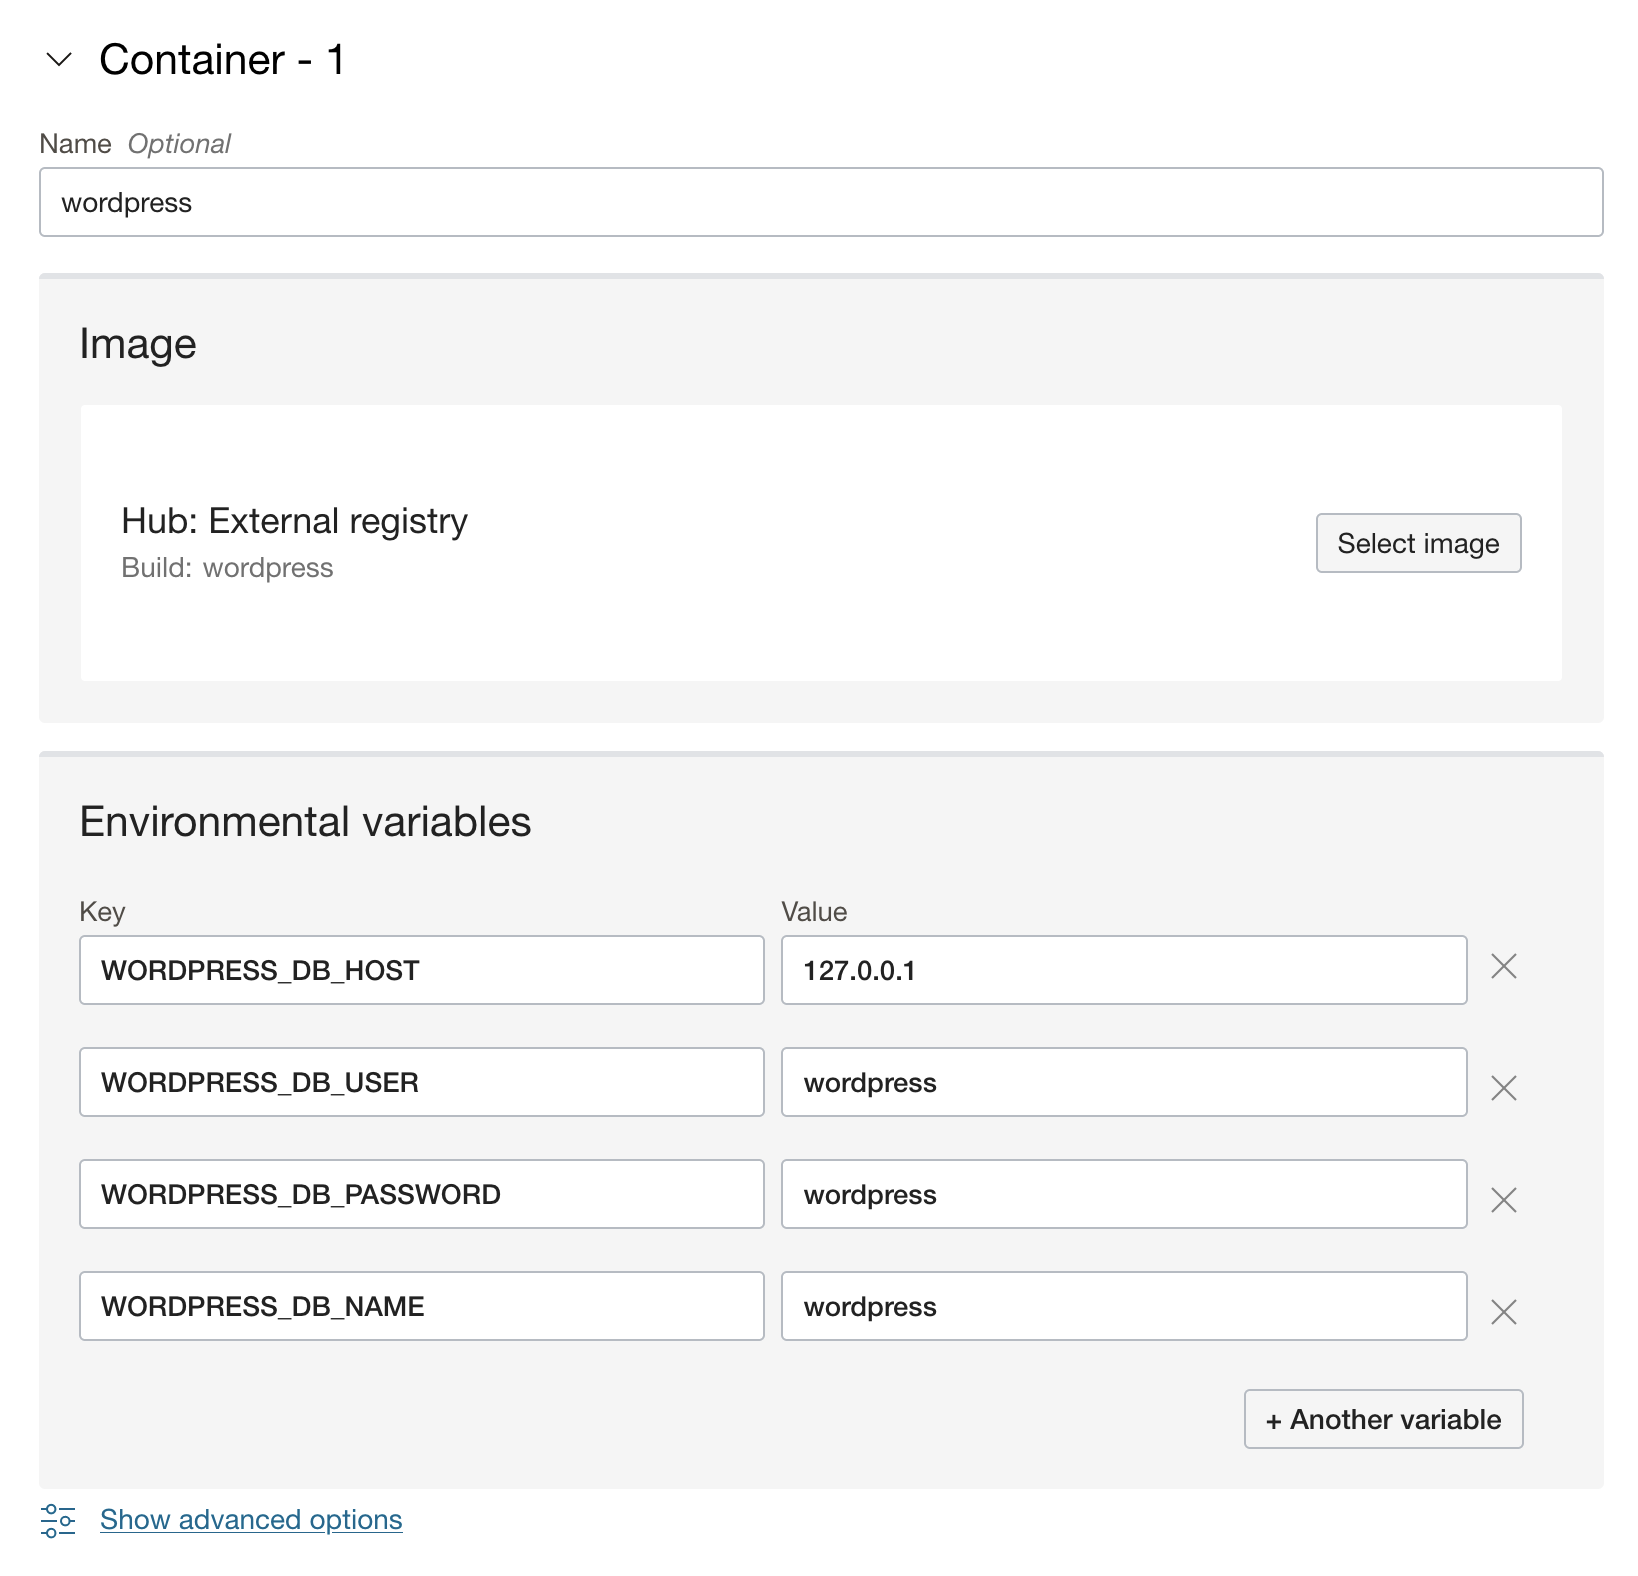
-
When you have multiple containers within a container instance, they share the compute resources like the CPU and memory that is available to the container instance. They also share the networking namespace, which is why the WordPress container can connect to the MySQL container over
localhostor the loopback address127.0.0.1as configured above. -
To avoid one container from utilizing too much of these resources and starving other containers in the container instance, you can throttle the resources made available to each container. You can also override some image defaults like the
ENTRYPOINT,CMDandWORKDIR. These options are available for each container under the Advanced Options. Lets expand the advanced options for this container and set the WordPress container to consume no more than 50% of our CPU cores.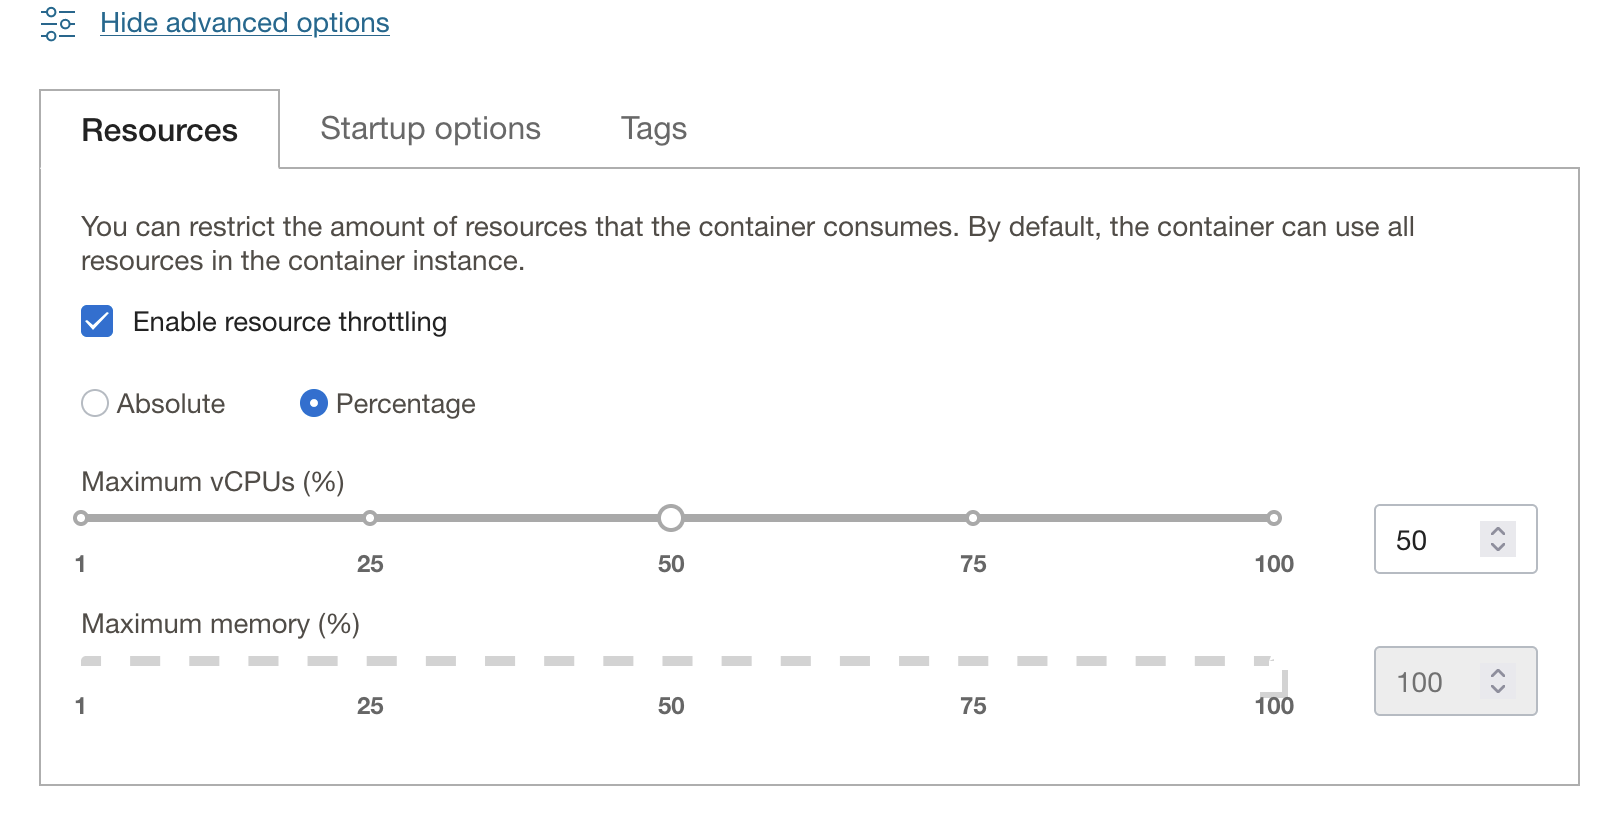
-
WordPress also requires a database to function. In this tutorial we shall run a MySQL database as a second container within the container instance. For real-world production deployments, using a database service like the MySQL database service is recommended.
-
-
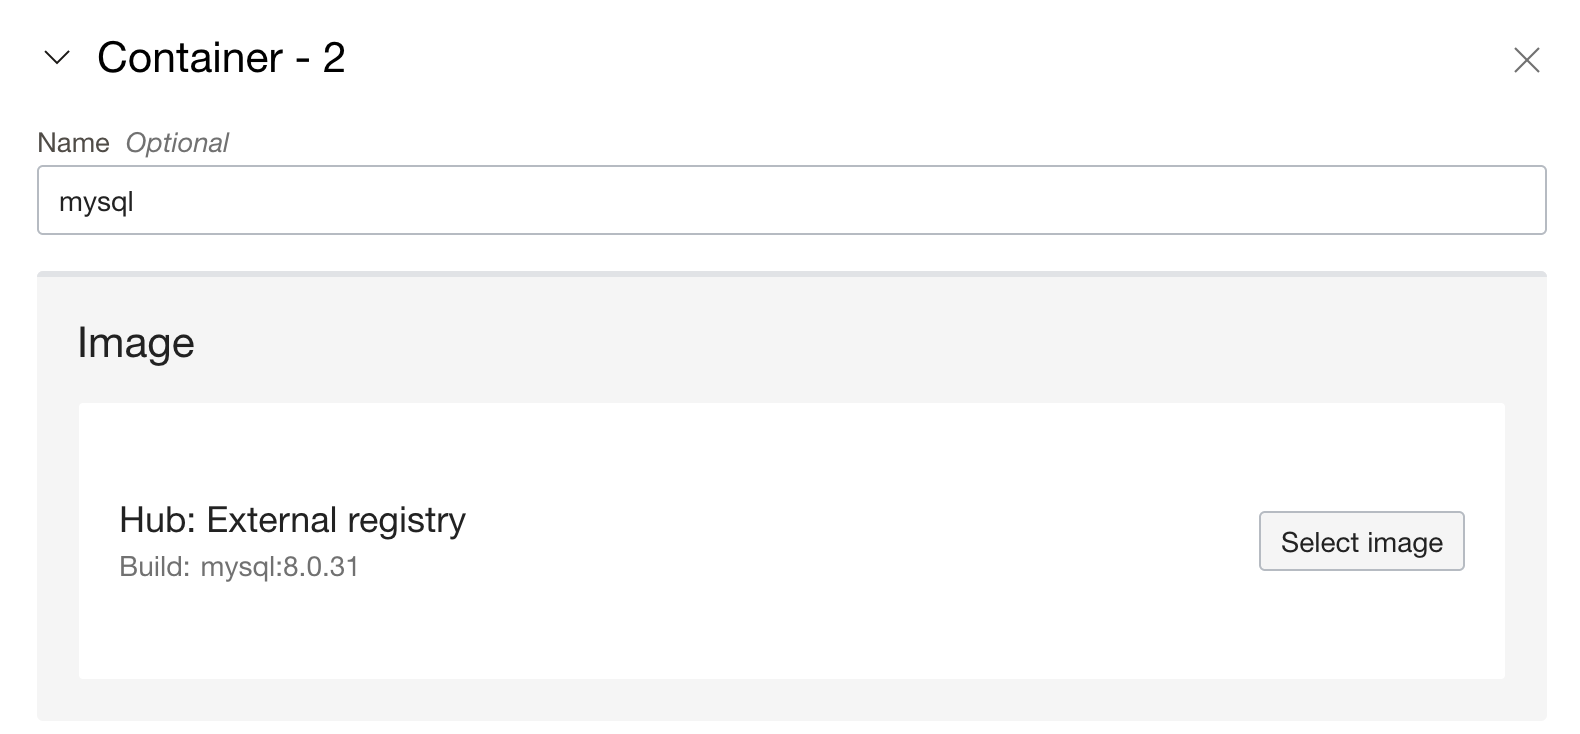
To start with the MySQL container, click + Another Container to add one more container to our container instance. As before, we start by naming the container and this time we name it “mysql”.
-
Next, click Select Image to provide image details. Oracle publishes the official MySQL images on DockerHub, and we shall use the MySQL 8.0.31 release for this tutorial.
-
Set up the following environment variables to initialize the database.
variable value MYSQL_ROOT_PASSWORD wordpressonmysql MYSQL_DATABASE wordpress MYSQL_USER wordpress MYSQL_PASSWORD wordpress 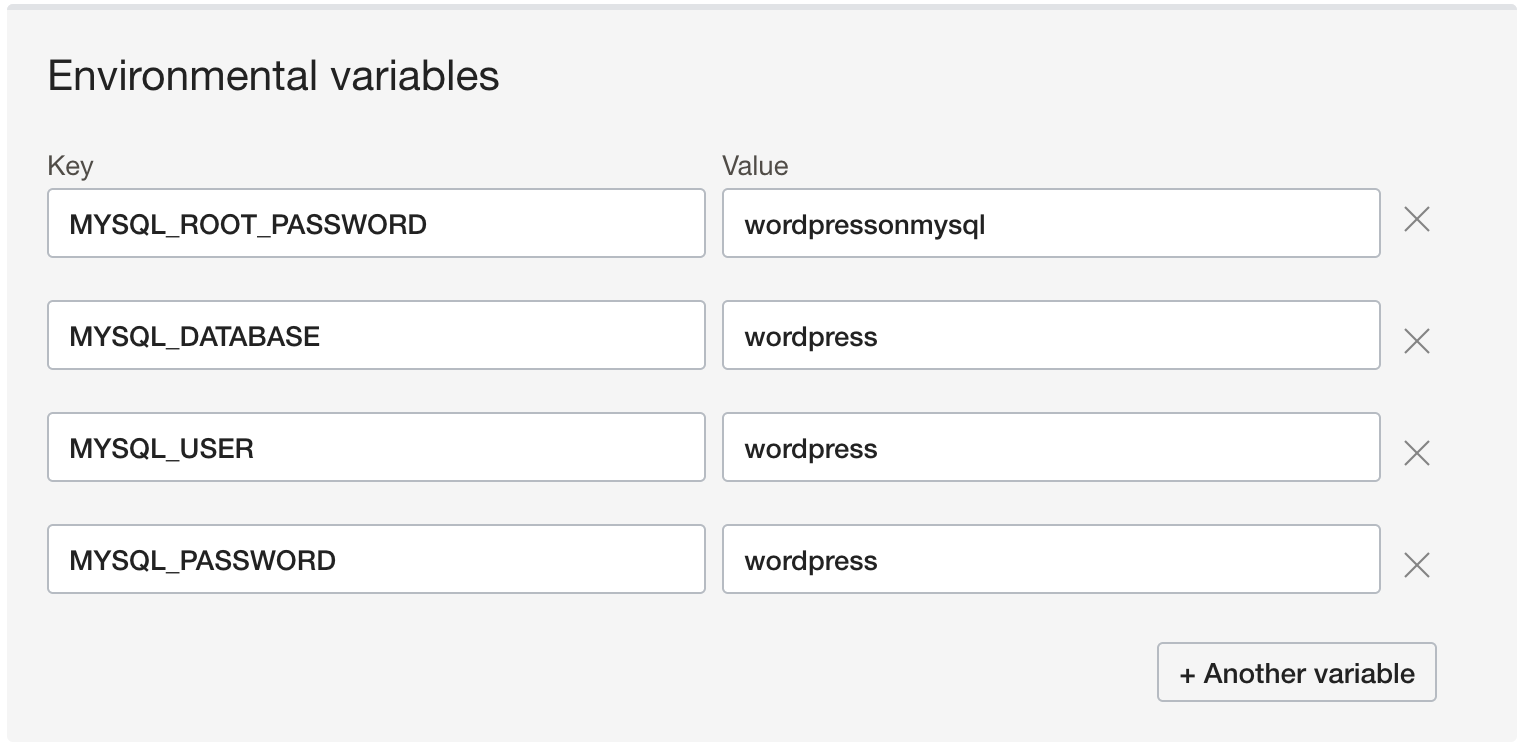
-
Similar to the WordPress container, we set the container throttles and additionally set a start up parameter to override the MySQL container’s
ENTRYPOINTargument. We pass in the argument--default-authentication-plugin=mysql_native_passwordto enable the database password authentication plugin.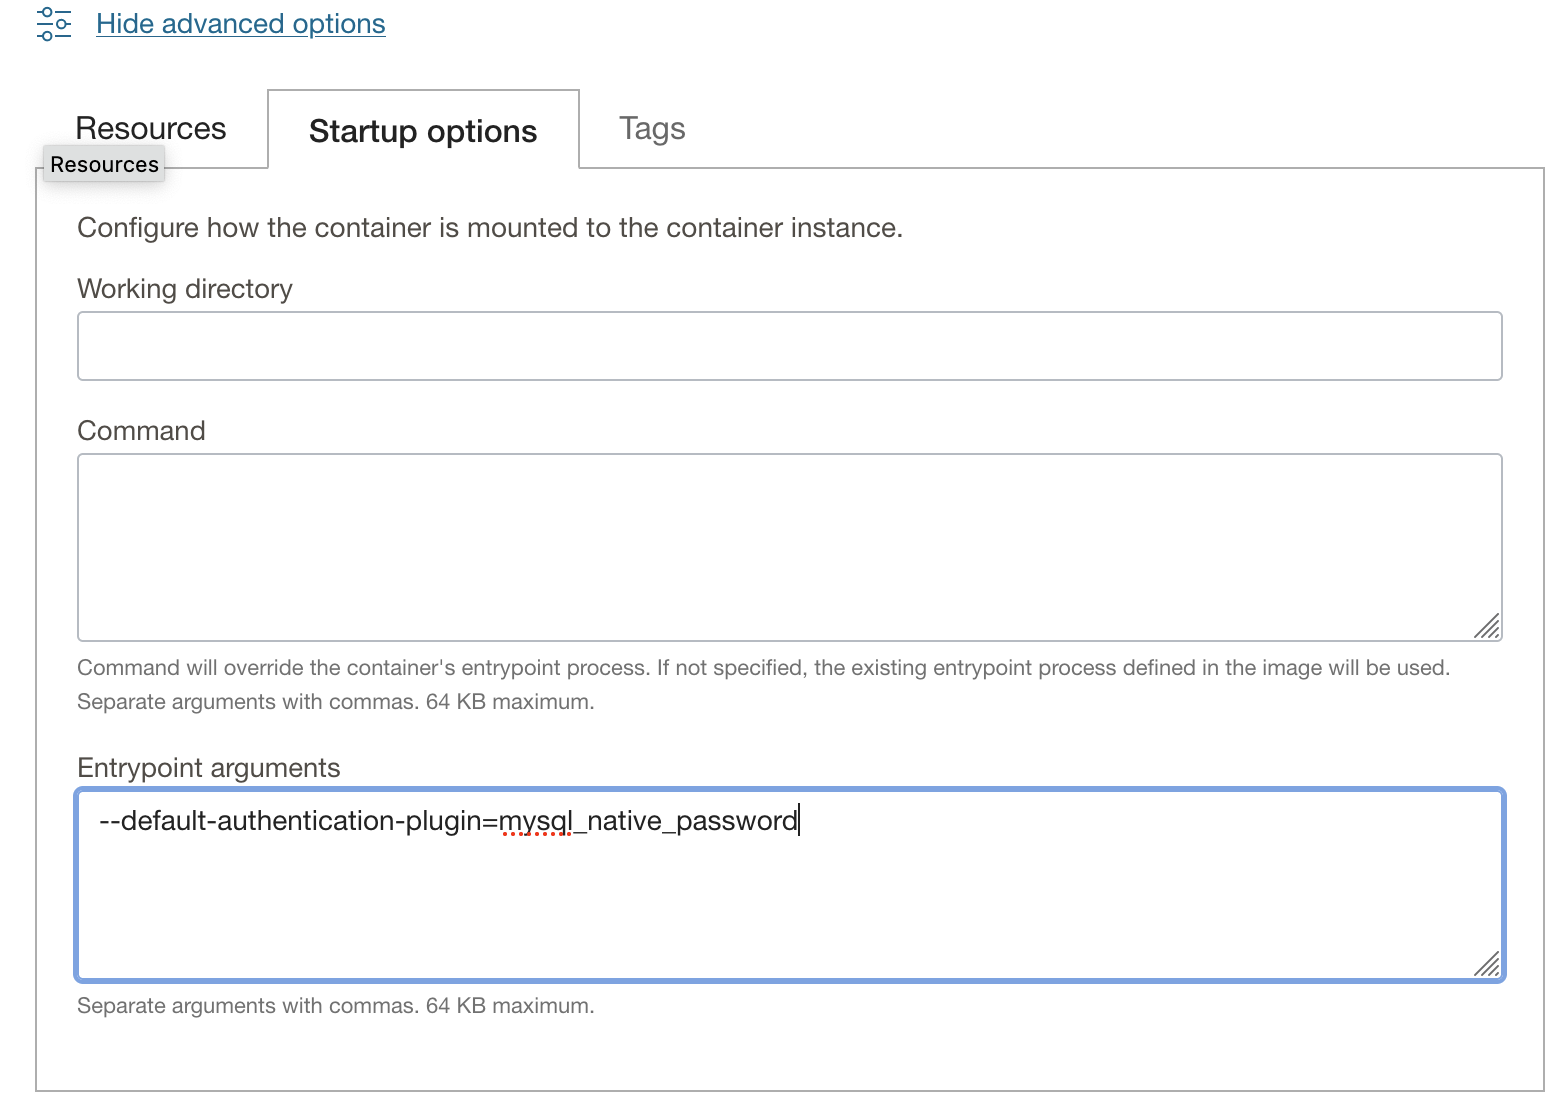
-
-
Click Next to review all information and then click Create to create your container instance. The container instance we have just configured will have two containers, each throttled to take up only 50% of the CPU and memory available on the container instance, and we have chosen the public images for WordPress and MySQL to create our WordPress site, each configured using environment variables to initialize the containers.
The container instance launches within seconds and your workload is now live. Since we chose to assign a public IP address to the container instance, we can use that to reach our WordPress site on the internet. The Public IP address assigned in displayed in the overview page for the container instance.

Visiting the IP address from a browser, now takes you to your live WordPress website on the internet.
Related Links
- OCI Container Instances Blog
- Container Instances Deep Dive
- Container Instances Documentation
- Oracle Cloud Free Tier
- Sign in to your Oracle Cloud Account
Acknowledgments
- Author - Jeevan Joseph (Senior Principal Product Manager)
More Learning Resources
Explore other labs on docs.oracle.com/learn or access more free learning content on the Oracle Learning YouTube channel. Additionally, visit education.oracle.com/learning-explorer to become an Oracle Learning Explorer.
For product documentation, visit Oracle Help Center.
Manage container workloads on OCI using the Container Instances service
F74879-02
December 2022
Copyright © 2022, Oracle and/or its affiliates.