Note:
- This tutorial requires access to Oracle Cloud. To sign up for a free account, see Get started with Oracle Cloud Infrastructure Free Tier.
- It uses example values for Oracle Cloud Infrastructure credentials, tenancy, and compartments. When completing your lab, substitute these values with ones specific to your cloud environment.
Deploy your application using OCI DevOps CI/CD pipeline on Kubernetes
Introduction
Oracle Cloud Infrastructure (OCI) DevOps service is a complete continuous integration/continuous delivery (CI/CD) platform for developers to simplify and automate their software development lifecycle. The OCI DevOps service enables developers and operators to collaboratively develop, build, test, and deploy software.
Objectives
- Learn how to use the OCI DevOps build pipeline.
- Deploy a simple NodeJs application using CI/CD pipeline on Kubernetes.
Prerequisites
- Create a Topic so that DevOps service can send messages to this Notification Topic for important events from your pipeline runs.
- Create and setup Container Engine for Kubernetes on which application will be deployed.
- Create an OCI container registry for pushing application image.
- Create an Artifact Registry for storing artifacts.
- Create a log group to enable logging for build pipelines.
Task 1: Set up the OCI DevOps project
-
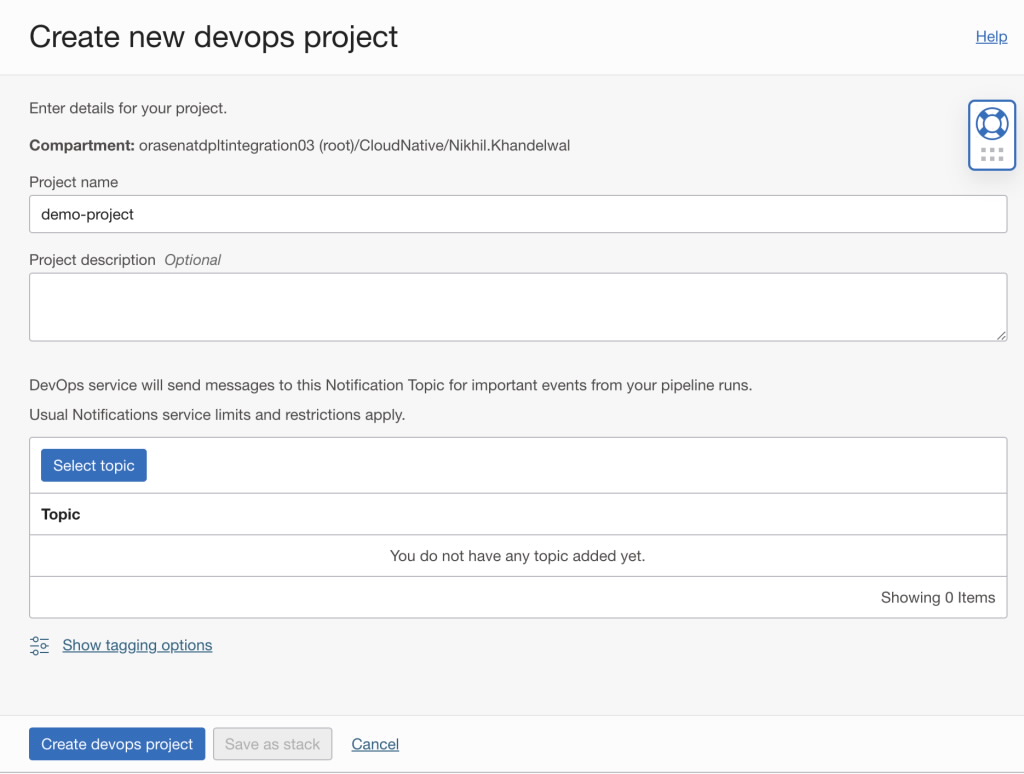
Click Create DevOps project under DevOps Service. Enter the Project name and select the topic which you have created previously.
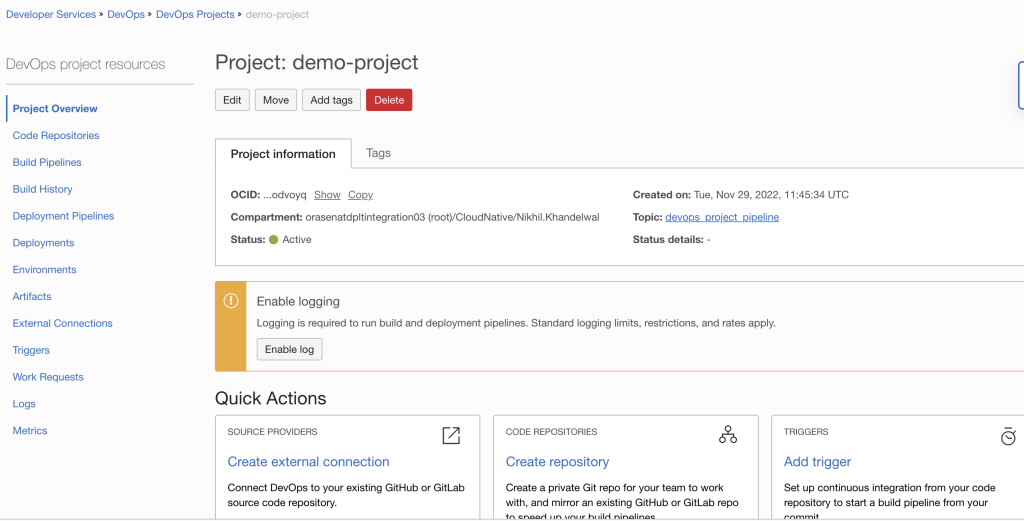
After creating project you’ll see the list of options available in the OCI DevOps service.
-
Click Code repository and enter the repository name. Set up the code repository and upload application files in the repository.

-
Create Dockerfile for creating the Docker image of NodeJS application and push it to the code repository.
FROM node:16 # Create app directory WORKDIR /usr/src/app # Install app dependencies COPY package*.json ./ RUN npm install # Bundle app source COPY . . EXPOSE 3000 CMD [ "node", "index.js" ] -
Create a build specification file named
build_spec.yaml. Push this file to root directory of the repository.version: 0.1 component: build timeoutInSeconds: 6000 runAs: root shell: bash steps: - type: Command timeoutInSeconds: 1200 name: "Build container image" command: | d ${OCI_WORKSPACE_DIR}/node_app docker build -t myapp:v1.0 . outputArtifacts: - name: myapp-image type: DOCKER_IMAGE location: myapp:v1.0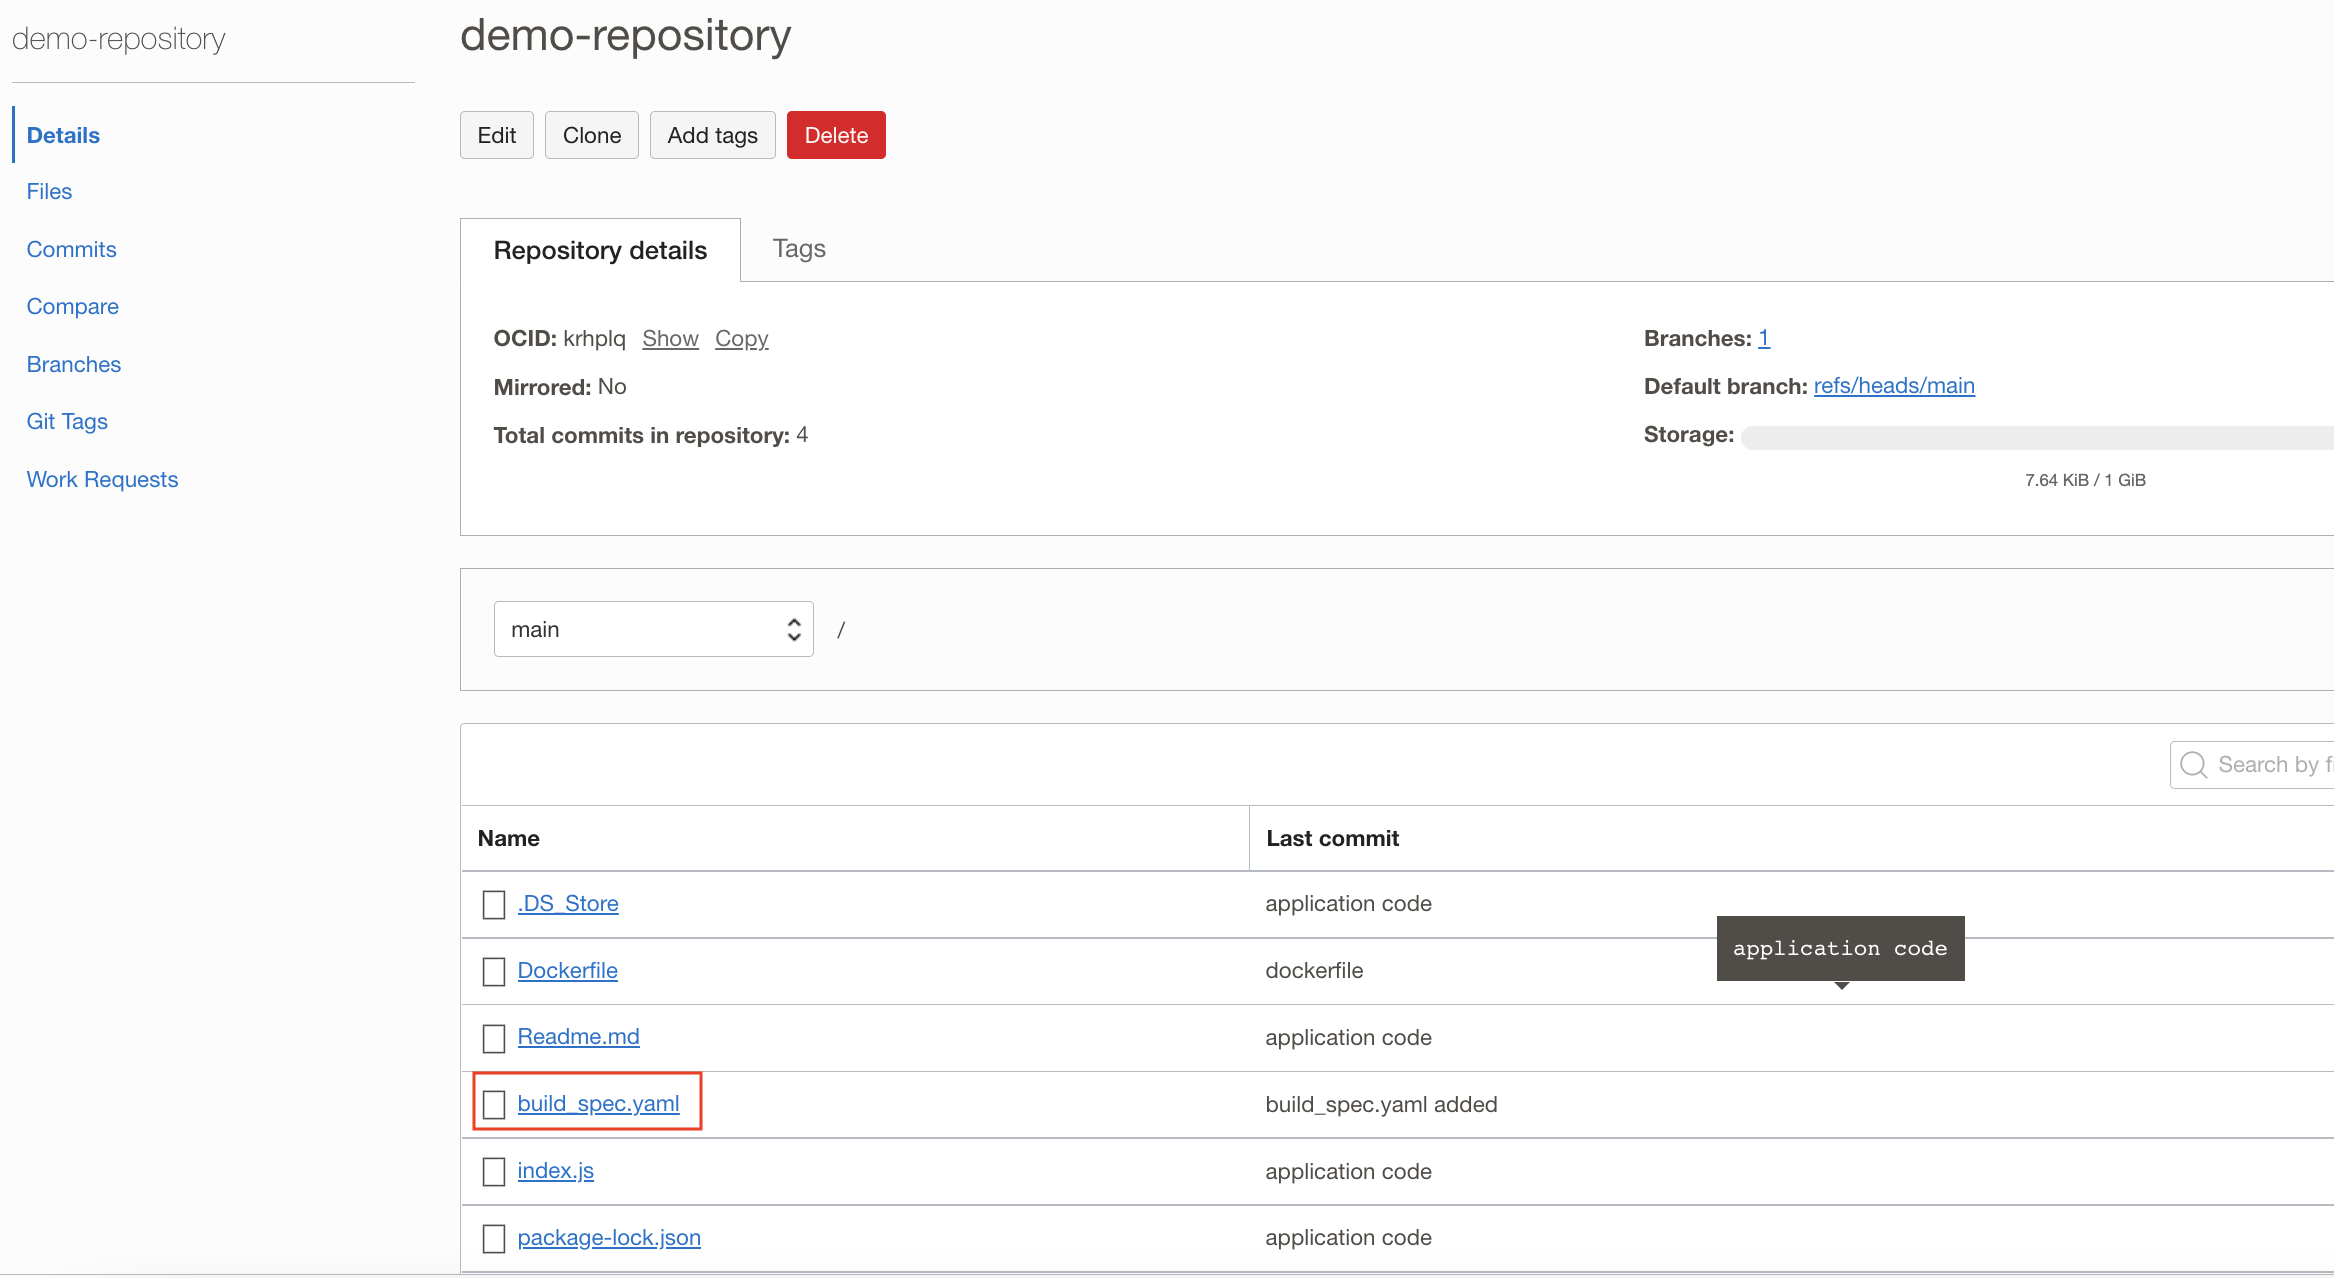
-
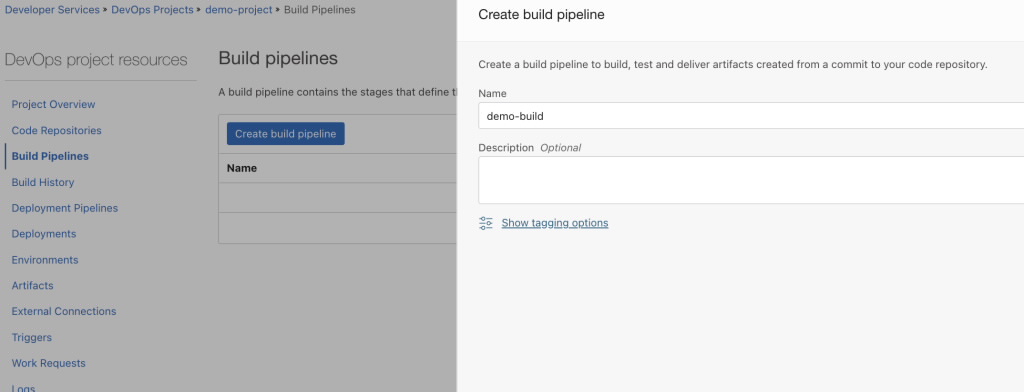
A build pipeline contains the stages that define the build process for successfully compiling, testing, and running software applications before deployment. Click Create build pipeline and enter a name.
-
Click Add a stage under the created build pipeline and choose Manage build stage.
-
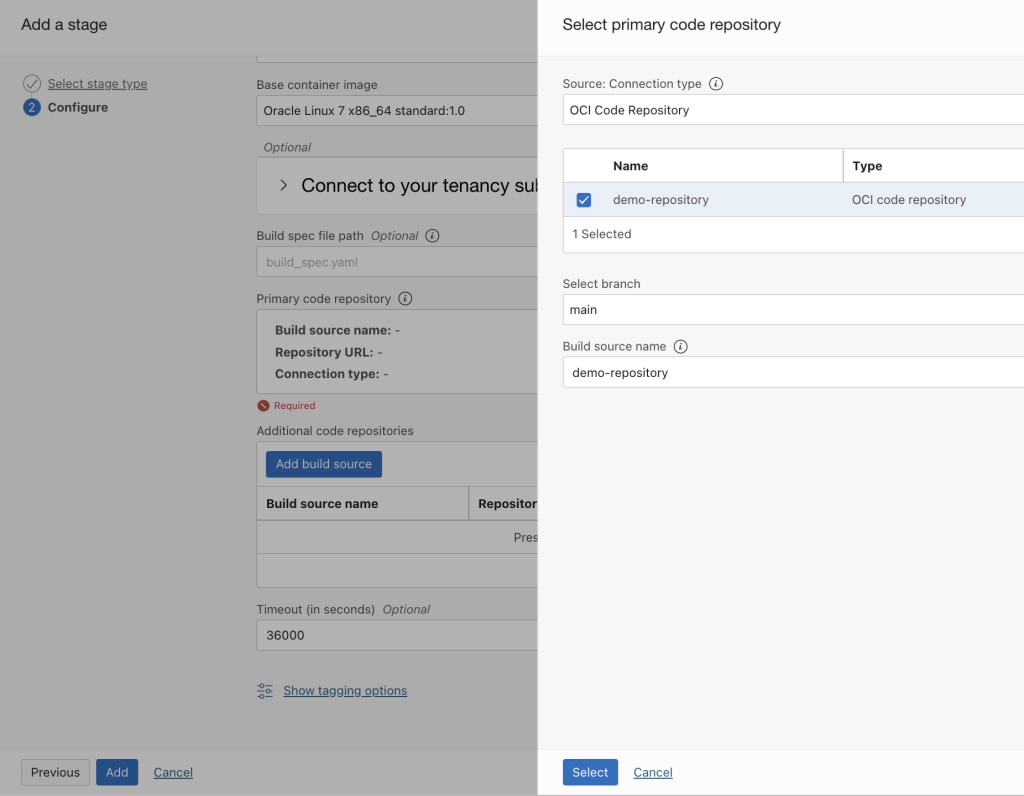
Enter the stage name and add primary code repository.
-
Select Connection type as OCI code repository and select code repo in which application code is present.
-
Click Select.
-
Click Add
-
-
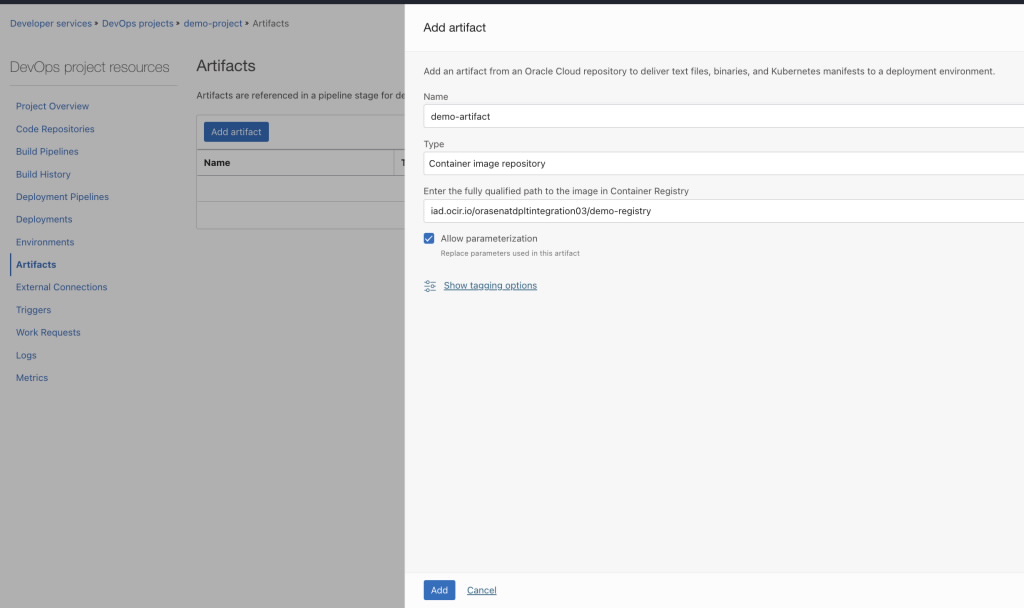
Click Add Artifact. Specify type as Container image repository and provide fully qualified path of the registry which was created previously.
-
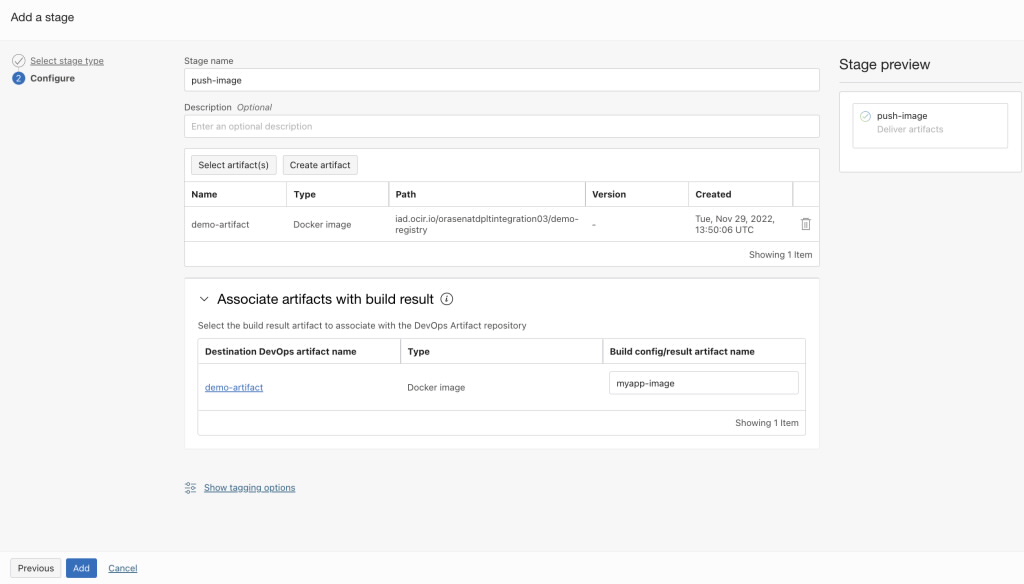
This stage will push the application image artifact to Container registry. In the previuosly created build pipeline, add another stage of type Deliver Artifacts. Click Select artifact(s) and select the artifact created.
-
Give Build config/result artifact name as myapp-image, because we mentioned this artifact name in our
build_spec.yamlfile. -
Click Add.
-
-
Create the
manifest.yamlfile as follows to deploy the application container on Kubernetes. Upload this manifest file to the created artifact registry.kind: Namespace apiVersion: v1 metadata: name: default apiVersion: apps/v1 kind: Deployment metadata: name: myapp-deployment namespace: default spec: selector: matchLabels: app: node-app replicas: 2 template: metadata: labels: app: node-app spec: containers: - name: node-app image: iad.ocir.io/orasenatdpltintegration03/demo-registry:latest imagePullPolicy: Always ports: - name: containerport containerPort: 8080 protocol: TCP --- apiVersion: v1 kind: Service metadata: name: myapp-service namespace: default annotations: oci.oraclecloud.com/load-balancer-type: "lb" spec: type: LoadBalancer ports: - name: nodejs-port port: 80 targetPort: 3000 protocol: TCP selector: app: node-app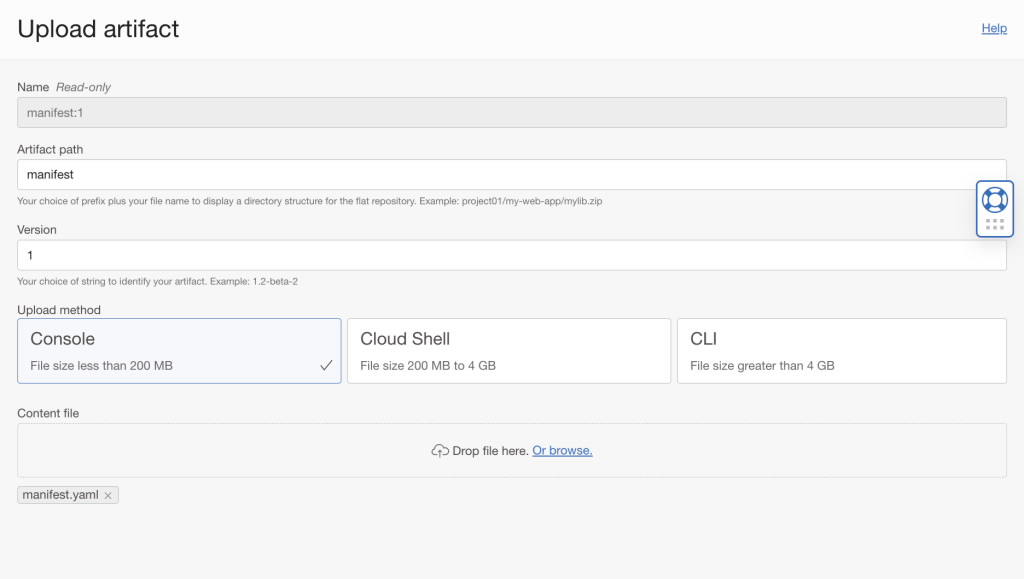
-
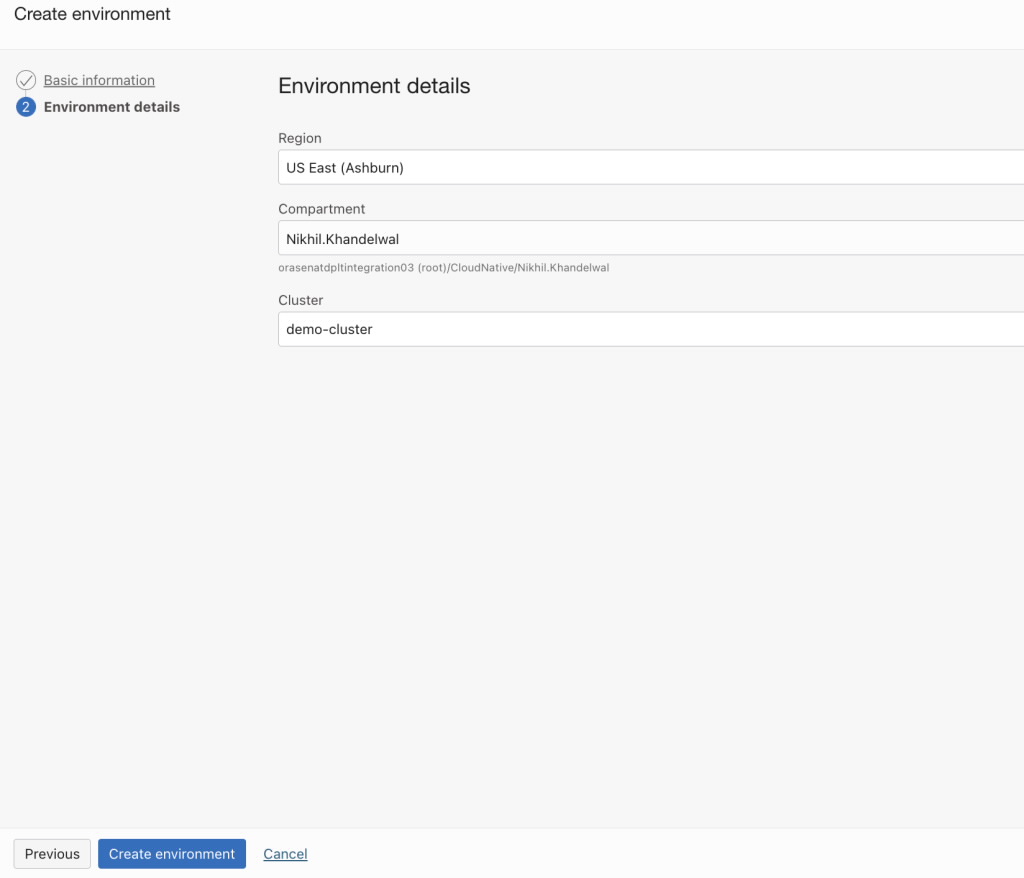
Click Create environment. Provide name and in the Environment details page, select the OKE cluster on which application will be deployed.
-
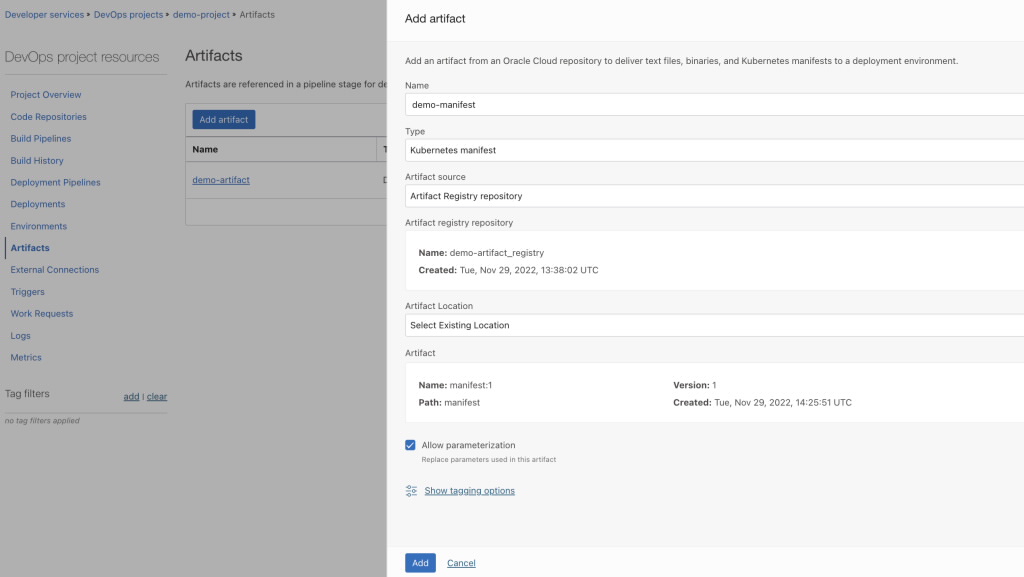
Add this manifest to artifacts. Click Add Artifact and select the type as Kubernetes manifest. Select Artifact registry repository which was created previously. Select manifest file as Artifact. Fill the form as shown in the following image.
-
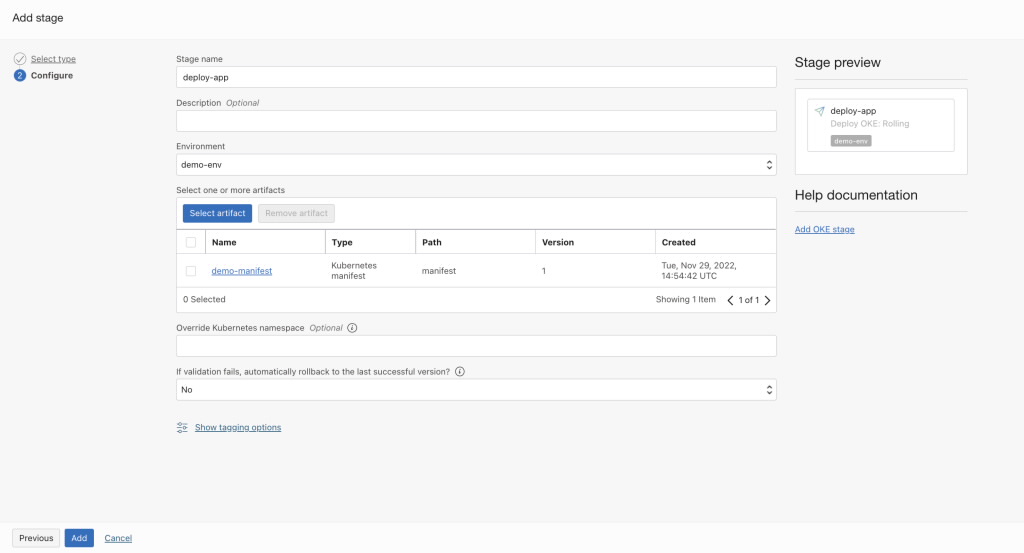
Click Create deployment pipeline and provide name. Add stage type Apply Manifest to your Kubernetes Cluster. Select environment and artifact created in previous steps.
-
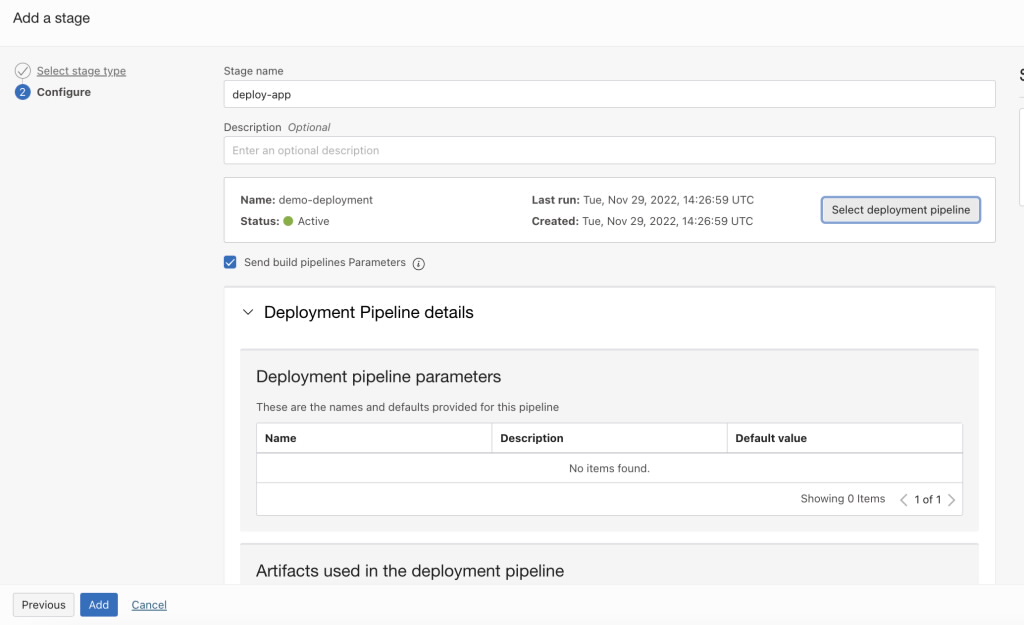
Add third stage to the created build pipeline. Select stage type as Trigger Deployment. Provide the stage name and select the created Deployment pipeline.
-
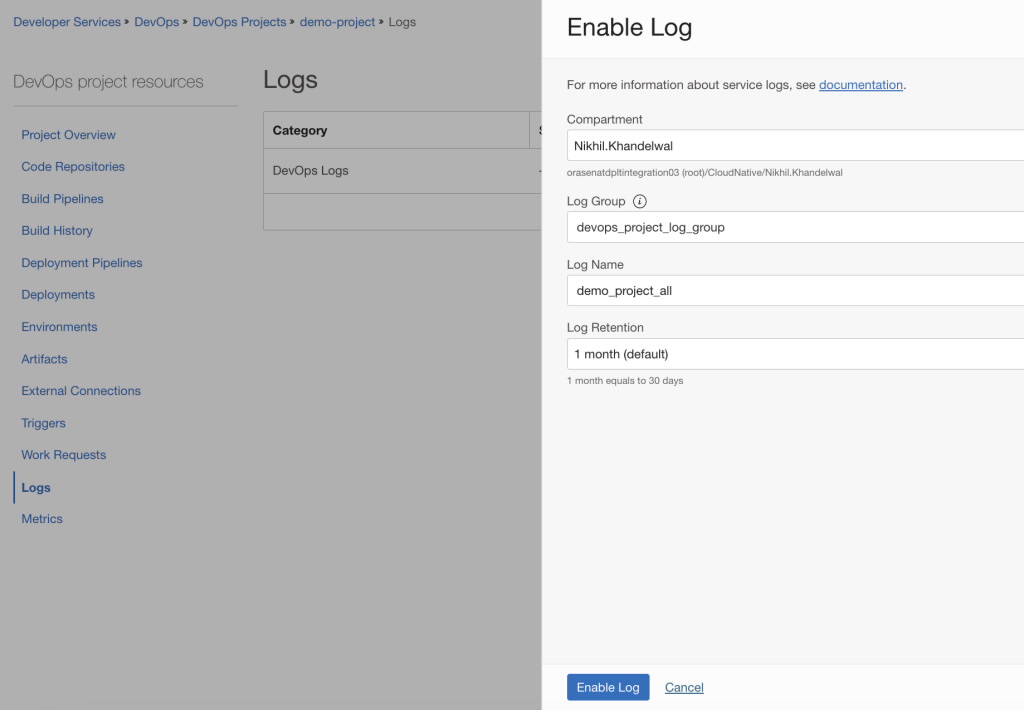
Click Logs for starting the build pipeline. Provide log group under which logs will be stored and click Enable Log.
-
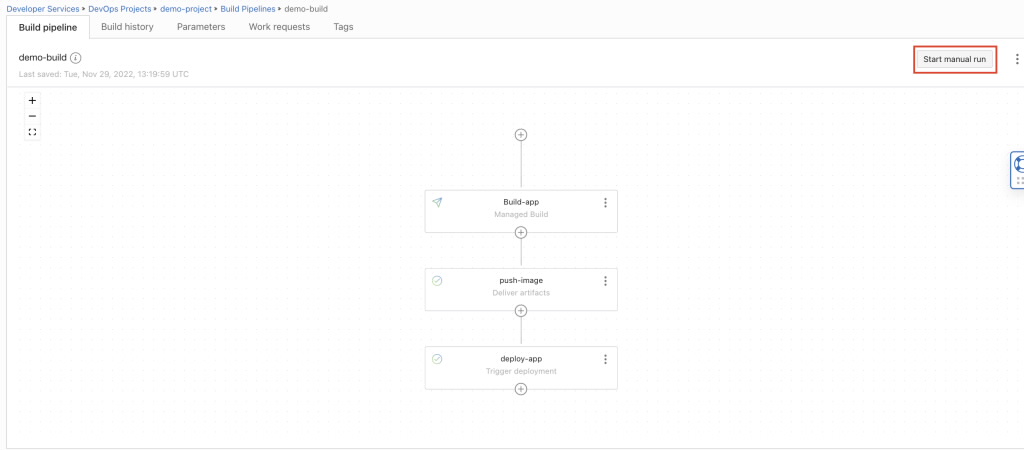
The build pipeline is shown in the following image. Click Start manual run to run the pipeline.
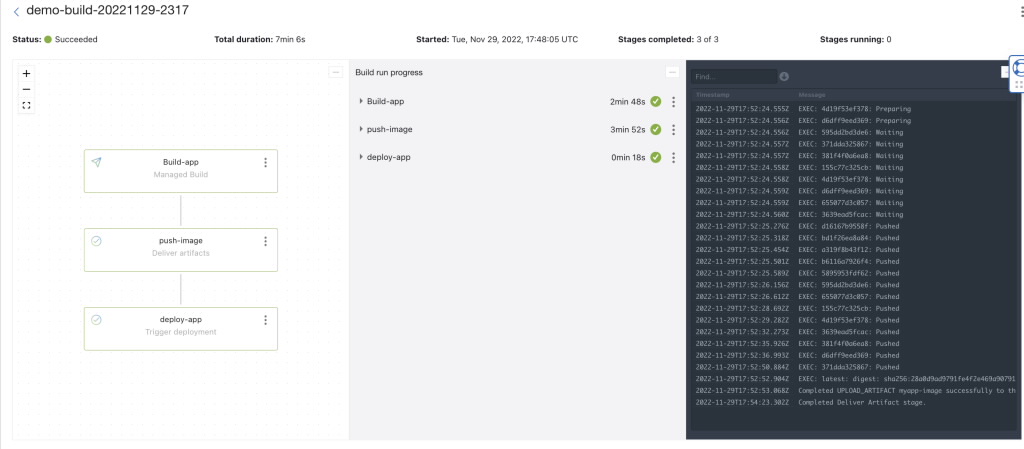
The pipeline is successfully executed. A load balancer will be created as we have used Load Balancer type service for accessing the application. To access the application, you can access the public IP Address of the created Load Balancer.
Related Links
- DevOps Service
- DevOps Service documentation
- Overview of Container Engine for Kubernetes
- Overview of Container Registry
- Overview of Artifact Registry
- Logging Overview
- Managing Topics and Subscriptions
Acknowledgments
- Author: Nikhil Khandelwal (Enterprise Cloud Architect)
More Learning Resources
Explore other labs on docs.oracle.com/learn or access more free learning content on the Oracle Learning YouTube channel. Additionally, visit education.oracle.com/learning-explorer to become an Oracle Learning Explorer.
For product documentation, visit Oracle Help Center.
Deploy your application using OCI DevOps CI/CD pipeline on Kubernetes
F77637-01
February 2023
Copyright © 2023, Oracle and/or its affiliates.