Note:
- This tutorial requires access to Oracle Cloud. To sign up for a free account, see Get started with Oracle Cloud Infrastructure Free Tier.
- It uses example values for Oracle Cloud Infrastructure credentials, tenancy, and compartments. When completing your lab, substitute these values with ones specific to your cloud environment.
Integrate Oracle Access Governance with Oracle Database
Introduction
Oracle Access Governance is a cloud native Identity Governance and Administration (IGA) solution that provides insights-based access reviews, identity analytics, and intelligence capabilities for businesses. For more information on Oracle Access Governance, see:
- Oracle Access Governance Product Page
- Oracle Access Governance Service Guide
- Oracle Access Governance Product Documentation
- Oracle Access Governance APIs
- Oracle Access Governance FAQ
Audience
Access Governance Administrators
Objective
In this tutorial, you’ll integrate an Oracle Database with Oracle Access Governance. This integration serves as a precursor to getting started with managing database users and their privileges and achieve provisioning and governance requirements for the database.
For this, you’ll need to:
- Configure Database Integration in Access Governance Console.
- Deploy Agent with the Database System.
Prerequisites
-
Access Governance Administrator rights. For more information, see Understanding Application Roles.
-
Access to an Oracle Database instance with administrative rights and credentials.
-
Oracle Database instance must be available and running on a compute instance.
-
SSH Key to access the compute instance and install the
_agent_package_. -
Identity synchronization configured for Access Governance using Oracle Identity Governance (OIG) or Oracle Cloud Infrastructure Identity and Access Management (OCI IAM) as an authoritative system by following one of the below tutorials:
You must have the following software installed on your compute instance. Follow the given instructions to install the required software.
-
For Windows system, OpenSSH Client.
Install OpenSSH Client on Windows System
Run the following command to install and verify SSH on your Windows system:
Add-WindowsCapability -Online -Name OpenSSH.Client~~~~0.0.1.0 ssh -
JDK 11 and Docker installed on the compute instance.
Install JDK 11 or higher and set it to $JAVA_HOME
Run the following commands on your compute instance:
tar -xvf <jdk_zip>export JAVA_HOME=<jdk_bin>export PATH=$JAVA_HOME:$PATH echo $PATH -
Docker service must be running on the compute instance.
Install and Start Docker Instance
Run the following commands on the compute instance:
sudo apt-get install docker-enginesystemctl start docker
Task 1: Configure Oracle Database as a Connected System in Oracle Access Governance Console
Note: The following tasks must be completed in the listed order.
Task 1.1: Sign in to the Oracle Access Governance Console
- From your browser, go to the Access Governance Console.
- In the Username field, enter AG Administrator user name.
- In the Password field, enter the password and click Sign In.
You will be navigated to the home page of your Oracle Access Governance Console.
Task 1.2: Define System Parameters to Onboard Oracle Database
-
On the landing page of Oracle Access Governance, under Service Administration tab, click Select on the Manage Connected systems tile or click the Navigation Menu, Service Administration and Connected Systems.
-
Click Add a connected system, select the Database User Management (Oracle DB) tile and then click Next.
-
In the Enter details step, enter the following information:
-
Enter the system name in What do you want to call database.
For example, enter OracleDatabase_AG.
-
Describe your system in the How do you want to describe this database? field.
For example, enter Database system to demonstrate AG Access Controls.
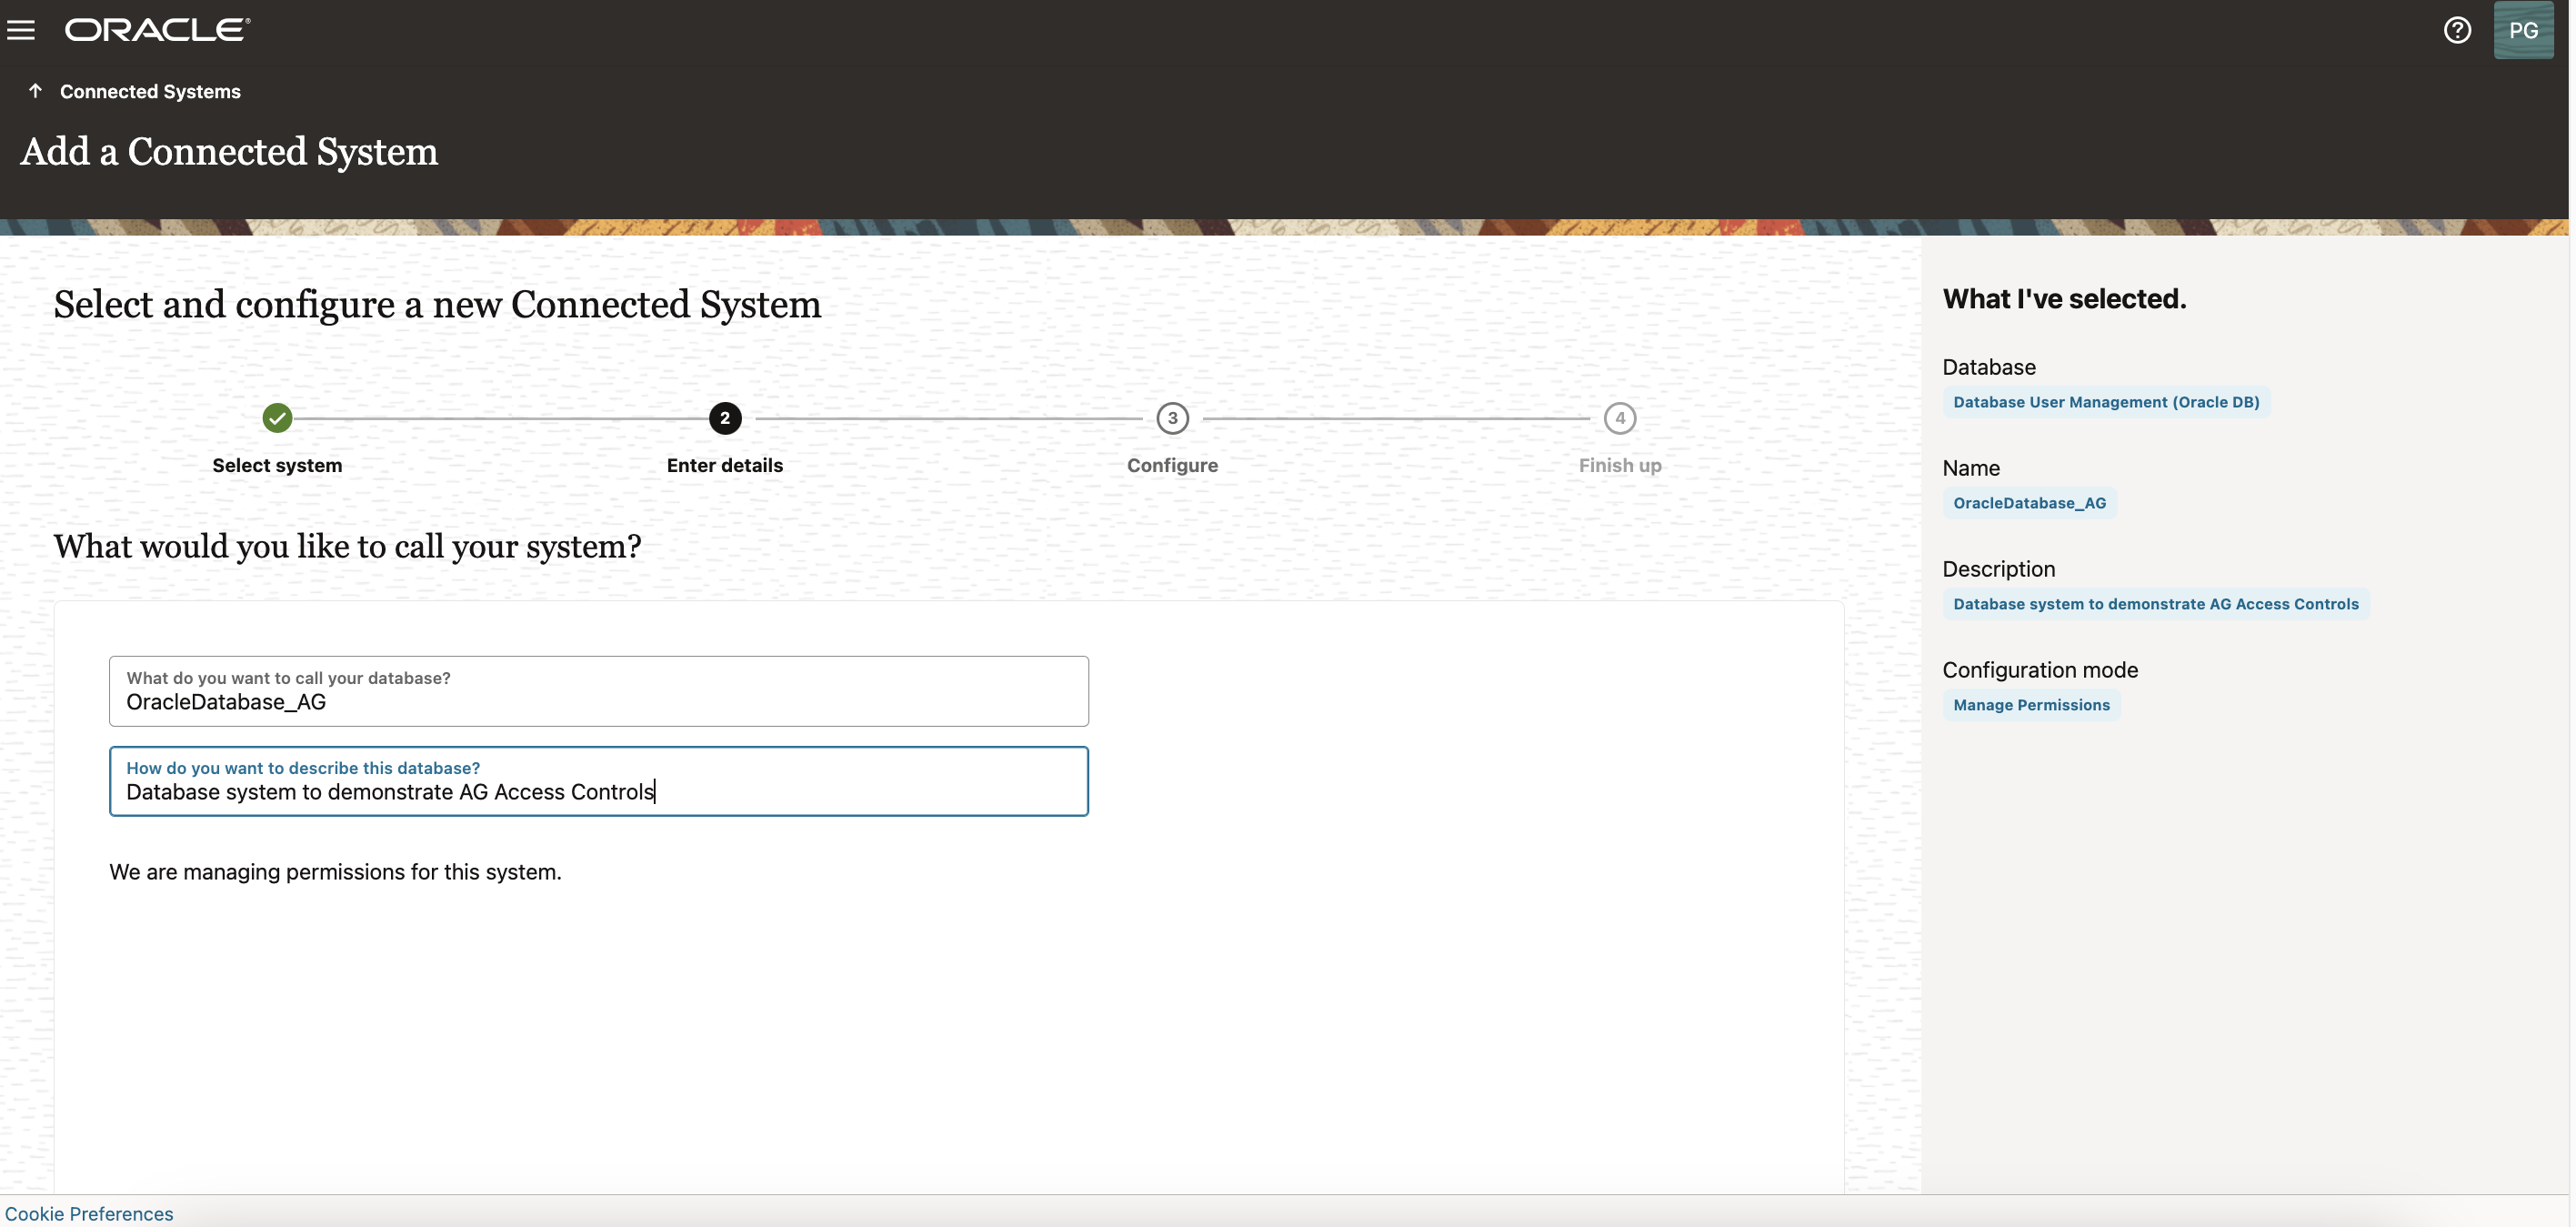
For more information, see Description of the Illustration - Database Configure.
-
-
Click Next.
-
In the Enter details step, enter the connection details of the database, as follows:
-
In the Easy Connect URL for Database field, enter the connect string for the database you want to integrate with Oracle Access Governance, in the format below:
jdbc:oracle:thin:@[host]:[port]/[sid]Note: Alternatively, you can click on the ‘Question mark’ icon to know more details about obtaining a Java Database Connectivity (JDBC) URL.
-
Enter the Database user name with administrator privileges.
sys as sysdba -
Enter and confirm the password.
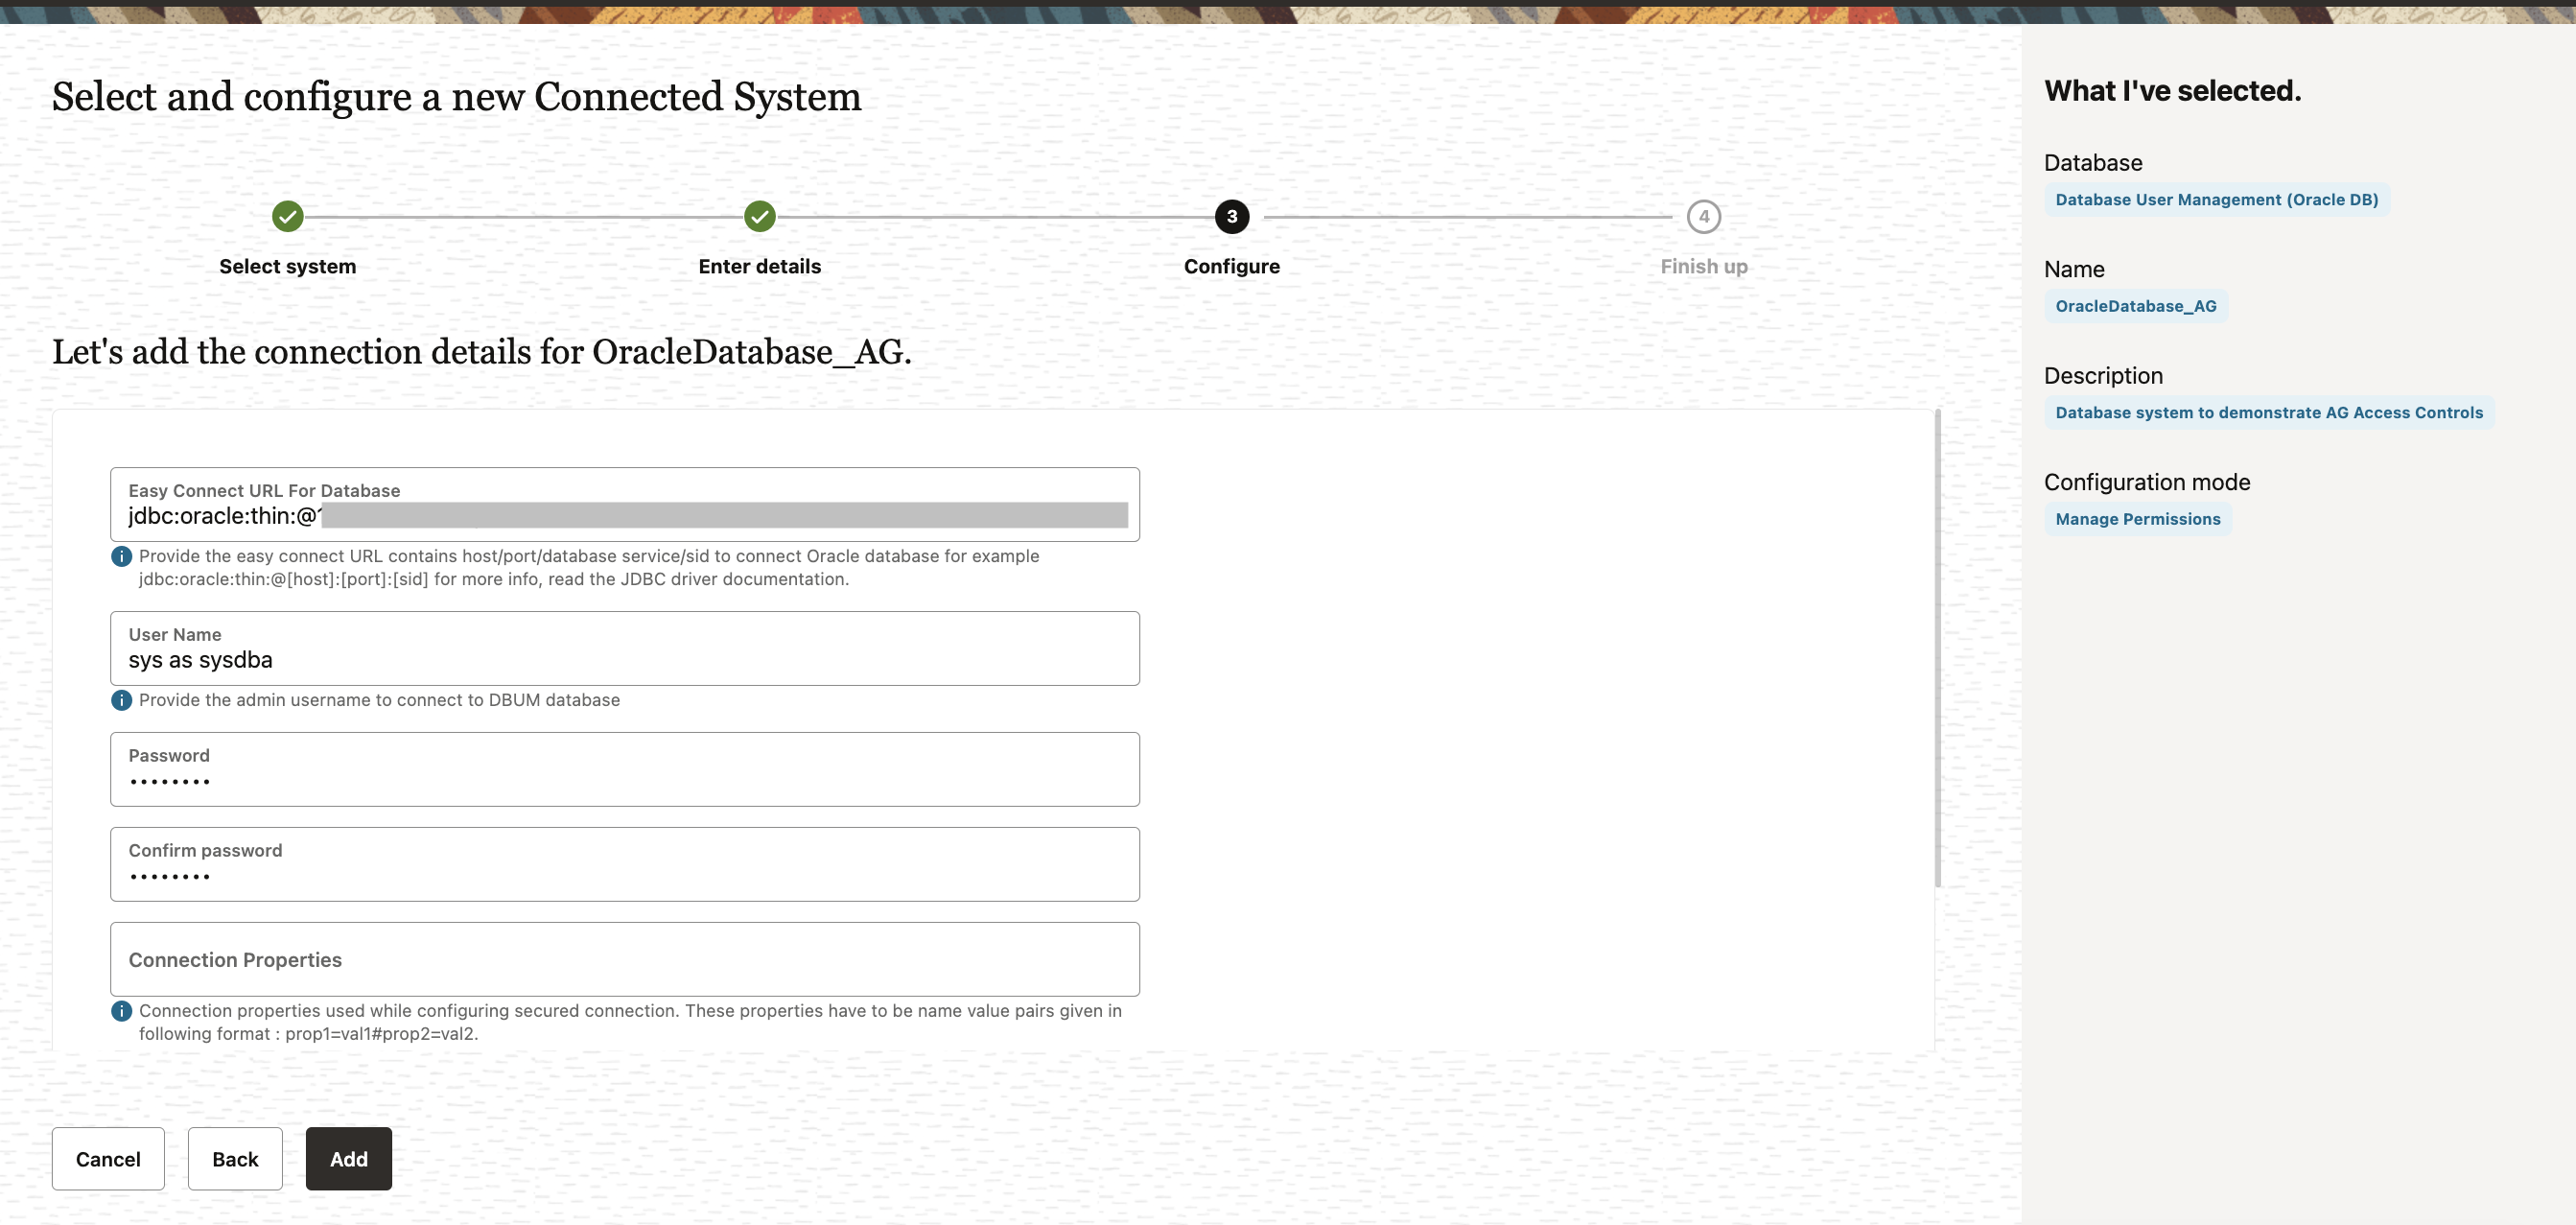
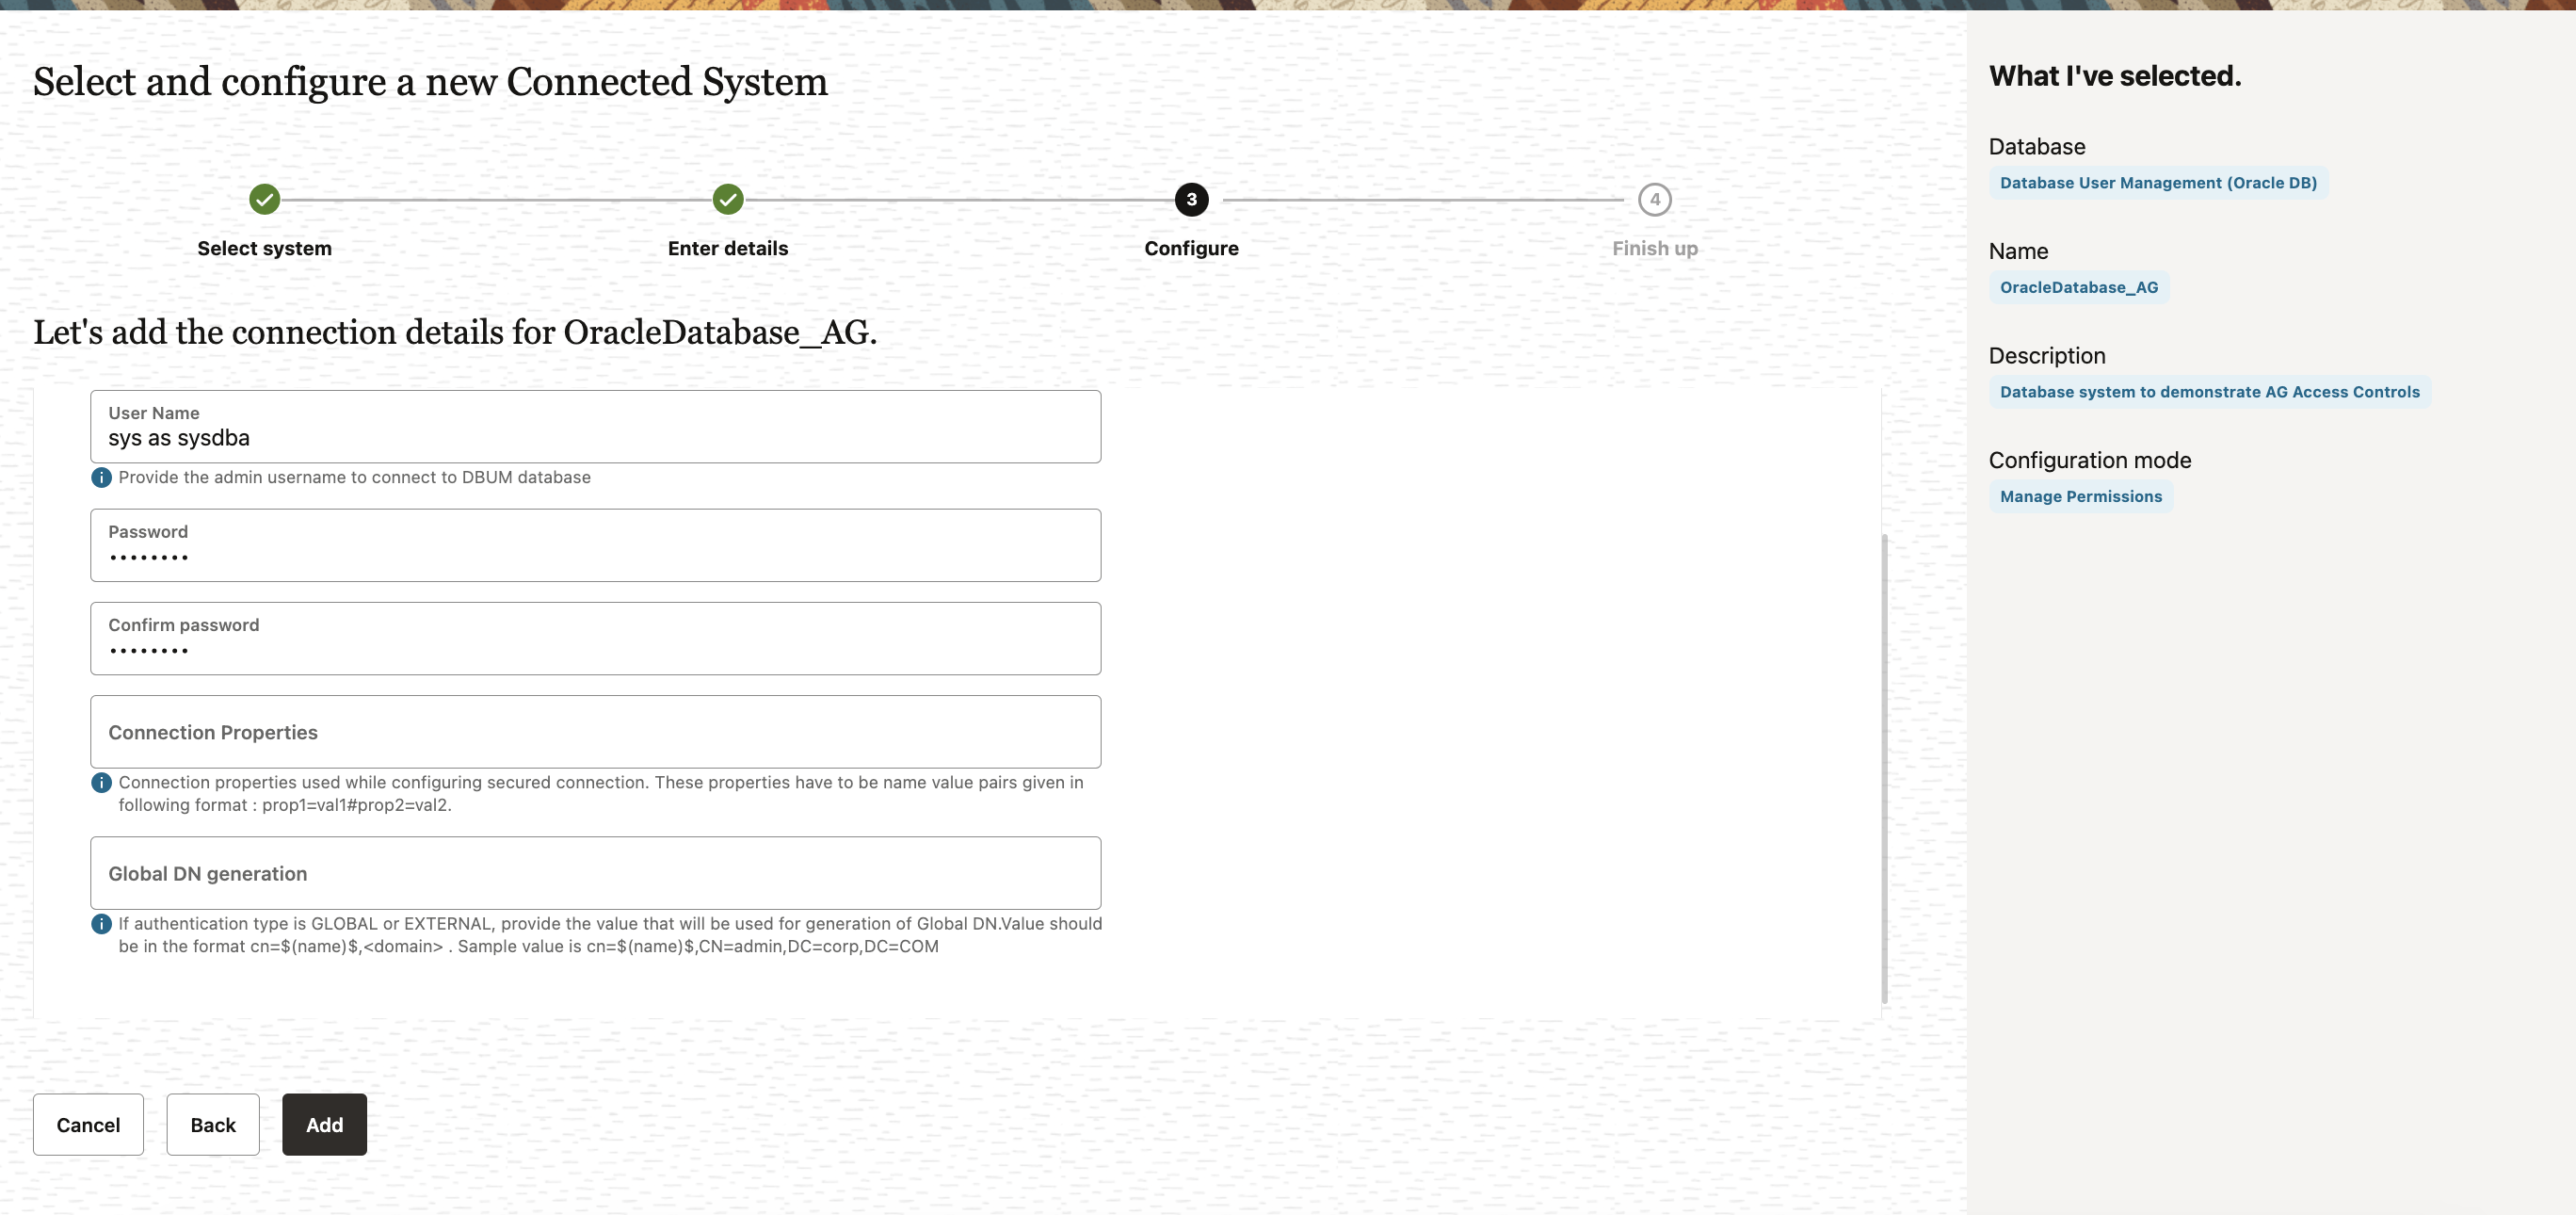
For more information, see Description of the Illustration - Database Configure.
-
-
Click Add.
-
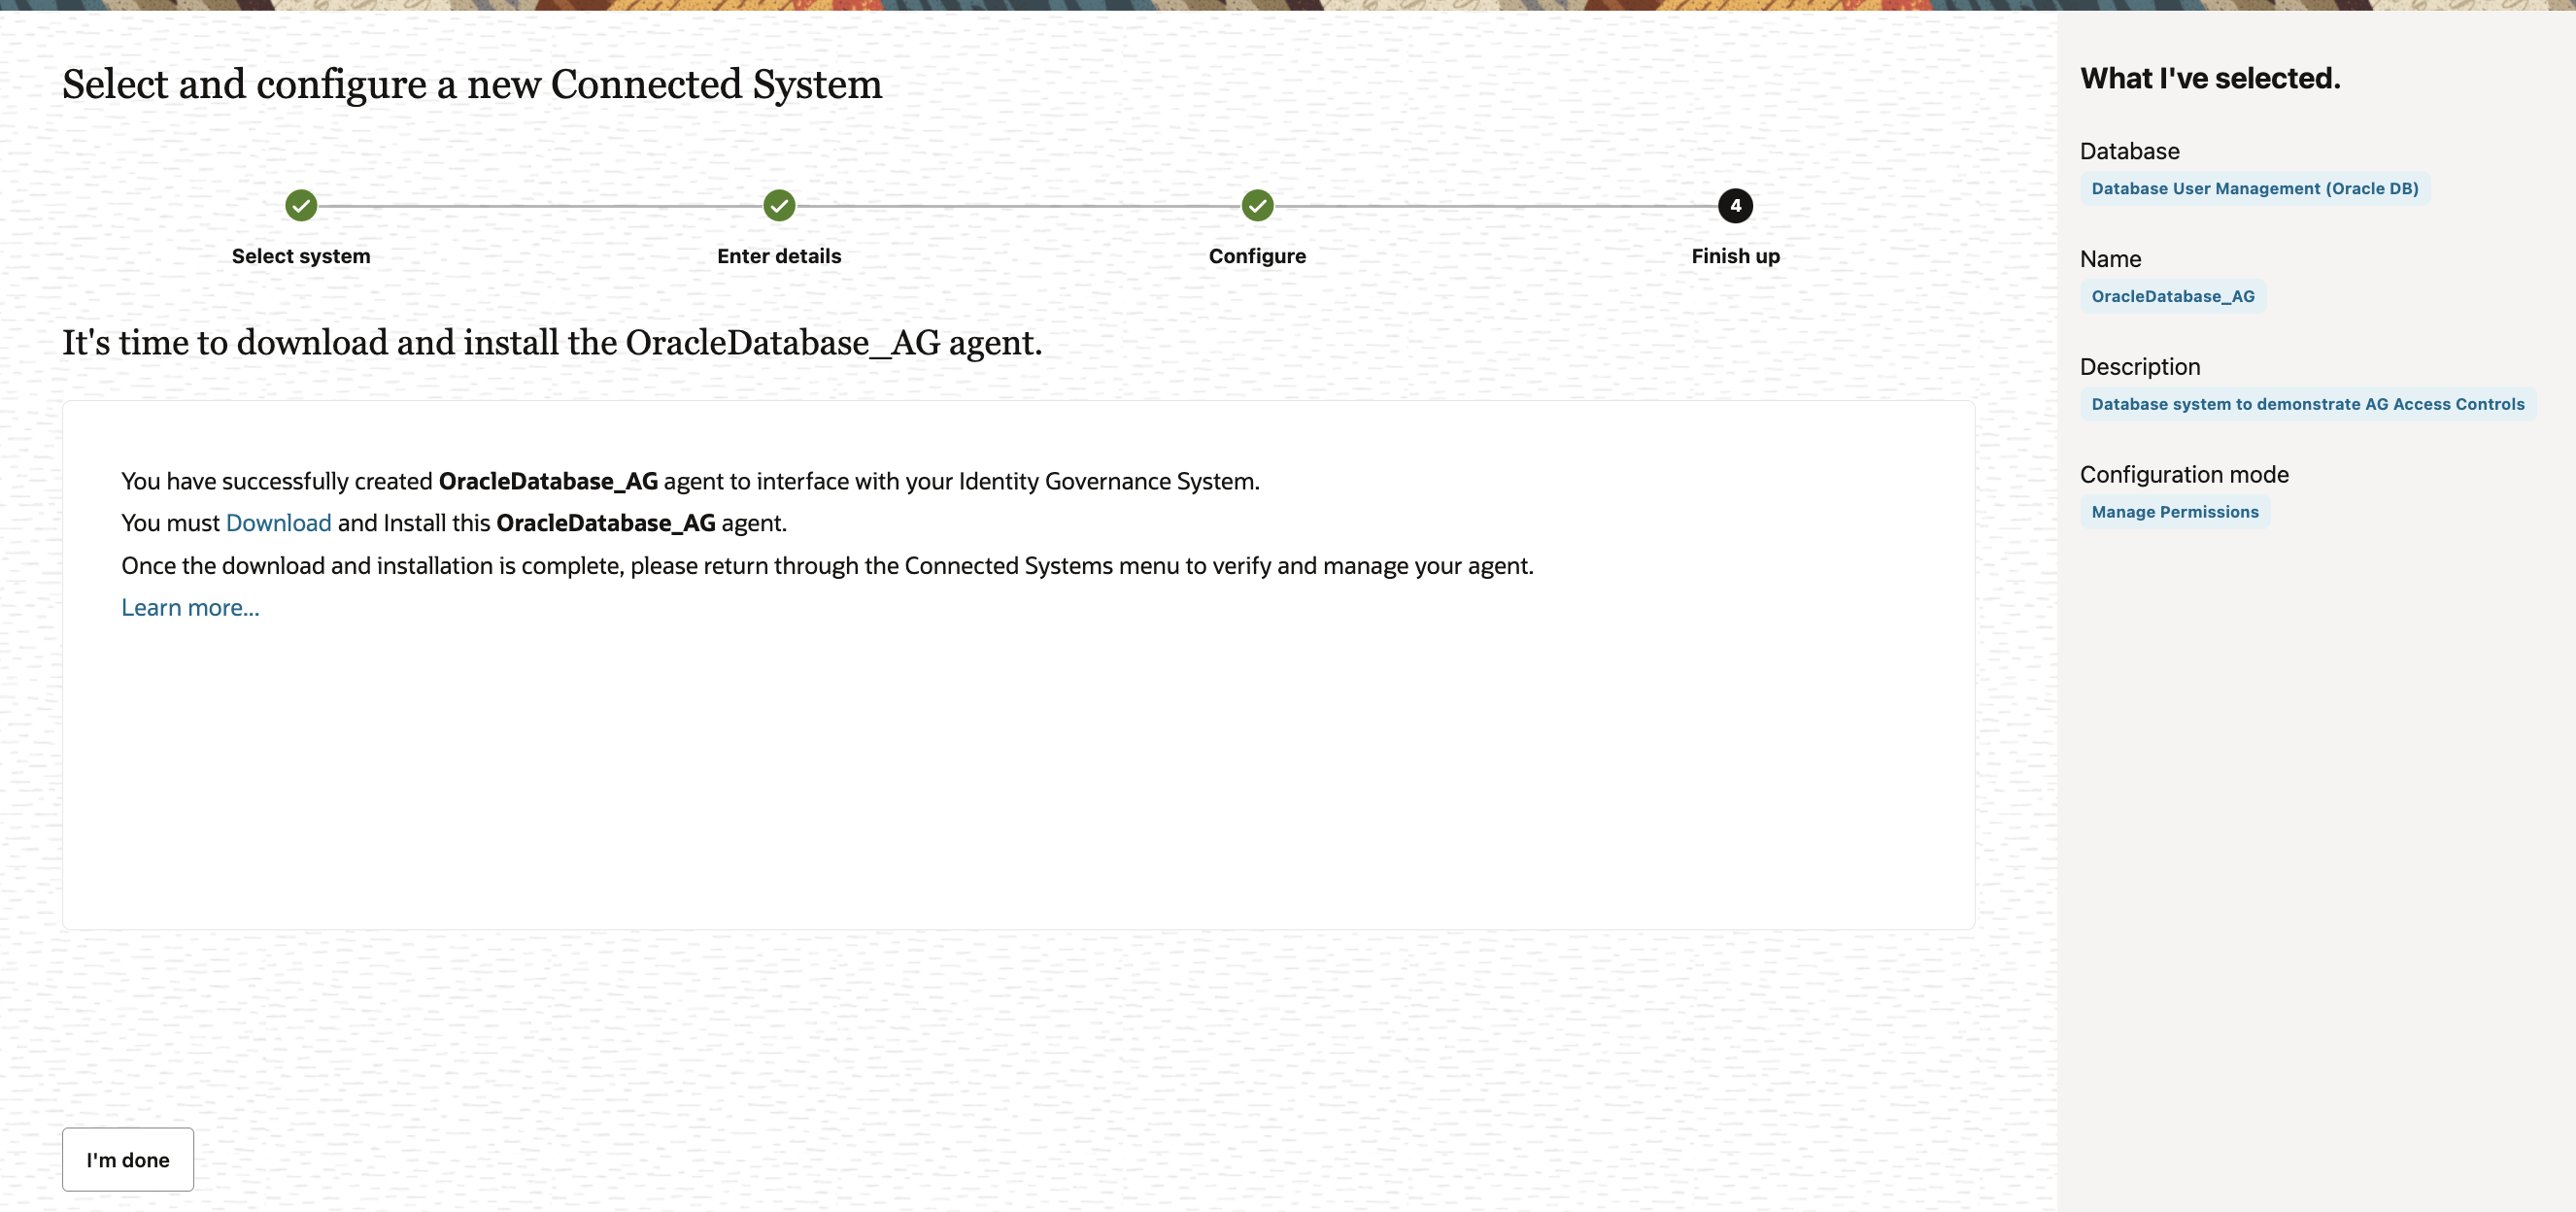
In the Download agent step, select the Download link and click I’m done. The zip file will be downloaded in your default Downloads folder.
Task 2: Deploy Identity Orchestration Agent with the Database System
Note: The following tasks must be completed in the listed order.
You must have access to the Linux-based environment to use Secure Shell (SSH) commands and must meet all the requirements mentioned in the Prerequisites section.
Task 2.1: Transfer Downloaded Agent to the Compute instance using the SSH key
In this task, you will move the agent downloaded from the Oracle Access Governance console from your local system to the Compute instance.
-
Open a new Terminal or PowerShell terminal.
-
Run the following command as per the following syntax :
scp -i <private key file name> <database_agent_package.zip> <compute instance user-name>@<ipaddress>:<directory path where agent should be saved>For example :
scp -i "home\user_name\accessgov_ssh_keyname.key" "home\username\Downloads\OracleDatabase_AG.zip" opc@152.1xx.1xx.1xx:/home/opc/
Task 2.2: Log on to the Compute Instance
Log on to the Compute Instance by running the following command.
ssh -i <pvt_key_filename.key> <username>@<compute instance ipaddress>
For example:
ssh -i "\home\username\oag_agent\accessgov_ssh_keyname.key" <opc@152.1xx.1xx.xx>
You will be logged on to the compute instance successfully.
Note: Alternatively, you can use PuTTY and PuTTYgen to generate SSH private key and operate on the SSH terminal.
Tas 2.3: Create an Agent Package Volume
You need to create a volume directory on the compute instance to persist agent data such as configuration, wallet, and logs.
-
Create a new directory.
cd ~ mkdir ~/agent_vol_db -
Assign read, write and execute permissions to the directory.
chmod 775 agent_vol_db
Task 2.4: Install the Agent on the Compute Instance
Note: You must have JDK 11 or higher installed on your system and Docker up and running.
-
Download the ShellScript to install agent.
curl https://raw.githubusercontent.com/oracle/docker-images/main/OracleIdentityGovernance/samples/scripts/agentManagement.sh -o agentManagement.shor
wget https://raw.githubusercontent.com/oracle/docker-images/main/OracleIdentityGovernance/samples/scripts/agentManagement.sh -
Install the agent.
sh agentManagement.sh --volume <path to agent package volume directory> --agentpackage <path to agent package> --installFor example:
sh agentManagement.sh --volume /home/opc/agent_vol_db --agentpackage /home/opc/OracleDatabase_AG.zip --install
Task 2.5: Start and Verify the agent
-
Start the agent.
sh agentManagement.sh --volume <path to agent package volume directory> --startFor example:
sh agentManagement.sh --volume /home/opc/agent_vol_db --startYou will see the response Starting Agent and Starting new container.
-
Verify the agent.
sh agentManagement.sh --volume <path to agent package volume directory> --statusFor example:
sh agentManagement.sh --volume /home/opc/agent_vol_db --status
The agent should be running and the integration status should display Success for Validate, Lookup Data Load and Full Data Load operations.
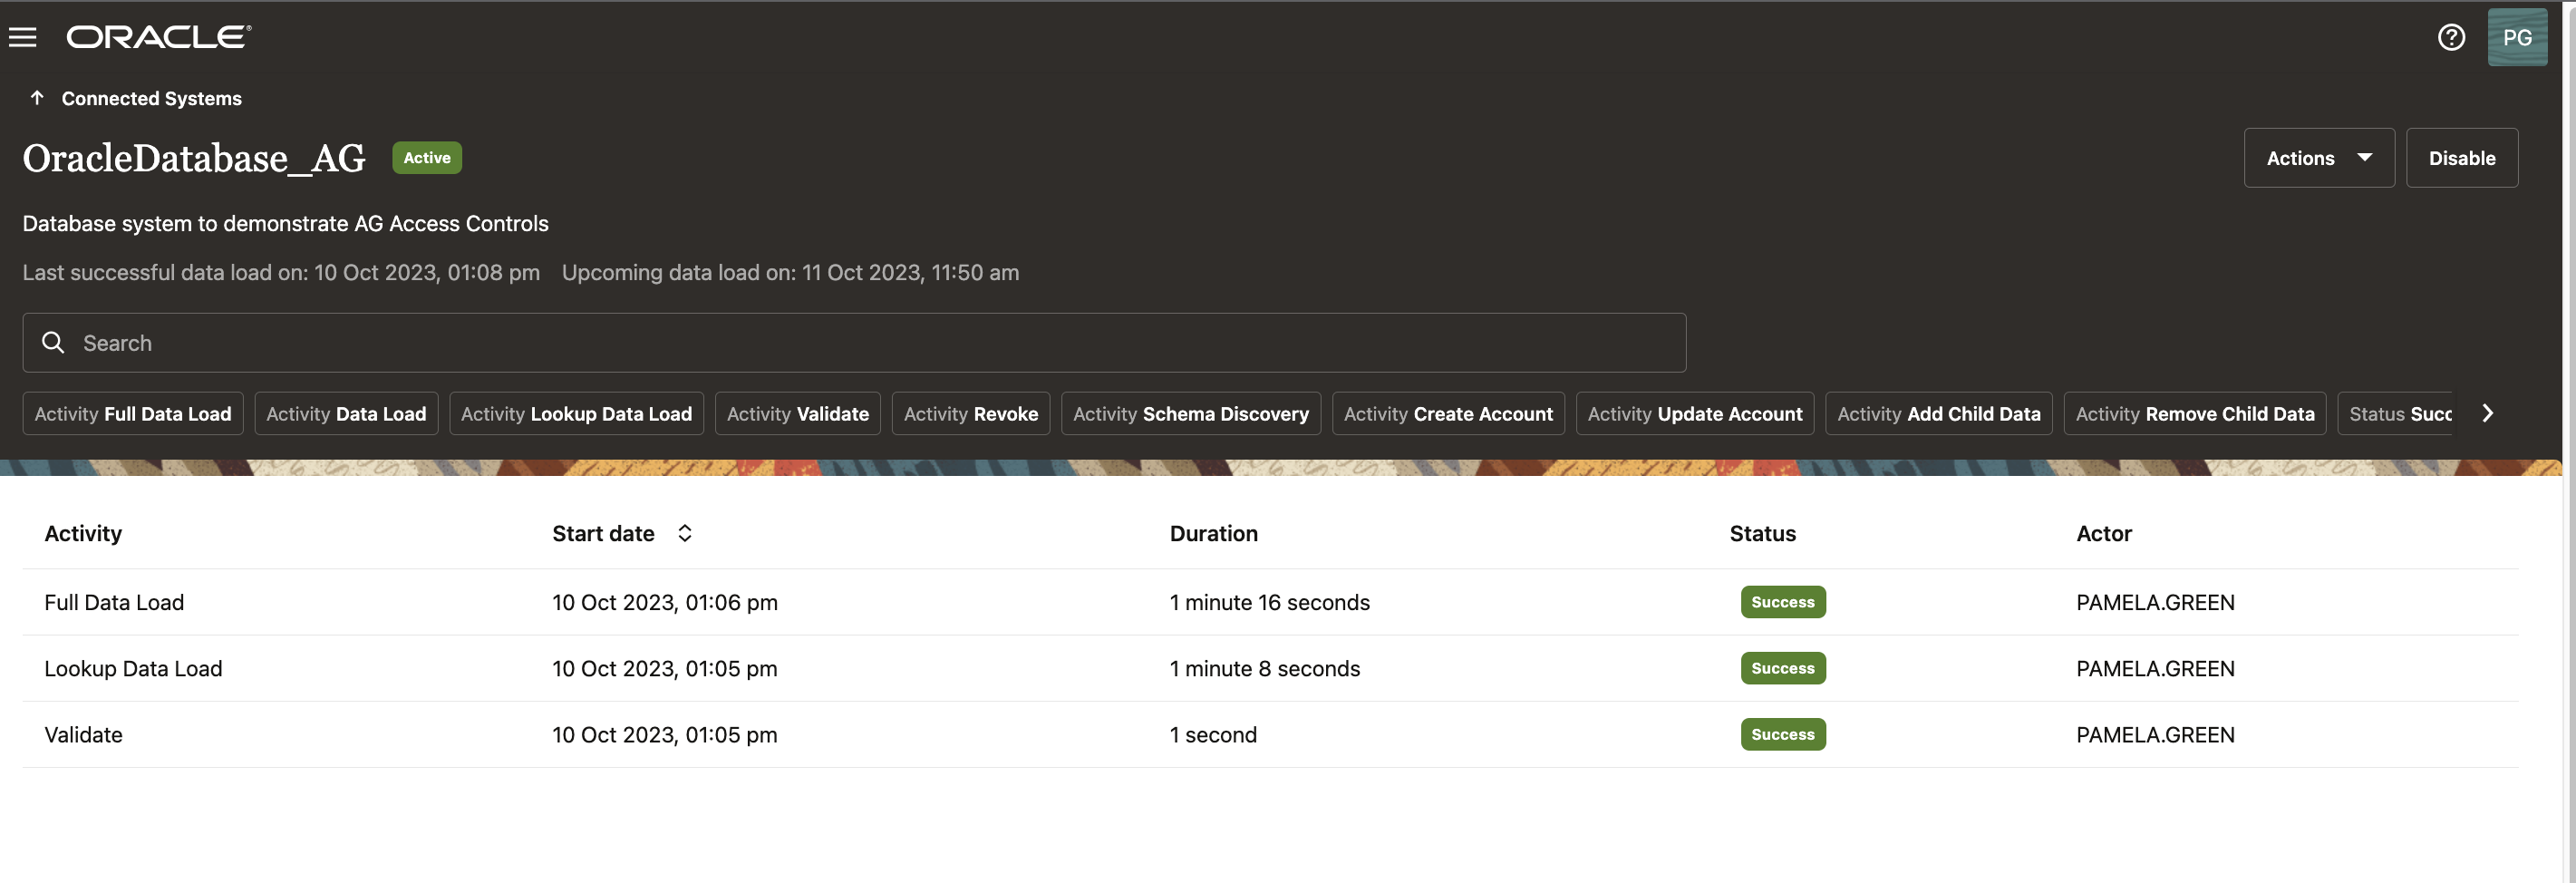
You can verify the integration status from the Access Governance Console, see Oracle Access Governance product documentation.
Next Steps
Once you complete the above steps, you can use Access Governance to manage users and their roles and privileges in the database. You can define policies in AG to automate user provisioning as well as create manual requests and incorporate approval workflows for those requests. You can govern who has access to what and define access review campaigns to regularly review users access and take remediation actions, if deemed appropriate.
Acknowledgments
- Author - Anuj Tripathi (NA Cloud & Tech Platform Specialist - Identity & Access)
More Learning Resources
Explore other labs on docs.oracle.com/learn or access more free learning content on the Oracle Learning YouTube channel. Additionally, visit education.oracle.com/learning-explorer to become an Oracle Learning Explorer.
For product documentation, visit Oracle Help Center.
Integrate Oracle Access Governance with Oracle Database
F88124-01
October 2023
Copyright © 2023, Oracle and/or its affiliates.