25 Installing, Upgrading, and Removing ADF Desktop Integration
You can install ADF Desktop Integration by downloading the installer file from the Fusion web application.
How to Install ADF Desktop Integration on Your System
Install ADF Desktop Integration by downloading the installer from the Fusion web application.
The URL has the following format:
http://<hostname>:<portnumber>/<context-root>/adfdiRemoteServlet?adfdi-installer-current-userAssume, a system administrator at your company has deployed the Summit sample application for ADF Desktop Integration to an application server named acme-corp-intranet using port 7101. In this scenario, you enter the following URL in your web browser to download the installer file:
http://acme-corp-intranet:7101/summit/adfdiRemoteServlet?adfdi-installer-current-userIf you cannot locate the URL, ask your system administrator.
This Oracle add-in for Microsoft Excel relies on a number of Microsoft technologies. These Microsoft technologies are subject to Microsoft's privacy policies and other Microsoft terms. By installing and using this add-in, you are agreeing to those policies and terms and this add-in's direct or indirect usage of these technologies. See also the Microsoft Privacy Statement.
If any required software is missing, the installation terminates without installing the add-in. Refer to Required Oracle ADF Modules and Third-Party Software for details including information on how to check for and install required components.
To install ADF Desktop Integration:
How to Remove ADF Desktop Integration
Use the Microsoft Windows Control Panel to remove ADF Desktop Integration from the system.
To remove the ADF Desktop Integration add-in:
- From the Windows Start menu, choose Settings and then click Apps.
- From the Apps & features page, select Oracle ADF Desktop Integration Add-in for Excel from the app list and click Uninstall.
Note:
The specific steps may vary depending on the version of Windows used. Please refer to the Windows documentation for more details.How to Upgrade ADF Desktop Integration On a Local System
When you establish a connection with the Fusion web application from the runtime integrated Excel workbook, ADF Desktop Integration verifies whether a new version of the add-in is available on the server. If a new version is available, a message appears asking you to upgrade. You can skip this upgrade for the current session and choose to be reminded at a later time that you select from the Remind Me Later dropdown list (for example, Next Week).
Note:
Using the newest version available from the server is highly recommended to avoid unexpected behavior or errors in integrated Excel workbooks.
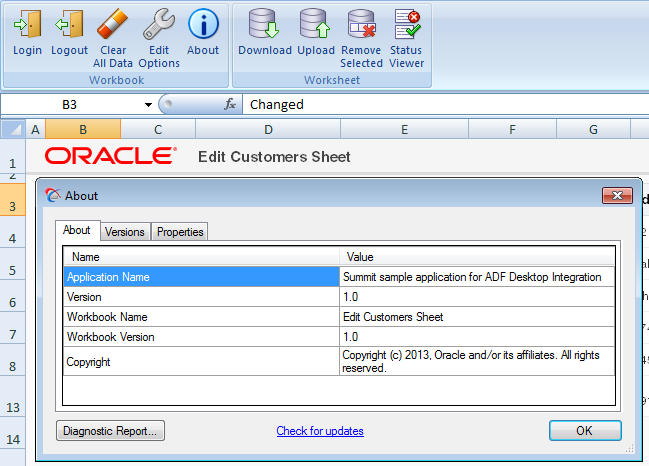
You can check for a newer version of the add-in at any time. To do this, establish a session with the Fusion web application and then click the Check for updates link in the About window of the integrated Excel workbook, as shown in Figure 25-1.
Figure 25-1 Check for Updates Link

For information about the upgrade process, see Verifying the Version of the ADF Desktop Integration Add-in.