5 Setting Your Personal Preferences
Your personal preferences provide easy configuration settings for tailoring WebCenter Portal to your particular working style.
Personal preferences include settings for your preferred display language, your preferred look and feel. your WebCenter Portal password, and more. Additionally, WebCenter Portal preferences provide an accessibility setting to optimize the application user interface for use with a screen reader, such as JAWS. Preferences settings are a user-level customization that affect only your view of WebCenter Portal.
Permissions:
The tasks described in this chapter are available to any WebCenter Portal user.
See Also:
Preferences associated with specific areas of WebCenter Portal are discussed in the chapters that cover each area.
For information about Messaging, Subscription, and Notifications preferences, see:
For information about People Connections preferences, see:
For information about Instant Messaging and Presence preferences, see Identifying Your Preferred Instant Messaging Provider.
For information about Search preferences, see Setting Individual Preferences for Search Results.
For information about Mail preferences, see Selecting Your Preferred Mail Connection.
Topics:
Accessing the Preferences Pages
To access the pages of your personal preferences:
-
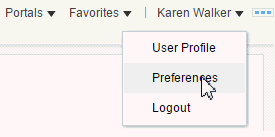
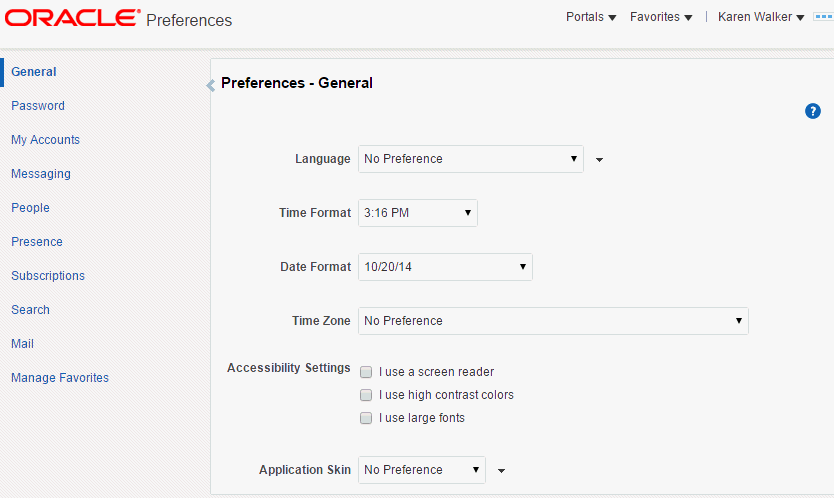
From your user menu in the menu bar, select Preferences (Figure 5-1) to open Preferences on the General page (Figure 5-2).
Choosing Your Preferred Display Language
The display language controls the language for user interface (UI) elements in your browser. UI elements include button and field labels, application links, screen text, and so on. The display language also provides options for identifying the current locale, which determines symbols, such as monetary symbols, and reading direction for UI text.
To set a display language:
-
From your user menu, select Preferences.
-
On the General page, from the Language drop-down list, select your preferred display language locale.
Alternatively, select No Preference to accept the application-level default set by your system administrator.
Your change is applied immediately, and the page refreshes in the selected language.
Note:
You can also set a display language on the Welcome page before you log in. Select a language in the language switcher.
Figure 5-3 Language Switcher on Welcome Page
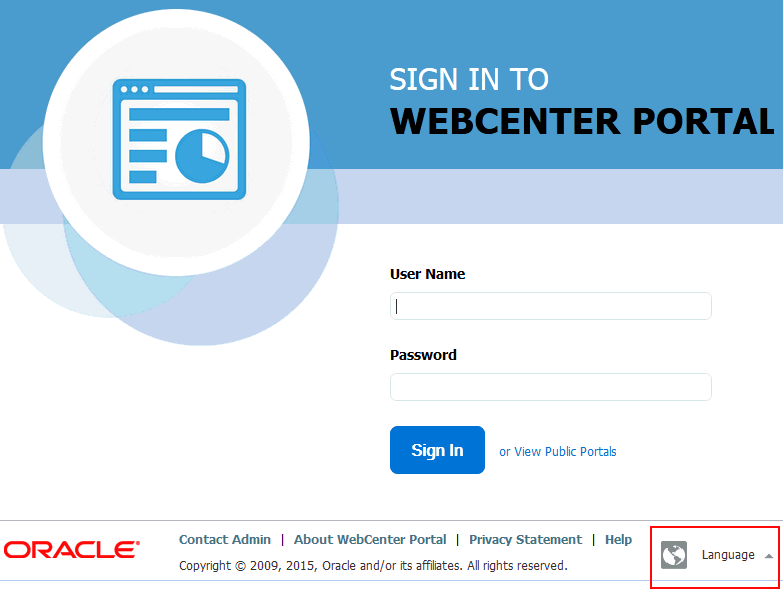
Description of "Figure 5-3 Language Switcher on Welcome Page"
Setting Date and Time Preferences
Use date and time preferences to specify your preferred date and time formats and your current locale's time zone.
Note:
Some content may be developed with an intrinsic time display format. In such cases, this content is not influenced by your date and time format selections.
To set your preferred time format, date format, and time zone:
-
From your user menu in the menu bar, select Preferences.
-
On the General page, set your date and time preferences as shown in the following table.
Table 5-1 Date and Time Preference Settings
Preference Description Time Format
Select a display default for time information in WebCenter Portal. This setting controls the format for showing time for the services that receive time data from WebCenter Portal preferences. (Some services provide their own time format defaults.)
Note: The available time formats depend on the locale selected in the Language list or by your browser locale. For example, if you select
English-United Kingdom [en-GB], the AM/PM is not included in the time format.-
No Preference—To display the default Time Format established by your system administrator
-
H:M AM/PM—To display hour, minutes, and AM or PM, such as
4:47 PM -
H:M:S AM/PM—To display hour, minutes, seconds, and AM or PM, such as
4:47:52 PM -
H:M:S AM/PM Time Zone—To display hour, minutes, seconds, AM or PM, and the abbreviation of the specified time zone, such as
4:47:52 PM PDT -
H:M:S o'clock Time Zone—(Not available for all locales.) To display hour, minutes, seconds, "o'clock", and the abbreviation of the specified time zone, such as
4:47:52 o'clock PDT
Date Format
Select a default format for date information in WebCenter Portal. This setting controls format for showing dates for the services that receive date data from WebCenter Portal preferences. (Some services provide their own date format defaults.)
Note: The available date formats depend on the locale selected in the Language list or by your browser locale. For example, if you select
English-United Kingdom [en-GB], the dates are listed in day, month, year order.-
No Preference—To use the default date format set by your system administrator
-
M/D/YY—To use a number format, such as
4/21/09 -
MON D, YYYY—To use an abbreviation format and the full year, such as
Aug 21, 2017 -
MONTH D, YYYY—To display the full month name and the full year, such as
Aug 21, 2017 -
DAY, MONTH D, YYYY—To display the full month name, the full year, and include the day of the week, such as
Tuesday, August 21, 2017
Time Zone
Select a time zone default. This setting helps to determine the time to show for time-stamped objects, such as uploaded and modified documents.
Alternatively select No Preference to accept the application-level default set by your system administrator.
-
Setting Your Accessibility Options for WebCenter Portal
Use accessibility options to optimize the application user interface (UI) for use with screen readers; to enable support of high-contrast colors; and to enable support for large fonts.
This section includes the following topics:
About Application Accessibility Options
WebCenter Portal Cloud accessibility options appear on the General panel of the Preferences page. Accessibility options assist visually and non-visually impaired users in navigating the application user interface.
The next topic, Applying Accessibility Options, describes how to apply WebCenter Portal Cloud accessibility options.
Note:
The color contrast of disabled actions—which are gray—against a white screen may be difficult to discern for some users. Because disabled actions are not selectable, this issue does not affect the use of WebCenter Portal.
Applying Accessibility Options
To apply accessibility options to the application UI:
-
From your user menu in the menu bar, select Preferences.
-
On the General page, select your preferred Accessibility Settings:
-
I use a screen reader—Specifically for visually impaired users, enables the use of JAWS, the screen reader software.
-
I use high contrast colors—Makes the WebCenter Portal user interface compatible with operating systems or browsers that have high-contrast features enabled. For example, WebCenter Portal changes its use of background images and CSS styles in high-contrast mode to prevent the loss of visual information.
Note:
High-contrast mode is more beneficial if used in conjunction with your browser's or operating system's high-contrast mode. Also, some users might find it beneficial to use large-font mode along with high-contrast mode.
The color contrast of disabled actions—which are gray—against a white screen may be difficult to discern for some users. Because disabled actions are not selectable, this issue does not affect the use of WebCenter Portal.
-
I use large fonts—Provides browser-zoom-friendly content. In default mode, most text and many containers have a fixed font size to provide a consistent and defined look. In large-font mode, text and containers are more scalable. This allows WebCenter Portal to be compatible with browsers that are set to larger font sizes and to work with browser-zoom capabilities.
Note:
If you are not using large-font mode or browser-zoom capabilities, you should disable large-font mode. Also, some users might find it beneficial to use high-contrast mode along with the large-font mode.
-
Changing the Look and Feel of Your View
Use application skins to change the look and feel of your view of the Home portal. Application skins specify the application background color, screen fonts, and, with some skins, the shapes and images used for application buttons and icons. The skin you select through Preferences affects only the look and feel of your view of the Home portal. No other users' views and no other areas of the application are affected.
To change the Home portal skin in your view:
-
From your user menu in the menu bar, select Preferences (Figure 5-1).
-
On the General page, select your preferred Application Skin:
-
No Preference—To defer to the application's configured skin setting
-
Skin_Name—To select a predefined application skin from the list of skins available to you
Note:
The available skins are determined by your system administrator.
Your change is applied immediately. Go to the Home portal to see the selected skin.
-
Changing Your Application Password
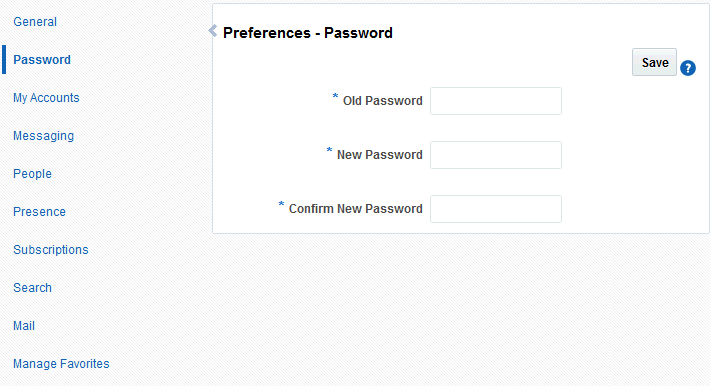
If your system administrator has enabled the capability, you can change your WebCenter Portal password.
To change your WebCenter Portal password:
Providing Login Information for External Applications
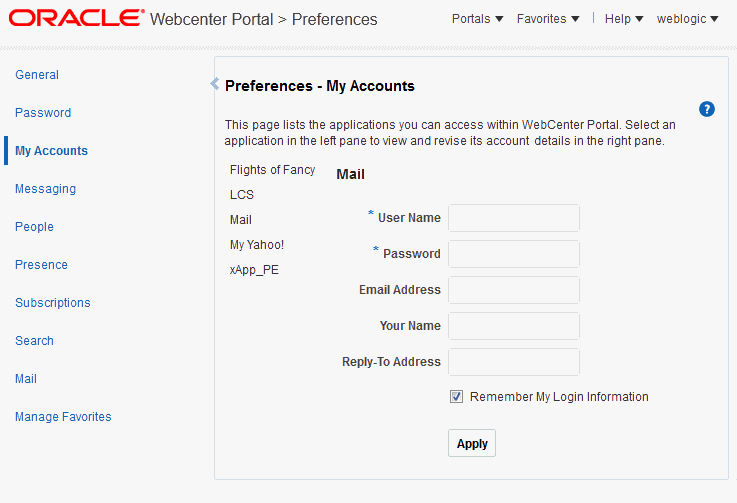
The My Accounts page enables you to provide login credentials for all external applications that are configured to be accessed through WebCenter Portal. After you have provided your credentials, every time you access an external application within WebCenter Portal, the login credentials are provided automatically.
Note:
If you change the login credentials for an application, you must enter them again on the My Accounts page.
To provide login credentials for external applications:
