10 Configuring Search in WebCenter Portal
Configure search to index and search objects in WebCenter Portal.
Note: Beginning with Release 12c (12.2.1.4.0), Oracle WebCenter Portal has deprecated the support for Oracle SES. If you have upgraded from a prior release, your upgraded instance might be configured to use Oracle SES. In this case, you must configure WebCenter Portal to use Elasticsearch or OCI Search Service with OpenSearch to index and search objects.
Permissions: To perform the tasks in this chapter, you must be granted the WebLogic Server
Adminrole through the Oracle WebLogic Server Administration Console and theAdministratorrole granted through WebCenter Portal Administration.
For more information about roles and permissions, see Understanding Administrative Operations, Roles, and Tools.
Topics:
-
Customizing Search Settings in WebCenter Portal Administration
-
Modifying the Default Connection Settings for Document Content Crawl Plugin in Elasticsearch Server
Parent topic:Administering Tools and Services
Creating a Crawl Admin User in WebCenter Portal
You can designate an existing user as crawl admin or create a crawl admin user (for example, mycrawladmin) in WebCenter Portal and in your back-end identity management server to search using Elasticsearch or OCI Search Service with OpenSearch. You must create a crawl admin user only once.
Note: See your identity management system documentation for information on creating users.
The following example uses Oracle Directory Services Manager to create the mycrawladmin user:
-
On the Data Browser tab, navigate to the target
cnand click Create.This example navigates to
"dc=com,dc=oracle,dc=us,cn=Users". -
In the Add Object Class dialog, select the appropriate object class, and click OK.

-
Find the distinguished name (DN) path, and click Select.
This example selects
"dc=com,dc=oracle,dc=us,cn=Users".
-
In the Create New Entry dialog, enter properties, and click Next.

-
When you see that the new entry was created successfully, click Finish.

Integrating with Elasticsearch
Configure Elasticsearch to index and search objects in WebCenter Portal.
Topics:
Understanding Search with Elasticsearch
Elasticsearch is a highly scalable search engine. It allows you to store, search, and analyze big volumes of data quickly and provides a distributed, multitenant-capable full-text search engine with an HTTP web interface and schema-free JSON documents.
Advantages of Elasticsearch
-
Elasticsearch provides full-text search capabilities as it is built on Lucene.
-
Elasticsearch is document-oriented. It stores data as structured JSON documents and indexes all fields by default, with a higher performance result.
-
Elasticsearch is API driven; actions can be performed using a simple Restful API.
-
Elasticsearch retrieves search results fast because it searches an index instead of searching the text directly.
You can configure Elasticsearch to search the following resources in WebCenter Portal:
-
Documents, including wikis and blogs
-
Portals, page metadata, page content (contents of HTML, Text, and Styled Text components), lists, and people resources
-
Announcements and Discussions (available only for portals upgraded from prior releases)
Prerequisites for Configuring Elasticsearch
Ensure the following requirements:
-
Oracle WebCenter Portal is installed.
-
Optional. If you choose to use WebCenter Content for search, ensure that WebCenter Content is configured and all required components are enabled. See Managing Connections to Oracle WebCenter Content Server.
Configuration Roadmap for Elasticsearch in WebCenter Portal
Table 10-1 Roadmap - Setting Up Elasticsearch in WebCenter Portal
| Actor | Task |
|---|---|
|
Administrator |
|
|
Administrator |
|
|
Administrator |
|
|
Administrator |
Configuring WebCenter Portal for Search |
| Administrator | Configuring Search Crawlers |
|
Administrator |
(Optional) Customizing Search Settings in WebCenter Portal Administration |
|
Administrator |
(Optional) Modifying Search Global Attributes |
|
Administrator |
(Optional) Configuring Search Custom Attributes |
| Administrator |
(Optional) Creating Custom Facets |
Installing Elasticsearch and Plugins
Elasticsearch can be installed as either single server set up or a cluster set up of minimum three servers.
The following topics describe how to set up a single server, a cluster, and use Oracle HTTP Server to do the load balancing:
- Setting Up Single Server
- Setting Up Cluster and Load Balancing Using OHS
- Securing Elasticsearch Using HTTPS
Setting Up Single Server
To install a single server setup, first you need to download the Elasticsearch 7.17.x or Elasticsearch 8.19.x binaries from Elasticsearch Releases. Then, follow the steps given below:
-
Set the following environment variables:
JAVA_HOME- Set the value to the Java home directory.PATH- Update path to$JAVA_HOME/bin.
-
Edit the
ORACLE_HOME/wcportal/es/installES.propertiesfile and specify the values for the properties.# A valid ORACLE_HOME. ORACLE_HOME= # # A valid Admin Server host which contains WebCenter Portal. ADMIN_SERVER_HOST_NAME= # # Admin server port. ADMIN_SERVER_PORT= # # A valid Weblogic administrator user name. WLS_ADMIN_USER= # # A valid user name configured with crawler privileges. SEARCH_APP_USER= # # Fusion Middleware configuration directory. This will typically be $WEBCENTER_PORTAL_DOMAIN_HOME/config/fmwconfig. # If $WEBCENTER_PORTAL_DOMAIN_HOME is not accessible from this host, copy the directory $WEBCENTER_PORTAL_DOMAIN_HOME/config/fmwconfig # from WebCenter Portal domain host to this host and provide that location. WCP_FMW_CONFIG_LOCATION= # # Name of the Elasticsearch cluster. Default value is CURRENT_HOST_NAME and it will be replaced with current hostname. This default is appropriate for single-host environment only. # If this value is changed, make sure that you don't reuse the same cluster names in different environments. Otherwise, you might end up with nodes joining the wrong cluster. # Cluster name should be environment-specific and unique across your enterprise. ELASTIC_SEARCH_CLUSTER_NAME=CURRENT_HOST_NAME # # Name of the Elasticsearch node. Default value is CURRENT_HOST_NAME and it will be replaced with current hostname. This default is appropriate for single-host environment only. # If this value is changed, make sure that you don't reuse the same node name within the Elasticsearch cluster. ELASTIC_SEARCH_NODE_NAME=CURRENT_HOST_NAME # # HTTP port of Elasticsearch server. Default value is 9200. ELASTIC_SEARCH_PORT=9200 # # Elasticsearch network host. Default value is 0.0.0.0 and it means Elasticsearch server will listen on all network interfaces. # If you have a requirement to limit traffic on multi-homed hosts with multiple network interfaces, set to a specific hostname, IP address, or network interface name. # If network interface name is to be specified, it should be specified as: _[networkInterface]_, for example _eth0_. ELASTIC_SEARCH_NETWORK_HOST=0.0.0.0 # # Elasticsearch home folder's parent directory. Configure the folder path where the esHome folder should be created. # Default value is DEFAULT and it means esHome will be created in $ORACLE_HOME folder's parent directory. # For example, if $ORACLE_HOME is /u01/oracle/fmw, then esHome will be /u01/oracle/esHome. ELASTIC_SEARCH_HOME_DIR_PARENT=DEFAULT # # Transport port of Elasticsearch server. Default value is 9300. # This configuration is used for internal communication between nodes within the cluster. ELASTIC_SEARCH_TRANSPORT_PORT=9300 # # An absolute path of Elasticsearch installer file. The installer can be downloaded from- https://www.elastic.co/downloads/past-releases#elasticsearch # The installer configured should be as per the OS where Elasticsearch server is being installed (i.e. .tar.gz for Linux and .zip for Windows). # For eg. for Elasticsearch 7.17.0 version this would be elasticsearch-7.17.0-linux-x86_64.tar.gz on Linux and elasticsearch-7.17.0-windows-x86_64.zip on Windows. ELASTIC_SEARCH_INSTALLER_LOCATION= # # Elasticsearch version. The value should be corresponding to the installer file which was downloaded. ELASTIC_SEARCH_VERSION= # ########################################################################################################################################################################## # # NOTE: The following properties are required/applicable only if Elasticsearch is being installed in windows. # ########################################################################################################################################################################## # # An absolute path of the directory where curl for Windows has been installed. The curl for Windows can be downloaded from- https://curl.se/download.html WINDOWS_CURL_HOME= # ########################################################################################################################################################################## # # NOTE: The following properties are required/applicable only if setting up a cluster. # ########################################################################################################################################################################## # # Elasticsearch cluster discovery host list. All the hosts that will be part of the cluster should be configured in this list. # Each host should be declared by the appropriate fully-qualified hostname. # Each host should be formatted in double-quotes separated with a comma and space. The list should be wrapped in square-brackets. For example, ["host1.example.com", "host2.example.com"]. ELASTIC_SEARCH_CLUSTER_HOST_LIST= # # Elasticsearch cluster discovery node list. All the nodes that will be part of the cluster should be configured in this list. # Each node should be declared by the corresponding value of ELASTIC_SEARCH_NODE_NAME specified during the installation. # Each node should be formatted in double-quotes separated with a comma and space. The list should be wrapped in square-brackets. For example, ["node-1", "node-2"]. ELASTIC_SEARCH_CLUSTER_NODE_LIST= # # The name of the certificate which will be generated and used for the secure communication between the nodes of the cluster. # The certificate generated is of PKCS#12 format. Hence the certificate extension should be .p12 only. ELASTIC_SEARCH_CERTIFICATE_NAME= # # The primary host of Elasticsearch cluster. This should be one of the hosts in ELASTIC_SEARCH_CLUSTER_HOST_LIST. # Only during installation on this host, the certificate specified in ELASTIC_SEARCH_CERTIFICATE_NAME and user specified in SEARCH_APP_USER are created. # The configured value should be fully-qualified hostname. ELASTIC_SEARCH_PRIMARY_HOST= -
Enter the following command to install Elasticsearch and plugins:
ORACLE_HOME/oracle_common/common/bin/wlst.sh
ORACLE_HOME/wcportal/es/installES.py
ORACLE_HOME/wcportal/es/installES.properties
The following is the sample output for the successful installation on Linux:
...

-> Installing file:////tmp/webcenter-search-es-content-crawl-plugin.zip
-> Downloading file:////tmp/webcenter-search-es-content-crawl-plugin.zip
[=================================================] 100%
-> Installed orcl-wcp-es-content-crawl-plugin
-> Please restart Elasticsearch to activate any plugins installed
Creating the user crawladmin in Elasticsearch server...

...

The user crawladmin is created successfully.
Executing /home/Oracle/product/esHome/startElasticsearch.sh
Elasticsearch server installation is complete. Elasticsearch server home is at: /home/Oracle/product/esHome
Note: Plugins are not installed for Elasticsearch 8.19.x
-
If Elasticsearch is being installed on Windows, execute the following command to secure the Elasticsearch server:
ORACLE_HOME/wcportal/es/secureESNode.cmd
ORACLE_HOME/wcportal/es/installES.properties
The following is the sample output for the successful installation:
... "**************** Creating the user crawladmin in Elasticsearch server... ****************" Enter password for user 'crawladmin': ******** "Please input the admin user password when prompted for host password below." Enter host password for user 'elastic': "Create user crawladmin is successful." "**************** Stopping Elasticsearch server ****************" "**************** Starting Elasticsearch server, please wait... ****************" "************ Elasticsearch server setup completed successfully. Elasticsearch server home is at: D:\Oracle\Middleware\esHome ************" -
After the successful installation, verify that the Elasticsearch is configured properly.
-
Access the URL
http://host:9200using the Mozilla Firefox browser.A basic authentication dialog is displayed to enter the user name and password.
-
Enter your crawl user name and password that you created in WebCenter Portal. See Creating a Crawl Admin User in WebCenter Portal.
Successful login confirms that Elasticsearch Server is configured properly.
Note: If you are unable to login or if Elasticsearch installation fails, check the logs in the following location:
/home/Oracle/product/esHome/esNode/logs
-
Setting Up Cluster and Load Balancing Using OHS
In order to use the Elasticsearch cluster with WebCenter Portal, first you need to setup up the Elasticsearch cluster (there should be a minimum of three Elasticsearch servers) and then you can use Oracle HTTP Server (OHS) to do the load balancing in the Elasticsearch cluster. In the case of a cluster setup, some system settings of the host should be modified before installing the Elasticsearch server.
Modify System Settings
By default, the Elasticsearch server binds to loopback addresses for HTTP and transport (internal) communication. To join a cluster, an Elasticsearch server must be reachable via transport communication and bind transport to a non-loopback address. When bound to a non-loopback address, the Elasticsearch server enforces the bootstrap checks. Hence to succeed, the following system settings must be modified as a root user:
-
The maximum number of open file handles for the
<install-user>should be at least 65,536. The current value for the logged-in user is obtained using the following command:ulimit -n. To increase it to the desired value, add the following line to the/etc/security/limits.conffile:<install-user> - nofile 65536Close and save the file. For the updated settings to take effect, the
<install-user>should log out and log in again. -
The maximum number of threads for the
<install-user>should be at least 4096. The current value for the logged-in user can be obtained using the command:ulimit -u.To increase it to the desired value, add the following line to the
/etc/security/limits.conffile:<install-user> - nproc 4096Close and save the file. For the updated settings to take effect, the
<install-user>should log out and log in again. -
The maximum virtual memory areas for the
<install-user>should be at least 262144. The current value can be obtained using the command:/sbin/sysctl vm.max_map_count.To increase it to the desired value, add (or update) the following in the
/etc/sysctl.conffile:vm.max_map_count=262144Close and save the file. For the updated settings to take effect, run the following command:
/sbin/sysctl -pas arootuser.
Install Elasticsearch on Primary Host
Once the system settings are modified, Elasticsearch server should be installed with cluster specific configurations. Before proceeding with the installation, you need to identify the primary host of the cluster. The primary host is nothing but one of the hosts of the cluster where Elasticsearch server should be installed first. The procedure to install Elasticsearch server on the primary host is as follows:
Once the system settings have been modified, the Elasticsearch server should be installed with some specific configurations as mentioned below:
- Edit the
ORACLE_HOME/wcportal/es/installES.propertiesfile and specify the required values. For cluster setup, the following property values should be specified and values should be same for each node of the cluster:
Table 10-2 Property Values
| Property | Value |
|---|---|
ELASTIC_SEARCH_CLUSTER_NAME |
<a unique value to identify the cluster> |
ELASTIC_SEARCH_CLUSTER_HOST_LIST |
["host1.example.com", "host2.example.com", "host3.example.com"] |
ELASTIC_SEARCH_CLUSTER_NODE_LIST |
["node-1", "node-2", "node-3"] |
ELASTIC_SEARCH_CERTIFICATE_NAME |
<Name of the certificate> |
ELASTIC_SEARCH_PRIMARY_HOST |
<Fully qualified name of the primary host> |
where, `host[n].example.com` is the fully-qualified hostname and `node[n]` is the value of `ELASTIC_SEARCH_NODE_NAME` corresponding to `host[n].example.com`.
-
Enter the following command to install Elasticsearch and plugins:
ORACLE_HOME/oracle_common/common/bin/wlst.sh
ORACLE_HOME/wcportal/es/installES.py
ORACLE_HOME/wcportal/es/installES.properties
The following is the sample output for the successful installation on Linux:
... -> Installing file:////tmp/webcenter-search-es-content-crawl-plugin.zip -> Downloading file:////tmp/webcenter-search-es-content-crawl-plugin.zip [=================================================] 100% -> Installed orcl-wcp-es-content-crawl-plugin -> Please restart Elasticsearch to activate any plugins installed Generating node certificate for secured communication... Node certificate generated and password added to elasticsearch keystore successfully. Creating the user crawladmin in Elasticsearch server... ... The user crawladmin is created successfully. Executing /home/Oracle/product/esHome/startElasticsearch.sh Elasticsearch server installation is complete. Elasticsearch server home is at: /home/Oracle/product/esHome -
If Elasticsearch is being installed on Windows, execute the following command to secure the Elasticsearch server:
ORACLE_HOME/wcportal/es/secureESNode.cmd ORACLE_HOME/wcportal/es/installES.properties -
After the successful installation, the Elasticsearch server will be up and running. Verify that the Elasticsearch server is configured properly.
Install Elasticsearch on Non-Primary Host
Once the installation is successful on the primary host of the cluster, the Elasticsearch server can be installed on other hosts of the cluster (that is non-primary hosts). The procedure to install Elasticsearch server on the non-primary host is as follows:
- Edit the
ORACLE_HOME/wcportal/es/installES.propertiesfile and specify the required values. For cluster setup, the following property values should be specified and values should be same for each node of the cluster:
Table 10-3 Property Values
| Property | Value |
|---|---|
ELASTIC_SEARCH_CLUSTER_NAME |
<a unique value to identify the cluster> |
ELASTIC_SEARCH_CLUSTER_HOST_LIST |
["host1.example.com", "host2.example.com", "host3.example.com"] |
ELASTIC_SEARCH_CLUSTER_NODE_LIST |
["node-1", "node-2", "node-3"] |
ELASTIC_SEARCH_CERTIFICATE_NAME |
<Name of the certificate> |
ELASTIC_SEARCH_PRIMARY_HOST |
<Fully qualified name of the primary host> |
-
Enter the following command to install Elasticsearch and plugins:
ORACLE_HOME/oracle_common/common/bin/wlst.sh
ORACLE_HOME/wcportal/es/installES.py
ORACLE_HOME/wcportal/es/installES.properties
After the successful installation, the Elasticsearch server is not started. The following is the sample output for the successful installation:
... -> Installing file:////tmp/webcenter-search-es-content-crawl-plugin.zip -> Downloading file:////tmp/webcenter-search-es-content-crawl-plugin.zip [=================================================] 100% -> Installed orcl-wcp-es-content-crawl-plugin -> Please restart Elasticsearch to activate any plugins installed ++++++++++++++++++++++++++++++++++++++++++++++++++++++++++++++++++++++++++++++++++++++++++++++++++++++++++++++++++++ NOTE: Elasticsearch server installation is not complete. Please copy the required files from the primary host as mentioned in the documentation and start the server to complete the installation. ++++++++++++++++++++++++++++++++++++++++++++++++++++++++++++++++++++++++++++++++++++++++++++++++++++++++++++++++++++ -
If Elasticsearch is being installed on Windows, execute the following command to secure the Elasticsearch server:
ORACLE_HOME/wcportal/es/secureESNode.cmd ORACLE_HOME/wcportal/es/installES.properties - Copy the node certificate (that is the file specified for
ELASTIC_SEARCH_CERTIFICATE_NAMEproperty) and theelasticsearch.keystorefile from theES_HOME/esNode/configfolder of the primary host toES_HOME/esNode/configfolder of the non-primary host. -
Start the Elasticsearch server by executing the following command:
# applicable if installing on Linux ES_HOME/startElasticsearch.sh # applicable if installing on Windows ES_HOME/startElasticsearch.cmd - Once the Elasticsearch server is up and running, verify that the Elasticsearch server is configured properly.
Validating Cluster Set Up
To validate the cluster set up, access the URL http://host1.example.com:9200 using the Mozilla Firefox browser.
A basic authentication dialog is displayed to enter the user name and password. Enter your crawl user name and password that you created in WebCenter Portal. After successful login, access the URL http://host1.example.com:9200/_cluster/health. Check the response received and the number of nodes should be as shown below:
"number_of_nodes": 3This indicates that cluster is set up successfully consisting of three nodes.
Note: The above steps can be validated using any hostname which is part of the cluster.
Setting Up Load Balancing Using OHS
We can use Oracle HTTP Server (OHS) to do the load balancing in the Elasticsearch cluster. In order to do this, we need to make use of virtual host configuration of OHS. The virtual hosts in OHS can be configured either based on the server name or port number. The sample configuration for port based virtual host is as follows:
-
Create a file
wcp-search.confin themoduleconfdirectory (this should be in the directory that has the filehttpd.conf). The sample configuration for port based virtual host is as follows:<Location /> WLSRequest ON SetHandler weblogic-handler WebLogicCluster host1.example.com:9200,host2.example.com:9200,host3.example.com:9200 WLIOTimeoutSecs 30000 WLSocketTimeoutSecs 600 </Location>When we access OHS server using the configured port, the request will be redirected to one of the hosts mentioned in the WebLogicCluster configuration.
-
Restart the OHS.
Validating Load Balancing Set Up
To validate the load balancing set up, access the OHS URL configured above using the Mozilla Firefox browser.
A basic authentication dialog is displayed to enter the user name and password. Enter your crawl user name and password that you created in WebCenter Portal. After successful login, access the URL http://OHS-HOST:OHS-PORT/_cluster/health. Check the response received and the number of nodes should be as shown below:
"number_of_nodes": 3This indicates that load balancing using OHS is set up successfully for three nodes.
Securing Elasticsearch Using HTTPS
The Elasticsearch 7.x server can be secured using HTTPS so that the communication between the client and the Elasticsearch server happens over SSL. The following steps are required to configure:
-
Stop the Elasticsearch server.
-
Set the following environment variables:
ES_HOME- Set this to Elasticsearch Home directory.JAVA_HOME- Set this to the Java Home directory.PATH- Update to use$JAVA_HOME/bin.
-
On any single node, generate a certificate and private key for the nodes in the cluster. When prompted, provide a password for the certificate.
$ES_HOME/elasticsearch/bin/elasticsearch-certutil cert -s -out $ES_HOME/esNode/config/https-certificate.p12 --dns <DNS_name>Where
<DNS_name>is the comma-separated list of fully qualified hostnames of the nodes of the cluster. -
The password used above should be stored in the Elasticsearch Keystore, run the following commands to store the password:
$ES_HOME/elasticsearch/bin/elasticsearch-keystore add xpack.security.http.ssl.keystore.secure_password $ES_HOME/elasticsearch/bin/elasticsearch-keystore add xpack.security.http.ssl.truststore.secure_password -
Copy
$ES_HOME/esNode/config/https-certificate.p12and$ES_HOME/esNode/config/elasticsearch.keystorefiles to$ES_HOME/esNode/configdirectory of every node in the cluster. -
On each node of the cluster, add the following configuration to the
$ES_HOME/esNode/config/elasticsearch.ymlfile:xpack.security.http.ssl.enabled: true xpack.security.http.ssl.verification_mode: certificate xpack.security.http.ssl.keystore.path: https-certificate.p12 xpack.security.http.ssl.truststore.path: https-certificate.p12 -
Start the Elasticsearch server.
Adding Certificate to WebCenter Portal Keystore
The Elasticsearch server certificate must be added to WebCenter Portal Keystore to establish the trust between the client and server.
Download Certificate from Elasticsearch Server
The following steps can be used to obtain the certificate from the Elasticsearch server:
-
Open the Firefox browser and connect to the Elasticsearch server with the following command:
https://host_name:9200where
host_nameis the name of the Elasticsearch server. - Accept the security exception and continue. Provide the login credentials when prompted.
- Click the Lock icon in the URL field and navigate to Connection not secure and then More Information.
- In the popup window, click the View Certificate button.
- Click on the link PEM (cert) to download the certificate in the .PEM format.
Add the Certificate to WebCenter Portal Keystore
Once the certificate is downloaded, it should be imported to WebCenter Portal Keystore.
To import:
-
Execute the following command in WebCenter Portal server and enter the Keystore password when prompted:
keytool -importcert -alias es_cert -file /filepath/sslcertificate/es_certificate.pem -keystore <JDK_path>/jre/lib/security/cacerts -
Restart the Managed server.
Search Connection to Elasticsearch Server Running on HTTPS
If the search connection doesn’t exist, the search connection to the Elasticsearch server running on HTTPS can be created using the following command:
createSearchConnection(appName='webcenter', name='<conn_name>', url='https://<ES_host>:<ES_port>', indexAliasName='<index_alias>', appUser='<app_user>', appPassword='<app_user_password>')If the search connection already exists, it should be updated to use HTTPS and can be done using the following command:
setSearchConnection(appName='webcenter', name='<existing_conn_name>', indexAliasName='<existing_index_alias>', appUser='<app_user>', appPassword='<app_user_password>', useSSL=1)Integrating with OCI Search Service with OpenSearch
Configure OpenSearch to index and search objects in WebCenter Portal.
Topics:
-
Prerequisites for Configuring OCI Search Service with OpenSearch
-
Configuration Roadmap for OCI Search Service with OpenSearch in WebCenter Portal
Understanding OCI Search Service with OpenSearch
Oracle Cloud Infrastructure (OCI) Search Service with OpenSearch is an insight engine offered as an Oracle-managed service. Without any downtime, Oracle automates patching, updating, upgrading, backing up, and resizing the service. You can store, search, and analyze large volumes of data quickly and see results in near real-time.
OCI Search Service combines proven OpenSearch technology with the flexibility of OCI.
You can configure OCI Search Service with OpenSearch to search the following resources in WebCenter Portal:
-
Documents, including wikis and blogs.
-
Portals, page metadata, page content (contents of HTML, Text, and Styled Text components), lists, and people resources.
-
Announcements and discussions (available only for portals upgraded from prior releases).
Note: Oracle WebCenter Portal can be hosted and run on-premise, but it is always recommended to host WebCenter Portal on OCI for leveraging the integration with OCI OpenSearch in the most optimum way while running WebCenter Portal on Cloud.
Prerequisites for Configuring OCI Search Service with OpenSearch
Ensure the following requirements:
- Get OCI tenancy details.
-
Create the required service policies in the Oracle Cloud Console, tailoring them to your needs. For example, change any user to the desired group, and provide the path to the compartment if required.
Working policies:
Allow group <your_group> to manage opensearch-family in compartment opensearch Allow service opensearch to manage vcns in compartment opensearch Allow service opensearch to manage vnics in compartment opensearch Allow service opensearch to use subnets in compartment opensearch Allow service opensearch to use network-security-groups in compartment opensearch - Create a VCN with a public subnet and a private subnet.
- Simplified process:
- Open the Oracle Cloud Console navigation menu.
- Click Networking. and then click Virtual Cloud Networks.
- Click Start VCN Wizard, and then click Create VCN with Internet Connectivity.
- Custom process:
- Open the Oracle Cloud Console navigation menu.
- Click Networking. and then click Virtual Cloud Networks.
- Click Create VCN and provide your own desired details.
- Simplified process:
Configuration Roadmap for OCI Search Service with OpenSearch in WebCenter Portal
Table 10-4 Roadmap - Setting Up OCI Search Service with OpenSearch in WebCenter Portal
| Actor | Task |
|---|---|
|
Administrator |
|
|
Administrator |
|
|
Administrator |
|
|
Administrator |
|
|
Administrator |
Configuring WebCenter Portal for Search |
| Administrator | Configuring Search Crawlers |
|
Administrator |
(Optional) Customizing Search Settings in WebCenter Portal Administration |
|
Administrator |
(Optional) Modifying Search Global Attributes |
|
Administrator |
(Optional) Configuring Search Custom Attributes |
| Administrator |
(Optional) Creating Custom Facets |
Create an OpenSearch Instance in OCI
Task 1: Create an OCI Search Service cluster
-
Open the Oracle Cloud Console navigation menu. Click Databases, OCI Search Service, and then click Clusters. Then, click Create cluster. Choose the cluster name and compartment where you want to create the cluster.

- Click Next.
-
Configure security. The user name should be the same as the Crawl Admin User created above.

-
Choose the cluster sizing, and then click Next.

-
Select the VCN you created and then select the private subnet.

-
Click Next. After the cluster creation, in the OCI Search Service cluster details page, note the API endpoints and the IP addresses which you can alternatively use.

Task 2: Create security rules for accessing the OpenSearch instance
- Create a security list for the Open Search instance:
- Open the Oracle Cloud console navigation menu.
- Click Networking and then click Virtual Cloud Networks.
- Open the VCN where the WebCenter Portal instance was created.
- Select Security Lists from the list of resources.
- Click Create Security List.
- Provide a name and compartment for the security list. For example: Provide a name such as OpenSearch_Security_List and select the compartment where the WebCenter Portal instance is created.
- Add the following Ingress Rule:
- Stateless: Leave this deselected (as all rules must be statetful).
- Source Type: CIDR
- Source CIDR: 0.0.0.0/0
- IP Protocol: TCP
- Source Port Range: All
- Destination Port Range: 9200
- Add the new security list to the subnet used by the OpenSearch instance.
- Open the Oracle Cloud console navigation menu.
- Click Networking and then click Virtual Cloud Networks.
- Open the VCN where the WebCenter Portal instance was created.
- Select Subnets from the list of resources.
- Select the private subnet that was created by default with the VCN (the subnet name should be like “Private Subnet-<VNC name>”).
- Add the new OpenSearch_Security_List security list to the subnet.

Task 3: Note down the Private IP of the OpenSearch cluster
You can note down the Private IP of the cluster as shown in the figure below.
Task 4: Test the connection to OCI Search Service – OpenSearch endpoint
You can access https://<opensearch_private_ip>:9200 and enter the credentials specified above.
You should see a response as follows:
{
  "name" : "opensearch-master-0",
  "cluster_name" : "amaaaaaawyxhaxqayue3os5ai2uiezzbuf6urm3dllo43accuxse57ztsaeq",
  "cluster_uuid" : "FncN4SpaT_em28b8gjb4hg",
  "version" : {
    "distribution" : "opensearch",
    "number" : "2.11.0",
    "build_type" : "tar",
    "build_hash" : "unknown",
    "build_date" : "2024-01-09T20:29:23.162321021Z",
    "build_snapshot" : false,
    "lucene_version" : "9.7.0",
    "minimum_wire_compatibility_version" : "7.10.0",
    "minimum_index_compatibility_version" : "7.0.0"
  },
  "tagline" : "The OpenSearch Project: https://opensearch.org/"
}
Add Certificate to WebCenter Portal Keystore
The OpenSearch server certificate must be added to WebCenter Portal Keystore to establish the trust between the client and server.
Download the Certificate from the OCI OpenSearch Server
To obtain the certificate from the OCI OpenSearch server, complete the following steps:
-
Open the Firefox browser and connect to the OCI OpenSearch server with the following command:
https://host_name:9200where
host_nameis the name of the OCI OpenSearch server. - Accept the security exception and continue.
- Provide the log-in credentials when prompted.
- Click the Lock icon in the URL field and navigate to Connection not secure and then More Information. In the pop-up window, click the View Certificate button.
- Click the link PEM (cert) to download the certificate in the .PEM format.
Add the Certificate to the WebCenter Portal Keystore
Once the certificate is downloaded, it should be imported into WebCenter Portal Keystore. To import:
-
Execute the following command in WebCenter Portal server and enter the Keystore password when prompted:
keytool -importcert -alias opensearch_cert -file <path-to-PEM-certificate> -keystore <JDK_path>/jre/lib/security/cacerts -
Restart the Portal Managed server.
Disable Hostname Verification
To disable hostname verification:
- Log in to the WebLogic console.
- Click the Lock & Edit button.
- Select Servers from the left navigation, select Server Name, then Configuration, then SSL, and Advanced. Select None from the Hostname Verification drop-down menu. Click Save and activate the changes.
Configuring WebCenter Content for Search
This topic describes how to configure WebCenter Content for search.
Note: The following topics are applicable only if WebCenter Content is configured.
Creating a Crawl User in WebCenter Content
This procedure describes how to create a new crawl user in WebCenter Content.
If you want users with the admin role to crawl, then use an admin user account as the crawl user. If you want non-admin users to crawl, then create a new crawl user.
To create a crawl user in WebCenter Content:
-
Log on to WebCenter Content as an Administrator.
-
To create a role
sescrawlerrole, do the following:-
On the WebCenter Content home page, select Admin Appletsfrom the Administrationmenu.
-
Select User Admin.
The User Admin dialog opens.

-
In the User Admin dialog, select Security tab, then Permissions by Role.
-
In the Permissions By Role dialog, click Add New Role.
-
In the Add New Role dialog, specify Role Name and Role Display Name as
sescrawlerrole. -
Click OK.
-
-
To create a user
sescrawler, and assign thesescrawlerrolerole to the user, do the following:-
On the WebCenter Content home page, select Admin Appletsfrom the Administrationmenu.
-
Select User Admin.
The User Admin dialog opens.
-
On the Users tab, click Add.
-
Choose the Authentication Type as Local and click OK.
-
In the Add User dialog, enter the name as
sescrawlerand specify password. -
On the Roles tab, click Add Role and select
sescrawlerroleto assign the role to the user. -
Click OK.
-
Close the User Admin dialog.
-
-
On the WebCenter Content home page, expand Administration, then Admin Server. Select General Configuration and append the
sceCrawlerRole=sescrawlerroleentry in the Additional Configuration Variables section. -
Restart WebCenter Content.
Configuring the SESCrawlerExport Component
Before you begin, verify that the SESCrawlerExport component is enabled. If not, enable the component (see Enabling the WebCenterConfigure Component) and restart the WebCenter Content server.
To configure the SESCrawlerExportcomponent for admin and non-admin users:
-
Log on to WebCenter Content as a system administrator.
-
On the WebCenter Content home page, expand Administration and select SESCrawlerExport.

-
On the SESCrawlerExport Administration page, click Configure SESCrawlerExport.

-
On the Configure SESCrawlerExport page, set the value for Crawler Role.
- If you want to configure SESCrawlerExport for an admin user, set the value for the Crawler Role as
admin. - If you want to configure SESCrawlerExport for a non-admin user, set the value for the Crawler Role as
sescrawlerrole. The following figure shows the Configure SESCrawlerExport page, where Crawler Role is set assescrawlerrolefor a non-admin user.

- If you want to configure SESCrawlerExport for an admin user, set the value for the Crawler Role as
-
Click Update.
-
Restart WebCenter Content.
Configuring WebCenter Portal for Search
To configure WebCenter Portal for search, you need to configure the connection between WebCenter Portal and Elasticsearch or OCI Search Service with OpenSearch.
Topics:
- Configuring WebCenter Portal for Elasticsearch
- Configuring WebCenter Portal for OCI Search Service with OpenSearch
Configuring WebCenter Portal for Elasticsearch
To configure WebCenter Portal for search, you need to configure the connection between WebCenter Portal and Elasticsearch and you have to configure the WebCenter Content crawl user and WebCenter Content admin user in Elasticsearch.
-
Navigate to your Oracle home directory and invoke the WLST script.
-
Connect to the Oracle WebCenter Portal domain (
WC_Portal) server. -
At the WLST command prompt, run the
createCredWLST command to configure the WebCenter Content crawl user in Elasticsearch.createCred(map="oracle.es.security", key="content.crawl.credentials", user='*wcc-crawl-user*', password='*wcc-crawl-password*', desc="UCM Crawl User")where,
-
wcc-crawl-useris the WebCenter Content crawl user. See Creating a Crawl User in WebCenter Content. -
wcc-crawl-passwordis the password of the WebCenter Content crawl user. -
descis the description of the WebCenter Content crawl user.
The following example shows how to configure the WebCenter Content crawl user:
createCred(map="oracle.es.security", key="content.crawl.credentials", user='sescrawler', password='welcome1', desc="UCM Crawl User") -
-
At the WLST command prompt, run the
createCredWLST command to configure the WebCenter Content admin user in Elasticsearch.createCred(map="oracle.es.security", key="content.admin.credentials", user='wcc-admin-user', password='wcc-admin-password', desc="UCM Admin User")where,
wcc-admin-useris the WebCenter Content Admin user.wcc-admin-passwordis the WebCenter Content Admin password.descis the description of the WebCenter Content Admin user. The following example shows how to configure the WebCenter Content admin user:
createCred(map="oracle.es.security", key="content.admin.credentials", user='weblogic', password='welcome1', desc="UCM Admin User") -
To confirm that the user credentials are added:
- Connect to the Fusion Middleware Control,
http:<host:port>/em. - From the WebLogic Domain drop-down menu, select Security > Credentials.
- Expand oracle.es.security.
- Ensure you have two credentials:
- content.admin.credentials: For the WebCenter Content admin user for Elasticsearch (for example, weblogic or any other user with administration permissions in the Content server)
- content.crawl.credentials: For the WebCenter Content crawl user for Elasticsearch (for example, sescrawler user or the user you created for doing Elasticsearch crawling)
- Connect to the Fusion Middleware Control,
-
Stop and start the Elasticsearch server.
-
At the WLST command prompt, run the
createSearchConnectionWLST command to configure a connection between WebCenter Portal and Elasticsearch:createSearchConnection(appName, name, url, indexAliasName, appUser, appPassword)where
-
appNameis the name of the application, for WebCenter Portal, the value iswebcenter. -
nameis the connection name. The name must be unique within the application. For exampledev-es. -
urlis the location of the Elasticsearch server. For example,http://host:9200Note: If you choose to connect to an Elasticsearch cluster. Enter the URL of the load balancer, for example
https://OHS-host:port -
indexAliasNameis the name of the index alias in the Elasticsearch server. For example,webcenter_portal.The indices will be created using the alias as the prefix, as shown in the following example:
-
<indexAliasName>_portalsFor example,webcenter_portal_portals -
<indexAliasName>_documentsFor example,webcenter_portal_documents
Note: The name must be in lowercase alphanumeric characters and unique across all portal servers.
-
-
appUseris the crawl admin user name. For example,mycrawladmin. -
appPasswordis the crawl admin user password.
The following example creates a connection between WebCenter Portal (
webcenter) and Elasticsearch located athttp://host:9200:createSearchConnection (appName='webcenter',name='dev-es', url='http://host:9200', indexAliasName='webcenter_portal', appUser='mycrawladmin', appPassword='welcome1')The following example creates a connection between WebCenter Portal (webcenter) and Elasticsearch cluster located at
http://OHS-HOST:OHS-PORT:createSearchConnection (appName='webcenter',name='dev-es', url='http://OHS-HOST:OHS-PORT', indexAliasName='webcenter_portal', appUser='mycrawladmin', appPassword='welcome1') -
Configuring WebCenter Portal for OCI Search Service with OpenSearch
To configure WebCenter Portal for search, you need to configure the connection between WebCenter Portal and OCI Search Service with OpenSearch and grant the crawl application role to the crawl admin user.
-
Navigate to your Oracle home directory and invoke the WLST script.
-
Connect to the Oracle WebCenter Portal domain (
WC_Portal) server. -
At the WLST command prompt, run the
grantAppRoleWLST command to grant the crawl admin user the application role so that it may perform searches on behalf of WebCenter Portal users.grantAppRole(appStripe='webcenter', appRoleName='webcenter#-#defaultcrawl', principalClass='weblogic.security.principal.WLSUserImpl', principalName='crawl-admin-user')where
crawl-admin-useris the crawl admin user.The following example shows how to grant the crawl admin user the application role:
grantAppRole(appStripe='webcenter', appRoleName='webcenter#-#defaultcrawl', principalClass='weblogic.security.principal.WLSUserImpl', principalName='mycrawladmin') -
At the WLST command prompt, run the
createCred WLSTcommand to configure the Crawl Admin user.createCred(map="oracle.wsm.security", key="basic.credentials", user='appUser', password='appPassword')where
appUseris the crawl admin user name. For example,mycrawladmin.appPasswordis the crawl admin user password. The following example shows how to configure the Crawl Admin user:
createCred(map="oracle.wsm.security", key="basic.credentials", user='mycrawladmin', password='welcome1') -
At the WLST command prompt, run the
createSearchConnectionWLST command to configure a connection between WebCenter Portal and OCI Search Service with OpenSearch:createSearchConnection(appName, name, url, indexAliasName, appUser, appPassword)where
-
appNameis the name of the application, for WebCenter Portal, the value iswebcenter. -
nameis the connection name. The name must be unique within the application. For exampledev-es. -
urlis the location of the OCI Search Service with OpenSearch server. For example,https://OpensearchPrivateIP:9200 -
indexAliasNameis the name of the index alias in the OCI Search Service with OpenSearch server. For example,webcenter_portal.The indices will be created using the alias as the prefix, as shown in the following example:
-
<indexAliasName>_portalsFor example,webcenter_portal_portals -
<indexAliasName>_documentsFor example,webcenter_portal_documents
Note: The name must be in lowercase alphanumeric characters and unique across all portal servers.
-
-
appUseris the crawl admin user name. For example,mycrawladmin. -
appPasswordis the crawl admin user password.
The following example creates a connection between WebCenter Portal (
webcenter) and OCI Search Service with OpenSearch located athttps://OpensearchPrivateIP:9200:createSearchConnection (appName='webcenter',name='dev-es', url='https://OpensearchPrivateIP:9200', indexAliasName='webcenter_portal', appUser='mycrawladmin', appPassword='welcome1') -
Synchronizing Users in WebCenter Portal
Before performing a portal full crawl, we recommend you to run the LDAP synchronization WLST command to ensure that all users are available in portal.
To synchronize users in WebCenter Portal:
-
Navigate to your Oracle home directory and invoke the WLST script.
-
Connect to the Oracle WebCenter Portal domain (
WC_Portal) server. -
At the WLST command prompt, run the startSyncProfiles WLST command to synchronize profile information.
startSyncProfiles(appName='webcenter')Note: Synchronizing profile information may take some time depending on the number of users.
-
Run the isSyncProfilesRunning command to verify that the user synchronization is complete.
isSyncProfilesRunning(appName='webcenter')
Configuring Search Crawlers
You can configure the following types of crawlers to index WebCenter Portal resources:
-
Portal Crawler: This uses the Portal crawl source to crawl certain objects, such as lists, page metadata, page content (contents of HTML, Text, and Styled Text components), portals, and profiles.
-
Documents Crawler: This uses the Documents crawl source to crawl documents, including wikis and blogs.
-
Discussions Crawler: This uses the Discussions crawl source to crawl discussion forums and announcements. This option is available only for portals upgraded from prior releases that include Discussions.
The following topics describe how to create different crawl sources using Scheduler UI in WebCenter Portal Administration:
Creating a Portal Crawl Source
To create a crawl source to crawl objects such as lists, page metadata, page content (contents of HTML, Text, and Styled Text components), portals, and profiles:
-
On the Settings page (see Accessing the Settings Pages in WebCenter Portal Administration), click Tools and Services.
You can also enter the following URL in your browser to navigate directly to the Tools and Services pages:
http://host:port/webcenter/portal/admin/settings/tools -
Click the icon for Search to open the Search Settings page.

-
On the Scheduler tab, select the Portal crawl source and click Edit.

-
On the Edit Portal Crawl Source page, modify the following source parameters as desired:
-
Maximum number of connection attempts: Maximum number of connection attempts to access the configuration URL. Choose number from 2 to 10.
-
Configuration URL: URL of the RSS crawl servlet. For example:
http://wcp-host:wcp-port/rsscrawl

-
-
Enter the WebCenter Portal crawl admin user credentials.
-
Click Test to test the connection.
-
Click Save and Close to save the changes.
Creating a Documents Crawl Source
If you have configured WebCenter Content, you can create a crawl source for documents, including wikis and blogs:
-
On the Settings page (see Accessing the Settings Pages in WebCenter Portal Administration), click Tools and Services.
You can also enter the following URL in your browser to navigate directly to the Tools and Services pages:
http://host:port/webcenter/portal/admin/settings/tools -
Click the icon for Search to open the Search Settings page.
-
On the Scheduler tab, select the Documents crawl source and click Edit.

-
On the Edit Document Crawl Source page, modify the following source parameters as desired:
-
Maximum number of connection attempts: Maximum number of connection attempts to access the configuration URL. Choose number from 2 to 10.
-
Configuration URL: URL of the Webcenter Content SESCrawlerExport component.
For example:
http://wcc-host:wcc-port/cs/idcplg?IdcService=SES_CRAWLER_DOWNLOAD_CONFIG&source=*source\_name*The
*source\_name*must be one of the strings used in the WebCenter Content SESCrawlerExport component Source Name (sceSourceName) parameter.For more information on SESCrawlerExport parameters, see Configuring SESCrawlerExport Parameters in Administering Oracle WebCenter Content.
For example:
http://host.example.con:port/cs/idcplg?IdcService=SES_CRAWLER_DOWNLOAD_CONFIG&source=esDS

-
-
Enter the WebCenter Content crawl admin user login credentials.
-
Click Test to test the connection.
-
Click Save and Close to save the changes.
Taking a Snapshot of the Content
The snapshot generates a configFile.xml file at the location specified by the SESCrawlerExport component FeedLoc parameter. XML feeds are created in the subdirectory with the source name; for example, wikis. Performing a snapshot can take some time depending on the number of items you have stored on the Content Server instance and how many sources you are generating.
Note: It is important to take a snapshot before the first crawl or any subsequent full crawl of the source.
To take a snapshot of the content:
-
Log on to WebCenter Content as a system administrator.
-
From the Administration drop-down list, select SESCrawlerExport.
-
Select All sources, and click Take Snapshot.
Creating a Discussions Crawl Source
This option is available only for portals upgraded from prior releases that use Discussions. To create a crawl source to crawl discussion forums and announcements:
-
On the Settings page (see Accessing the Settings Pages in WebCenter Portal Administration), click Tools and Services.
You can also enter the following URL in your browser to navigate directly to the Tools and Services pages:
http://host:port/webcenter/portal/admin/settings/tools -
Click the icon for Search to open the Search Settings page.
-
On the Scheduler tab, select the Discussions crawl source and click Edit.

-
On the Edit Discussions Crawl Source page, modify the following source parameter as desired:
- Database Connection String:
jdbc urlof the Discussions schema. The format of the string isjdbc:oracle:thin@host:port:servername.

- Database Connection String:
-
Enter the Discussions crawler schema user name (for example,
Prefix_Discussions_Crawler) and password. -
Click Test to test the connection.
-
Click Save and Close to save the changes.
Enabling AutoSuggest in WebCenter Portal
In WebCenter Portal, you can enable autosuggest, so that a list of suggested keywords appear as you type a keyword in the search field. The suggested keywords are based on the portal that you recently accessed.
The attribute, wcEnableAutoSuggest, is used to configure autosuggest. By default, the attribute is set to false. You can modify the value of the attribute in the WebCenter Portal Administration - Attributes page. After you modify the value, you must restart the WebCenter Portal server for the changes to take effect.
To modify the default value:
-
Log in to WebCenter Portal as an administrator.
-
In the portal browser, click the Administration tile, then click Attributes in the left pane.
-
On the Attributes page, click the Actions icon for the
wcEnableAutoSuggestand select Edit Attribute.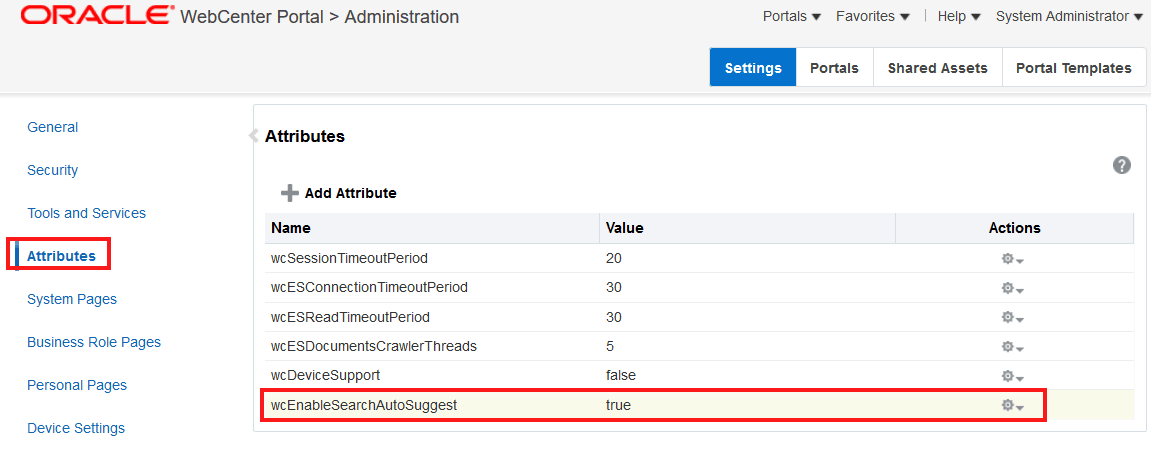
-
In the Edit Attribute dialog, modify the attribute value to
true. To disable, set the attribute value tofalse.. -
Click OK.
-
Restart WebCenter Portal.
Configuring Search Custom Attributes
When you search using WebCenter Portal, only certain predefined attributes show up in the search results. WebCenter Portal allows you to see additional attributes in your search results. This can be achieved from the Search Setting page in portal administration, where the Custom Attributes section lets you select which custom search attributes should appear in search results and the order in which they appear. This list in the Search Setting page is driven by search-service-attributes.xml. It contains list of all attributes that we crawl for each service. Types in search index is defined by this metadata. You can add a new custom attribute or modify the existing one in the search-service-attributes.xml file.
The following procedure describes how to add a new search custom attribute using Document service as an example:
To add a new search custom attribute:
-
Create a custom metadata field. See Adding a Custom Metadata Field in Oracle WebCenter Content.
-
Rebuild the WebCenter Content index. See Rebuilding the WebCenter Content Index.
-
Update the metadata list on Oracle WebCenter Content
SESCrawlerExportcomponent:-
Log on to Oracle WebCenter Content as a system administrator.
-
On the WebCenter Content home page, expand Administration and select SESCrawlerExport.
-
On the SESCrawlerExport Administration page, click Configure SESCrawlerExport.
-
On the Configure SESCrawlerExport page, append the Metadata list with the new custom attribute.
In this example, Web Site Object Type custom attribute (
xWebsiteObjectType) is added to the metadata.dDocAuthor,dDocAccount,dDocCreatedDate,dDocCreator,dDocFunction,dDocLastModifiedDate,dDocLastModifier,dDocName, dID,dDocType,dFileSize,dFormat,dOriginalName,dOutDate,dRevLabel,dSecurityGroup,fParentGUID,sceHostname,xClbraRoleList, xClbraUserList,xComments,xIdcProfile,xLibraryGUID,xWCTags,xWCWorkflowApproverUserList,xWCWorkflowAssignment, xAnnotationDetails,dDocTitle,xRegionDefinition, **xWebsiteObjectType**
-
-
Add a new custom attribute to the
search-service-attributes.xmlfile:-
At the WLST command prompt, run the
exportMetadataWLST command to export the latestsearch-service-attributes.xmlfile from MDS repository:exportMetadata('webcenter', 'WC_Portal', toLocation='/tmp/es', docs='/oracle/webcenter/search/scopedMD/ s8bba98ff_4cbb_40b8_beee_296c916a23ed/search-service-attributes.xml') -
Add the new custom attribute to the
search-service-attributes.xmlfile.In this example,
Web Site Object Typeis added to thesearch-service-attributes.xmlfile under theoracle.webcenter.doclibservice ID:<service id="oracle.webcenter.doclib"> <attribute name="author" displayNameKey="WC_AUTHOR" displayName="Author" type="keyword"/> <attribute name="doc_author" displayNameKey="WC_DOC_AUTHOR" displayName="Author" type="keyword" backendAttribute="dDocAuthor"/> … … … … <attribute name="wcsecattr" displayNameKey="WC_SECATTR" displayName="Security Attributes" type="keyword" hidden="true"/> <attribute name="wcsecattr_deny" displayNameKey="WC_SECATTRDENY" displayName="Security Deny Attributes" type="keyword" hidden="true"/> <attribute name="website_object_type" displayNameKey="WC_xWebsiteObjectType" displayName="Web Site Object Type" type="keyword" backendAttribute="xWebsiteObjectType"/> </service> -
Save and import the updated
search-service-attributes.xmlfile to the MDS repository using theimportMetadaWLST command:importMetadata('webcenter', 'WC_Portal', fromLocation='/tmp/es', docs='/oracle/webcenter/search/scopedMD/ s8bba98ff_4cbb_40b8_beee_296c916a23ed/search-service-attributes.xml')
-
-
Access the Search Settings page in portal administration and verify if the new attribute is appearing in the Available Attributes under Custom Attributes section.
In this example, Web Site Object is the newly added custom attribute.

-
Select the newly added custom attribute from the list of Available Attributes and move it to the Included Attributes column so that they appear in search results.
-
Click Apply.
-
Navigate to your portal and enter a search term in the global search field and click the search icon.
The following figure shows search results that include the newly created custom attributes, Web Site Object Type:

Creating Custom Facets
Oracle WebCenter Portal supports faceted search to refine the search results without running a new search. With faceted search, search results are grouped under a predefined category and thus help users to narrow down the search results based on a relevant category. for example, Author, Portal, Last Modified date.
In Oracle WebCenter Portal, by default, certain predefined facets are provided in the Search Setting page. The list of facets is driven by the search-service-custom-facets.xml metadata file and each facet in the file is mapped with search-service-attributes.xml metadata file.
The following is the sample of the search-service-custom-facets.xml metadata file:
<custom-facet dataType="keyword" displayName="Author" displayNameKey="ES_FACET_AUTHOR" mappedSearchAttribute="author" name="Author" itemsToDisplay="20"/>
<custom-facet dataType="keyword" displayName="Service ID" displayNameKey="ES_FACET_SERVICEID" mappedSearchAttribute="wc_serviceId" name="Service ID"/>
<custom-facet dataType="keyword" displayName="Portal" displayNameKey="ES_FACET_SCOPE" mappedSearchAttribute="wc_scopeGuid" name="Scope GUID" itemsToDisplay="20"/>
<custom-facet dataType="keyword" displayName="Tags" displayNameKey="ES_FACET_TAGS" mappedSearchAttribute="wc_tagWords" name="Tags"itemsToDisplay="20"/>
<custom-facet dataType="keyword" displayName="Mimetype" displayNameKey="ES_FACET_MIMETYPE" mappedSearchAttribute="mimetype" name="Mimetype" itemsToDisplay="20"/>
<custom-facet dataType="date" displayName="Last Modified Date" displayNameKey="ES_FACET_LASTMODIFIED" mappedSearchAttribute="lastmodified"
name="Last Modified Date" />
where,
-
nameis the name of the facet. -
displayNameKeyis the value of the custom facet metadata field. -
displayNameis the display name of the facet.Note: If your business is supported in multiple languages, you can translate the newly added custom facets to the desired languages. See Translating Strings for Search Facets.
-
mappedSearchAttributeis used to map the custom facet with the search attribute. This value should be same asnameattribute value in thesearch-service-attributes.xmlmetadata file. dataTypeis the type of data. The available data types arekeyword,keyword_text, anddate. This value should be same as the type value in thesearch-service-attributes.xmlmetadata file. The data typekeywordshould be used when the user wants to do a case-sensitive search for the value of the custom facet. The data typekeyword_textshould be used when the user wants to do the case-insensitive search for the value of the custom facet.itemsToDisplayis an optional attribute that defines the maximum number of items to be displayed under a facet. If the value is not specified, the default value is configured using option Administration > Tools and Services > Search in WebCenter Portal.
Note: This attribute is supported only if dataType
keywordis used.
Based on your business needs, you can add or modify the list of the facets in the search-service-custom-facets.xml metadata file for any of the services available in Oracle WebCenter Portal, for example, you can add custom facets for documents, people and other services listed in the search-service-custom-facets.xml metadata file.
This section shows how to add a custom facet for the document service. To add custom facet for the document service, you need to first add a custom metadata field in Oracle WebCenter Content, and then rebuild the content index.
The following steps shows you how to add the custom facet for the document service:
- Adding a Custom Metadata Field in Oracle WebCenter Content
- Rebuilding the WebCenter Content Index
- Configuring the SESCrawlerExport Component
- Configuring the Search Setting Metadata
- Configuring the Search Custom Facet Metadata
- Update the Metadata for the Document in Your Portal
- Configuring the File Exclusion in Search Results
Adding a Custom Metadata Field in Oracle WebCenter Content
To add a custom facet for the document service, you need to begin with creating a metadata field in Oracle WebCenter Content. In this example, we’ll create a new metadata field and name it as CustomMetadataField.
To add a custom metadata field in Oracle WebCenter Content:
-
Log in to Oracle WebCenter Content server as a system administrator.
-
On the WebCenter Content home page, expand Administration and select Admin Applets.
-
On the Administration Applets page, click Configuration Manager.
-
On the Configuration Manager page, click the Information Fields tab and click Add to add a new custom metadata field.
-
In the Add Metadata Field Name dialog, enter the name of the metadata. For example, CustomMetadataField and click OK.
Note: The metadata field name should be unique and the maximum field length is 29 characters. Use only letters, numbers, and underscores (_). Do not use spaces or other special characters.
-
In the Add Metadata Field dialog, edit the following information:
-
Field Type: Select Long Textfrom the drop-down list.
-
Enable on User Interface: Select Enabled to display the field. If you don’t select the option, the field is hidden in the search pages.
-
Enable for Search Index: Select Indexed for the metadata field to be indexed for searching. If you don’t select the option, the field is not indexed nor does it appear on search pages.
-
-
Click OK.
-
In the Configuration Manager page, click Update Database Design and click OK to confirm.
Rebuilding the WebCenter Content Index
In Oracle WebCenter Content, after you’ve created the new metadata field, you need to rebuild the collection and update the search index using the Repository Manager utility.
To rebuild and update the search index in Oracle WebCenter Content:
-
Log in to Oracle WebCenter Content server as a system administrator.
-
On the Oracle WebCenter Content home page, expand Administration and select Admin Applets.
-
On the Administration Applets page, click Repository Manager.
-
On the Repository Manager page, click the Indexer tab.
-
Under Collection Rebuild cycle section, click Start and then click OK to proceed.
Note: Rebuilding the search index is a time-consuming process.
-
Next, configure the
SESCrawlerExportcomponent with the new custom metadata field. See Configuring the SESCrawlerExport Component.
Configuring the SESCrawlerExport Component
You need to update the Oracle WebCenter Content SESCrawlerExport component with the newly created metadata field.
To update the SESCrawlerExport component:
-
Log in to WebCenter Content server as a system administrator.
-
On the WebCenter Content home page, expand Administration and select SESCrawlerExport.
-
On the SESCrawlerExport Administration page, click Configure SESCrawlerExport.
-
On the Configure SESCrawlerExport page, append the Metadata Listwith the newly created metadata field. For example,
xCustomMetadataField.The following figure shows the Configure
SESCrawlerExportpage, where the newly created metadata field is added to the Metadata List.
-
Click Update.
-
Next, add the new search metadata field to the search-service-attributes.xml file. See Configuring the Search Setting Metadata.
Configuring the Search Setting Metadata
You need to add the defined custom attribute in Oracle WebCenter Portal. For the new custom attribute to appear in the search settings page, you need to add or update the search-service-attributes.xml.
To add the defined custom attribute:
-
At the WLST command prompt, run the
exportMetadataWLST command to export the latestsearch-service-attributes.xmlfile from MDS repository:exportMetadata(application='webcenter', server='WC_Portal', toLocation='/tmp/mds_dump', docs='/oracle/webcenter/search/scopedMD/s8bba98ff_4cbb_40b8_beee_296c916a23ed/search-service-attributes.xml') -
Add the new search attribute field to the
search-service-attributes.xmlfile within the section forid="oracle.webcenter.doclib". Set the type field to keyword.<service id="oracle.webcenter.doclib"> ......................... ...................... <attribute name="custom_metadata_field" displayNameKey="WC_CustomMetadataField" displayName="Custom Metadata Field" type="keyword" backendAttribute="xCustomMetadataField"/> </service>Note: The
displayNameattribute can be used to provide language support,displayNameappears in Custom Attributes section of Search Settings in Portal.Oracle WebCenter Portal supports translations of strings to other languages. To translate the
displayNameattribute to other language, see Translating Strings for Custom Search Attributes. -
Save and import the updated
search-service-attributes.xmlfile to the MDS repository using theimportMetadaWLST command:importMetadata(application='webcenter', server='WC_Portal', fromLocation='/tmp/mds_dump',docs='/oracle/webcenter/search/scopedMD/s8bba98ff_4cbb_40b8_beee_296c916a23ed/search-service-attributes.xml') -
Next, create a new facet and map that facet to the search attribute. See Configuring the Search Custom Facet Metadata.
Configuring the Search Custom Facet Metadata
In WebCenter Portal Search Setting page, you can select which facets to display with search results. This list in the Search Setting page is driven by the search-service-custom-facets.xml metadata file. It contains a list of facets used in WebCenter Portal. Each facet in the search-service-custom-facets.xml metadata file is mapped with a custom attribute using the mappedSearchAttribute attribute.
To configure the search custom facet metadata:
-
At the WLST command prompt, run the
exportMetadataWLST command to export the latestsearch-service-custom-facets.xmlmetadata file from MDS repository:exportMetadata(application='webcenter', server='WC_Portal', toLocation='/tmp/mds_dump',docs='/oracle/webcenter/search/scopedMD/s8bba98ff_4cbb_40b8_beee_296c916a23ed/search-service-custom-facets.xml') -
Open the
search-service-custom-facets.xmlfile and create a new facet, and then map the facet to the search attribute.<?xml version='1.0' encoding='UTF-8'?> <search-service-custom-facets xmlns="http://xmlns.oracle.com/webcenter/search/customfacets"> ............................. <custom-facet name="CustomFacet" dataType="keyword" displayNameKey="WC_CustomFacet" displayName="Custom Facet" mappedSearchAttribute="custom_metadata_field"/> </search-service-custom-facets>Where
-
custom-facet nameis the name of the custom facet that you want to create.Note:
dataTypemust bekeyword, and thedisplayNameattribute should be used to provide the language support,displayNameappears in Facets section of Search Settings in portal.Oracle WebCenter Portal supports translations of strings to other languages. To translate the
displayNameattribute to other language, see Translating Strings for Search Facets. -
mappedSearchAttributeis the attribute used to map the facet with custom attrbute.Note: The
mappedSearchAttributeattribute in thesearch-service-custom-facets.xmlmetadata file should contain the same value as specified in thenameattribute of thesearch-service-attributes.xmlmetadata file. In this example, usecustom_metadata_field.
-
-
Save and import the
search-service-custom-facets.xmlmetadata file to the MDS repository using theimportMetadaWLST command:importMetadata(application='webcenter', server='WC_Portal', fromLocation='/tmp/mds_dump',docs='/oracle/webcenter/search/scopedMD/s8bba98ff_4cbb_40b8_beee_296c916a23ed/search-service-custom-facets.xml' -
Log in to WebCenter Portal.
-
Access the Search Settings page in portal administration and verify if the new attribute is appearing in the Facets and Custom attributes section.
-
Select and move the newly added facet to the Included Facets section, then click Apply.
In this example, select
Custom Facet. -
Select and move the newly added custom attribute to the Included Attributes section, then click Apply.
In this example, select
CustomMetadata Field.
Update the Metadata for the Document in Your Portal
Add the newly created metadata field value to the documents in your portal. In this example, CustomMetadataField.
To update metadata field value for document:
-
In your portal, navigate to the document page.
-
Select the document that you want to edit and click Properties from the More drop-down menu.

-
In the Metadata tab, locate the newly added metadata field,
CustomMetadataField, and click Edit. -
Add a value for the newly created metadata field and click Save.

-
Perform an incremental crawl for the new facet to appear in the Search Settings page. See Manually Starting an Incremental Crawl.
-
Navigate to your portal and enter a search term in the global search field and click the search icon.
The following figure shows search results that include the newly created facet,
Custom Facet:
Configuring the File Exclusion in Search Results
You can configure to exclude certain file types from the search results. In order to exclude the file types, the file types have to be specified in the metadata file search-service-exclude-file-types.xml.
The following steps should be performed to configure the file exclusion in search results:
- Export Metadata Service Document
- Update the File Types to Filter
- Import Metadata Service Document
- Verifying File Exclusion in Search Results
Export Metadata Service Document
The location of the file in MDS is /oracle/webcenter/search/scopedMD/s8bba98ff_4cbb_40b8_beee_296c916a23ed/search-service-exclude-file-types.xml.
To export the metadata service document search-service-exclude-file-types.xml, enter the following command:
exportMetadata(application='webcenter', server='WC_Portal', toLocation='/tmp/search', docs='/oracle/webcenter/search/scopedMD/s8bba98ff_4cbb_40b8_beee_296c916a23ed/search-service-exclude-file-types.xml')In the metadata service document search-service-exclude-file-types.xml, you can customize the file types to be excluded.
Update the File Types to Filter
The metadata describes how we can specify the files types which have to be excluded during the search.
<?xml version='1.0' encoding='UTF-8'?>
<search-service-exclude-file-types xmlns="http://xmlns.oracle.com/webcenter/search/excludefiletypes">
  <exclude-file-in-search>
    <fileType extension=".xml" customType="site-studio-file" description="Exclude Site Studio data files that have extension .xml"/>
    <fileType extension=".wav" description="Exclude all the file types with extension .wav"/>
    <fileType extension=".jpeg" description="Exclude all the file types with extension .jpeg"/>
  </exclude-file-in-search>
</search-service-exclude-file-types>
The following are a few important points about this metadata:
- The extension of the file which we want to filter from the search has to be entered in this metadata file.
- The
customTypeattribute is optional. If we want to exclude the Site Studio data files in the search results, specify thecustomTypeassite-studio-filefor extension “.xml”. - The
descriptionattribute is optional. It explains the details of the files being excluded.
Import Metadata Service Document
To import the metadata service document search-service-exclude-file-types.xml, enter the following command:
importMetadata(application='webcenter', server='WC_Portal', fromLocation='/tmp/search', docs='/oracle/webcenter/search/scopedMD/s8bba98ff_4cbb_40b8_beee_296c916a23ed/search-service-exclude-file-types.xml')Verifying File Exclusion in Search Results
To verify the file types exclusion, click the Search icon and specify the file type, for example, *.wav or *.jpeg, and notice that these file types are excluded in the search result. Similarly, search on the .xml file, and notice that the .xml files created in the Site Studio are excluded.
Customizing Search Query Pattern
Oracle WebCenter Portal allows customizing the Search Query Pattern. This can be done by changing the pattern in the Query String Query used for search.
The following steps should be performed to customize the Search Query Pattern:
- Export Metadata Service Document
- Modify Query String Query Pattern
- Import Metadata Service Document
Export Metadata Service Document
To export the metadata service document search-service-custom-config.xml, enter the following command:
exportMetadata(application='webcenter', server='WC_Portal', toLocation='/tmp/search', docs='/oracle/webcenter/search/scopedMD/s8bba98ff_4cbb_40b8_beee_296c916a23ed/search-service-custom-config.xml')In the metadata service document search-service-custom-config.xml, you can customize the query pattern and enable or disable of appending wildcard to the search term.
Modify Query String Query Pattern
The Query String Query pattern is included as a value of the property called query_string. The snippet shown below is the default value for the query_string property. The %s indicates the token that will be replaced by the search term input through the search field in WebCenter Portal. The %s can appear any number of times in the query_string value and each occurrence of this token will be replaced with the search term. For more details, see https://www.elastic.co/guide/en/elasticsearch/reference/6.8/query-dsl-query-string-query.html.
<!-- The query_string query to be executed in Elasticsearch. The value should be in JSON format. -->
<property name="query_string"><![CDATA[
   "query_string": {
      "query": "(%s)"
   }]]>
</property>
Handling Wildcards
Whether to append the wildcard ( * ) to the search term is determined by the property append_wildcard. If true, * will be appended to the search term.
Note: Setting
append_wildcardto true will cause all the results to have the same relevancy score. To have proper relevancy score, you should use the following in thequery_stringpattern:rewrite: scoring_boolean
<property name="append_wildcard">false</property>
Example:
<property name="query_string"><![CDATA[
   "query_string": {
      "query": "(%s)",
      "rewrite": "scoring_boolean"
   }]]>
</property>
Sample Query String Query Patterns
The following are some of the examples for the Query String Query patterns:
-
Search across all fields and boost the matches in the
titlefield by 2.<property name="query_string"><![CDATA[ "query_string": { "query": "(title:%s^2 OR %s)" }]]> </property> -
Search only in
titleandcontentfields.<property name="query_string"><![CDATA[ "query_string": { "fields": ["title", "content"], "query": "(%s)" }]]> </property> -
Search for the exact phrase across all fields.
<property name="query_string"><![CDATA[
   "query_string": {
      "query": "(\"%s\")"
   }]]>
</property>
Examples of Query String Query
The examples given below are with respect to the sample Query String Query patterns mentioned above:
-
If the search term is
schooland theappend_wildcardvalue is false, then%swill be replaced withschooland thequery_stringvalue will be:"query_string": { "query": "(title:school^2 OR school)" } "query_string": { "fields": ["title", "content"], "query": "(school)" } "query_string": { "query": "(\"school\")" }Note: If the
append_wildcardproperty value istrue,%swill be replaced withschool*in the above examples. -
If the search term is
school childrenand theappend_wildcardvalue isfalse, then%swill be replaced withschool childrenand thequery_stringvalue will be:"query_string": { "query": "(title:school children^2 OR school children)" } "query_string": { "fields": ["title", "content"], "query": "(school children)" } "query_string": { "query": "(\"school children\")" }
Note: If the
append_wildcardproperty value istrue,%swill be replaced withschool children*in the above examples.
Import Metadata Service Document
To import the metadata service document search-service-custom-config.xml, enter the following command:
importMetadata(application='webcenter', server='WC_Portal', fromLocation='/tmp/search', docs='/oracle/webcenter/search/scopedMD/s8bba98ff_4cbb_40b8_beee_296c916a23ed/search-service-custom-config.xml')Scheduling a Crawl
You can schedule an incremental search crawl or manually start a full crawl or manually start a fast crawl or manually start a reindex crawl. The topics in this section describe how to schedule a crawl and how to start, enable, or disable a crawl.
Scheduling an Incremental Crawl
By default, the crawler is set to manual, but you can specify a different frequency, such as minutes, hourly or daily:
-
On the Settings page (see Accessing the Settings Pages in WebCenter Portal Administration), click Tools and Services.
You can also enter the following URL in your browser to navigate directly to the Tools and Services pages:
http://host:port/webcenter/portal/admin/settings/tools -
Click the icon for Search to open the Search Settings page.
-
On the Scheduler tab, select the crawl source and click Schedule to open the crawl source Schedule page.

-
From the Frequency Type list, select the required frequency type.
| Frequency Type | Required Data to be Specified |
|---|---|
|
Manual Launch |
This is the default crawler frequency type. If you select Manual Launch, ensure that you start the schedule manually. |
|
Minutes |
If you select Minutes, specify the Time Between Launches in minutes. Allowed values: 10 to 59 minutes. |
|
Hourly |
If you select Hourly, specify the Time Between Launches in hours. Allowed values: 1 to 23 hours. |
|
Daily |
If you select daily, specify the Time Between Launches in days and specify the schedule launching time. Allowed values: 1 to 99 days and the time from 1 to 12 AM or PM |
|
Weekly |
If you select weekly, specify the Time Between Launches in weeks and specify the schedule launching time. Allowed values: 1 to 12 weeks and the time from 1 to 12 AM or PM. |
- Click Save and Close.
Enabling and Disabling a Scheduled Crawl
When a crawl is in progress, you cannot disable it. To enable and disable the schedule defined for a crawl:
-
On the Settings page (see Accessing the Settings Pages in WebCenter Portal Administration), click Tools and Services.
You can also enter the following URL in your browser to navigate directly to the Tools and Services pages:
http://host:port/webcenter/portal/admin/settings/tools -
Click the icon for Search to open the Search Settings page.
-
On the Scheduler tab, select the crawl source that you want to modify and click Enable to activate the schedule defined for the crawl or click Disable to stop the crawl schedule.
Manually Starting a Full Crawl
You can manually start a full crawl to crawl all items in WebCenter Portal. Start a full crawl only during non-peak times as it is time-consuming. A full crawl must be manually started and cannot be scheduled to run automatically.
To start a full crawl:
-
On the Settings page (see Accessing the Settings Pages in WebCenter Portal Administration), click Tools and Services.
You can also enter the following URL in your browser to navigate directly to the Tools and Services pages:
http://host:port/webcenter/portal/admin/settings/tools -
Click the icon for Search to open the Search Settings page.
-
On the Scheduler tab, select the crawl source and click Schedule to open the crawl source Schedule page.

-
On the Scheduler tab, expand Crawl All Items and then click Start Crawl Now.
WebCenter Portal immediately starts a full crawl for the selected crawl source.
Manually Starting a Fast Crawl
You can manually start a fast crawl to crawl only the items that have changed. It crawls only the metadata fields of all the items that have changed. This operation does not crawl the content of the changed documents. This crawl is applicable only to the Documents crawl source. A fast crawl must be manually started and cannot be scheduled to run automatically.
To start a fast crawl:
-
On the Settings page (see Accessing the Settings Pages in WebCenter Portal Administration), click Tools and Services.
You can also enter the following URL in your browser to navigate directly to the Tools and Services pages:
http://host:port/webcenter/portal/admin/settings/tools -
Click the icon for Search to open the Search Settings page.
-
On the Scheduler tab, select the Documents crawl source and click Schedule to open the Schedule Documents Crawler page.

-
On the Scheduler tab, expand Fast Crawl Items and then click Start Fast Crawl.
WebCenter Portal immediately starts the fast crawl for the documents.
Manually Starting a Reindex Crawl
You can manually start a reindex crawl when the type of one or more custom search attributes are changed in search-service-attributes.xml file. The reindex crawl only copies the crawled items from one index to another. A reindex crawl must be manually started and cannot be scheduled to run automatically. For example, suppose for an attributewc_description the type is defined as text. Now, the type is changed to keyword. In this scenario, you can start reindex crawl instead of full crawl (as was the case earlier).
To start a reindex crawl:
-
On the Settings page (see Accessing the Settings Pages in WebCenter Portal Administration), click Tools and Services.
You can also enter the following URL in your browser to navigate directly to the Tools and Services pages:
http://host:port/webcenter/portal/admin/settings/tools -
Click the icon for Search to open the Search Settings page.
-
On the Scheduler tab, select the crawl source and click Schedule to open the crawl source Schedule page.

-
On the Scheduler tab, expand Reindex Crawled Items and then click Start Reindex Now.
WebCenter Portal immediately starts a reindex crawl for the selected crawl source.
Manually Starting an Incremental Crawl
You can manually start an incremental crawl to crawl only the items that have been created, updated, or deleted after the last crawl in WebCenter Portal.
To start an incremental crawl:
-
On the Settings page (see Accessing the Settings Pages in WebCenter Portal Administration), click Tools and Services.
You can also enter the following URL in your browser to navigate directly to the Tools and Services pages:
http://host:port/webcenter/portal/admin/settings/tools -
Click the icon for Search to open the Search Settings page.
-
On the Scheduler tab, select the crawl source and click Start.
WebCenter Portal immediately starts an incremental crawl for the selected crawl source.
Search Crawl Summary and History
You can access the Search Crawl Summary and History in the Search Settings Page.
Crawl History for the Portal crawl source

Crawl History for the Documents crawl source

Crawl History for the Discussions crawl source

Clicking on the Crawl Type (FULL or INCREMENTAL) provides summary of the crawl.


Customizing Search Settings in WebCenter Portal Administration
You can customize Result Types and Filtering, Search Scope, Facets, and Custom Attributes on the Search Settings page in WebCenter Portal Administration. Portal managers can reset only the search scope for the portals that they manage.
To customize search settings for Elasticsearch:
-
On the Settings page (see Accessing the Settings Pages in WebCenter Portal Administration), click Tools and Services.
You can also enter the following URL in your browser to navigate directly to the Tools and Services pages:
http://host:port/webcenter/portal/admin/settings/tools -
Click the icon for Search to open the Search Settings page.
-
On the Search tab, select Enable filtering dropdown to enable filtering the search results based on selected services.

-
Select the types of results to be included in the search result by moving them between the Available Result Types and Included Result Types.
-
Set the search scope to include search results for the Home portal only or all portals (including the Home portal).

-
Select which facets to display with search results and the order in which they appear by moving them between the Available Facets and Included Facets lists.

-
In the Custom Attributes section, select which custom search attributes should appear in search results and the order in which they appear by moving the attributes to the Included Attributes section.

-
Click Apply.
Modifying the Default Connection Settings for Document Content Crawl Plugin in Elasticsearch Server
After installing Elasticsearch, you can modify the default connection settings for document content crawl plugin using the configuration file.
You can specify the following attributes in the configuration file:
-
es.wcc.connection.timeout is the connection time-out interval, in seconds. This is the amount of time Elasticsearch server will wait to establish the connection to the WebCenter Content server. The default value is 30 seconds.
-
es.wcc.read.timeout is the read time-out interval, in seconds. Once Elasticsearch server is connected to the WebCenter Content server, this attribute specifies the amount of time allowed for the WebCenter Content server to respond in a given request. The default value is 30 seconds.
-
es.wcc.max.connection.attempts is the maximum number of connection attempts to access the WebCenter Content server. The default value is 3.
To modify the default connection settings:
-
In Elasticsearch server, navigate to the
/home/Oracle/product/esHome/esNode/configdirectory and create thewebcenter.propertiesfile -
In the
webcenter.propertiesfile, add the following attributes and specify the required value.-
es.wcc.connection.timeout -
es.wcc.read.timeout -
es.wcc.max.connection.attempts
For example,
es.wcc.connection.timeout=60 es.wcc.read.timeout=60 es.wcc.max.connection.attempts=5 -
-
Save the file and restart Elasticsearch server.
Modifying Search Global Attributes
Note: The attributes discussed below are of Elastisearch. But these are also applicable if OCI Search Service with OpenSearch is configured.
The attributes wcESConnectionTimeoutPeriod and wcESReadTimeoutPeriodare used to configure the interaction between WebCenter Portal and Elasticsearch. The wcESDocumentsCrawlerThreads attribute is used to configure the number of threads required to process the crawling of documents.
The following are the attributes:
-
wcESConnectionTimeoutPeriod is the connection timeout interval, in seconds. This is the amount of time WebCenter Portal will wait to establish the connection to the Elasticsearch server. The default value is 30 seconds.
-
wcESReadTimeoutPeriod is the read timeout interval, in seconds. Once WebCenter Portal is connected to the Elasticsearch server, this specifies the amount of time allowed for the Elasticsearch server to respond in a given request. The default value is 30 seconds.
-
wcESDocumentsCrawlerThreads: The tasks for crawling the documents for search are handled in threads. This is done by creating a thread pool with a fixed number of threads, where each thread handles the crawl for the documents. The attribute
wcESDocumentsCrawlerThreadscan be used to specify the number of threads used to create a thread pool. The default value is 10. If a thread is not available for a crawl task, the task is in queue, waiting for other task to complete.
You can modify the default value of the attributes in Attributes page in WebCenter Portal administration. After you modify the value, you must restart the WebCenter Portal server for the changes to take effect.
To modify the default value:
-
On the Settings page, click Attributes.

-
On the Attributes page, click the Actions icon for the attribute and select Edit Attribute.
-
In the Edit Attribute dialog, modify the attribute Value.
-
Click OK.
-
Restart WebCenter Portal.