36 Exploring the Portals Page in WebCenter Portal Administration
Use the Portals page in WebCenter Portal Administration to edit and administer all portals. The tasks available to you are dependent on your role or permissions.
Permissions: To perform the tasks in this chapter on any portal, you must have the WebCenter Portal
Administratorrole or a custom role that grants the following permission:
Portals: Manage Security and Configuration
If you are a portal manager (or have the Administration: Manage Security and Configuration or Administration: Manage Configuration permission in a portal), you can perform these tasks on that portal alone, as described in Administering a Portal in Building Portals with Oracle WebCenter Portal.
For more information about permissions, see About Application Roles and Permissions.
Topics:
Parent topic:Administering Portals in WebCenter Portal
About the Portals Page in WebCenter Portal Administration
The Portals page in WebCenter Portal Administration (Figure 1) provides access to editing and administering all portals in WebCenter Portal, including exporting and importing portals.
If granted appropriate permissions, users can use this page to edit or administer portals. However, this chapter is addressed to a system administrator, who can perform administrative actions on all portals. Managing individuals portals that you create or have permissions to manage is covered in Administering a Portal in Building Portals with Oracle WebCenter Portal.
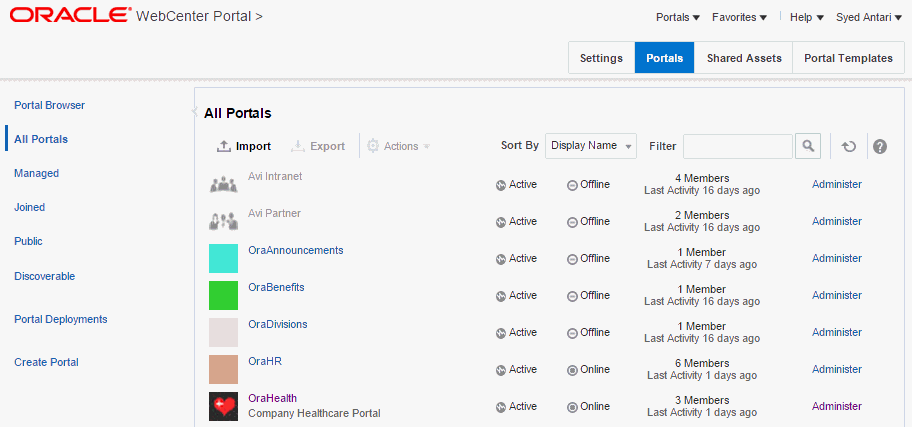
Accessing the Portals Page in WebCenter Portal Administration
To manage all portals in WebCenter Portal:
-
Open the Portals page in WebCenter Portal Administration in either of the following ways:
-
From the Portals menu, select Administration, then click Portals.
-
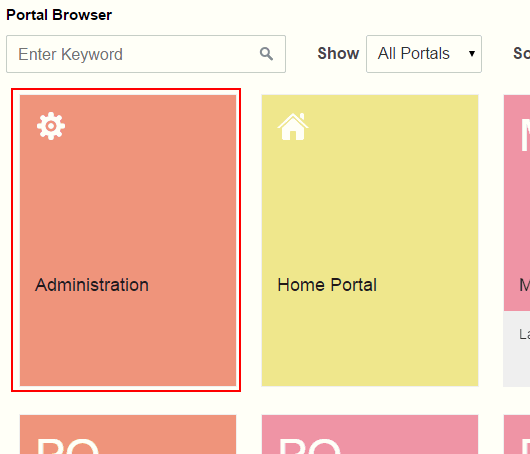
In the portal browser, click the Administration tile (Figure 2), then click Portals.
-
Enter the following URL in your browser to navigate directly to the Portals page:
http://host:port/webcenter/portal/admin/portalsSee Also: WebCenter Portal Pretty URLs in Building Portals with Oracle WebCenter Portal.
The Portals page displays (Figure 3).

-
-
On the Portals administration page, in the left pane, select:
-
All Portals to show all portals that are available to you, both public and private.
Note: Hidden portals can be seen on this page by users with the
Portal Server: Manage ConfigurationorPortals: Manage Security and Configurationpermission, such as a system administrator. While these users can manage the portal (change settings and membership), they cannot see the portal pages and content unless they are a portal member. -
Managed to display portals for which you have portal manager privileges.
-
Joined to display portals of which you are a member.
-
Public to display portals accessible by anyone with the portal URL.
-
Discoverable to display portals that can be found in search results.
-
Sorting the Portals Listing
To sort the list of portals on the Portals page:
-
On the Portals administration page, click the Sort By selection list.
Note: When All Portals is selected in the left selection pane, you can sort by only Display Name and Last Accessed.

-
Choose a display order for the portals on the page:
-
Created Dateto order from most to least recently created.
-
Display Name to order alphabetically by external display name, as specified by its Title value in the portal administration.
-
Last Accessed to order from most to least recently viewed, whether or not it was updated.
-
Last Updatedto order from most to least recently updated.
-
Member Countto order by greatest to least number of portal members.
-
Portal Nameto order alphabetically by internal name of the portal, as specified by its Name value in the portal administration. The internal name is not visible on the Portalspage.
-
Creating a Portal
To create a new portal:
-
On the Portals administration page, click Create Portal in the left pane.
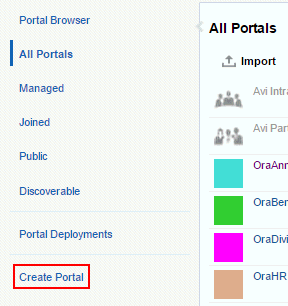
The Select a Portal Template page appears.
For information about creating a portal, see Creating and Building a New Portal in Building Portals with Oracle WebCenter Portal.
Exporting and Importing a Portal
With Portals: Manage Security and Configuration permission, you can export and importportals. For more information, see:
-
Exporting Online Portals to an Archive Using WebCenter Portal Administration
-
Importing a Portal from an Archive Using WebCenter Portal Administration
See also Troubleshooting Individual Portal and Portal Template Import and Export.
Viewing Information About Any Portal
On the Portals administration page, you can quickly see whether portals are active, online, offline, how recently a portal was accessed, and membership counts.
To view information about a portal:
-
On the Portals administration page, select a portal by highlighting its row in the table.
-
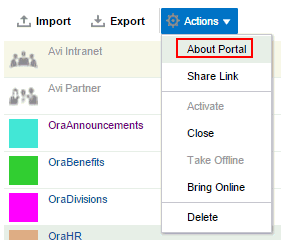
From the Actions menu, select About Portal.
-
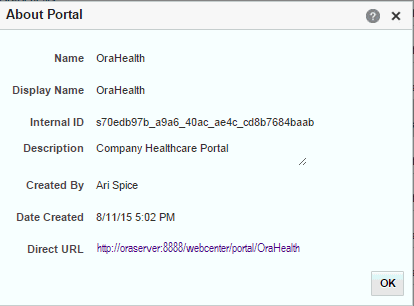
Explore the information in the About Portal dialog:
-
Name: Internal name of the portal displayed in the portal URL.
-
Display Name: Display name of the portal. This name displays at the top of the portal and other places where portals are available for selection, such as the Portals page.
-
Internal ID: ID of the portal, which other applications may use to reference this portal.
-
Description: A description of the portal, specified when creating the portal or in the portal administration settings.
-
Created By: User name of the portal creator.
-
Date Created: Date and time that the portal was created.
-
Direct URL: URL that provides direct access to the portal.
-
Sharing the Link to a Portal
If you want to share a portal with others, you can publish a link to the portal that will appear in activity streams of other users. With appropriate permissions, users can directly access a portal by clicking the link that specifies the portal display name.
To publish the direct link to a portal:
-
On the Portals administration page, select the required portal by highlighting its row in the table.
-
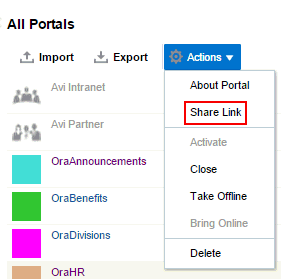
From the Actions menu, select Share Link.
-
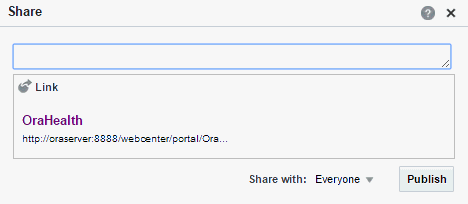
In the Share dialog, optionally enter a comment to appear with the link.
-
In the Share with list, select who you want to share the link with:
-
Everyone to share the link with all members of the current portal in their activity streams. This is useful to notify members of updates to the portal.
-
Portals to open the Select a Portal dialog, where you can select a portal to share the link in the activity streams of all members of the selected portal. This is useful for sharing information with members of other portals who may be interested in your portal.
-
-
Click Publish.
Closing Any Portal
By default, a portal is active. You can close a portal that is no longer being actively used. Closing a portal archives its content. When you close a portal, it is removed from everyone’s Portals menu and displays on the Portals page in the Home portal only when a user selects Closed from the Show list. The content of a closed portal remains accessible and searchable to those who still want to reference it and portal members can continue working in the portal either by displaying closed portals, or by pretty URL (http://host:port/webcenter/portal/portalName).
When a portal is closed, any activities performed in the portal are no longer reflected in the Activity Stream in the Home portal. Only the Home page of the closed portal shows activity in the portal.
If you want to close down a portal temporarily, take the portal offline instead.
To close a portal:
-
On the Portals administration page, select the required portal by highlighting the row in the table.
Press Ctrl+click to select more than one portal.
-
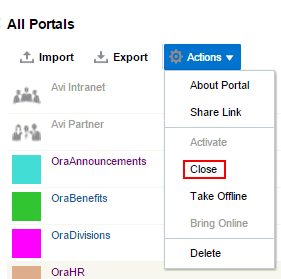
From the Actions menu, select Close.
-
Confirm the action by clicking OK.
Notice that the Active status changes to Closed.

Reactivating Any Portal
You may close a portal if it is no longer being used. If you want to reopen a portal, you can reactivate it.
To reactivate a portal:
-
On the Portals administration page, select the required portal by highlighting the row in the table.
Press
Ctrl+clickto select more than one portal. -
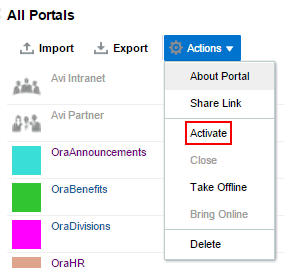
From the Actions menu, select Activate.
-
Confirm the action by clicking OK.
Notice that the Closed status changes to Active.
Taking Any Portal Offline
By default, a portal is online. You can take a portal temporarily offline for maintenance. For example, if you notice inappropriate content, you can take a portal offline to modify its content, then bring it back online. With Portals: Manage Security and Configuration permission, you can access a portal that is offline, or bring it back online. Without this permission, users see the Portal Unavailable page (see Customizing System Pages).
To take a portal offline:
-
On the Portals administration page, select the portal you require by highlighting the row in the table.
Press Ctrl+click to select more than one portal.
-
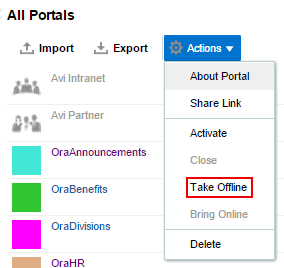
From the Actions menu, select Take Offline.
-
Confirm the action by clicking OK.
Notice that the Online status changes to Offline.

Bringing Any Portal Back Online
To bring any portal back online:
-
On the Portals administration page, select the required portal by highlighting the row in the table.
Press Ctrl+click to select more than one portal.
-
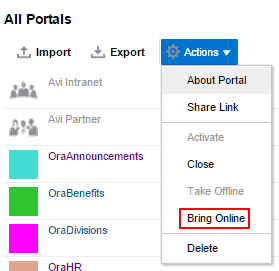
From the Actions menu, select Bring Online.
-
Confirm the action by clicking OK.
Notice that the Offline status changes back to Online.
Deleting a Portal
When a portal has been closed or inactive for some time, you may want to remove it permanently from WebCenter Portal. Deleting a portal is permanent; it cannot be restored after it is deleted.
When you delete a portal:
-
All pages associated with the portal are deleted.
-
Links, lists, notes, tags, and events associated with the portal are deleted.
-
Portal roles and membership details are deleted.
-
Content managed by discussions and announcements is deleted, when it is stored in the default forum or category created by the portal. Content managed by nondefault forums or categories is not deleted.
Note: Oracle WebCenter Portal has deprecated the support for Jive features (announcements and discussions). If you have upgraded from a prior release to Release 12c (12.2.1.4.0), Jive features remain available in your upgraded instance but Oracle support is not provided for these features. In the next release, Jive features will not be available even in the upgraded instances
-
The portal mail distribution list that is automatically created by the Oracle WebCenter Portal is deleted. However, distribution lists that are customized by the portal manager are not deleted.
-
Content managed by external services, such as content repositories and mail, is removed.
You cannot delete a portal while the portal manager is editing portal settings, but there are no other restrictions.
To delete a portal:
-
On the Portals administration page, select the portal to delete by highlighting the row in the table.
Press Ctrl+click to select more than one portal.
-
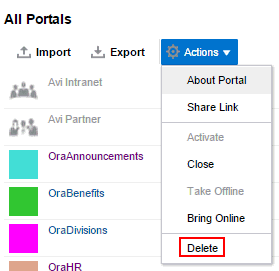
From the Actionsmenu, select Delete.
-
Click Delete to confirm that you want to delete the portal(s).
If the delete process fails for any reason, the portal is not removed from the Portals page; this sometimes happens when a back-end server cannot be contacted. If you click Delete again, the portal is removed.