- Oracle Exadata Storage Server X9-2 EF, HC, and XT Service Manual
- Servicing NVMe Cables
- Remove NVMe Cables
Remove NVMe Cables
-
Prepare the server for service.
- Power off the server and disconnect the power cords from the power supplies.
- Extend the server to the maintenance position.
- Attach an antistatic wrist strap to your wrist, and then to a metal area on the chassis.
- Remove the server top cover.
- Remove the air baffle.
-
Remove the fan modules.
See Remove a Fan Module.
-
Remove the fan tray from the server.
See Remove the Fan Tray.
-
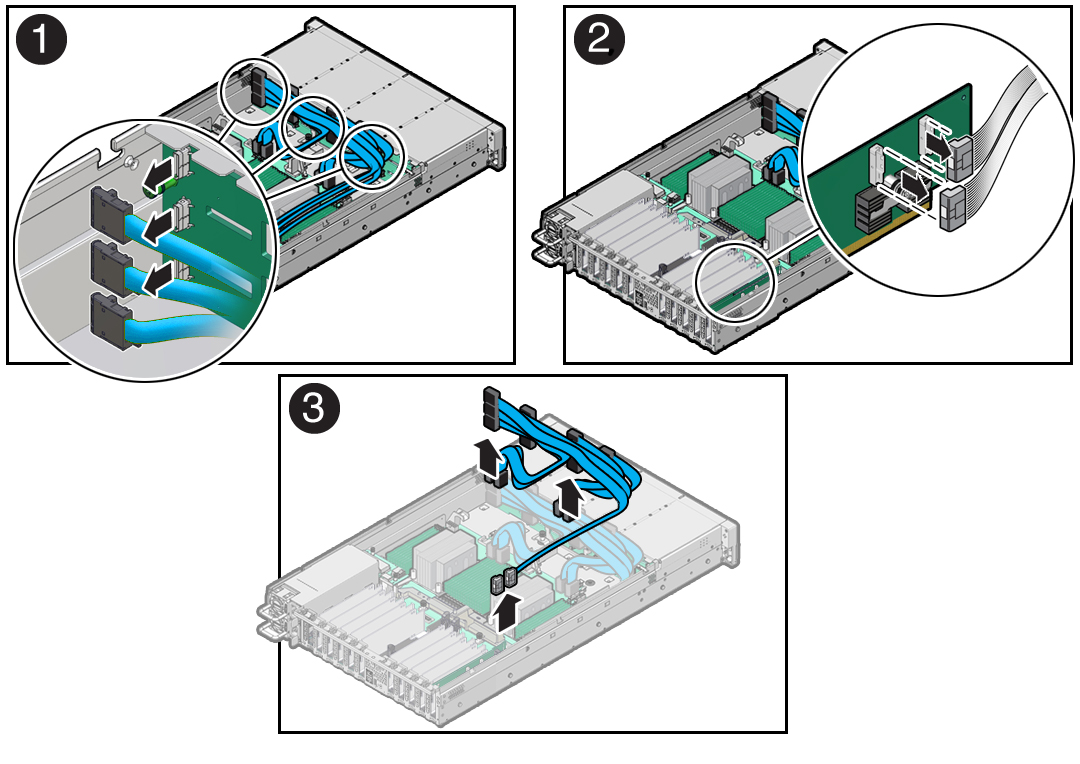
Disconnect the NVMe cables from the disk backplane [1].
Press and hold the green button on each connector to disengage the locking mechanism, then gently pull each connector from the disk backplane.

-
If your storage drive configuration includes NVMe drives in slots 8 through
11, disconnect the NVMe cables from the Oracle Retimer card in PCIe slot 10
[2].
Press and hold the green button on each connector to disengage the locking mechanism, then gently pull each connector to disengage them from the P0 and P1 connectors on the HBA. See also Remove a PCIe Card.
-
Disconnect the NVMe cables from the motherboard NVMe connectors [3].
Press and hold the green button on each connector to disengage the locking mechanism, then gently pull each connector to disengage them from the motherboard connectors.
-
Remove the NVMe cables from the server [3].
Carefully remove the NVMe cable bundles from the center and front left-side cable guides and the left-side cable trough. Be careful not to snag the cables on the server components.
Related Topic: