Install the Base Module Back Rails

The back rails will connect to the front rails and support the module. Install the back rails before the front rails.

Parts Required

Back rails (1 left, 1 right)

Two Mounting blocks

Two 8–32 X 5/8 screws

Figure 2-3 Back Rail Position
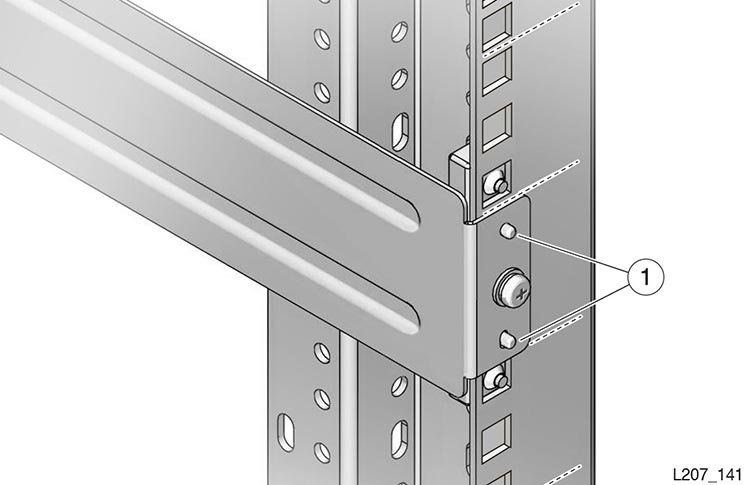
Back rail mounted in rack
  • Illustration Legend:
  • 1 - Pins

Figure 2-4 Back Rails Installed
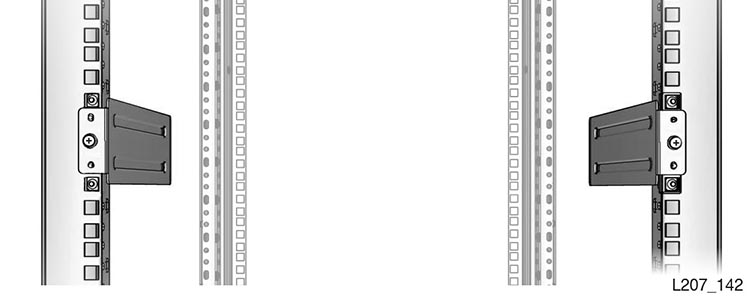
Rear of rack with back rails mounted in rack
  1. Locate where you will mount the Base Module within the rack, allowing space for Expansion Modules (use the rail installation template as necessary).
  2. Verify that the rails will reside with a single U boundary. Do not mount the block with the pins straddling a U boundary.
  3. From the accessory kit, select the appropriate attachment hardware for your rack, and set the other hardware aside.

    Note:

    A rack with square mounting holes uses the clip nuts and 10-32 X 5/8 screws (the M5 and M6 screws are only used in threaded hole racks).

  4. At the back of the rack, position the mounting block so the screw hole is in the second hole (center hole) of the rack unit. Position the back rail so the rail extends to the interior of the rack, align the mounting block pins with the holes in the rail bracket (see Figure 2-3).
  5. Verify the pins and screw hole are within the boundaries of a single rack unit.
  6. Insert the 8–32 screw into the mounting block hole, and turn the screw several full turns by hand. Tighten the 8–32 screw with a #2 Phillips screwdriver.
  7. Make sure the wide surface of the back rail is plumb with the inside edge of the rack stile. The back rails should neither tilt in nor out.
  8. Repeat the procedure for the other back rail. Verify the top edges of the rails are level with each other (see Figure 2-4).