Chapter 8 Create Virtual Machines
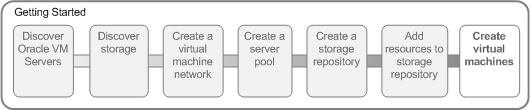
When you have a virtual machine template (either as an Oracle VM template or an virtual appliance), or an ISO file that contains an the installation files for an operating system, you can create a virtual machine. If you use a virtual machine template, you need to clone the template to create a virtual machine. If you use the OVF template format, you first need to create an Oracle VM template from the OVF file, then use that template to clone a virtual machine. If you use an installation source ISO file, you can create a virtual machine directly from the ISO file. The examples in this tutorial first use a template, a virtual appliance, and then an ISO file to create virtual machines. A final example shows you how to start a virtual machine and connect to the virtual machine's console.
8.1 Creating a virtual machine from a template
This example uses the virtual machine template you imported in Section 7.2, “Importing a virtual machine template” to create a virtual machine, and deploy it in the server pool.
-
Click the Servers and VMs tab.
-
Click Create Virtual Machine
 in the toolbar.
-
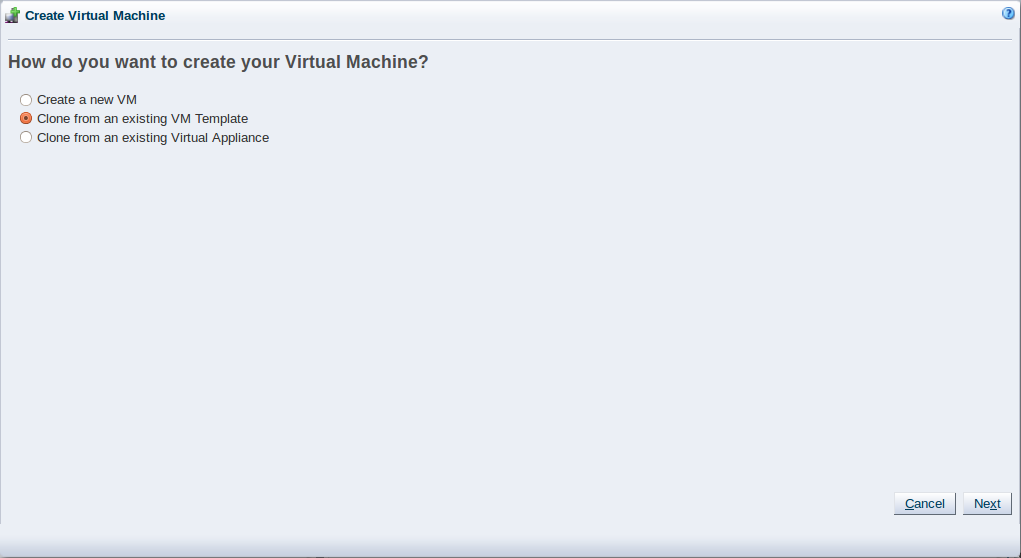
The Create Virtual Machine wizard is displayed. Select the Clone from an existing VM Template option and then click Next.
-
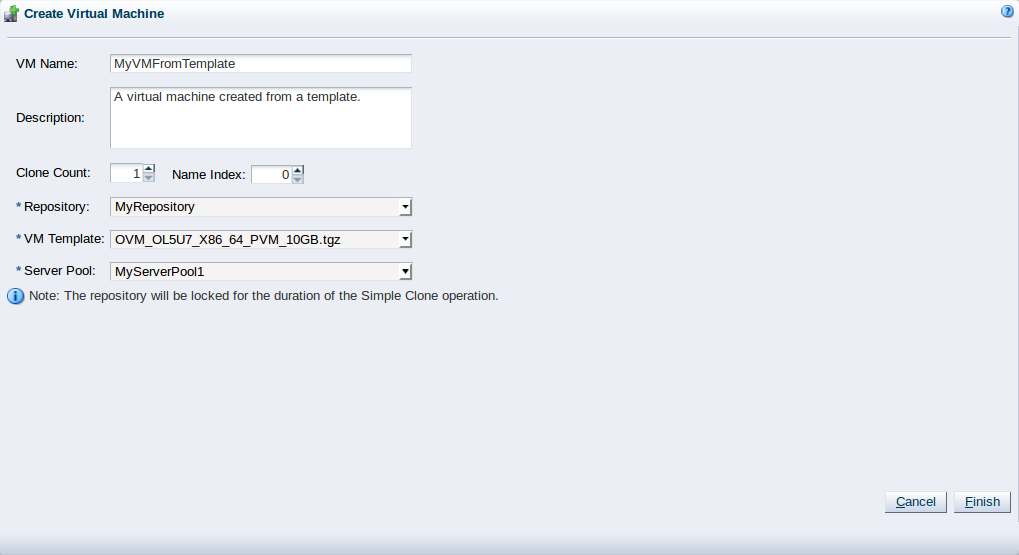
The Create Virtual Machine wizard prompts you to specify details for the virtual machine.
Enter the number of virtual machines to create from the template in the Clone Count field. Select the storage repository in which to store the virtual machine files. Select the virtual machine template from the VM Template field. Enter a name for the virtual machine(s) in the VM Name field. Select the server pool on which to deploy the virtual machine(s) from the Server Pool field. Click Finish.
The template is cloned to create one or more virtual machines. The cloning job may take some time. When the clone job is completed, the virtual machine is deployed to an Oracle VM Server in the server pool. To see the virtual machine, select the server pool in the navigation pane and select Virtual Machines from the Perspective drop-down list in the management pane toolbar.

8.2 Creating a virtual machine from a virtual appliance
This example uses the virtual appliance you imported in Section 7.1, “Importing a virtual appliance” to create a virtual machine, and deploy it in the server pool.
-
Click the Servers and VMs tab.
-
Click Create Virtual Machine
in the toolbar.
-
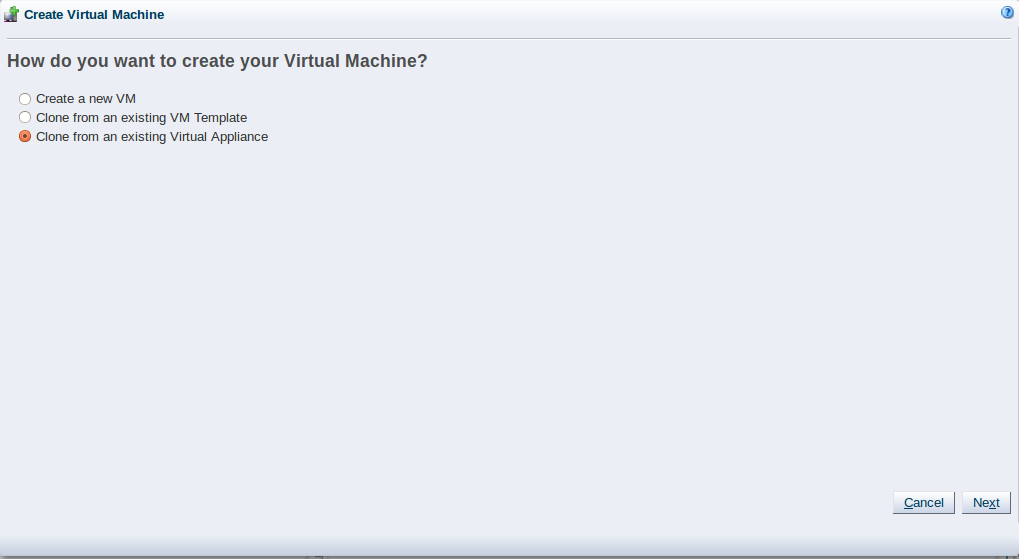
The Create Virtual Machine wizard is displayed. Select the Clone from an existing Virtual Appliance option and then click Next.
-
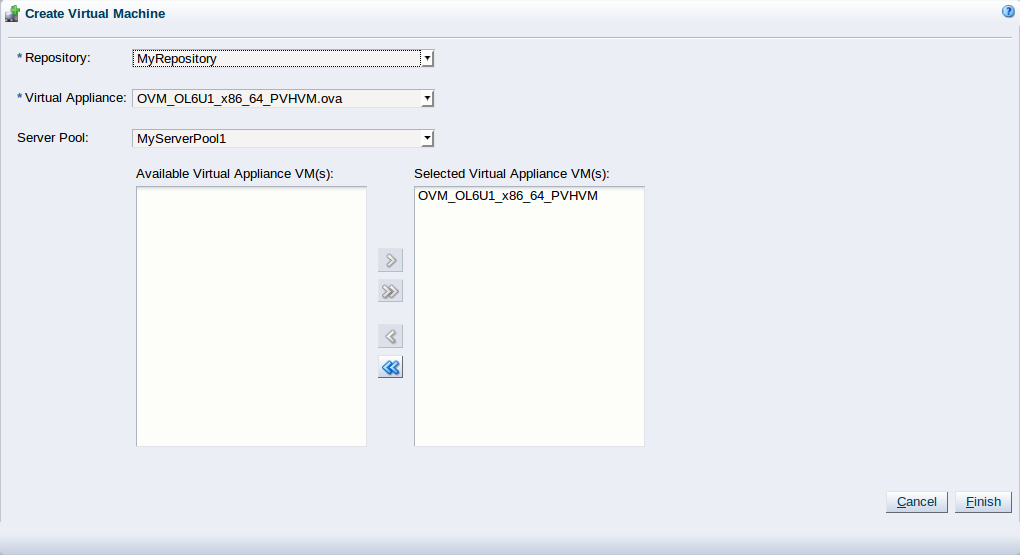
The Create Virtual Machine wizard prompts you to specify details for the virtual machine.
Select the repository in which to create the virtual machine configuration files from the Repository menu. Select the virtual appliance from which you want to create the virtual machine from the Virtual Appliance menu. Select the server pool in which you want to deploy the virtual machine from the Server Pool menu. Select the virtual machines that you want to create from the Available Virtual Appliance VM(s) column. Confirm the virtual machines in the Selected Virtual Appliance VM(s) column. Click Finish.
Oracle VM Manager creates one or more virtual machines from the selected virtual appliance(s). The job to create the virtual machine may take some time. When the job is completed, Oracle VM Manager deploys the virtual machines to the server pool you specified. If you did not specify a server pool, the virtual machines are deployed to the Unassigned Virtual Machines folder in the Servers and VMs tab. You can then migrate each virtual machine to a compatible server or server pool.
8.3 Creating a virtual machine from an ISO file
This example uses the ISO file you imported in Section 7.3, “Importing an ISO file” to create a virtual machine, and deploy it in the server pool.
-
Click the Servers and VMs tab.
-
Click Create Virtual Machine
in the toolbar.
-
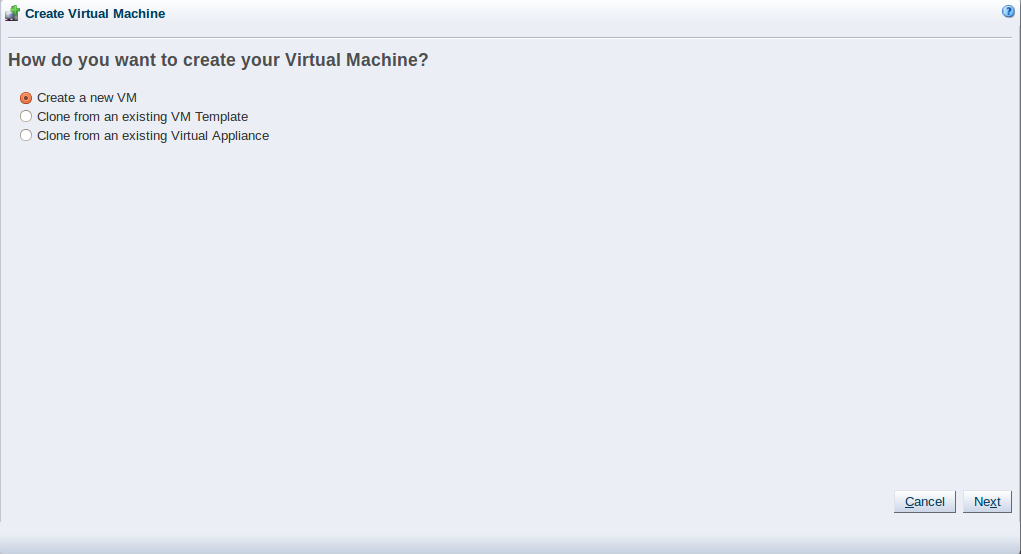
The Create Virtual Machine wizard is displayed. Select the Create a new VM option and then click Next.
-
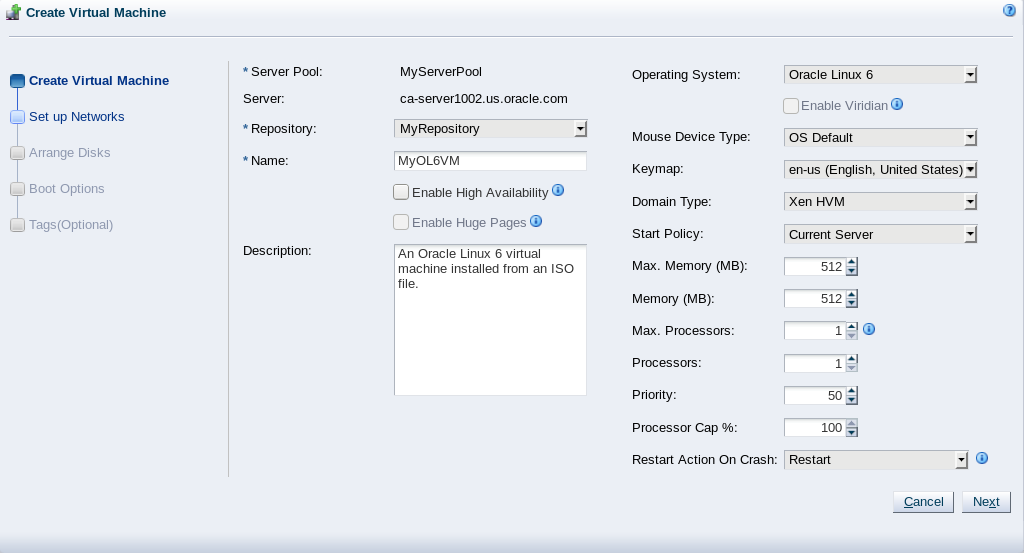
The Create Virtual Machine wizard is displayed. In the Create Virtual Machine step, select the server pool you created earlier, the repository you created as the location to store the virtual machine configuration file, and enter a name for the virtual machine. Click Next.
-
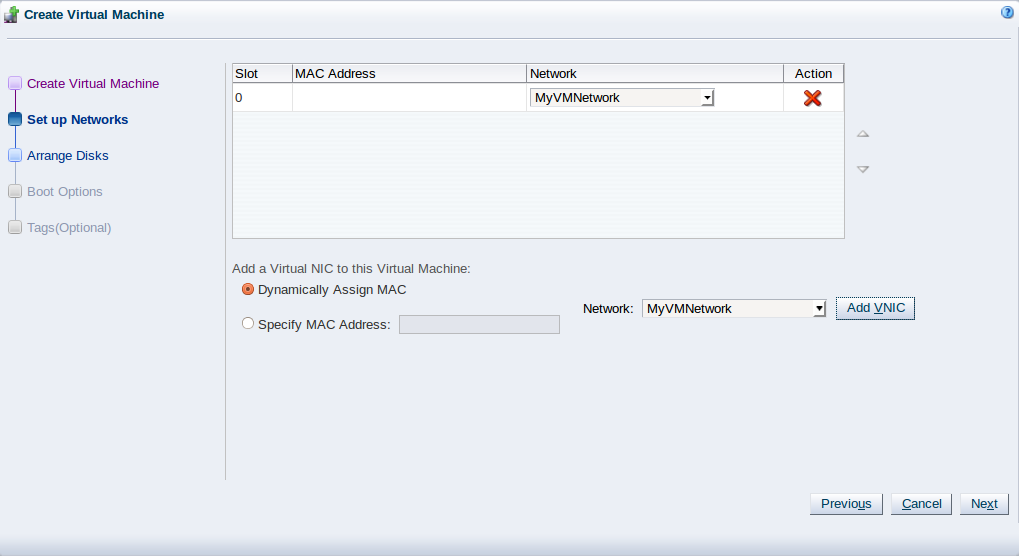
In the Setup Networks step, add one or more VNICs to the virtual machine. To dynamically create a VNIC, select the Dynamically Assign Mac check box and click Add VNIC. The VNIC is added to the virtual machine, and a MAC address is assigned when the create virtual machine job is submitted. Click Next.
-
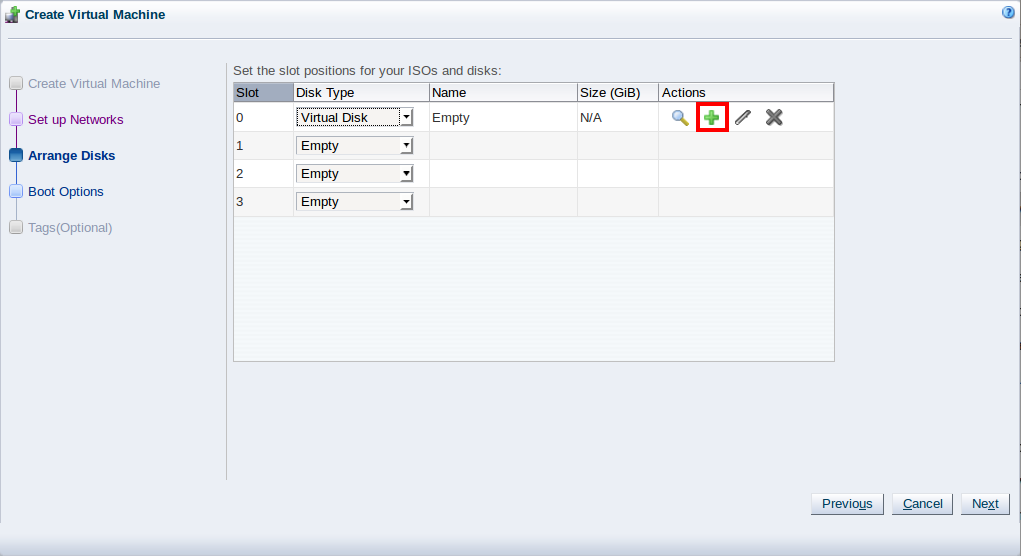
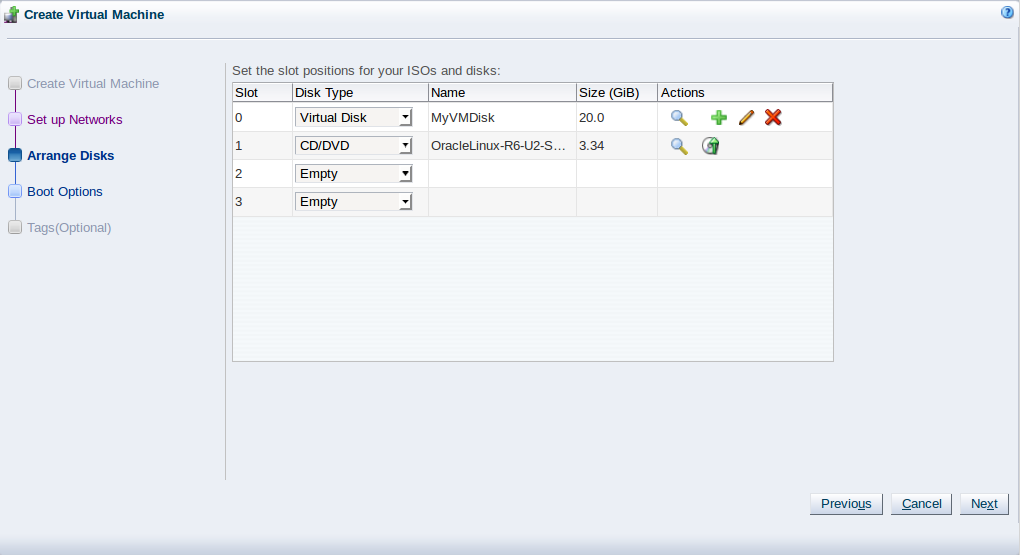
In the Arrange Disks step, create a virtual disk to use as the virtual machine's hard disk and select the ISO to use to create the virtual machine. For slot 0, select Virtual Disk from the Disk Type drop-down list. Click Create a Virtual Disk
 .
.
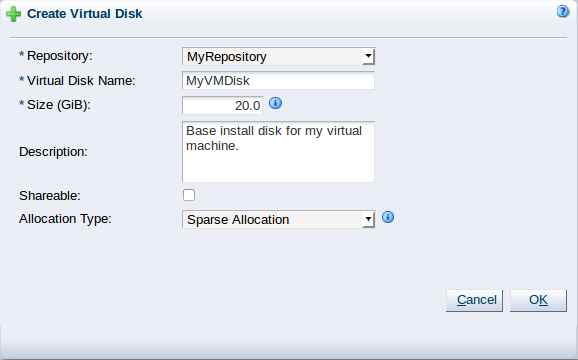
The Create Virtual Disk dialog box is displayed. Select the repository on which to create the virtual disk, enter a name for the disk, and enter the size of the disk. Click OK.
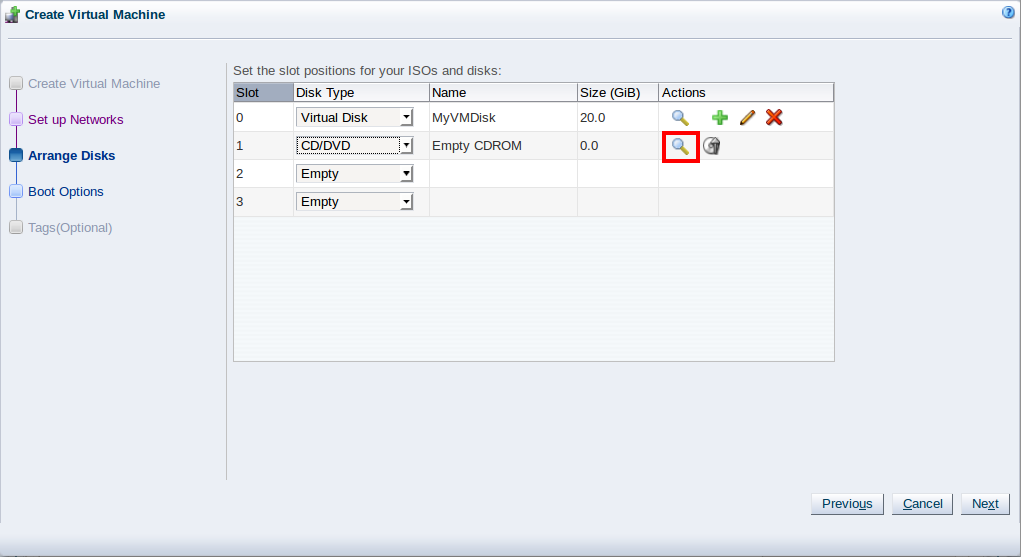
For slot 1 select CD/DVD from the Disk Type drop-down list. Click Select a Virtual Machine Disk
 .
.
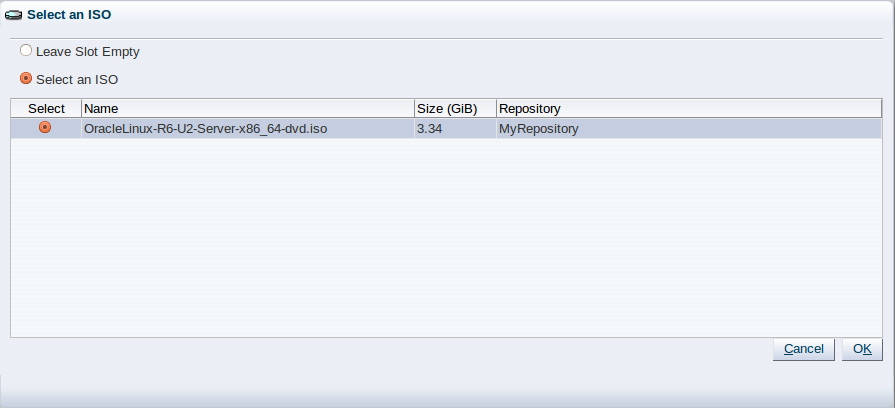
The Select an ISO dialog box is displayed. Select the ISO file and click OK.
You have now created a virtual disk to use as the virtual machine's hard disk, and added the ISO file which contains the operating system to be installed. Click Next.
-
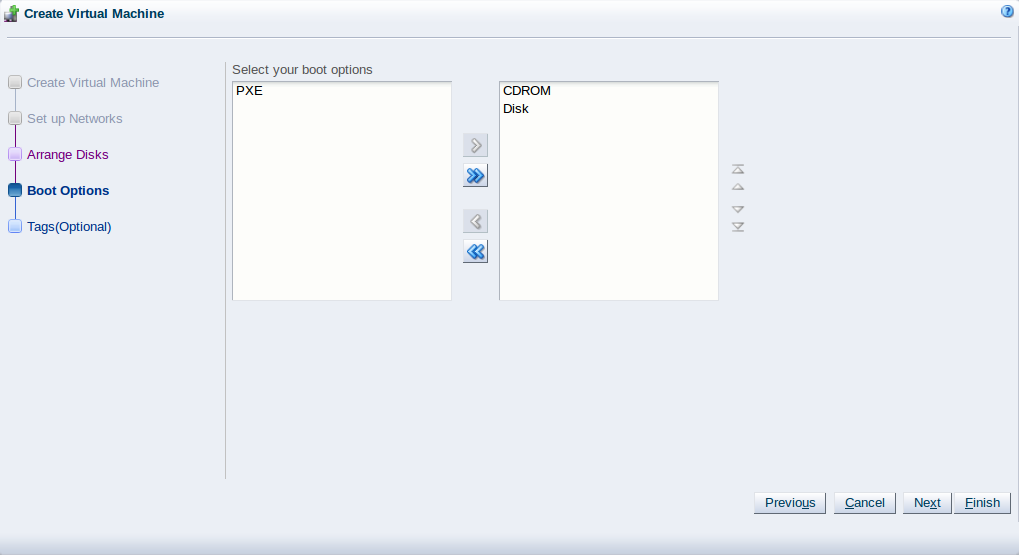
In the Boot Options step, select the boot media and order for your virtual machine. Click Finish.
The virtual machine is created and deployed to an Oracle VM Server in the server pool. To see the virtual machine, select the server pool in the navigation pane and select Virtual Machines from the Perspective drop-down list in the management pane toolbar.
8.4 Starting a virtual machine and connecting to the console
When a virtual machine is created, it is deployed to the server pool in a stopped state. This step of the tutorial starts the virtual machine created with an ISO file, and logs into the virtual machine console.
-
Click the Servers and VMs tab. Select the server pool in which the virtual machine is deployed in the navigation pane.
-
From the Perspective field in the management pane, select Virtual Machines from the drop-down list.
-
Select the virtual machine in the table and click Start
 in the management pane toolbar.
-
When the virtual machine is running, you can connect to the virtual machine's console and log in, if required. To connect to the console, click Launch Console
 in the management pane toolbar.
-
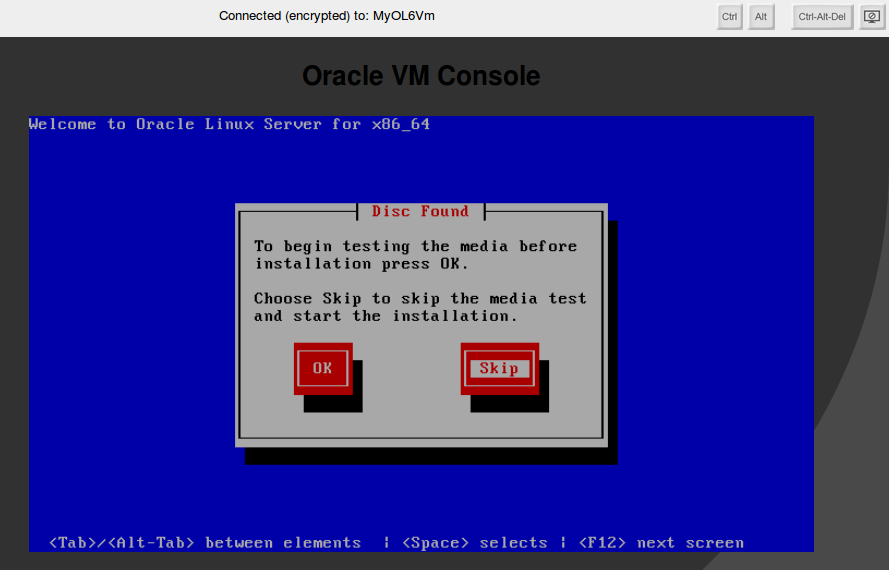
The virtual machine console is displayed. Log in and interact with the virtual machine as you would through any other VNC session.
This example shows the initial installation screen for the virtual machine created with the Oracle Linux operating system ISO file.


See Create Virtual Machine for more information on creating virtual machines.