4 Configuring ODI Settings
After you have installed Oracle Data Integrator (ODI), you must configure certain settings to be able to use it to run the ETL process.
All the ODI related data has been zipped into a file, which is a part of the installation package and is available at the following path:
...\ArgusMart\ODI\AM.zip
However, there are certain tasks that you need to execute before and after importing this zip file. All these tasks are covered in sequence in the later sections.
This chapter explains the step-by-step procedure to configure all the ODI related tasks using the ODI Studio. The configuration of these tasks using the ODI Console is not supported for this release.

4.1 Minimum Components Required
The following are the minimum components required to setup ODI for Argus Mart:
-
ODI Studio
-
ODI Agent
4.2 Installing and Configuring ODI
To install and configure the ODI components (ODI Studio and ODI Agent):
Reference:
To view the Oracle® Fusion Middleware Installing and Configuring Oracle Data Integrator Guide, refer to the following:-
For ODI 12.1.3
https://docs.oracle.com/middleware/1213/core/ODING/toc.htm -
For ODI 12.2.1
https://docs.oracle.com/middleware/1221/core/ODING/toc.htm
-
Understand the ODI Topology—To understand the ODI agent topologies for the best suitable installation, refer to the Oracle® Fusion Middleware Installing and Configuring Oracle Data Integrator Guide > Section: Planning the Oracle Data Integrator Installation.
-
Install the ODI—Refer to the Oracle® Fusion Middleware Installing and Configuring Oracle Data Integrator Guide > Section: Installing Oracle Data Integrator.
-
Create the Master and Work Repository Schema—Refer to the Oracle® Fusion Middleware Installing and Configuring Oracle Data Integrator Guide > Section Creating the Master and Work Repository Schema.
-
Create Repository Login—Create a login name for the Master or Work Repository.
-
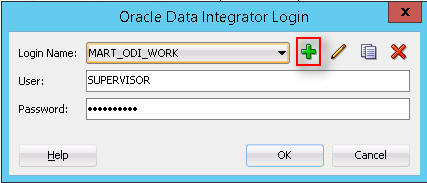
On the Oracle Data Integrator Login screen, click the + icon.
The Repository Connection Information screen appears.
-
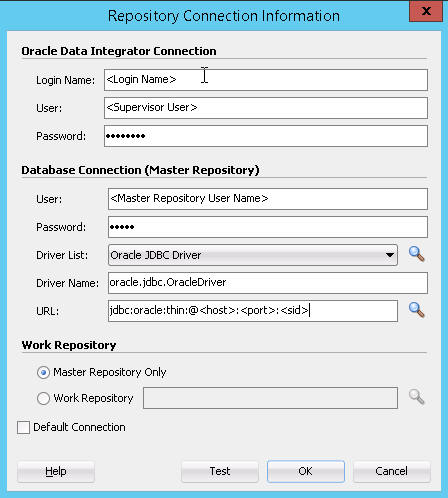
On the Repository Connection Information screen:
-
In the Login Name field, enter a login name for the repository.
-
In the User field, enter the name of the SUPERVISOR user.
-
In the Password field, enter the password for the SUPERVISOR user.
Enter the same password as provided for the SUPERVISOR while installing the ODI.
-
In the Database Connection section, enter the Master Repository User Name and Password.
Enter the same User Name and Password as provided while installing the ODI.
-
Enter the database details in the Driver List, Driver Name and URL fields.
You may also click the Search icon next to the Driver List and URL fields to search for the required Driver List and URL.
-
In Work Repository section:
— Select Master Repository Only option, if the login is being created for the Master Repository.
— Select the Work Repository option, and enter the name of the Work Repository in the adjacent text box (for example, WORKREP1).
You may also click the Search icon next to the Work Repository name text box.
-
Click OK.
The login name is created.
-
-
-
Import Argus Mart Schema Objects
-
Open the ODI, and connect to the repository using the Work Repository credentials that you have just created, as mentioned in the previous section.
-
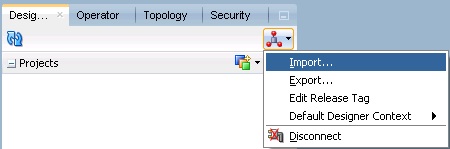
From the Designer tab, click the down arrow.
A drop-down menu appears.
-
Click Import.
The Import Selection dialog box appears.
-
Select Smart Import, and click OK.
The Smart Import dialog box appears.
-
Click the Search icon next to the File Selection field.
The Select an import file dialog box appears.
-
Navigate to the AM.zip file, saved at the following location:
...\ArgusMart\ODI\AM.zip
-
Select the AM.zip file, and click Open.
The complete path of the zip file appears in the File Selection field.
Keep the Response file field as blank. -
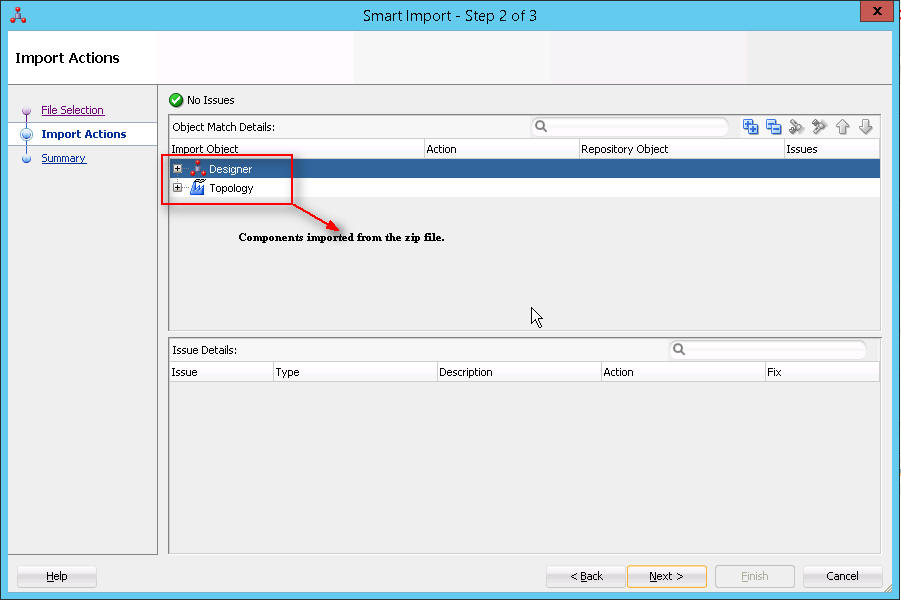
Click Next.
The Please wait dialog box appears with a Matching Import Objects message.
Subsequently, the Smart Import dialog box appears listing the components that will be imported from the zip file using the Import Actions screen.
-
Click Next.
The Summary screen appears with the No issues message if there are no errors in the import process.
-
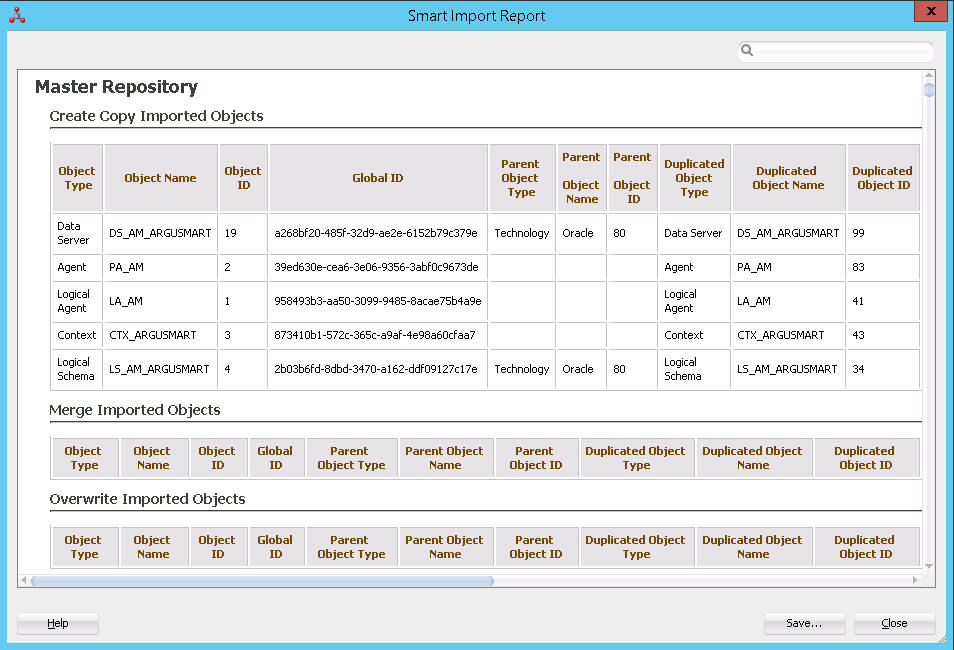
Click Finish.
The Please wait dialog box appears with a Import in progress message.
Subsequently, the Smart Import Report screen appears listing the objects imported using the zip file.
-
Click Save.
The Save Report dialog box appears.
-
Click the Search icon next to the Name of the target file field.
The Save dialog box appears.
-
Navigate to the path where you want to save the report, and in the File Name field, enter the name for the report.
-
Click Save.
The name of the report file appears along with the complete path in the Name of the target file field.
-
Click OK.
The Information dialog box appears with the path where the report file has been saved.
-
Click OK.
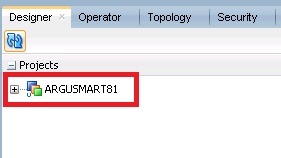
This completes the steps to import the AM zip file.
You may verify this from ODI > Designer tab. The Argus Mart specific folders now appears in the Designer tab under Projects section, such as ARGUSMART<version number>.
-
-
Setup the Physical Agent
-
Open the ODI Studio, and login to the Work Repository Connection created in the Step 4.
-
Go to the Topology tab, from the left side pane, navigate to the Physical Architecture > Agents.
-
Double -click PA_AM.
-
From the Definition Vertical tab, in the Host field, enter the IP address of the ODI Server.
If you configure a Standalone Agent, then leave the Agent Name as PA_AM, and configure the Standalone Agent in the next step with same name.If you configure a Java EE Agent, then change the Agent Name to OracleDIAgent (as by default), and the Agent Name for Java EE Agent will be created as OracleDIAgent. For more information, refer to Oracle® Fusion Middleware Installing and Configuring Oracle Data Integrator > 5 Configuring the Domain for the Java EE Agent > 5.3 Creating a Java EE Agent in the Master Repository Using ODI Studio.
Make sure to use the same port number in ODI Studio as well as Agent configured.
-
-
Configure the Domain for the ODI Agent
Note:
For Argus Mart, configure either one of the ODI Agents (Standalone, or Java EE).-
To configure the domain for the Standalone Agent, refer to the Appendix A, "Configuring Standalone Installation Topology for Standalone Agent."
-
To configure the domain for the Java EE Agent, refer to the Appendix B, "Configuring Standard Installation Topology for Java EE Agent."
-
4.3 Creating and Testing Data Server Connection
To create and test the Data Server connection, execute the following procedure:
-
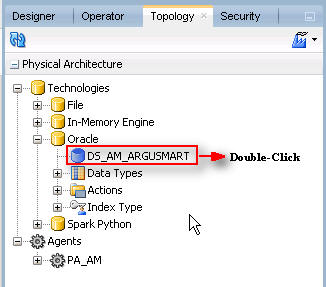
Select the Topology tab.
In the Physical Architecture section, under Oracle folder, double-click DS_AM_ARGUSMART.
The connection details appears in the right pane, with Definition selected by default.
-
In the User field, enter the name of the Argus ETL user (AM_ETL_USER).
This user was created in the Section 2.2.4, "Creating Fresh Argus Mart Schema".
-
In the Password field, enter the password for the Argus ETL User.
-
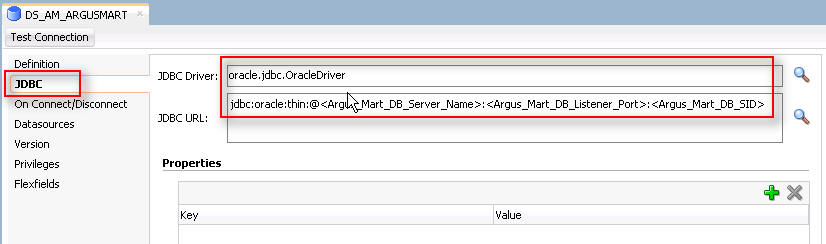
Select JDBC in the right pane, and enter database details of the Argus Mart schema in the JDBC Driver and JDBC Url fields.
You may also click the Search icon next to the JDBC Driver and JDBC Url fields to search for the required JDBC Driver and JDBC Url.
-
Click Test Connection.
A confirmation message appears to save data before testing the connection.
-
Click OK.
The Test Connection dialog box appears.
-
From the Physical Agent drop-down list, select Local, and click Test.
The Information dialog box appears with the Successful Connection message.
-
Click OK.
-
From the Physical Agent drop-down list, select the Physical Agent, and click Test.
The Information dialog box appears with the Successful Connection message.
-
Click OK.
This completes the steps to create and test the Data Server connection.
4.4 Creating New Physical Schema
To fetch data by ODI ETL, you must create a new physical schema.
-
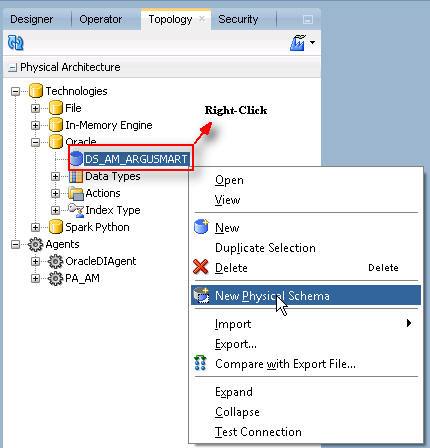
Select the Topology tab.
In the Physical Architecture section, under Oracle folder, right-click DS_AM_ARGUSMART.
-
Select New Physical Schema.
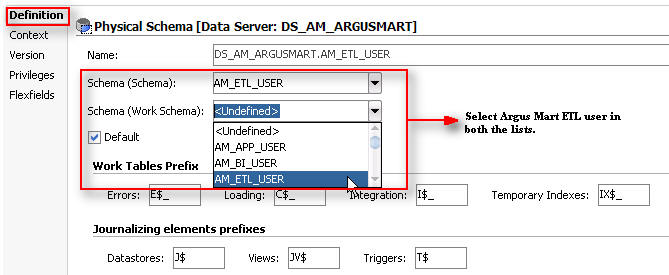
The Physical Schema screen appears, where Definition is selected by default.
-
From the Schema drop-down list, select the Argus ETL User (AM_ETL_USER).
This user was created in Section 2.2.4, "Creating Fresh Argus Mart Schema".
-
From the Schema (Work Schema) drop-down list, select the Argus ETL User (AM_ETL_USER) again.
-
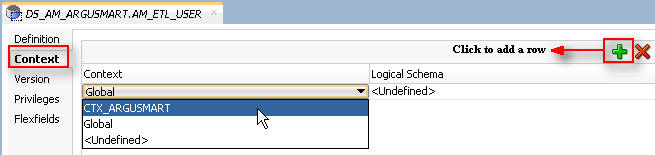
From the left-pane, select Context, and click the + symbol.
A new row is added in the empty space below the Context and Logical Schema options.
-
From the Context drop-down list, select CTX_ARGUSMART.
-
From the Logical Schema drop-down list, select LS_AM_ARGUSMART.
-
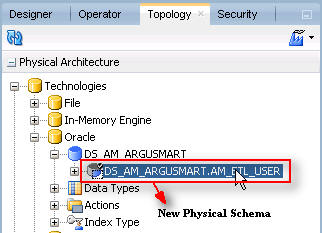
Click Save on the menu bar.
The new physical schema appears under Physical Architecture section, in Oracle folder.
4.5 Setting-up the Physical Agent for Context CTX_ARGUSMART
To associate the physical agent with the context:
-
Select the Topology tab.
-
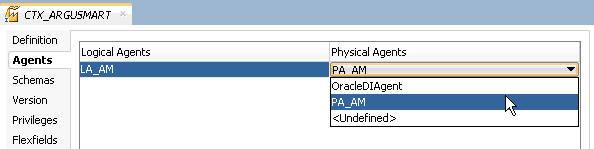
To open the context, from the Contexts section, double click CTX_ARGUSMART.
-
Navigate to Agents.
-
For the Logical Agent LA_AM, from the Physical Agent drop-down list, select an agent.
Select the physical agent that was created in while configuring the ODI.
-
Click Save.
4.6 Validating Load Plan
To validate the Load Plan, execute the following steps:
-
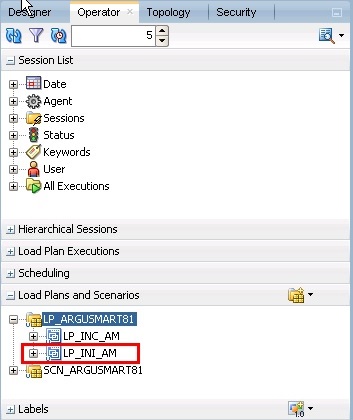
Select Operator tab.
-
In the Load Plans and Scenarios > LP_ARGUSMART811 section, double-click the LP_INI_AM Load Plan.
If the Object Locking dialog box appears, click No and proceed with the Validation process.
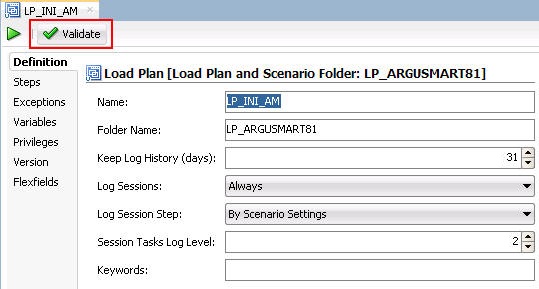
The Load Plan details appears in the right pane.
-
Click Validate.
A confirmation message appears, if there are no issues associated with the Load Plan.