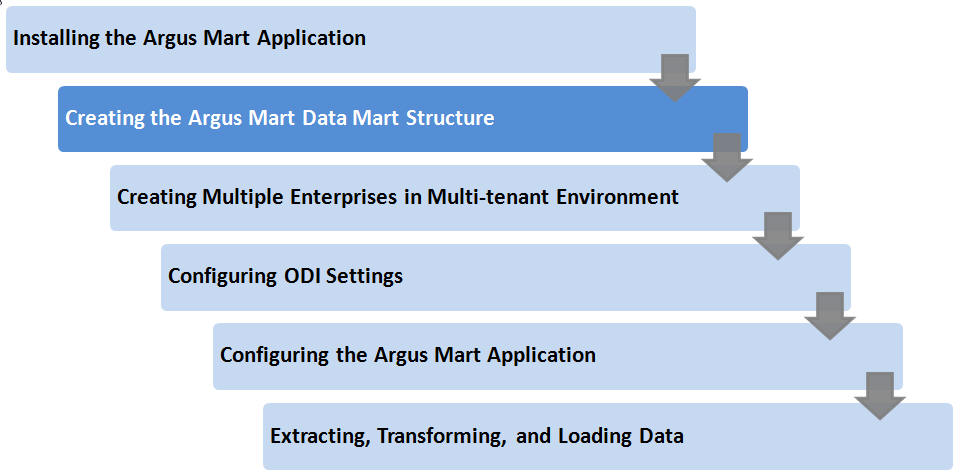
2 Creating the Argus Mart Database Structure
The Argus Mart is now installed in silent-mode through Liquibase.
Liquibase is a refactoring tool that enables Argus Mart to be in synchronization with the closest major release, and subsequently upgrades the product to the required minor versions of the product
The Argus Mart Liquibase install enables you to create the Argus Mart schema structure. It creates a link between the safety database and the new Argus Mart database. The Extract, Transform, and Load (ETL) process uses this link to transfer data from source (Argus Safety) database to the Argus Mart database. When transferred, this data can be used for querying and reporting purposes.
2.1 Overview of the dbinstaller.properties file
Open the DBInstaller\dbinstaller.properties file, and view or modify the following parameters to make sure that Liquibase runs properly.
| Parameter | Description | Modify | Default or Sample Value |
|---|---|---|---|
| db_connect_string | Jdbc Url to connect to the Target Database. | Yes | url=abc.in.oracle.com:1521/811DB |
| dba_User | Name of the Target Database DBA user | Yes | dba_User=am_dba_user |
| logLevel | Log level setting related to liquibase for smooth run.
Possible values:
|
Yes | logLevel=info |
| appSchema_sm_mart | Argus Mart schema Owner name and password | No | appSchema_mart_user=am_mart/pwd |
| appSchema_sm_stage | Argus Mart Staging schema Owner | No | appSchema_sm_stage=am_stage |
| appSchem_sm_app | Argus ILinkMart Application schema Owner name and password | No | appSchema_sm_app=am_app/pwd |
| appSchema_etl_user | Argus Mart Etl User and password | No | appSchema_etl_user=am_etl/pwd |
| appSchema_rls_user | Argus Mart VPD schema Owner name and password | No | appSchema_rls_user=am_vpd/pwd |
| appSchema_bi_user | Argus Mart BI schema Owner name and password | No | appSchema_bi_user=am_bi/pwd |
| #Mart Database Role
am_vpd_admin_role |
Admin role given to AM_ETL_USER | Yes | am_vpd_admin_role=AM_VPD_ADMIN_ROLE |
| Safety_db | Argus Safety Database TNS | Yes | Safety_DB=AS_DBA_USER/pwd@SAF811DB |
| Safety_RO_User | Argus Mart read-only user name in Argus Safety | Yes | Safety_RO_User=am_ro_user |
| #Datafile directory location | Location of the default datafiles directory. | Yes | default_datafile_destination
=c:/app/oradata/AM811DB |
| #Argus Mart Stage User Datafiles | Location of Argus Mart stage user datafiles. | Yes |
|
| #Argus Mart > Mart User Datafiles | Location of Argus Mart > Mart user datafiles. | Yes |
|
| #Argus Mart Apr User Datafiles | Location of Argus Mart APR user datafiles | Yes |
|
| Default and Temporary tablespaces | Defines default and temporary tablespace name | No |
|
| Tablespace Encryption | Specifies the logic used for default encryption | Yes |
|
| Tablespace Parameters | Specifies the details of the tablespace | Yes |
|
| LOB Storage | Location of Argus Mart LOB storage.
Possible Values:
|
Yes | lob_storage=basicfile |
2.2 Installing Argus Mart
This section gives you a brief introduction about all the options that are available when you run the Argus Mart Liquibase install.
To start the Argus Mart installation, execute the following steps:
-
Pre-requisites
-
Creating the Safety Read Only user for Argus Mart
-
Creating the Install user in Argus Mart
-
Creating the fresh schema of Argus Mart
-
Validating the schema
2.2.1 Pre-requisites
You must check the following settings before you run the Argus Mart installation:
-
GLOBAL_NAMES is set to FALSE to enable the Argus Mart application to create the database links.
-
NLS_LENGTH_SEMANTICS is set to CHAR for the Argus Mart Schema Creation Tool to run.
-
TNS Name for the Argus Safety Database must be present in the Oracle Database Client > tnsnames.ora file at the following path:
...\network\admin\tnsnames.ora.
2.2.2 Creating User for the Argus Safety Database
-
To create the Safety Read-only user for Mart, execute the following script from the folder DBInstaller\Utilities\Create_Safety_Ro_User:
-
For Windows—Use the batch script sm_argus_read_only{user}.bat
-
For Linux—Use the shell script sm_argus_read_only{user}
-
-
When prompted, enter the following parameters:
-
Name of the Safety Database instance
-
Name of DBA User in Safety Database
-
DBA user password in Safety Database
-
Name of the Safety Read Only User to be created for Mart
-
Password of the Safety Read Only User
-
Role to be associated with Safety Read-only User
-
Default Tablespace for Safety Read-only User—For example, USERS
-
Temporary Tablespace for Safety Read-only User—For example, TEMP
The process of creating a Safety Read-only user begins.
-
-
When a confirmation message appears, review the log file and check for any errors from:
\DBInstaller\Utilities\Create_Safety_RO_User
2.2.3 Creating the Install User
Note:
You must execute this script to install Argus Mart database, even if you are using the SYSTEM user. This script provides additional grants to the existing user.To create an Install user that has privileges same as the SYSTEM user for installation:
-
Execute the following script from the folder DBInstaller\Utilities\Create_Dba_User:
-
For Windows—Use the batch script am_create_dba_user.bat
-
For Linux—Use the shell script am_create_dba_user
-
-
When prompted, enter the following parameters:
-
Argus Mart Database instance name
-
SYS or an equivalent SYSDBA user on this database
-
SYSDBA user password
-
Name of the Install User—For example, SYSTEM or AM_DBA_USER
-
Install user password
If you provide a non-existing user name, then the script creates this as a new user, and provides the necessary grants to this user.
If you provide an already existing user name, then the script provides the necessary additional grants to the existing user.
When done, a message appears as:
Install User created.
-
-
Press Exit.
Recommendation:
For security reasons, Oracle recommends to drop the Install user from the database after successful installation of Argus Mart as this user will have Install privileges.To drop this user, connect to the respective database as a privileged user, and execute the following command:
DROP USER <INSTALL_USER> CASCADE;
2.2.4 Creating Fresh Argus Mart Schema
-
Log in to the Argus Mart Server with administrator privileges.
-
Navigate to Programs > Oracle > Argus Mart > Database > DBInstaller.
-
Open Dbinstaller\dbinstaller.properties file.
-
Modify the following parameters:
-
Mart Database:
-
db_connect_string—connects to the Argus Mart database.
Syntax: db_connect_string=<host>:<port>/<SID>
For example, server.us.xx.com:1521/AM811MT
-
dba_user—specifies the name of the Install user to run Argus Mart Liquibase Install.
-
default_datafile_directory—default location on the database server, where datafiles will be created.
-
-
Mart User of each schema, where password is optional:
-
appschema_sm_mart
-
appschema_sm_stage
-
appschema_sm_app
-
appschema_etl_user
-
appschema_rls_user
-
appschema_bi_user
-
-
Safety Database:
-
safety_db—Argus Safety database instance name
-
safety_ro_user—Argus Mart Read-only user created in Argus Safety
-
Note:
For more information on these parameters, see Section 2.1, "Overview of the dbinstaller.properties file."It is recommended that you preserve the default names for tablespaces and roles.
-
-
From the command prompt, go to DBInstaller directory.
-
Type dbinstaller.bat, and press Enter.
The Liquibase install begins, and the parameters (as entered) appear on the command prompt screen with password in the hidden mode (****).
-
Keep monitoring the Liquibase progress by querying the Liquibase Log table mart_dbchangelog, created in AM_MART_USER schema.
-
When the process is complete, a confirmation message appears with the latest version of Argus Mart.
The following is created as per the values specified in the dbinstaller.properties file:
-
Users
-
AM_MART_USER
-
AM_STAGE_USER
-
AM_APP_USER
-
AM_ETL_USER
-
AM_VPD_USER
-
AM_BI_USER
-
-
Roles
-
AM_VPD_ADMIN_ROLE
-
-
Factory Data
-
Out of the box Factory data is loaded into tables such as ETL_SIGNAL_TABLE_MAPPING, RM_CMN_PROFILE_GLOBAL, etc.
-
-
Database Links, DB_LINK_ARGUS:
-
From AM_STAGE_USER of Argus Mart to ARGUS_APP of Safety
-
-
Tablespaces
Note that the tablespace names begin with APR. The Argus Power Reports (APR) product was renamed to Argus Insight.
The Schema Creation Tool creates the following tablespaces for the Argus Mart database, when you create Argus Mart schema:
AM_APP_DATA_01 AM_APP_INDEX_01 AM_APP_LOB_01 AM_MART_DATA_01 AM_MART_INDEX_01 AM_MART_LOB_01 AM_STAGE_DATA_01 AM_STAGE_INDEX_01 AM_STAGE_LOB_01
-
2.2.5 Validating the Schema
-
Navigate to Database > DBInstaller > ValidateSchema.
-
Run the batch script validate_schema.bat.
-
When prompted, enter the following parameters:
-
Enter instance name: <Argus Mart Database Instance name>
-
Enter DBA User Name: <Install user of Argus Mart>
-
Enter Password for DBA User: <Install user password in Argus Mart>
-
Enter Validation Data File Name: The validation control file name (without the .CTL extension)
For example, VLDN_AM_8.1.1
-
Enter the destination where the log file is to be placed:
<C:\AM_811\Database\DBInstaller\ValidateSchema>
-
Enter the log file name for recording the schema differences:
<VLDN_AM_8.1.1_diff.log>
-
Enter Validation Output File Name: The validation output file name to record the validation progress:
<VLDN_AM_8.1.1_out.log>
-
-
Enter the password for the Argus Mart SYSTEM or Install user, and press Enter.
-
When the validation process is complete, a confirmation message appears.
-
To view any schema discrepancies, such as missing objects, use the Difference Log File.
-
To view the list of errors, which occurred during schema validation, use the Output Log File.
-
Note:
If Argus Mart read-only user is created, then ignore the schema validation differences, where-
Objects are RO% views/columns
-
GRANTEE is Argus Mart Read-only user
2.3 Creating Database Links
2.3.1 From Argus Mart to Argus Safety (manually)
During Fresh installation, the database link from Argus Mart to Argus Safety (DB_LINK_ARGUS) is created as a part of the installation process. However, you can manually recreate the link DB_LINK_ARGUS.
-
Navigate to DBInstaller\Utilities\Create_Safety_RO_User:
-
For Windows—execute the batch script sm_create_db_link_argus.bat
-
For Linux—execute the shell script sm_create_db_link_argus
-
-
When prompted, enter the following parameters:
-
Enter the name of the Safety Database instance: Safety Database Instance Name
-
Enter the name of the Mart Database instance: Mart Database Instance Name
-
Enter the name of DBA User in Mart DB: Mart Install user
-
Enter the password for user Mart DBA User: Mart Install user password
-
Enter the name of the Read Only User in Safety DB: Safety Read-only user for Mart
-
Enter the password for Read Only user in Safety: Read-only user password
-
Enter the name of the stage owner in Mart: Stage user of Mart
-
Enter the password for Stage user: Stage user password
-
-
Verify that the script is successfully connected as <Mart Install user/Mart Install user pwd>@<Argus Mart>, and press Enter.
Wait until a message Created DB_LINK_ARGUS appears for each Stage, Mart, and App user.
-
Press Exit to close the Mart to Argus Database Link Creation window.
-
Verify the log files for status from:
DBInstaller\Utilities\Create_Safety_RO_UserDB_LINK_ARGUS_MMDDYYYY_HH24MISS.log
2.3.2 From Argus Mart to Argus Insight
-
When Argus Insight and Argus Mart are on different database instances, execute the script from the folder DBInstaller\Utilities\Database_Links\ ai_am_db_link:
-
For Windows—execute the batch script am_insight_db_link_setup.bat
-
For Linux—execute the shell script am_insight_db_link_setup
-
-
When prompted, enter the following parameters:
-
Enter the Argus Mart Database Instance name
-
Enter the INSTALL user name in Argus Mart, like AM_DBA_USER
-
Enter the password for the above user
-
Enter the Argus Mart application user name, like AM_APP_USER
-
Enter the password for the above user
-
Enter the Argus Mart Schema user name, like AM_MART_USER
-
Enter the password for the above user
-
Enter the Argus Insight Database Name
-
Enter the Argus Insight Application User name, like APR_APP
-
Enter the Password for the above user
-
Enter the Argus Insight Readonly User name, like APR_LINK_USER
-
Enter the Password for the above user
The process of creating the database links begins.
-
-
The following database links are created (by dropping the existing links if any, with the same name.
-
DB_LINK_INSIGHT—From Argus Mart AM_APP_USER > Argus Insight APR_APP
-
ARGUS_MART_TO_INSIGHT_MART—From Argus Mart AM_MART_USER > Argus Insight APR_LINK_USER
-
-
Review the following log file, and check for any errors, when a confirmation message appears.
MART_TO_INSIGHT_DB_LINK_MMDDYYYY_HH24MISS.log
2.4 Creating Argus Mart Read-only User
You can create a read-only schema in Argus Mart. This schema will have read-only (SELECT) access on all the tables and views of the AM_MART schema. Besides, this read-only schema can also be used for customized reporting purpose.
-
Open DBInstaller\Utilities\Create_Mart_Ro_User file.
-
For Windows—execute the batch script am_ ro_user.bat
-
For Linux—execute the shell script am_ ro_user
-
-
When prompted, enter the following parameters:
-
Enter TNSNAME Entry to connect to the ARGUS MART Database: < ARGUS MART Database name>
-
Enter the name of Custom DBA user in Mart Database: < Argus Mart Install user>
-
Enter password for install user in Mart Database: <Install user password>
-
Enter Read Only user to be created in Mart Database: <Read-only user to be created in Mart>
-
Enter password for Read Only user of Mart Database: <Mart Read-only user password>
-
-
When the process is complete, press Exit.
-
Verify the log files for status information from:
DBInstaller\Utilities\Create_Mart_Ro_User\AM_RO_User_MMDDYYYY_HH24MISS.log