3 Administration
This section describes the following administrative tasks in Oracle Thesaurus Management System (TMS):
Security
TMS enables data access to be controlled in multiple dimensions. First, database roles control what kind of activity each user is allowed to complete, such as classification, item definitions, item approval. Then, after a user has role assignments, your organization can choose to further specify the domains and/or dictionaries in which this user can perform these activities by assigning certain predefined Data Access Groups (DAGs) to that user. Database roles are created during installation; DAGs are defined in the UI.
This section includes:
Predefined Roles
This section illustrates the predefined roles, with the functions permitted and the menu option associated with each:
opa_admin
rxclin_read
tms_access
tms_allocate_priv
tms_approve_priv
tms_classify_priv
tms_define_priv
tms_dictupg_priv
tms_dsi_priv
tms_integrate_priv
tms_maintain_priv
tms_reclassify_priv
tms_research_priv
A description of each predefined role is included below.
In addition, you can see the grants that are predefined for each of these roles by logging into SQL*Plus as SYSTEM and entering the following:
select *from dba_tab_privs where grantee='TMS_ROLE';
This role grants access to the Security menu, which contains Define Users, Define Security Columns, and Maintain DAGS windows, as well as the DAG and Setting Inconsistencies report and the Create/Drop EXT_Value Indexes job. The three windows allow you to create new users, define their privileges, and migrate user information from an Oracle Clinical database. The DAG and Setting Inconsistencies report displays inconsistencies between users' data access via DAG and their profile settings. The Create/Drop EXT_Value Indexes job creates or drops indexes on external value columns for performance.
All users are granted this role by default, which gives them access to items under the Repository menu. Thus, all users can browse repository data, VT classification data, and Informative Note data; and all users can run the Date Comparison Report, Dictionary Comparison Report, Dictionary Export Report, and view the TMS Lite Browser.
All users are granted this role automatically. This role enables you to view the TMS menu and the Favorites menu.
This role gives users access to the windows under the Task Allocation menu. In these windows, users can set up task allocation and allocate tasks—approving VTAs, approving Action assignments, and classifying omissions—to other users.
Note:
Users with this privilege can allocate/reallocate/deallocate any task in any domain/dictionary, regardless of their own DAG assignments. However, they can only allocate tasks to users whose DAG assignments and database roles give them access to the data required to perform the task.Note:
Users with TMS_CLASSIFY_PRIV and TMS_APPROVE_PRIV have access to the Task Allocation by Term window, where they can deallocate terms assigned to themselves, and, depending on the value of the reference codelist setting DEALLOCONLY, reallocate those tasks to other users.This role gives users access to the Approve VTAs and Approve Action Assignments window under Omission Management. In this window, users can approve and unapprove VTAs, and create workflow Informative Notes for the VTA approval process.
This role gives users access to all the items under Omission Management and also the Task Allocation By Term window under Task Allocation. However, users who do not also have tms_approve_priv cannot approve VTAs or Action assignments. Users with tms_classify_priv can classify verbatim terms, apply actions to omissions, and run the VTA Creation Report and VT Domain Differences Report.
This role give users access to all items under Definition and to the Reports tab in the TMS Lite Browser. Users with tms_define_priv can define dictionaries, domains, external systems, Global Actions, search objects, TMS settings, named relations, and Informative Note Attributes. Users can also run synchronization, refresh the context server index, analyze tables, force rederivation from DSI, and purge classified omissions.
This role gives users access to every item under Dictionary Upgrade where you can view and manipulate verbatim terms and their relations in the predictionary tables before Activation.
This role gives users access to the menu item DSI Maintenance including the Maintain DSI Files window and several jobs related to data exchange between TMS and disconnected systems.
This role gives users access to special integration features in the API, but does not unlock any menus or windows in the application.
This role gives users access to all items under the Repository Maintenance and Translation Reports menus. Repository Maintenance tasks include: creating and maintaining and deleting terms, relations, and Informative Notes; maintaining dictionary loading error logs; running the Preliminary Repository Report, and running Activation.There are three reports under the Translation Reports menu: Inconsistent Dictionary Codes, Duplicate Dictionary Codes, and Inconsistent Dictionary Relations.
This role give users access to all items under VTA Maintenance. Users with this role can promote or demote VTAs, maintain actions, reclassify and declassify verbatim terms, perform high-level reclassification, copy domains, maintain domain copying error logs, and run the Nonapproved VTs Report, Classification to a New Domain Report, and the VT Modifications Report.
This role enables Oracle Clinical and Oracle AERS users that do not have any other TMS privileges to use the TMS Lite Browser for drilling down to external system data. You may want to grant this role to external system users who require access to source data searches in the TMS Lite Browser, but do not need access to any TMS windows.
Enrolling an Administrator
In a new installation, you must use a script to create one user with the OPA_ADMIN role. That administrator can then use the Define Users window to create user accounts for all the other users in this database; see "Defining Users" for instructions.
Note:
If you are upgrading to TMS Release 5.2.1 from Release 4.5.2 you may need to use this script as well.To create a new account for a TMS administrator:
-
Connect to SQL*Plus as SYSTEM and run the following script:
opa_home\tms\install\tmsadduser.sql
-
Enter the user's first name.
-
Enter the user's last name.
-
Enter a password for this user. Your input is hidden.
The script creates a user account for the user you specified and gives the user the OPA_ADMIN database role.
Note:
You cannot use this script to create a nonadministrator user.
Defining Users
This section includes:
The OPA_ADMIN database role is required to access the Define Users window. See "Enrolling an Administrator" for information on creating a user account with the OPA_ADMIN database role.
Defining a New User
When you create a new user in the database, you define the user's first and last name, user name in the database, and set a password. Additionally, you can add an email address and set superuser status.
To define a new user, from the Define Users window under the Security menu:
-
Define the Account Name, which is the user name a user specifies upon login to the application. The account name is often prefixed with OPS$ but this prefix is not required.
-
Enter the user's First Name and Last Name. The first name and last name appear in the menu bar when this user is connected to TMS.
-
Set the Super User? field to either Yes or No. If this person is a superuser then no Data Access Group information is stored (see "Assigning Data Access Groups to a User"). Superusers have access to all data. Only superusers can run the following jobs and reports:
-
all Disconnected System Integration (DSI) jobs, including importing and exporting data
-
Autoprocess VTAs
-
Predict VTA/VTI Report
-
Site Impacts Report
-
Omission Impacts Report
-
Cross Dictionary Impacts
-
X Areas with Outstanding Changes
-
Classification Statistics Report
-
Date Comparison
-
Dictionary Comparison
-
Dictionary Export
-
-
Set the Load User? field to either Yes or No. If set to Yes, this person can load dictionaries into the predictionary tables. Most TMS users do not need this ability.
-
(Optional) Enter a Comment about this user. Comment information can help administrators identify users, and thus maintain each user's privileges more effectively.
-
(Optional) Enter an Email Address for the user. This field is added to support future functionality.
-
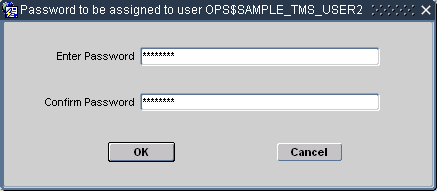
Click Create Schema. The "Password to be Assigned to User Account Name" window opens.
Description of the illustration ''users_password.gif''
-
Enter and confirm the password for this user, and click OK.
If the password entries match, TMS adds this user to the OPA_ACCOUNTS table and TMS_ACCOUNTS table, and grants the TMS_ACCESS role to the account. Proceed to "Assigning and Revoking Roles" to assign additional roles for this user.
Assigning and Revoking Roles
TMS uses menu-based security, so roles give a user access to particular TMS menus or windows. The TMS role TMS_MAINTAIN_PRIV, for example, allows a TMS user to use all of the windows and batch jobs under the Repository Maintenance menu.
This section describes how to assign roles to, and revoke roles from, a TMS user.
Assigning Roles to a User
To assign roles to an account:
-
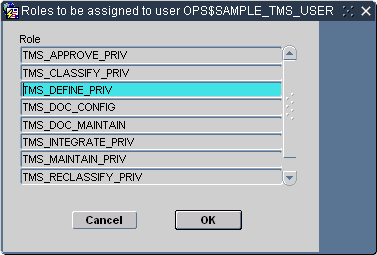
Select the user in the Define Users window, then click Assign Roles.
The "Roles to be Assigned to User Account Name" window opens, displaying the TMS roles that this account does not currently have.
Description of the illustration ''users_assign_roles.gif''
-
Highlight the roles you want to grant to this account. You can Shift-click to select multiple consecutive rows, or Ctrl-click to select multiple non-consecutive rows.
-
Click OK. TMS grants the role or roles you selected to this account.
Revoking Roles from a User
To revoke roles for an account:
-
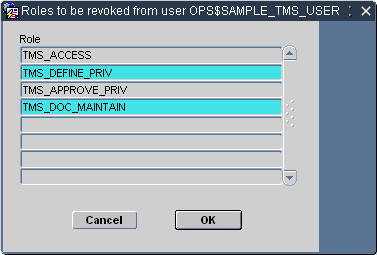
Select the user in the Define Users window, then click Revoke Roles.
The "Roles to be Revoked from User Account Name" window opens, displaying the roles currently granted to this account.
Description of the illustration ''users_revoke_roles.gif''
-
Highlight the roles you want to revoke from this account. You can Shift-click to select multiple consecutive rows, or Ctrl-click to select multiple non-consecutive rows.
-
Click OK. TMS revokes the role or roles you selected to this account.
Changing a User's Password
You can change any user's password in a database where you have administrator privileges.
To change a user's password:
-
Start a SQL*Plus session as SYSTEM.
-
Issue the following alter user command:
alter userusername
identified bynew_password
Assigning Data Access Groups to a User
Data Access Groups (DAGs) work in conjunction with roles to control a user's access to TMS data. You can use them to fine tune the data that a particular user or class of users can operate on. For example, the user with TMS_MAINTAIN_PRIV would still be able to access all of the windows and batch jobs under the Repository Maintenance menu, but if you also assign a DAG that only allows access to MedDRA, then he would see only items relevant to MedDRA.
If a person is designated as a superuser in the Define Users window, he or she belongs to all DAGs and has access to all data.
To assign a DAG:
-
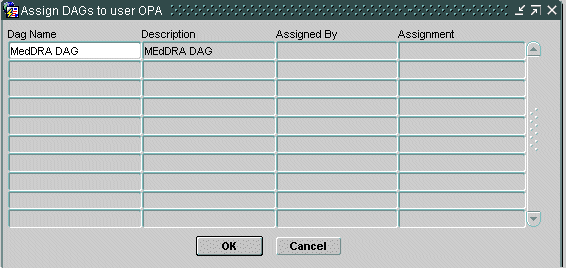
Select the user in the Define Users window, then click Assign DAGs.
The "Assign DAGs to user Account Name" window opens. If the user has been assigned any DAGs, they are listed.
Description of the illustration ''user_assign_dags.gif''
-
Place the cursor in an empty field under Dag Name. From the LOV, select the DAG to assign.
-
Click OK. TMS assigns the DAG or DAGs you selected to this account.
Migrating Account Information from Oracle Clinical
This section applies only to TMS installations that are integrated with Oracle Clinical.
TMS stores general user account information in the OPA_ACCOUNTS table and TMS-specific user account information in the TMS_ACCOUNTS tables. See the Oracle Thesaurus Management System Technical Reference Manual for details.
If you have already set up user accounts in Oracle Clinical, you can migrate all account information from ORACLE_ACCOUNTS to OPA_ACCOUNTS, as follows:
-
In TMS, go to Security, then select Define Users.
-
Click Get O*Clinical Account Data.
The system inserts all records from the ORACLE_ACCOUNTS table into the OPA_ACCOUNTS table. The default comment text for each record is "Maintained in Oracle Clinical."
-
Set up TMS-specific security for each user:
-
Either set their Superuser flag to Yes in the Define Users window or assign a Data Access Group; see "Assigning Data Access Groups to a User".
-
Assign roles as required; see "Assigning Roles to a User".
-
Give dictionary loading privileges if required; see "Defining a New User".
-
Set password; see "Defining a New User".
-
You must continue to maintain these accounts in Oracle Clinical.
Using Data Access Groups (DAGs) for Security
This section includes:
In TMS, database roles dictate which windows in the user interface a user can access. For users assigned to one or more Data Access Groups, their DAG assignments dictate the data they see in TMS windows and in the TMS Lite Browser, and whether or not they can operate on TMS data in specific dictionaries and/or domains.
When you define a DAG:
-
You can specify whether users in the group can make changes or only read data.
-
You can specify whether users in the group can see data that originated in one or more specific external systems, and from a particular project or study, for example.
-
You can specify whether users in the group can see data that originated in one or more specific databases.
-
You can specify whether a user can see only his or her own task assignments and/or those of which specific other users.
You define DAGs in the Maintain DAGs window and then assign users to the group either in the User Assignments tab of the Maintain DAGs window or as you create user accounts. A single user can be assigned to multiple DAGs. The user then has access to the sum of data allowed by all his or her DAG assignments. Alternatively, a user can be designated as a Superuser. Superusers can see all data and cannot be assigned to any DAGs.
The OPA_ADMIN database role is required to access the Maintain DAGs window.
Defining Security Columns
Before you define any DAGs, you must specify which TMS table columns—each of which stores a particular type of data—are available to include in DAGS; if a column is available to DAGs, a particular DAG can limit the data its users can see to one or more values stored in that column in TMS. If the column is not available to DAGs, data for all its values is always viewable to users with normal security access.
The columns available for use in DAG security are:
-
DEF_ DICTIONARY_ID. This column contains the IDs of dictionaries defined in TMS. If you make this column available for use in DAGs, you can allow users assigned to DAGs to see data associated with only one or a few dictionaries.
-
DEF_DOMAIN_ID. This column contains the IDs of domains defined in TMS. If you make this column available for use in DAGs, you can allow users assigned to DAGs to see data associated with only one or a few domains.
-
DEF_INSTANCE_ID. This column contains the IDs of your TMS databases. If you make this column available for use in DAGs, you can allow users assigned to DAGs to see data collected on only one or a few databases.
-
DEF_INTEGRATION_KEY. If you have integrated one or more external source data systems with TMS, this column holds the name of the system(s). If you make this column available for use in DAGs, you can allow users assigned to DAGs to see data associated with only one or a few external systems.
-
EXT_VALUE_1. This column holds external system data associated with a term and stored in the EXT_VALUE_1 column in the tables TMS_SOURCE_TERMS and TMS_VT_OMISSIONS. For external systems other than Oracle Clinical, you specify the data stored in this column; see "Setting Up External System Columns and Details". For Oracle Clinical, this column stores the name of the Project associated with a source term. If you make this column available for use in DAGs, you can allow users assigned to DAGs to see data associated with only one or a few Oracle Clinical projects, for example.
-
EXT_VALUE_2. This column holds external system data associated with a term and stored in the EXT_VALUE_2 column in the tables TMS_SOURCE_TERMS and TMS_VT_OMISSIONS. For external systems other than Oracle Clinical, you specify the data stored in this column; see "Setting Up External System Columns and Details". For Oracle Clinical, this column stores the name of the Study associated with a source term. If you make this column available for use in DAGs, you can allow users assigned to DAGs to see data associated with only one or a few Oracle Clinical studies, for example.
-
ASSIGNED. This column holds the user name of the person to whom a term is assigned as a task allocation because the term requires work: approving a VTA, approving an Action assignment, or classifying an omission. If you make this column available for use in DAGs, you can allow users assigned to DAGs to see terms assigned only to themselves (LOGIN_USER) or to specific other users.
To make columns available for use in DAGs, do the following:
-
In the Security menu, select Define Security Columns. The Define Security Columns window opens, displaying each column in a different row.
-
For each column, select a value for the following fields:
-
Used?. If set to Yes, you can define DAGs to control whether users can see the corresponding field in TMS windows. If set to No, DAGs cannot control whether users see the field. The field is visible or enterable to anyone with access to the window.
Note:
You can change the Used? setting from No to Yes at any time. After a column is included in a DAG definition you can no longer change the setting from Yes to No. -
Create Index?. You can set this flag to Yes only for the EXT_VALUE columns. If set to Yes, when you run the Create/Drop EXT_VALUE Indexes job (under the Security menu) TMS creates an index on the values in this column to speed performance when these values are used in the context of security. If set to No, TMS drops the index when you run the same job.
-
-
Save. TMS enters values in the Creation Time and Created By fields. If you modify the settings for any column, TMS enters values in the Modification Time and Modified By columns.
Creating a DAG
The process of defining a Data Access Group includes three parts: creating the DAG, specifying the DAG rules, and assigning users to the DAG. There are three tabs in the Maintain DAGs window, one for each task.
To create a DAG:
-
In the Security menu, select Maintain DAGs. The DAGs tab is displayed.
-
On the DAGs tab, enter a Name and a Short Name for the DAG.
-
Select an option for the Modify Flag? option. If you want users assigned to this DAG to be able to modify data in the windows to which they have DAG access, select Yes. If not, select No.
-
Enter a Status of Provisional. You can set it to Active any time after the definition is completed, including defining the DAG rules. You can add users to a DAG whose status is either Provisional or Active. Only active DAGs are used to enforce data security.
-
Save. Click the DAG Rules tab and select settings as described below.
Setting DAG Rules
This section includes:
About DAG Rules
In the DAG Rules tab you specify the data that users assigned to the DAG can view. For one or more of the columns you selected in the Define Security Columns window, you can specify values to determine which data users in this group can see. For example, you can specify a particular dictionary or set of dictionaries. Users assigned to the DAG can then see data related to only those dictionaries (or other dictionaries to which they have access through another DAG).
You can also specify the type of operations that a user can perform in a dictionary or domain by requiring a DAG role for a particular dictionary or domain, and then specifying the role assigned to users in the DAG; see Example 3-1, "DAG Example 1".
DAG Roles You can use DAG roles for the dictionary and domain columns to determine which operations users with normal security access to various TMS windows can perform there on which dictionary and/or domain data. The DAG roles are:
-
TMS_CLASSIFY allows users assigned to the DAG to perform classification operations in the Classify VT Omissions window in a particular dictionary and/or domain, if they also have the database role TMS_CLASSIFY_PRIV.
-
TMS_APPROVE allows users assigned to the DAG to perform approval operations in the Approve VTAs window in a particular dictionary and/or domain, if they also have the database role TMS_APPROVE_PRIV.
-
TMS_MAINTAIN allows users to perform all operations in all windows in the Repository Maintenance and Translation Reports menus in a particular dictionary and/or domain, if they also have the database role TMS_MAINTAIN_PRIV.
-
TMS_DUPG allows users to perform all operations in all windows in the Dictionary Upgrade menu in a particular dictionary and/or domain, if they also have the database role TMS_DICTUPG_PRIV.
-
TMS_RECLASSIFY allows users assigned to the DAG to perform reclassification operations in the Reclassify Verbatim Terms window and in the High-Level Reclassifications window in a particular dictionary and/or domain, if they also have the database role TMS_RECLASSIFY_PRIV.
Data Access Group 12345 has the following DAG rule defined for the dictionary column (DEF_DICTIONARY_ID), for which a DAG Role is required:
-
For the value MedDRA, the DAG roles specified are TMS_CLASSIFY and TMS_APPROVE.
-
For the value WHO-Drug, only the DAG role TMS_CLASSIFY is specified.
If you assign a user who has all TMS database roles assigned to this DAG, the user can perform Classify and Approve activities on MedDRA. However, on WHO-Drug, the user can only perform Classify activities, and not, for example, Approve activities.
User A belongs to only one DAG, and that DAG specifies MedDRA as the only dictionary he can access. Therefore, in any windows he can open, he can view only MedDRA data. User A has two database roles: TMS_CLASSIFY_PRIV and TMS_APPROVE.
User A can do the following:
-
Open Classify VT Omissions window (because he has the database role TMS_CLASSIFY_PRIV) and open the Approve VTAs window (because he has the database role TMS_APPROVE_PRIV).
-
See data from MedDRA in both windows (because MedDRA is specified as a value for the DEF_DICTIONARY_ID column in his DAG).
-
Classify verbatim terms to MedDRA terms ((because his DAG has Roles Required for the column DEF_DICITONARY_ID, MedDRA defined as a value for that column, and the DAG role TMS_CLASSIFY is specified for that value).
However, he cannot approve VTAs in the Approve VTAs window because his DAG has Roles Required for DEF_DICTIONARY_ID, MedDRA defined as a value for that column, and TMS_APPROVE is not specified as a DAG role for MedDRA.
Defining DAG Rules
After you have created a DAG, define rules for it:
-
In the Maintain DAGs window, DAGs tab, select the DAG for which you want to define rules.
-
Click the DAG Rules tab. TMS displays the DAG Rules tab with the DAG name and short name displayed at the top of the tab.
-
Click in the first empty row in the Columns section, Name field.
-
Click the ellipsis (…) to invoke the list of values. TMS displays a list of the columns you defined as available to DAGs; see "Defining Security Columns".
-
For each column you select, specify the following:
-
Role Req'd?. TMS allows setting this flag to Yes only for the DEF_DICTIONARY_ID (dictionary) and DEF_DOMAIN_ID (domain) columns.
If set to No, users assigned to this DAG can perform any transactions on the data they can see in the windows they can open.
If set to Yes, users assigned to this DAG can perform only certain transactions (specified in the Roles section for each column value) on the data they can see (specified in the Values section) in the windows that they can open.
-
Values. In the Values section, specify every value that applies for the currently selected column in the Columns section. For most columns, no value appears in the External System field. Click in the Column Value field and select a value from the list of values. To specify more than one value, select one in the next row.
The list of values for the Assigned column includes the predefined value [LOGIN_USER]. If you select this predefined value, the user currently logged in to TMS can see the tasks assigned to himself or herself.
For information on the external system-related columns, see "Rules for External System Data".
-
Roles. If you set Role Req'd? to Yes, you must specify at least one role for each column value. For example, if you specified Role Required for the DEF_DICTIONARY_ID column, and specified MedDRA as one of the values for the column, the Roles you specify for MedDRA determine what operations users in this user group will be able to perform on MedDRA terms. If you specify TMS_CLASSIFY, users with access to the Classify VT Omissions window will be able to classify verbatim terms to MedDRA terms. If you do not specify TMS_CLASSIFY, users with access to the window will be able to see MedDRA terms but will not be able to perform any classification operations on them.
-
-
Save. Repeat for each column you want to include in the DAG.
Rules for External System Data
To limit users' access to data from a particular external system, select the DEF_INTEGRATION_KEY as a column, then select the particular external system to which you want to allow access in the Column Value field.
To allow access to a particular level of information within an external system, use the EXT_VALUE_1 and EXT_VALUE_2 columns.
For Oracle Clinical, the EXT_VALUE_1 is predefined to hold project names and the EXT_VALUE_2 column is predefined to hold study names. For other external systems you define what data to store in these columns; see "Setting Up External System Columns and Details".
For example, if you specify Oracle Clinical as an external system value and then specify Project A as the only EXT_VALUE_1 value and Study A as the only EXT_VALUE_2 value, users assigned to this DAG can only view source terms that originated in Oracle Clinical Project A, Study A. They cannot view source terms from Project A, Study B, or source terms that originated in another external source data system.
To specify external system data to be accessible to users in this DAG, do the following:
-
In the Columns section, Name field, select EXT_VALUE_1 or EXT_VALUE_2 from the list of values.
-
With EXT_VALUE column selected in the Columns section, click the External System field in the Values section.
-
From the list of values, select the external system whose data you want users to be able to see.
-
Click the Column Value field and invoke the list of values. TMS displays the values stored in the EXT_VALUE_1 (or EXT_VALUE_2) column for the external system you selected. For example, if you selected Oracle Clinical as the external system, TMS displays Oracle Clinical project names.
-
From the list of values, select a column value.
Users in this DAG will be able to see data associated with the external systems and column values you specify, and they will not be able to see data associated with external systems and column values you did not specify. Repeat this procedure to allow access to additional values for the same external system, and to allow access to data from additional external systems.
Note:
If you use the EXT_VALUE_1 or _2 columns to specify access to data from a particular external system, you must also specify the external system itself as a value in the DEF_INTEGRATION_KEY column.Note:
For best performance, each time you add or delete a value from one of the EXT_VALUE columns, run the Create/Drop EXT_VALUE Indexes job.Rules for Task Allocation
If your company is using the Task Allocation feature and you want to restrict users' ability to allocate tasks in certain dictionaries or domains, or restrict user's ability to see other users' assigned tasks, you can use DAGs to enforce those restrictions.
TMS allows users with task allocation privileges to allocate tasks to any user who is available for tasks associated with a particular dictionary. However, if the allocator is assigned to one or more DAGs, he or she can allocate tasks to other users only for the dictionaries he or she (the allocator) has access to through a DAG. The task-receiving user must have access to the same dictionary through a DAG as well (or as a superuser).
Example 3-3 DAG Definitions and Task Allocation
TMS user Ted has TMS_ALLOCATE_PRIV and is assigned to DAG 12345, which includes two dictionaries: MedDRA and WHO-Drug.
TMS user Alice is assigned to DAG 67890, which includes two dictionaries: MedDRA and CoStart.
Ted can assign Alice tasks related to MedDRA only; not WHO-Drug or CoStart.
Note:
The values of the Assigned column restrict the data that the user sees in Classify VT Omissions, Approve VTAs, Approve Action Assignments windows. They do not affect what the user sees in the Task Allocation windows. As long as the user has task allocation privilege, he can see all tasks (assigned to anyone) in the Task Allocation windows.Assigning Users to DAGs
You can assign users to a DAG either in the User Assignments tab of the Maintain DAGs window or in the Define Users window. In the Maintain DAGs window, you can add multiple users to a single DAG at the same time. In the Define Users window you can assign a single user to multiple DAGs at the same time. See "Defining Users" for more information.
To add users to a DAG in the Maintain DAGs window, do the following:
-
In the Security menu, select Maintain DAGs. The Maintain DAGs window opens.
-
Click the User Assignment tab. The User Assignment tab opens.
-
Click in the Account Name field in the first empty row. TMS displays … in the right corner of the field.
-
Click the … to retrieve the list of values including all user accounts available for assignment to a DAG (superusers are not included).
-
Select the user account you want to assign to the DAG. You can query in the Find field to narrow your search.
-
Repeat the procedure to add another user account in the next row as many times as necessary. If necessary, select Insert from the Record field to additional rows, one at a time.
-
Save. TMS assigns the users you specified to the DAG, which now controls their access to TMS data.
DAG and Settings Inconsistencies Report
This section includes:
About the DAG Settings and Inconsistencies Report
When you create a user account in TMS, you specify profile settings for the user. In addition, if the user is not a superuser you also assign the user to at least one Data Access Group (DAG).
DAGs determine which data the user can view, and profile settings determine which data a user views by default. TMS does not check or enforce that these settings match; therefore it is possible to set a user's profile to default settings for data the user cannot actually see. Use this report to determine if any users are currently in this situation.
It is also possible to create a user account and not assign the user to any DAGs. Users designated as superusers can see all data and cannot belong to a DAG. However, if you do not designate a user as a superuser and also do not assign him or her to a DAG, the user will not be able to do anything in TMS.
The DAG and Setting Inconsistencies Report shows the following:
-
A list of all non-superusers who are not associated with an active DAG.
-
A list of all non-superusers who do not have DAG access to the following default settings:
-
dictionary
-
domain
-
external system
-
external value(s)
-
Running the DAG and Setting Inconsistencies Report
To generate a DAG and Setting Inconsistencies Report, do the following:
-
From the Security menu, select the DAG and Setting Inconsistencies Report.
-
Enter a value for the General parameter Output. Select the format in which you wish to generate the report - HTML, PDF, RTF, XLS or XML. This is a mandatory field.
-
Enter a value for the Job Specific parameter Template. Select the template you want to use for this report. If your company has created a custom template, it appears in the list of values. The Oracle Template is the default template.
-
Submit the job. Select Job, then Submit, or click the Submit icon to generate the report in the selected output format.
A new browser window opens with the generated report.
Creating and Dropping External System Value Indexes
Use this job to create or drop indexes on the column EXT_VALUE_1 and/or EXT_VALUE_2 in the TMS tables TMS_VT_OMISSIONS and TMS_SOURCE_TERMS. You specify which column or columns to create an index for in the Define Security Columns window (see "Defining Security Columns") but you must run this job to actually create the index.
For best performance, run this job whenever you add or remove values from the EXT_VALUE_1 or EXT_VALUE_2 columns in a DAG definition.
To run the job, do the following:
-
Under Job-Specific parameters, click in the Actions field and select a value from the drop-down list: Create Indexes or Drop Indexes.
-
Under Schedule, select a Report Server.
-
To run the job at a later time, set the other scheduling parameters; see "Scheduling Parameters".
-
Submit the job.
Customizing Defaults in TMS Windows Using TMS Settings
TMS Settings are default values that populate many fields in TMS, such as Domain, Dictionary, and the fields that appear in the Filter window. You can establish settings that are company-wide, or specify profiles from which sets of TMS users will inherit settings values.
This section includes:
Profiles
A profile is a catalog of TMS settings values. You can define profiles that specify one or more of the TMS settings, then assign any profiles to users to control their default behavior in TMS. For example, you can create a profile that defines default values for the Action Owner and External System. If you assign this profile to a user (see "User Profiles"), these settings could control that user's default settings for these two fields in TMS.
Two default profiles provide baseline settings for TMS. The Oracle profile includes a standard set of keys and settings that provide default settings throughout the system. The Company Settings profile establishes default values that are specific to your company. Company settings override Oracle settings, and provide a baseline set of values for all users in your company.
The additional, custom profiles you define enable you to set up more specific default values for groups of users. Custom profiles override both the Company Settings and Oracle profiles. You can set up as many custom profiles in TMS as you want, and assign multiple profiles to each user.
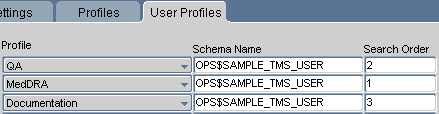
User Profiles
The user profile is the set of profiles that have been assigned to a user. For each profile that you assign to a user, you must define a Search Order Number. The Search Order Number shows TMS which profiles to consider first when a user profile contains multiple profile definitions.
TMS sets a user's default values by checking through each profile in the user profile:
-
TMS finds the first user profile (the user profile with the lowest Search Order Number) and sets the value of each TMS field that the setting specifies.
-
TMS then checks each subsequent user profile row in ascending order by Search Order Number. For each of these profiles, TMS sets defaults that have not been set by an earlier profile. If the first user profile created this user's default domain setting, the other profiles cannot override it.
-
The system then checks the Company Settings profile for other TMS settings that have not been specified for this user by any of the user's custom profiles.
-
Finally, TMS checks the Oracle profile for other unspecified TMS settings.
Full List of TMS Settings
Each setting value controls the default behavior of one field in TMS. To determine your default domain, for example, TMS checks through your hierarchy of profiles for a value in the TMS_CURRENT_DOMAIN setting. The system then chooses that domain for you when you log in to TMS.
Many TMS settings control the default value for fields that also appear in the TMS filter windows. The following windows have filters: Approve VTAs, Reclassify Verbatim Terms, Classify VT Omissions, and Maintain DSI Files.
The Approve VTAs and Reclassify Verbatim Terms windows both use the Omissions Filter, with the same settings. The TMS_DSI settings control values in the Maintain DSI Files window. Enter values for TMS_DSI settings only if you are using the Disconnected System Integration feature, and only if you want a default value set in your filter for that window (see "Using TMS with Disconnected Systems").
For information on how to enter values for parent and child settings, see "Defining a Setting When No Parent-Child Setting Relationship Exists" and "Defining a Setting in Parent-Child Relationships".
Note:
You may need to log out and log in again for new settings to take effect.Settings are grouped according to the part of the application they control:
OPA Settings
OPA settings control areas of the application that are common to all Oracle Health Sciences (formerly Oracle Pharmaceutical Applications) products.
OPA_JAVA_DATE_FORMAT: The default format for data values in Java activities in TMS. For example, dd-MMM-yyyy
OPA_JAVA_TIME_FORMAT: The default format for time values in Java activities in TMS. For example, kk:mm:ss
OPA_SQL_DATE_FORMAT: The default format for date values in SQL queries. For example, DD-MON-YYYY
OPA_SQL_TIME_FORMAT: The default format for time values in SQL queries. For example, HH24:MI:SS
OPA_UIX_MAX_ROWS: For UIX-based applications such as the TMS Lite Browser, this setting determines the maximum number of records that queries will retrieve.
OPA_UI_COUNTRY: Two-letter short name of the default country. An LOV is available.
OPA_UI_LANG: Two-letter short name of the default language. An LOV is available.
TMS Forms Settings
TMS Forms settings control the default settings for the Oracle Forms-based TMS user interface.
The parent-level settings are:
TMS_CURRENT_ACTION_OWNER: This setting controls the default value for the Action Owner field.
TMS_CURRENT_ACTION_SYS: Controls the default value for the External System field.
TMS_CURRENT_ACTION_WKFLW: Controls the default value for the Action Workflow field.
TMS_CURRENT_ASSIGNED: Controls the default value for the Assigned field in the General tab of the Omission Filter.
TMS_CURRENT_DOMAIN: The domain that is selected for your profile by default. This setting is a parent key for TMS_CURRENT_DICTIONARY.
TMS_CURRENT_EXT_SYSTEM: The external system that is selected by default.
TMS_CURRENT_SYNC_INSTANCE: Controls the TMS DB field in the General tab of the Omission Filter and other Filter windows.
TMS_DSI_CURRENT_EXT_SYS…: From the list of values, select the name of the external source data system you most commonly use in Disconnected System Integration. This setting populates the External System field in the Maintain DSI Files Filter, and has a child and grandchild setting; see TMS_DSI_CURRENT_INSTANCE and TMS_DSI_CURRENT_X_AREA.
TMS_DSI_ERROR_PROCESS_STATUS: From the list of values, select N or Y (No or Yes). If N, the Error box for Process Status is deselected by default, and the system does not query for jobs that ended with a status of Error. If Y, the Error box for Process Status is selected by default, and the system queries for jobs that ended with a status of Error.
TMS_DSI_FATAL_PROCESS_STATUS: From the list of values, select N or Y (No or Yes). If N, the Fatal box for Process Status is deselected by default, and the system does not query for jobs that ended with a status of Fatal Error. If Y, the Fatal box for Process Status is selected by default, and the system queries for jobs that ended with a status of Fatal Error.
TMS_DSI_LAST_EXPORT_END_TS: If you will often search for files exported during a particular time period, enter the last day of that time period using the date format in your OPA_SQL_DATE_FORMAT setting. This setting populates the (Last Export Between…) And… field in the Maintain DSI Files Filter.
TMS_DSI_LAST_EXPORT_START_TS: If you will often search for files exported during a particular time period, enter the first day of that time period using the date format in your OPA_SQL_DATE_FORMAT setting. This setting populates the Last Export Between… field in the Maintain DSI Files Filter.
TMS_DSI_MANUAL_STATUS: From the list of values, select the import/export job manual status you most frequently want to query for, if any. The choices are: New, Pending, or Fixed. This setting populates the Manual Status field in the Maintain DSI Files Filter.
TMS_DSI_PROCESS_END_TS: If you will often search for files that ran during a particular time period, enter the last day of that time period using the date format in your OPA_SQL_DATE_FORMAT setting. This setting populates the (Process Between…) And… field in the Maintain DSI Files filter.
TMS_DSI_PROCESS_START_TS: If you will often search for files that ran during a particular time period, enter the first day of that time period using the date format in your OPA_SQL_DATE_FORMAT setting. This setting populates the Process Between… field in the Maintain DSI Files filter.
TMS_DSI_PROCESS_TYPE: From the list of values, select Export or Import. This setting populates the Process Type field in the Maintain DSI Files Filter.
TMS_DSI_SUCCESS_PROCESS_STATUS: From the list of values, select N or Y (No or Yes). If N, the Success box for Process Status is deselected by default, and the system does not query for jobs that ended with a status of Success. If Y, the Success box for Process Status is selected by default, and the system queries for jobs that ended with a status of Success.
TMS_DSI_WARNING_PROCESS_STATUS: From the list of values, select N or Y (No or Yes). If N, the Warning box for Process Status is deselected by default, and the system does not query for jobs that ended with a status of Warning. If Y, the Warning box for Process Status in selected by default, and the system queries for jobs that ended with a status of Warning.
TMS_DSI_X_AREA_STATUS: From the list of values, select Active, Complete, or Inactive. This setting populates the X Area Status field in the Maintain DSI Files Filter.
TMS_PROCESS_DICTIONARY If some dictionary/domain combinations require approval for VTAs or actions, you can use this profile setting allow one or more particular users to apply Answerable Actions directly in this dictionary (for any domain), with no approval or Internal Action required, and/or to create Approved VTAs directly, with no approval required. See TMS_ACTION_APPROVAL_REQUIRED and TMS_VTA_APPROVAL_REQUIRED.
Each of the following settings is dependent on one of the parent-level settings. See "Defining a Setting in Parent-Child Relationships".
TMS_ACTION_APPROVAL_REQUIRED: If set to N, users with this setting in their profile can assign Answerable actions directly, without assigning an Internal Action for approval, regardless of the Action approval setting for the dictionary/domain combination. This setting is a child key for TMS_PROCESS_DICTIONARY.
Note:
A setting of Y is not supported. (You can save the setting Y, but it will not have any effect.)TMS_CURRENT_DICTIONARY: Within the selected domain, the dictionary that is selected for your profile by default. This setting is a child key for TMS_CURRENT_DOMAIN.
TMS_CURRENT_EXT_VALUE_1 … 8: Within the selected external system, these eight settings determine the default values for each of the eight external system fields in the External System tab of the Omission Filter.
TMS_CURRENT_INSTANCE: Within the selected external system, the default source database in the External System tab of the Omission Filter.
TMS_CURRENT_OMIS_STATUS: Within the selected external system, the default omission status. This setting populates the Omission Status field in the Actions tab. No LOV is available for this field, so make sure the omission status you enter as the default matches the status required in the Filter window.
TMS_DSI_CURRENT_INSTANCE: Within the selected DSI external system, the default Database ID; enter the most frequently used remote database or leave blank. The list of values displays the name as well as the ID of each registered remote database.
TMS_DSI_CURRENT_X_AREA: This is a child key of the TMS_DSI_CURRENT_INSTANCE child key. For the database chosen as the default current instance, enter the ID of the most frequently used X Area on the remote database, if any. The list of values displays the name as well as the ID of each X Area on the selected remote database.
TMS_VTA_APPROVAL_REQUIRED: If set to N, users with this setting in their profile can create Approved VTAs directly in this dictionary (for any domain), regardless of the VTA approval setting for the dictionary/domain combination. This setting is a child key for TMS_PROCESS_DICTIONARY.
Note:
A setting of Y is not supported. (You can save the setting Y, but it will not have any effect.)TMS HTML Settings
TMS HTML settings control the default settings for HTML-based parts of the TMS application, such as the TMS Lite Browser.
The parent-level settings are:
TMS_HTML_DQ_EXT_SYS: This setting controls the default value for the External System field in the TMS Lite Browser. This setting is a parent key for TMS_HTML_DQ_EXT_SYS_QRY.
TMS_HTML_LANGUAGE: This setting controls the default value for the Action Owner field. This setting is a parent key for TMS_HTML_DICTIONARY.
The child level settings are:
TMS_HTML_DQ_EXT_SYS_QRY: Within the selected HTML external system, this setting controls which external system query is selected by default. These queries are also called groups, and appear in the Group field in the TMS Lite Browser. This setting is a child key for TMS_HTML_DQ_EXT_SYS.
TMS_HTML_DICTIONARY: Within the selected HTML language, the dictionary that is selected for your profile by default. This setting is a child key for TMS_HTML_LANGUAGE.
Defining the Settings for a Particular Profile
The Settings tab enables you to define the default settings values for a profile. All settings are grouped hierarchically by their Top External Area (Top X Area), which describes what part of the application they control. The Top External Areas are OPA, TMS Forms, and TMS HTML.
Some settings also have parent-child relationships, where the child setting depends on the selected value of the parent. For example, the TMS Forms setting TMS_CURRENT_DOMAIN is a parent key for the child key TMS_CURRENT_DICTIONARY. While you can use TMS_CURRENT_DOMAIN to define which domain is selected by default for your profile, you can specify for non-default domains which dictionary is selected by default when you switch to that domain.
This section includes:
Defining a Setting When No Parent-Child Setting Relationship Exists
This section describes how to define which settings to use for a particular profile. A profile must exist in the database before you can define its settings; See "Defining and Maintaining Profiles".
This section describes how to define values for settings that are not part of parent-child relationships. See "Defining a Setting in Parent-Child Relationships" for more information about that process.
To define a setting for a profile:
-
From the Definition menu, select Maintain Settings. The Maintain Settings window opens.
-
From the Profile list, choose the profile in which you want to define settings.

Description of the illustration ''settings_top.gif''
-
Choose the Top External System Area from the Top X Area field. Top External System Areas group together the settings by application area: you can choose OPA, TMS Forms, and TMS HTML.
Your choice of External System Area populates the values in the Settings Key field.
-
Choose the setting that you want to define from the list.

Description of the illustration ''settings_mid.gif''
The detail fields under the Extend Type field provide more information about the value or default value, but only in cases where the value or default value is not descriptive by itself. The above example for Current Domain uses the domain ID as its value, so the detail fields display the Domain Short Name.
-
Enter the value for the setting, or choose a value if an LOV exists. The Define Settings window displays default settings values for each setting key in the Default Value field.
Extend Type currently has no effect in TMS.
-
Click Set Default. TMS saves this default value for this setting.
Defining a Setting in Parent-Child Relationships
In cases where a setting has one or more child settings that are dependent on it, you can use the child setting to establish a default value for every parent setting choice. For example, the Domain setting has the Dictionary setting as a child. You can establish a default Dictionary setting for each domain value in the database. When you choose a domain in the application, TMS will default the dictionary to the one specified for your setting for the selected domain.
To define a child setting:
-
Select the Profile and External Area that contain the parent and child key you want to define.
-
From the Setting Key field, choose the child key's parent.
-
Choose the parent key's value. You can specify the default child key setting for any parent key value, whether or not the value is the parent key's default.
-
From the Child Key field, choose the child key for which you want to create defaults.
TMS populates the Setting Key field with your selected child key, and displays the information about its parent key and parent key value.
-
Enter the value for the child key for this parent setting. A list of values may be available when you click in the field.
-
Click Set Default. TMS will use this default setting for the child key setting whenever you select this parent key value.
You can return to the parent settings level by clicking the Top Level button.
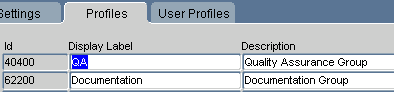
Defining and Maintaining Profiles
Profiles are the basis for creating default settings. By default, TMS includes the default Oracle Profile and a default Company Profile. You can use the Profiles tab to add, modify, and delete profiles.
Description of the illustration ''settings_profiles.gif''
To add a new profile, insert a row and enter a display name and a description. The display name appears in the Settings and User Profiles tabs.
To delete a custom profile (that is, one other than the Oracle or Company Profiles), select its row and delete the record. TMS prompts you to confirm the deletion; click Yes to complete the profile deletion. You cannot delete the Oracle or Company Settings profiles.
You can also change the profile's display name or description at any time.
Assigning Profiles to Users
The User Profiles tab displays user/profile combinations, and enables you to assign profiles to (or remove profiles from) users, and to modify a user profile. Because you can assign multiple profiles to a user, the User Profile determines the relative precedence of these profiles.
This tab is also convenient for assigning a profile to all members of a group.
Adding a Profile to a User's Set of Profiles
To add a profile to a user, and set its Search Order Number:
-
Insert a record.
-
Choose the profile to which you want to add the user from the LOV.
-
Enter the user's OPS$ user name. It must match exactly, and no LOV is available.
-
Enter a Search Order Number. TMS checks lower numbers earlier when determining which profile's values to use. You can always adjust a user's overall search order by following the instructions in "Configuring a User's Profile Search Order".
-
Save.
Configuring a User's Profile Search Order
Search Order determines the hierarchy of profiles for a particular user. TMS first consults the profile with the lowest Search Order value and implements the default values it specifies. The system then proceeds through the remaining profiles in ascending order by Search Order value, implementing any defaults that have not yet been set for this session.
Description of the illustration ''settings_user_profiles.gif''
To configure a user's profile Search Order:
-
Query for the user. The window displays a row for each group to which that user belongs, with a Search Order specified for each.
-
Rank the profiles by updating numbers for each row. The lower the Search Order Number, the earlier TMS will consult this profile for this user. Each Search Order Number must be unique for a user.
-
Save.
Setting TMS Preferences with Reference Codelist Values
This section includes:
Reference codelists provide a body of information for TMS forms and processes, which use the codelist values to create default settings, populate lists of values, and control some aspects of TMS data processing. The values and settings are defined in TMS databases, and can usually be overridden for a more specific situation somewhere else in the system. You cannot delete reference codelists or their values, but you can set one or more values or a reference codelist itself to Inactive so it will have no effect in TMS.
For example, many TMS forms enable you to perform simple text queries as well as queries that use the Oracle Context Server. In these forms, you can choose which of these query options you want by selecting SIMPLE or CONTEXT in the Query Type field. These two values are provided in a TMS installation reference codelist, TMS_QUERY_TYPE.
Reference Codelists in Integrated and Nonintegrated Environments
To integrate TMS with Oracle Clinical, you must set three reference codelists in Oracle Clinical; see "Setting Integration Reference Codelist Values".
If you are using the Disconnected System Integration feature of TMS, see "Setting DSI Preferences with Reference Codelist Settings".
Editing Reference Codelists
To edit a reference codelist:
-
Navigate to the Definition menu and click either Installation Reference Codelists or Local Reference Codelists. The window opens in Query mode.
-
In the Name field, query for the codelist that you want to edit.
-
Define the codes in the lower part of the window using the Description field and documentation for each codelist.
-
The short value for the code is read-only.
-
The long value for the code. You can edit this value.
-
Active? If selected, this codelist value will appear in lists that use this codelist for an LOV. If not selected, this value will not appear.
-
Default? This box has no effect in TMS.
-
-
Save.
TMS_CONFIGURATION
TMS_CONFIGURATION provides a list of values and behaviors that you can set for the application. The Short Value column provides a short name for the value or behavior. The Long Value column is enterable, and you can accept the value provided or modify it. If you select Active?, the value becomes valid in the system.
There is no default value for TMS_CONFIGURATION, so selecting Default? does not change the behavior of this reference codelist.
This section provides additional descriptions of TMS_CONFIGURATION values and the features they drive in TMS. See also "Changing TMS_CONFIGURATION Settings After Data Has Been Processed".
Note:
*The settings followed by asterisks (*) below help determine the way TMS processes source terms and omissions. See "Changing TMS_CONFIGURATION Settings After Data Has Been Processed".The settings are:
CREATEGLOBALVTA*
GLOVTAAPPRREQD*
DOMVTAAPPRREQD*
NONAPPRVTAUSED*
ALLOWGLOVTAS*
MAINTAINEXT
SUPPRESNAMDRELS
WRKFLWINFALLVSN
VTAAPPRFLAG
DTAPPRFLAG
CLCLEARCOMMENT
CLCLEARACTION
AUTOGLOVTAS*
SYNCREFRESHMV
ADVDICTFEATURES
EMBEDDEDTMS
OCDISCINTCOMM
MTRECCLASSHOUR
DOMACTAPPRREQD
DEALLOCONLY
NONAPPRDICTCODE
CREATEGLOBALVTA
This setting controls the default behavior of the Global setting in the Maintain VT Omissions window, which is in turn used to classify a VTA as being available globally or specific to a particular domain.
If Y, in the Maintain VT Omissions window TMS will create VTAs as Global by default. If N, in this window TMS will create VTAs as Domain-specific by default.
GLOVTAAPPRREQD
This setting dictates the default approval status of manually created Global VTAs. If Y, TMS creates global VTAs as Nonapproved by default. If N, TMS creates Global VTAs as Approved by default.
Note:
When TMS creates a VTA automatically by synchronization, the system does not refer to this setting.DOMVTAAPPRREQD
This setting determines the default value of the Approval Required? flag in the Define Domain Dictionaries window. If Y, the default setting is checked; if N, the default setting is unchecked. Users can change the value for any particular domain. See "Creating Domains and Assigning Dictionaries to Domains" for more information.
NONAPPRVTAUSED
If N, a term that matches a Nonapproved VTA will generate an omission in TMS with Search = 'Nonapproved VTA' and a discrepancy in Oracle Clinical.
If Y, such a term will classify in TMS.
ALLOWGLOVTAS
If Y, TMS allows users to create global VTAs. If N, users cannot create global VTAs manually.
MAINTAINEXT
If Y, users can edit external terms from TMS windows under the Repository Maintenance menu. If N, external terms are read-only in these windows.
SUPPRESNAMDRELS
If Y, TMS hides named relations in the Maintain Repository Data and Browse Repository Data windows. If N, these windows display named relations. You might want to suppress named relations if you only use strong dictionaries in your TMS environment.
WRKFLWINFALLVSN
This setting controls the default behavior of the All Versions? box in the Maintain Informative Notes window accessed from the Repository Authoring window under the Repository Maintenance menu. If Y, this box defaults to selected; if N, it defaults to deselected.
WRKFLWINFALLVSN controls the default behavior only. You can still override the default and select All Versions? to make a workflow Informative Note apply to all versions, or clear it to make the note version-specific.
VTAAPPRFLAG
This setting controls the default status of the Appr? (or Approved?) box for verbatim terms you create in either Maintain Repository Data or Repository Authoring. If Y, this box will be selected by default for each verbatim term you create while the window is open. If N, this box will be deselected while the window is open.
VTAAPPRFLAG controls only the default status of the Appr? box. You can still override this default.
DTAPPRFLAG
This setting controls the default status of the Appr? (or Approved?) box for dictionary terms you create in either Maintain Repository Data or Repository Authoring. If Y, this box will be selected by default for each dictionary term you create while the window is open. If N, this box will be deselected while the window is open.
DRAPPRFLAG controls only the default status of the Appr? box. You can still override the default.
CLCLEARCOMMENT
(Classify VT Omissions Window Clear Comment) If Y, TMS clears the Comment field in the Classify VT Omissions window when you classify a verbatim term. If N, TMS retains the original comment, which you can edit before you commit your classification change to the database.
CLCLEARACTION
(Classify VT Omissions Window Clear Action) If Y, TMS clears any Action associated with a verbatim term after you apply an Action to an omission. If N, TMS does not clear the Action.
AUTOGLOVTAS
(Autocoding Process Creates Global VTAs) If AUTOGLOVTAS is Y, and ALLOWGLOVTAS is Y, the autocoding process will create Global VTAs. If AUTOGLOVTAS is N (but ALLOWGLOVTAS is still Y), autocoding creates Domain VTAs, but you can manually create Global VTAs.
SYNCREFRESHMV
If Y, TMS will refresh materialized views during Synchronization.
The Filter windows in TMS use materialized views to keep external system data up-to-date. Refreshing the materialized views can be time-consuming, so if you do not rely on external system data in Filter windows, you might want to choose N for this setting. See "Controlling the Use of Materialized Views".
ADVDICTFEATURES
If Y, TMS will display advanced dictionary features, such as the Object Classification? box in the Define Dictionaries window. If you do not use the advanced dictionary features, you might want to choose N for this setting.
OCDISCINTCOMM
This codelist setting enables you to control where the system saves the comments you create for terms. If Y, the system saves comments in the discrepancy_entries.internal_comment column. If N, the system saves comments in the discrepancy_entries.comment column. The default value is Y.
The difference is significant to Oracle Clinical Discrepancy Management, because internal comments appear in some reports and Data Clarification Forms (DCFs), while regular comments do not. If you prefer to hide these non-internal comments from DCFs and other reports, set OCDISCINTCOMM to N.
MTRECCLASSHOUR
Enter the number of hours, if any, you want a user to have to fix a classification mistake he or she has made. When the long value is greater than zero, users can change classifications they have made in the Reclassify Verbatim Terms window, within the number of hours in the Long Value field, even if they do not have the normal reclassification privilege. The system displays only classifications created by the user logged into the system.
DOMACTAPPRREQD
This setting determines the default value of the Action Appr Reqd? flag in the Define Domain Dictionaries window. If Y, the default setting is checked; if N, the default setting is unchecked. Users can change the value for any particular domain. See "Creating Domains and Assigning Dictionaries to Domains" for more information.
DEALLOCONLY
If the long value for short value DEALLOC is set to Y, any user can deallocate tasks from him or herself but cannot reallocate tasks to other users. If set to N, any user can reallocate tasks from him or herself to other users.
Note:
Users with the TMS_ALLOCATE_PRIV role can reallocate tasks regardless of this reference codelist setting.NONAPPRDICTCODE
This setting determines the default value of the Non Appr DT field in the Define Domain Dictionaries window. If the long value is NONE, the default value for the Non Appr DT field is NONE. If the long value is VTA, the default value of the field is VTA. See "Creating Domains and Assigning Dictionaries to Domains" for more information.
Changing TMS_CONFIGURATION Settings After Data Has Been Processed
Some of the settings for the TMS_CONFIGURATION reference codelist (CREATEGLOBALVTA, GLOVTAAPPRREQD, DOMVTAAPPRREQD, NONAPPRVTAUSED, ALLOWGLOVTAS, and AUTOGLOVTAS) help determine the way TMS processes source terms and omissions in fully integrated external systems, and omissions in partially integrated external systems.
If you change one of these settings after source terms and omissions have already been processed, the system does not automatically reprocess old data using the new setting. You must use the Force Rederivation job to mark study omissions (and source terms, in fully integrated external systems) for processing during the next Batch Validation or equivalent job.
If you are using TMS with Oracle Clinical, you can call the Force Rederivation job by selecting Oracle Clinical's Plan menu, choosing TMS Domains, then selecting Studies, Domain Elements, and then Force Rederivation. Alternatively, you could call through the API, using the procedure ocl_tms_pack.SetLastTMSDerivTS (see the Oracle Thesaurus Management System Technical Reference Manual for details). You must then run Oracle Clinical Batch Validation.
If you are using a different external system, you must mark records for reprocessing and then run the equivalent of Batch Validation to actually reprocess them.
Other Installation-wide Codelists
Descriptions of the TMS installation-wide codelists, other than the TMS_CONFIGURATION codelist, follow.
TMS_LANGUAGES
Values in this codelist populate the Language field in the Define Dictionaries window. English is the default dictionary language.
TMS_QUERY_TYPE
TMS_QUERY_TYPE populates the LOV in the Query field for several forms in TMS. The default value, STANDARD, provides a standard Oracle query, while the CONTEXT value enables you to use the Oracle interMedia option.
TMS_SOURCE_MAT_VIEWS
TMS_SOURCE_MAT_VIEWS controls whether materialized views or regular views are used to populates the LOVs for each external system value in the Filter window, which launches from Reclassify Verbatim Terms and Approve VTAs. Oracle recommends using materialized views for Values 1-3 when using TMS with Oracle Clinical. See "Controlling the Use of Materialized Views".
TMS_TAL_POOL_CONFIGURATION
Set a value for VTOs (omissions), VTAs (here, unapproved VTAs only), and ACTs (here, unapproved Action assignments):
-
N (No Allocation). If set to N, Task Allocation is not available to omissions, unapproved VTAs, or unapproved Action assignments.
-
D (Direct Allocation). If set to D, TMS performs Direct Allocation as soon as an omission, unapproved VTA, or unapproved Action assignment is created. See "Direct Allocation".
-
P (Pool Allocation). If set to P, TMS effectively puts omissions, unapproved VTAs, or unapproved Action assignments in a pool. They can then be allocated either manually or by invoking a pooled algorithm. "Manual Pool Allocation" and "Automatic Pool Allocation".
Note:
The Task Allocation menu item does not appear in the TMS Navigator panel unless the long value for at least one of the short values—VTO, VTA, or ACT—is set to either D or P. If all are set to N, Task Allocation does not appear in the Navigator.
Local Codelists
TMS includes the following local reference codelists.
REPORTS_CONFIG
The local reference codelist REPORTS_CONFIG is required for TMS reports. There is one parameter, JDBC_DATA_SRC. You must set its long value to:
jdbc/opadatabase_nameDS
This same value must be in the WebLogic Server Administration Console. To check this:
-
Log in to the WebLogic Server Administration Console at:
http://host:port/console/login/LoginForm.jsp -
Navigate to Services under Domain Structure, then Data Sources.
-
Confirm that a data source with JNDI Name:
jdbc/database_nameDS. (During installation the TMS Installer creates and names the data source.)
TMS_DSI
The local reference codelist TMS_DSI contains parameters whose settings determine important aspects of DSI behavior; see "Setting DSI Preferences with Reference Codelist Settings".
Autoclassification
The Autoclassification process tries to code, or classify, terms from an external source data system by looking for dictionary terms that exactly match each source term. It also looks for exact matches to previously manually classified source terms. These are called Verbatim Term Assignments (VTAs) or, in the case of dictionaries with nonunique coding levels such as WHO-Drug C, Verbatim Term Individuals (VTIs). In the case of VTIs, the auxiliary information associated with the omission must match that of the VTI and autocoding with auxiliary information must be enabled. See "Nonunique Coding Level Dictionaries."
If Autoclassification does not find a direct match or a previously created VTA or VTI for a term, it creates an omission that must be manually classified.
Using Search Objects
You can use search objects to supplement TMS's basic Autoclassification process, increasing the likelihood that TMS will find a match for a verbatim term, and specify the order in which you want TMS to execute them. Depending on the Approval Type setting in the Define Search Objects window, if TMS finds a match via a search object, it creates:
-
An Omission with a Candidate Term
-
An Approved VTA
-
A Nonapproved VTA
See "Defining Search Objects".
Domain Match
TMS provides one pre-packaged search object called Domain Match. If the Domain Match search object is enabled for the current dictionary/domain combination, TMS searches for a match in all other domains.
Custom Search Objects
You can also create custom search algorithms to supplement TMS's Autoclassification process. Create a PL/SQL function in the database and define the object in the Define Search Objects window. See "Creating Custom Search Algorithms".
Creating Global VTAs during Autoclassification
Before running Autoclassification, consider whether you want the VTAs that you create to be available only within the domain in which you create them (Domain VTA) or available to all domains (Global VTA). Two settings in the TMS reference codelist TMS_CONFIGURATION control the default status of VTAs created during Autoclassification: ALLOWGLOVTAS and ALLOWGLOVTAS. If both are set to Y, Autoclassification creates global VTAs. If either is set to N, Autoclassification creates domain VTAs.
You can change the scope of the VTA after autoclassification. For information about promoting a VTA (making a Domain VTA available globally) or demoting a VTA (making a Global VTA specific to a domain), see "Promoting and Demoting VTAs".
Running Autoclassification
When TMS is fully or partially integrated with an external system, the Autoclassification process is triggered by the batch job through which the two systems share information (for Oracle Clinical, this is Batch Validation). When there is no integration between TMS and an external system, you must run the tms_user_autocode package from the API.
You can also do a trial run of Autoclassification without updating the Omissions table by running the TryClassifying function in the tms_user_autocode API package, and view the results by looking in the function output. This allows you to see what the results of Autoclassification would be, without actually updating any data.
Synchronization
This section includes:
The TMS Synchronization batch job runs on individual TMS instances. It checks for changes in the TMS repository that impact the Omissions and Source Terms tables and:
-
Updates records in those tables
-
Marks the Update flag for the same records so that they are reprocessed during the next data exchange between TMS and the external system (Batch Validation in Oracle Clinical)
If you have TMS integrated fully or partially with an external source data system, you must run Synchronization. TMS Synchronization is included in Oracle Clinical Batch Validation when the two systems are integrated.
If you are using TMS as a look-up system only, without integration to an external source data system (such as Oracle Clinical), you do not need to run Synchronization.
Scheduling Frequency
Oracle recommends that you run Synchronization at least five times during the business day at each site. You should also run Synchronization before and after batch jobs that exchange information between TMS and an external system. When TMS is integrated with Oracle Clinical, this happens automatically during Batch Validation.
Data Processed During Synchronization
The Omissions table contains source terms that Autoclassification could not classify. The Source Terms table includes all locally collected source terms and the classification (VTA ID or dict_content_id) for each one. When an omission is classified manually, the Synchronization job moves the source term from the Omissions table to the Source Terms table, associated with its classification. If a VTA is changed at any point, Synchronization changes the VTA ID in the Source Terms table.
The following types of changes require synchronization with the Source Terms table:
-
Classifying source term omissions
-
Declassifying and reclassifying verbatim terms
-
Approving and unapproving VTAs
-
Loading a new dictionary (to mark the dictionary for future processing)
-
Loading a new dictionary version (to mark the dictionary version and its source terms and omissions for future processing)
-
Changes to Informative Notes that are derived to the external system
In addition, if TMS is integrated with an external system, the following changes to source terms in the external system must be synchronized in TMS:
-
Definitional changes such as question definition changes or mapping a study or project to a different domain in Oracle Clinical
-
Deletion of source terms in the source system (Oracle Clinical responses)
Synchronization runs on data imported using the TMS DSI feature; because the systems are not integrated, the importing instance owns the data.
Synchronization Processing Order
Synchronization always includes two phases, pre-synchronization and post-synchronization.
Pre-synchronization Pre-synchronization runs first. It updates records as outlined "Data Processed During Synchronization" and sets the Update flag to Y so that records will be updated in the external system during the next data exchange (Batch Validation in Oracle Clinical).
Post-synchronization Post-synchronization runs last. It refreshes materialized views if the TMS_CONFIGURATION reference codelist value SYNCREFRESHMV is set to Y (see "SYNCREFRESHMV").
External System Integration If TMS is integrated with an external source data system, additional processing occurs between these two phases during data exchange between the two systems. The data exchange job must:
-
Run full autocode on all source terms that have been changed since the last data exchange and on all records in the Source Terms and Omissions tables whose Update flag is checked
-
Reset the Update flag on all processed records to N
Oracle Clinical Batch Validation is predefined to do both.
The batch processing unit (a study in Oracle Clinical) is called an X Area in TMS. The following indexes use the X Area to give fast access to source terms and omissions that need to be processed:
-
TMS_SOURCE_TERMS_BI3
-
TMS_VT_OMISSIONS_BI1
Both indexes include the following columns: NONUNIQUE X_AREA, NONUNIQUE DEF_INTEGRATION_KEY, NONUNIQUE UPDATE_FLAG.
Note:
Although Batch Validation runs on only a single study, or TMS X Area, Synchronization always runs on all TMS data, even when run during Batch Validation.Running Synchronization
To run Synchronization:
-
From the Definition menu, select Jobs, then Synchronize Dictionary Data. The Synchronization batch job window appears. There are no parameters to enter.
-
Use the runner icons in the toolbar to save and retrieve parameter sets as necessary, submit the job, and monitor its progress.
See Chapter 2, "Reports and Batch Jobs" for more information.
Writing a Procedure to Change the Dictionary Display
By default, the Dictionary Term field in the Classify VT Omissions and Reclassify Verbatim Terms windows displays the dictionary term to which the selected verbatim term is mapped. In some cases, however, you may require different information about a verbatim term's mapping within a particular dictionary to make a decision about classification—instead of the classification level term, you might want to see its parent term or another term in the hierarchy.
By defining a Dictionary Term Display Procedure for a TMS dictionary, you can dictate the level of dictionary term shown in the derivation path for a dictionary. You specify which procedure to use in the Base Dictionary tab window in the Define Dictionaries window.
If you leave the Dictionary Term Display Procedure field blank when defining the dictionary, TMS exhibits the default behavior: displaying the classification level term to which the selected verbatim term is mapped.
Writing a Dictionary Term Display Procedure
Any Dictionary Term Display Procedure must be written with the input and output parameters shown below. Oracle recommends that you create the procedure from the TMS role.
PROCEDURE procedure_name (
   pDictContentId IN NUMBER
   , pDefLevelId IN NUMBER
   , pTermType IN NUMBER
   , pCutOffDate IN DATE
   , pReturnLevel IN OUT VARCHAR2
   , pReturnTerm IN OUT VARCHAR2
After you write a procedure, grant the proper execute privilege to the tms_classify_priv role by issuing the following statement from TMS (or the role you used to write the procedure):
grant execute on procedure_name to tms_classify_priv
Controlling the Use of Materialized Views
TMS can use materialized views to populate the lists of values for external system columns in the Filter window of Reclassify Verbatim Terms and Approve VTAs. Using materialized views accelerates populating many of these LOVs, but in databases with a high data volume, refreshing materialized views during Synchronization can be too slow.
If the materialized views refresh during Synchronization is slowing Synchronization at your database, you have two options:
-
You can reduce the number of external system columns that rely on materialized views, switching some or all of them to regular views. To perform this switch, follow the steps in "Choosing Materialized or Regular Views for Each External System Value", then create the new views by "Creating Source Term Views".
-
You can remove the materialized views refresh from the Synchronization process. To de-couple this refresh from Synchronization, perform the steps in "Including the Materialized Views Refresh in the Synchronization Process". If you use materialized views for any external system values, and you have made this refresh process independent of Synchronization, you must still perform the refresh periodically. See "Refreshing Source Term Materialized Views".
Choosing Materialized or Regular Views for Each External System Value
The installation reference codelist TMS_SOURCE_MAT_VIEWS controls whether regular views or materialized views are used to populate the list of values for external system values in the Filter window. Each value in the codelist controls the view behavior of one external system field: for example, setting the long value of the codelist value MV1 to Y will make TMS use a materialized view to populate the list of values for the external value 1 in these Filter windows.
By default, TMS_SOURCE_MAT_VIEWS specifies that materialized views be created for external values 1 to 5, and regular views for external values 6 to 8.
Whenever any of the values in TMS_SOURCE_MAT_VIEWS are changed, you must run the Create Source Terms Views batch job. See "Creating Source Term Views".
To change the view settings for an external system value:
-
Open the Installation Reference Codelists window. (From the Definition menu, select Installation Reference Codelists.)
-
Query for the TMS_SOURCE_MAT_VIEWS codelist.
-
Update the long value for each external system value that you want to change.
-
Save.
Creating Source Term Views
Whenever you change any of the values in the TMS_SOURCE_MAT_VIEWS reference codelist, TMS must create a new view for each external system value you changed. Run the Create Source Terms Views batch job to create the materialized or regular views that your change requires.
To run this job from the user interface:
From the Definition menu, select Jobs, then choose Create Source Terms Views.
To run this job from a SQL*Plus prompt, execute the following API call:
tms_user_data_admin.configSTMatViews
Including the Materialized Views Refresh in the Synchronization Process
You can control whether TMS refreshes materialized views during the Synchronization process by changing the reference codelist value SYNCREFRESHMV in the TMS_CONFIGURATION reference codelist. If this setting is Y, the materialized views refresh will be included in Synchronization.
If you remove the materialized views refresh from Synchronization, you must periodically run the Refresh Source Term Materialized Views batch job to refresh them manually. See "Refreshing Source Term Materialized Views".
To change the inclusion status of materialized views in Synchronization:
-
Open the Maintain Installation Codelists window. (From the Definition menu, select Installation Reference Codelists.)
-
Query for the TMS_CONFIGURATION reference codelist.
-
Scroll down to the SYNCREFRESHMV row, and change its long value setting. A long value of Y includes the materialized views refresh in Synchronization; N removes this refresh from Synchronization.
-
Save. TMS will either couple or de-couple the materialized views refresh and the Synchronization process.
Refreshing Source Term Materialized Views
If you do not refresh the materialized views as part of Synchronization, you must refresh them periodically by running the Refresh Source Term Materialized Views batch job.
To run this job from the user interface:
From the Definition menu, select Jobs, then select Refresh Source Term Mat. Views.
To run this job from a SQL*Plus prompt, execute the following API call:
tms_user_synchronization.RefreshMviews
Enabling Context Searches for Non-English Dictionaries
Context searches enable you to be more flexible in your queries. You can perform context searches for word fragments, terms that share a common root, terms that sound similar, or terms that have the same meaning. For more information on context searches, see Entering a Context Query.
By default, TMS is configured to perform context searches for English-language dictionaries only. However, because TMS indexes information in a multi-lexer, a data structure that can store information in multiple languages; you can configure TMS to allow context searches in other languages.
To add a new language to the Context Server Index:
-
From the Install directory, open the following script in a text editor:
tms\database\tmscincontextinx.sql
This script includes sample commands for adding Japanese, Danish, or German to the Context Server Index. To add one or more of these languages to your index, copy the appropriate lines to a buffer.
To add a different language, modify the lines to suit the language you want. For more information, see the System-Defined Preferences section of the Indexing chapter in the Oracle Text Reference manual (part number A96518).
-
Start a SQL*Plus session as TMS.
-
Run the copied or edited lines.
-
Refresh the Context Server Index by running the job from the Definition menu. See "Refreshing the Context Server Index".
Refreshing the Context Server Index
When you insert new dictionary terms or VTAs into the TMS repository, the Context Server cannot find them in a query until you refresh the Context Server Index. Oracle recommends that you schedule this refresh as a batch job running as often as is appropriate for your TMS installation.
You can refresh the Context Server Index by running the Refresh Context Server Index batch job.
To refresh the Context Server Index:
-
From the Definition menu, select Jobs, then Refresh Context Server Index. The Refresh Context Server Index batch job window appears. There are no parameters to enter.
-
Use the runner icons in the toolbar to save and retrieve parameter sets as necessary, submit the job, and monitor its progress.
See Chapter 2, "Reports and Batch Jobs" for more information.
Analyzing Tables
TMS automatically runs the Analyze Tables batch job after Activation to optimize TMS performance. You can also schedule this batch job to run periodically; from the Definition menu, select Jobs, then Analyze Tables, and specify the batch job's parameters.
See Chapter 2, "Reports and Batch Jobs" for more information.
Running Scripts to Gather Schema Statistics for the 12c Optimizer
After upgrading from a release prior to TMS 5.0 and setting initialization parameter optimizer_features_enable to 12.1.0.2 you must gather statistics required for the Oracle 11g Optimizer to be effective for accounts used internally by TMS.
Failure to execute these scripts can negatively impact performance.
Scripts opastats.sql and tmsstats.sql, are available for this purpose. If your database contains large amounts of data, the scripts may take a long time to run. You may want to edit the scripts; for information on opastat.sql and tmsstats.sql parameters see the following documentation of the DBMS_STATS package that they call: http://docs.oracle.com/cd/B19306_01/appdev.102/b14258/d_stats.htm#i1036456.
Note:
This information is also available in the Installation Guide. You need to do this only once after installation. You should also do it after loading a dictionary. It is especially important after loading WHODrug Format C.tmsstats.sql Since TMS already has a procedure, AnalyzeTable in tmspb_user_analyze.sql, that runs as part of every activation job, you may prefer to edit it if required and call it from tmsstats.sql to keep the two synchronized.
The tmsstats.sql script prompts for the password of the account it processes: TMS.
To change how TMS analyzes tables and ensure that tmsstats and AnalyzeTable remain in synch:
-
Modify the Analyze procedure in tmspb_user_analyze.sql.
-
Edit tmsstats.sql to call tms_user_analyze.AnalyzeTable. Replace the section that analyzes tables with:
exec tms_user_analyze.AnalyzeTables -
Run tmsstats.sql.
opastats.sql captures new statistics in the OPA application account used by TMS. It is also used by Oracle Clinical and RDC Onsite.
Adding and Configuring WebLogic Server Data Sources
When you run the TMS Installer, it sets up a connection, or data source, for OPA and the TMS Lite Browser from the WebLogic Server to the default database.
If you plan to use more than one database, you must create an OPA and a TMS Lite Browser data source for each additional database. The OPA data source is used to run TMS reports.
Note:
In addition, you must modify tnsnames.ora at C:\Oracle\Middleware\asinst_1\config. Ensure that it contains an entry for each database.Oracle recommends maintaining a master tnsnames.ora file and copying it to each location—database and application servers— whenever you add a database.
Add Data Sources
Go through these instructions for one data source at a time.
-
Log in to the WebLogic Server Administration Console at:
http://host:7101/console/login/LoginForm.jsp -
Select Data Sources, then New, then Generic Data Source.
-
Enter a name for the data source.
-
Enter the JNDI name as:
-
For TMS:
jdbc/tmsdatabase_nameDS -
For OPA:
jdbc/opadatabase_nameDSNote:
Enter the JNDI name for OPA in the REPORTS_CONFIG local reference codelist, JDBC_DATA_SRC setting.
-
-
On the next screen:
-
If the database you want to connect to is a RAC database, choose Oracle's Driver (Thin) for Service connections; Versions:9.0.1 and later
-
If the database is not a RAC database, choose Oracle's Driver (Thin) for Instance connections; Versions 9.0.1 and later
-
-
On the next screen, deselect Supports Global Transactions.
-
On the next screen, enter the database name, host name, and port for the database. For the user, enter the following user account and its password:
-
For OPA:
bc4j_internal -
For the TMS Lite Browser:
ops$tmsbrowser
-
-
On the next screen, select Test Configuration to validate if you can connect using the pool setup.
-
On the next screen, assign
OpaServer1as the target. -
Click Finish.
-
Select the newly created Data Source, click the Connection Pool tab, and then click Advanced.
-
Add the property
dataSourceName=OracleDataSourceinto the Properties field (without quotes). -
If the following property has not already been created by the Create Data Source wizard, add the property
databaseName=SID_or_servicenameinto the Properties field (without quotes). -
Uncheck Wrap Data Types and save.
-
Review and set additional parameters in Advanced Settings as appropriate for your expected data load.
-
Activate your changes or restart OpaServer1 for the changes to take effect.
Configure Maximum Connections
By default, the value for the Maximum Capacity parameter for each data source, which determines the maximum number of concurrent connections, is 15.
The value for the Maximum Capacity parameter should be equal to or greater than the maximum number of concurrent users you expect for:
-
TMS TMS Lite Browser (TMS data source)
-
TMS Reports (OPA data source)
To change this value:
-
Log in to the WebLogic Server Administration Console at:
http://host:7101/console/login/LoginForm.jsp -
Select Data Sources, then select the data source whose setting you want to modify: for example, DS_1_tms for TMS or DS_1_ops for OPA (TMS reports).
-
Click the Connection Pool tab.
-
Scroll down to find the parameter Maximum Capacity.
-
Enter a value as described above.
-
Save.
You must then restart the OPA Server:
-
In the same OPA domain WLS Administration Console, click on Servers, then the Control tab.
-
Select OpaServer1 and then Shutdown - Force Shutdown now.
-
Click Refresh to ensure the State changes to Shutdown.
-
Select OpaServer1 and then Start.
-
Click Refresh to see the State change to Running.
Configure Inactive Connection Timeout
To ensure that a connection is available for a user who needs to run a report, change the default setting of the Inactive Connection Timeout of 0 to 5 or a similar value. This is the number of seconds of inactivity that is allowed before the connection is made available to another user. If set to zero, the feature is disabled.
To change this value:
-
Log in to the OPA domain WebLogic Server Administration Console at:
http://host:7101/console/login/LoginForm.jsp -
Select Data Sources, then select the data source whose setting you want to modify: for example, DS_1_ops for OPA (TMS reports).
-
Click the Connection Pool tab.
-
Scroll down to find the parameter Inactive Connection Timeout.
-
Enter a value; for example,
5. -
Save.
You must then restart the OPA Server:
-
In the same OPA domain WLS Administration Console, click on Servers, then the Control tab.
-
Select OpaServer1 and then Shutdown - Force Shutdown now.
-
Click Refresh to ensure the State changes to Shutdown.
-
Select OpaServer1 and then Start.
-
Click Refresh to see the State change to Running.
TMS Lite Browser Administration
This section describes the following administrative topics:
-
Creating a Launch Page, Button, or Link for the TMS Lite Browser
-
Customizing the TMS Lite Browser URL to Support Additional Databases or Automatic Login
Granting User Privileges for Using the TMS Lite Browser
Users require the rxclin_read privilege to browse dictionary data. See "Security" for information about creating TMS users and granting them roles appropriate to their work.
Creating a Launch Page, Button, or Link for the TMS Lite Browser
You can customize the shipped TMS Launch page to add a link to the TMS Lite Browser, create a new Launch page, or create a button or link to the TMS Lite Browser from an existing website such as your users' Home page. Oracle provides scripts that help prevent problems that may arise in the TMS Lite Browser.
In addition, you may want to customize the TMS Lite Browser URL:
-
If you have multiple databases, you can specify a database other than the default one set up during installation.
-
You can enable automatic login, so that the system automatically logs in any user as ops$tmsdbrowser.
Note:
By default, automatic login is disabled.
See "Customizing the TMS Lite Browser URL to Support Additional Databases or Automatic Login."
Creating or Customizing a Launch Page to Use Provided Scripts
Oracle recommends using the scripts provided here to control when and how the TMS Lite Browser Login page opens, to prevent users from having problems in the TMS Lite Browser application resulting from:
-
Using the browser's Back button—Sample Java Script for Launching in a New Window without Tool or Menu Bar suppresses the browser toolbar, making the Back button unavailable.
-
Turning on IE's Compatibility View—Sample JavaScript for Checking if Compatibility View Is On detects if Compatibility View is turned on and if it is, does not open the application and displays a message telling the user to turn it off.
-
Opening more than one TMS Lite Browser session to the same application server or from the same parent window—the scripts prevent this.
To use these scripts in your launch page:
-
Place the script from "Sample Java Script for Launching in a New Window without Tool or Menu Bar" in a file called Launch.js.
-
Place the script from "Sample JavaScript for Checking if Compatibility View Is On" in a file called IeCompatCheck.js.
-
Place the scripts at the same location as the Launch page or in a folder (called JS in the example code below) in the same location as Launch page. The shipped TMS Launch page, launch.htm, is located in opa_home/html.
-
Create an HTML page that contains a button or link to the TMS Lite Browser that invokes the functions in the JavaScript files or add code to the shipped Launch page or an existing website to do the same.
Put the code referencing the scripts near the top of the HTML page; for example:
 <title> Launch RDC Onsite </title>
  <script type="text/javascript" src="JS/IeCompatCheck.js"></script>
  <script type="text/javascript" src="JS/LaunchJS.js"></script>

 </head>
<body>
Add button code or link code as follows, and see "Customizing the TMS Lite Browser URL to Support Additional Databases or Automatic Login."
<script language="JavaScript">
document.write('<FORM>');
document.write('<input type="button" value="TMS Browser" onclick="return launch(event,\'../tmsadf/faces/Login\',\'TMSLite\')" class="loginButton"/>');
document.write("</FORM>");
</script>

<noscript>
<a onclick="return launch(event,'../tmsadf/faces/Login',\'TMSLite\')" href="#">Launch TMS Browser</a>
</noscript>
Sample Java Script for Launching in a New Window without Tool or Menu Bar
function launch(event,url,windowname){
            if(detectIECompatibility(event)){
                cancelEvent(event);
                return false;
            }
            if(!!!windowname){
                windowname="_blank";
            }
            window.open(url,windowname,'location=0,resizable=1,toolbar=0,titlebar=1,status=1,scrollbars=1,menubar=0','true');
}
Sample JavaScript for Checking if Compatibility View Is On
The following script checks if Compatibility View is on and if so, displays a message asking the user to turn it off.
function IECompatDetect(){
        this.isCompatOn = function(){
                    var ua = navigator.userAgent;
                    var on = false;
                    for(var index=0; index< this.ieUAProps.length; index++){
                        var ieProp = this.ieUAProps[index];
                        if(ua.search(ieProp.layoutEngine) == -1){
                            continue;
                        }
                        if(ua.search(ieProp.browser) == -1){
                            on = true;
                            break;
                        }
                    }
                    return (on);
                };
        this.ieUAProps= [
                        {
                            browser: 'MSIE 10',
                            layoutEngine: 'Trident/6'
                        },
                        {
                            browser: 'MSIE 9',
                            layoutEngine: 'Trident/5'
                        },
                        {
                            browser: 'MSIE 8',
                            layoutEngine: 'Trident/4'
                        }
                    ]

    }
function cancelEvent(e){
    var event = e || window.event;
    if(event == null){
        return;
    }
    if(event.preventDefault){
        event.preventDefault();
    }else{
        event.returnValue=false;
        event.cancelBubble=true;
    }
}

function compatCheck(event,isCompatRequiredToBeOn){
    var compatOn=(new IECompatDetect()).isCompatOn();
    if(compatOn && !isCompatRequiredToBeOn){
        cancelEvent(event);
        alert("Please turn off IE's Compatibility View. Go to Tools->Compatibility View/Compatibility View Settings to do so.");
    }
    if(!compatOn && isCompatRequiredToBeOn){
        cancelEvent(event);
        alert("Please turn on IE's Compatibility View. Go to Tools->Compatibility View/Compatibility View Settings to do so.");
    }
    return compatOn;
}
function detectIECompatibility(e){
    return compatCheck(event,false);
}

//Call on load
(function(){
    compatCheck(null,false);
})();
Customizing the TMS Lite Browser URL to Support Additional Databases or Automatic Login
The format of the TMS Lite Browser URL is:
https://server.domain/tmsadf/faces/Login?setUpDone=Y ¶meter1=value1¶meter2=value2
This URL, without any parameters, goes to the default database set up during installation and requires the user to log in. You can use one or more parameters to change this behavior:
Table 3-1 Parameters Used to Customize the URL
| Parameter | Parameter Value | Description |
|---|---|---|
|
db |
database_name |
Links to a database that is not the default one; see "Adding and Configuring WebLogic Server Data Sources." The database name must be the JNDI name defined in the data source. |
|
event |
doAutoLogin |
Helps enable automatic login; see"Enabling and Disabling Automatic Login." |
For example, when both parameters are used:
https://server.domain/tmsadf/faces/Login?setUpDone=Y & db=database& event=doAutoLogin
Enabling and Disabling Automatic Login
If automatic login is enabled, any user can click a link for the TMS Lite Browser and the application opens immediately, bypassing the Login page. The system passes the credentials for the ops$tmsbrowser user, using the password entered in the TMS Installer. Users who log in with automatic login cannot perform searches on patient data.
By default, automatic login is disabled and when users click the link the Login page opens and they must enter their own credentials.
Enabling Automatic Login
To enable automatic login:
-
Open the tmsconfig.properties, which is located at c:\opapps51\config.
-
Search for the parameter tms_auto_login. If it is not present, add it.
-
Set it to Y:
tms_auto_login=Y -
Save.
Note:
You must also add the stringevent=doAutoLoginto the TMS Lite Browser URL; see "Customizing the TMS Lite Browser URL to Support Additional Databases or Automatic Login.".
Disabling Automatic Login
Automatic login is disabled by default.
The setting of the parameter tms_auto_login in the tmsconfig.properties file overrides the URL event setting. If it is set to any value other than Y, or if it is not present in the tmsconfig.properties file, even if the TMS Lite Browser URL includes event=doAutoLogin, the link goes to the Login page instead of automatically logging in the user as ops$tmsbrowser.
To disable automatic login:
-
Open the tmsconfig.properties, which is located at c:\opapps51\config.
-
Search for the parameter tms_auto_login.
-
If it is set it to
Y, change its setting toN. -
Save.
Enabling TMS Lite Browser Logs
Do the following to enable exception log files for the TMS Lite Browser. A file named OpaServer-tms_1.log will be created in Middlware_HOME\user_projects\domains\OPADomain\ servers\OpaServer1\logs.
-
Open the logging config file logging.xml that is located at:
Middlware_HOME\userprojects\domains\OPADomain\config\fmwconfig\ servers\OpaServer1
-
Add the following entry:
<?xml version='1.0' encoding='UTF-8'?> <logging_configuration> <log_handlers> .. .. <log_handler name='tmshandler' class='oracle.core.ojdl.logging.ODLHandlerFactory' filter='oracle.dfw.incident.IncidentDetectionLogFilter'> <property name='path' value='${domain.home}/servers/${weblogic.Name}/logs/${weblogic.Name}-tms_1.log '/> <property name='maxFileSize' value='10485760'/> <property name='maxLogSize' value='104857600'/> <property name='encoding' value='UTF-8'/> <property name='useThreadName' value='true'/> <property name='supplementalAttributes' value='J2EE_MODULE.name,composite_name,component_name'/> </log_handler> .. .. </log_handlers> <loggers> .. .. <logger name='oracle.pharma.tms.logging' level='ALL' useParentHandlers='false'> <handler name='tmshandler'/> </logger> .. .. </loggers> </logging_configuration> -
Add the following to the URL to get all debug information:
?setUpDone=Y&debug=all
Using the About Window
The About window shows information about the TMS and other Oracle Health Sciences releases that have been applied to this database. Choose either TMS or OPA from the Installed Product list to browse:
-
Which releases have been applied to the middle and database tiers.
-
The dates in which these releases were installed.
Troubleshooting
Report Error
If you are getting an error message like "Java exception" followed by another message like "http://127.0.0.1/opaxdo/getXdoReport not found" when you try to run a TMS report, you may want to modify the setting of registry variable OPA_LOCAL_MT_URL. This variable is used to redirect the server to the opaxdo servlet to get reports. When not defined, http://127.0.0.1 is used as default value.
Depending on the settings on middle tier, you may encounter this problem. To fix it, add a port number to the registry variable OPA_LOCAL_MT_URL value on the middle tier; for example, http://127.0.0.1:7777.
To confirm that the path in the registry variable is correct, submit the value such as http://127.0.0.1:7777 (or, without port, http://127.0.0.1) from a browser on the middle tier. If the registry value is correct, you receive the message "Got Request."
Restart Application Server After Redeploying TMS Lite Browser
If you redeploy the TMS Lite Browser .ear file—for example, to apply a patch—restart the application server, including the WebLogic Admin Server. This helps clear connection pools and any DLLs that may be loaded.
If you do not restart the server, an error message may be displayed the next time a user opens the TMS Lite Browser that includes:
java.lang.UnsatisfiedLinkError: Native Library