4 View data of a single patient or subject
In this chapter you will find out how to:
View records
To view a patient record:
-
On the Home page, on the left, click the Single Patient Viewer icon (
 ).
). -
Enter the patient ID.
-
Select the Source:
-
All records is the default option. This allows you to search through all available patients in the CDM database.
-
Cohort
-
-
Select the clinical and genomic data you want to view for the patient.
-
Click Submit.
Note:
Attributes displayed in the Single Patient Viewer align with the criteria described in the Cohort Query screen, where you select criteria for patients and subjects.To sort patient or subject data, either click the phenotype column to reorder them, or enter a value in the blank field, at the top of any column, then hit Enter.
To save patient or subject data in an Excel file, click the Export button ( ![]() ) next to the category title. You can export either all data or just the selected criteria.
) next to the category title. You can export either all data or just the selected criteria.
Variants can only be exported separately. To do so, follow these steps below:
-
In the Single Patient Viewer screen, on the left, select the Variants checkbox.
-
Click Submit. The Variants hierarchy graph is displayed on the right side of the screen.
-
Click on any nodes in the graph to display the tables with Variants data and select it. These tables show 500 records only.
-
Along the top, click Export to export the variants. Variants are exported in an XLS file for the selected node.
Remember that variant export is not supported for the top two level nodes in the Variant hierarchy graph.
If the number of variants that you want to export is less or equal than the pre-configured limit of 50000, then all variants for the selected node are exported. If the number of variants that you want to export exceeds the limit, variants are then exported only for the selected chromosome within the node.
Note:
If the number of variants that you want to export exceeds the limit of 50000, contact your database administrator. The limit can be modified within the database. For more details, see the Oracle Healthcare Translational Research Administrator's Guide on the Oracle Help Center.
Navigate through selected patients or subjects
To navigate through patients' or subjects' data in the Single Patient Viewer, keep in mind three things:
-
If the selected patient ID generates a patient or subject count larger than 1, you can navigate through patients' or subjects' history using the Previous and Next buttons found next to the Patient ID field, on the left. This is also available for patient or subject counts generated in the Cohort Query or Cohort Viewer screens.
-
Every patient has an ordinal number (his position within the selection) listed under the Patient field. If the selected source is a cohort, then the total number of available patients or subjects from that cohort is also displayed.
-
If you went from the Cohort Timeline screen to the Single Patient Viewer screen, then the total number of available patients or subjects in the cohort is the count of patients or subjects selected in the initial pool, in the cohort timeline.
View genomic data
Genomic data is displayed in four sections as follows:
Specimen with Genomic Results
Table 4-1 Specimens with Genomic Results
| Column Heading | Definition | Sample Value or Values |
|---|---|---|
|
Specimen Id |
Specimen belonging to the selected patient or subject |
HG00096 |
|
Specimen Vendor Id |
Specimen Vendor for that specimen |
Vcf |
|
Version Label |
Represents Assembly Version (DNA reference version against which this data was loaded) |
GRCh37(V68) |
|
Sequence Variants Results |
Whether the sample has sequence variants results |
Yes / No |
|
Copy Number Variation Results |
Whether the sample has copy number variants results |
Yes / No |
|
Single Channel Microarray Results |
Whether the sample has single channel results |
Yes / No |
|
Dual Channel Microarray Results |
Whether the sample has dual channel results |
Yes / No |
|
Rna-Seq Expression Results |
Whether the sample has rna sequencing results |
Yes / No |
Derived Files
| Column Heading | Definition | Sample Value or Values |
|---|---|---|
|
Alternate Filepath |
The FTP path of the file |
|
|
File Type, Version |
Type of file and Version |
Variant Call Format, 4.1 |
|
Result Type |
Type of result data in the file |
Sequencing, Copy Number Variation, Gene Expression (2-channel or single channel) |
|
Alignment Version (DNA Reference Version) |
Represents Assembly Version (DNA reference version against which this data was loaded) |
GRCh37(v68) |
|
Total Number of Specimen in File |
Total number of specimen that the file contains where not all specimen belong to the selected patient |
Numeric, positive integer |
File Lineage
Note:
If you have appropriate permissions, and if files are present in the middle tier accessible location, the path listed in the File Name fields for Genomic data are enabled to let you click and download the files directly from OHTR.| Column Heading | Definition | Sample Value or Values |
|---|---|---|
|
Parent Filename |
Parent Filename including path of the genomic file stored including path |
C:/John_specimen01.BAM |
|
Alternate Filepath |
The FTP path of the file |
|
|
Alignment Version (DNA Reference Version) |
Represents Assembly Version (DNA reference version against which this data was loaded) |
GrCH37 |
|
Derived Child Files: File - Specimen Id, Vendor Id |
Information about Derived Results files that have their lineage based on the particular Low Level file. |
C:/John_specimen01.vcf - HG00096_1,HarvardLab1 |
Variants Found
Selecting this option displays different variants available for a patient. These variants are grouped and displayed in a hierarchical structure with the count of the variants displayed for each type of variants.
Note:
Variants can only be exported after they've been submitted.Variant details are displayed in a table as follows:
| Column Heading | Definition | Sample Value or Values |
|---|---|---|
|
Chromosome |
Chromosome location of the variant |
1 |
|
Position |
The position of the variant within the chromosome |
Numeric value |
|
Reference Allele |
The reference allele of the variant |
C |
|
Alternate Allele |
The alternate allele of the variant |
G |
|
Gene |
The gene containing the variant |
BID |
|
Transcript |
The transcript name |
ENSTXXX |
|
Variant Name |
The reference id of the variant |
rs111 |
|
Variant Type |
The type of variant |
Substitution |
|
Variant Status |
Status of the variant |
Known |
|
Protein Name |
||
|
SIFT Impact |
The SIFT impact of the variant |
Intolerant |
|
PolyPhen Impact |
The polyphen Impact of the variant |
Damaging |
|
Drug |
The related drug |
Clofazimine |
|
Associated Disease |
The disease associated to the variant |
Anaemia |
|
Histology |
||
|
Site |
||
|
Specimen Id |
The specimen containing the variant |
HG00096 |
|
Alignment Version |
Alignment version of a variant |
GRCh37 |
Select the Assembly Version
By default, the last loaded assembly is displayed but this selection can be modified. The Genomic data is filtered out with this assembly version instead of the DNA reference version. One Assembly version can belong to multiple DNA reference versions.
Use the Dalliance Browser
To view variants, chromosomes or gene ranges:
-
On the left, in the patient details screen, scroll down to Variants. The variant detail table hyperlinks for variant reference IDs, gene names and chromosome positions.
-
Click any of those hyperlinks to navigate to the Dalliance browser where you can see the particular VCF tracks.
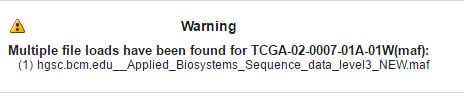
If a file is loaded multiple times for a particular specimen, then the following warning message is displayed. It lists all the multiple files names.
-
Scroll down to see some configurations that are required to plot the gene track in the Dalliance browser.
You can create your own DAS server and the corresponding entries should be added in the TRC.properties file.
The following is an example of the required entries, to look up the Authority, University of California Santa Cruz (UCSC) name for the alignment and the public URLs for the Sequence and Genes tracks (reference tracks):
DALLIANCE.AUTHORITY_37=GRCh
DALLIANCE.UCSC_NAME_37=hg19
DALLIANCE.SEQ_URL_HG18=http://www.derkholm.net:8080/das/hg18comp/
DALLIANCE.SEQ_URL_HG19=http://www.derkholm.net:8080/das/hg19comp/
DALLIANCE.GENES_URL_HG18=http://www. derkholm.net:8080/das/hsa_54_36p/
DALLIANCE.GENES_URL_HG19=http://www. derkholm.net:8080/das/hsa_59_37d/
While integrating Dalliance with OHTR, the server http://www. derkholm.net:8080/das/ has been used. However, this has been shut down.
These can be manually customized in TRC.properties. To add any new alignments, add all the above code to TRC.properties. Make sure that you research the reference for where they can be found. It is possible to use downloaded files instead of public DAS server(s) for reference, but the client should host these files on a web server.
The Dalliance browser is a third party tool that displays a graphical representation of the variant, chromosome or gene range. The variant detail table comprises of hyperlinks for variant reference ID, gene name and chromosome position.
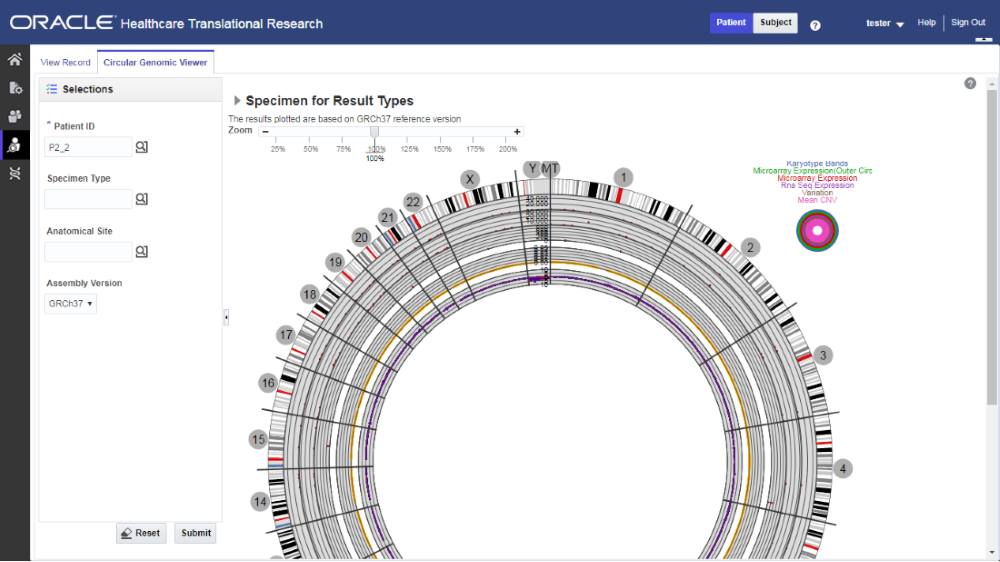
View circular genomic data
-
On the left, click the Circular Genomic Viewer tab. Select a Patient ID or Subject ID.
If an ID is selected in the View Record tab, it's inherited in the Circular Genomic Viewer tab.
-
To filter your view, you can select a Specimen Type or an Anatomical Site. The DNA Reference Version selected is used to filter out the results and determine the cytoband to be used while rendering the circular genomic plot for any of the five data types.
-
Select an Assembly Version.
-
Click Submit.
-
Select only one specimen of different result types to plot the graph. By default, the cytoband of chromosomes is also plotted which is the outer most ring of the circular plot.
-
Click Plot Graph.
Note:
For the circular viewer to run properly in IE9, turn off compatibility mode.
About the Circular Genomic Viewer
Circular genomic data viewer provides an interface for you to visualize the genomic data which includes variation, micro array expression, copy number variation, dual channel expression and RNA sequencing. The system uses the VisQuick tool, which is a Javascript library built specifically for genomic data visualization.
Select data to plot
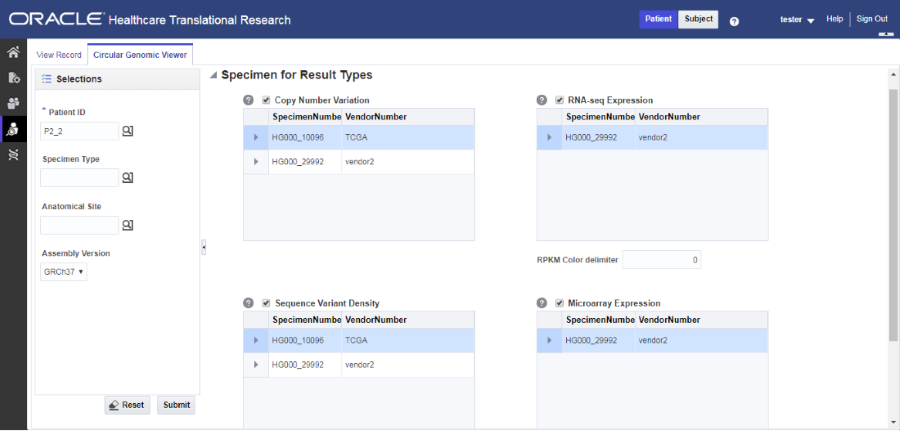
Microarray Expression
The microarray expression panel displays all the specimens of the result type expression. You can select only one specimen at a time.
For the selected specimen from the panel, you can view the list of hybridizations available for that specimen. You can select a maximum of two hybridizations from the multiple choice box, for which the plot is rendered.
The color delimiter value is used to render color to the data points in the plot based on the intensity value. If the intensity value is above the value defined in color delimiter then the data points have green color Otherwise, the points have red color.
Sequencing-Variant Density
This option enables you to plot the density of variants for every 100-kb region for a specimen. The sequence variant density panel displays all the specimens of the result type sequence variants. You can select only one specimen at a time.
RNA-Seq Expression
This panel displays all the specimens of result type RNA Sequencing.You can select only one specimen at a time.
The color delimiter value is used to render color to the data points in the plot based on the RPKM value. If the RPKM value is above the value defined in color delimiter then the data points have green color. Otherwise, the points have red color.
You can use the check boxes provided next to each of the result types to determine if the specimen selected is plotted or not. You can select one or all of the result types for plotting of the graph. Once the specimens are selected, the circular genomic plot is displayed. The outermost circle in the plot is the Cytoband. The supported Cytoband versions are: hg-18 and hg-19.
Note:
To display the cytoband in the Circular Genomic plot we need an entry mapping each DNA Reference Version to the Cytoband in the TRC_LOOKUP_CODE table in the APP_schema.For each reference version we must insert a row with the following values:
-
CODE_TYPE: TRC_REFVERSION_CYTOBAND
-
CODE:cytobandHG19 (for HG19), cytobandHG18 (for HG18), or cytobandHG38 (for HG38)
-
CODE_NAME: Name of the loaded DNA reference version (for example, V69)
You can hover over the plot to get details such as:
-
Microarray Expression: Chromosome, Start Position, End Position, Value and Gene
-
Copy Number Variation: Chromosome, Start Position, End Position and Value
-
Sequence Variants: Chromosome, start position, end position, and value. The density value is calculated by: Total number of variants for 100kb region / 100000
-
Dual Channel Microarray Expression: Chromosome, Start Position, End Position, Value and Gene
-
Rna Seq Expression: Chromosome, Start Position, End Position, Value and Gene
Copy Number Variation
The panel displays all the specimens of the result type copy number variation. You can select only one specimen at a time.
The value for copy number variation depends on the CNV result type selected. If the selected specimen contains data from Genome_Wide_SNP_6 array, then the value for CNV is taken from segment mean stored in the database. If the selected specimen has data from complete genomics, then the value is calculated based on the called Ploidy value stored in the database. The value to be plotted is calculated using the following formula for CNV data from complete genomics:
log2(called_ploidy/expected_ploidy)
where,
expected_ploidy is 2 for chr1-22
expected_ploidy is 2 for chrX for females.
expected_ploidy is 1 for chrX outside the pseudo-autosomal region in males
expected_ploidy is 2 for chrX inside pseudo-autosomal region in males
The pseudo autosomal regions on chrX for 'NCBI build 37' as reported by Complete Genomic are 60000 - 2,699,519 and 154,931,043 - 155,260,559.
The pseudo autosomal regions on chrX for 'NCBI build 36' as reported by Complete Genomic are 0 -2,709,519 and 154,584,237 - 154,913,753.
For called_ploidy zero, the log2 should be infinity, in which cases the final value is taken as -2.
Dual Channel Microarray Expression
This panel displays all the specimens of result type Dual Channel Microarray expression. You can select only one specimen at a time.
The color delimiter value is used to render color to the data points in the plot based on the Log2Ratio value. If the Log2Ratio value is above the value defined in color delimiter, then the data points have green color. Otherwise, the points have red color.
Here is how the graph looks.