Beta Draft: 2016-07-11
2 Installing and Running Applications on the Intel Galileo Gen2 Board
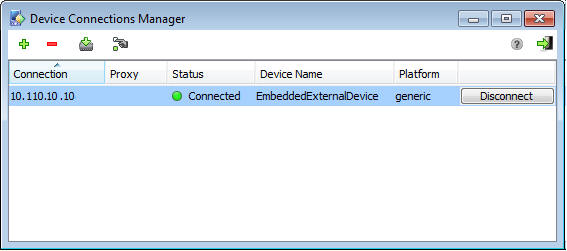
This chapter describes how to run IMlets using the command-line shell interface and the Application Management System (AMS) command-line interface (CLI). You learn how to add the board to the Device Connections Manager in the Oracle Java ME SDK.
Ways of Using the Java Runtime on the Intel Galileo Gen2 Board
There are several ways to use the Oracle Java ME Embedded platform on the Intel Galileo Gen2 board.
-
Directly run commands using a command-line shell interface or logging in using the
sshprotocol. -
Manually start a Developer Agent program on the desktop host and run commands using the Application Management System (AMS).
-
Run NetBeans IDE.
Run of IMlets on Intel Galileo Gen2 Using the Command Shell
You can run IMlets directly on the Intel Galileo Gen2 board by using the commands shown in Table 2-1.
Table 2-1 Intel Galileo Gen2Shell Commands
| Syntax | Description |
|---|---|
|
|
List all installed IMlet suites and their status or show the detail of a single suite. |
|
|
Install an IMlet using the specified JAR file. |
|
|
Remove an installed IMlet. |
|
|
Run the specified IMlet or the default if none is specified. All logging information from the IMlet appears in the standard output of this command. |
Note:
The term IMlet, in the context of theOracle Java ME Embedded command-line interface (CLI) and references in this chapter, is synonymous with MIDlet.
An Example of Managing Application Life Cycle with Shell Commands
The following is a typical example of using the commands to install, list, run, and remove an Oracle Java ME Embedded application on the Intel Galileo Gen2 Pi board. Most commands can be terminated with the Ctrl-C key combination if they become unresponsive.
First, install the application using the installMidlet.sh command, specifying its location on the local file system.
root@galileo:~/bin# ./installMidlet.sh /home/root/EmbeddedTestProject.jar
Java is starting. Press Ctrl+C to exit
The suite was successfully installed, ID: 2
After an IMlet is installed, note its ID: in this case, it is 2. Next, verify it using the listMidlets.sh command.
root@galileo:~/bin#  $ ./listMidlets.sh
Java is starting. Press Ctrl-C to exit
detect_fb_type: unknown device type
Suite: 2
  Name: EmbeddedTestProject
  Version: 1.0
  Vendor: Vendor
  MIDlets:
    MIDlet: GPIODemo
You can run any installed IMlet using the runSuite.sh command. This command runs the IMlet that was just installed, passing any logging information to the standard output of this command. Note that you can press the Ctrl-C key to exit from this command, which will terminate the application.
root@galileo:~/bin# ./runSuite.sh 2
Java is starting. Press Ctrl-C to exit
Starting - GPIODemo
You can use the removeMidlet.sh command to remove any installed IMlet.
root@galileo:~/bin# ./removeMidlet.sh 2
Java is starting. Press Ctrl-C to exit
Suite removed
root@galileo:~/bin#
You can verify the results by using the listMidlets.sh command.
root@galileo:~/bin# ./listMidlets.sh
Java is starting. Press Ctrl-C to exit
No suites installed
Purpose of the Developer Agent Program on the Desktop
The Developer Agent program runs on the Windows or Linux desktop and transmits all communication to and from the Oracle Java ME Embedded executable file on the Intel Galileo Gen2 board.
You can start the Developer Agent program on the desktop host computer either in a server or a client mode. The server mode is used by default. The client mode must be configured in the jwc_properties.ini file.
Configuring Client Mode Connection
To configure a client mode connection, edit the jwc_properties.ini file in the bin directory on the Intel Galileo Gen2 board as follows.
proxy_connection_mode = client
proxy.client_connection_address = <IP address>
where <IP address> is the IP address of the desktop host computer running the Developer Agent program.
Installing the Developer Agent Program
The Developer Agent program is the proxy.jar file inside the util directory of the Oracle Java ME Embedded distribution.
To install the Developer Agent program, follow these steps:
- Extract files from the copy of the Oracle Java ME Embedded ZIP archive on the host desktop.
- Delete the
/appdband/bindirectories.
Starting the Developer Agent in a Server Mode
When using the Developer Agent in a server mode, it is important that you first started the Java runtime on the Intel Galileo Gen2 board to allow access to the AMS.
To start the Developer Agent program, follow these steps:
After the Developer Agent starts, use the AMS CLI.
Starting the Developer Agent in a Client Mode
When using the Developer Agent in a client mode, ensure that you configured the client mode as described in the Configuring Client Mode Connection.
To start the Developer Agent program, use these steps:
After the Developer Agent starts, use the AMS CLI.
Running IMlets on Intel Galileo Gen2 Using the AMS CLI
To run IMlets on the Intel Galileo Gen2 board using the AMS CLI, you must first make a raw connection to the AMS CLI and then use commands.
This section contains the following topics:
Making a Raw Connection to the AMS CLI
Before making a raw connection to the AMS CLI ensure that you started the Developer Agent program on the desktop host and the Java runtime - on the Intel Galileo Gen2 board unless the Developer Agent was started automatically by Java ME SDK.
To make a raw connection to the AMS CLI, perform the following.
- Start a PuTTY executable file on your desktop computer.
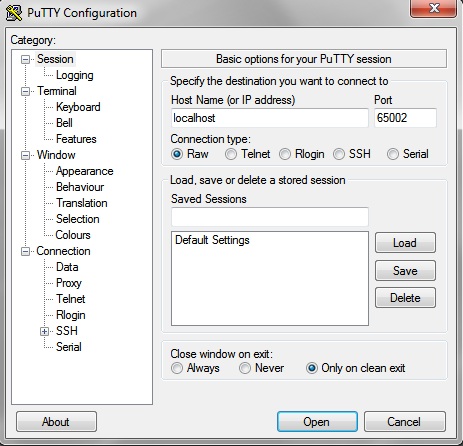
- Create raw socket connections to the IP address of the host running the Developer Agent, and port 65002.
A connection to localhost and the port 65002 is shown in Figure 2-1.
Figure 2-1 Using PuTTY to Connect to the Command-Line Interface

Description of "Figure 2-1 Using PuTTY to Connect to the Command-Line Interface"
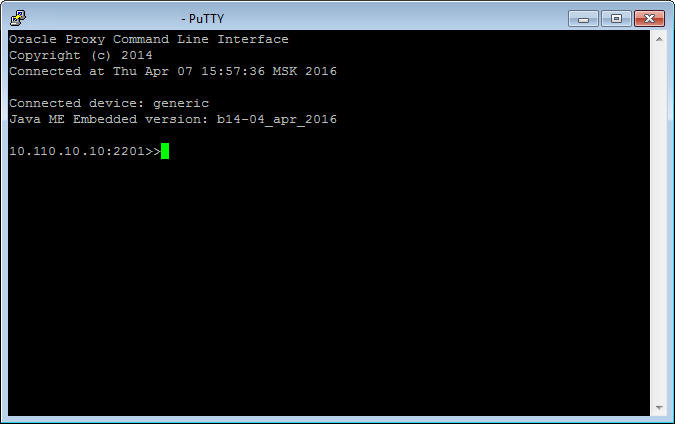
The window from port 65002 provides a CLI as shown in Figure 2-1.
Figure 2-2 Command-Line Interface to Intel Galileo Gen2

Description of "Figure 2-2 Command-Line Interface to Intel Galileo Gen2"
Note:
The CLI feature in this Oracle Java ME Embedded software release is provided only as a concept for your reference. It uses connections that are not secure, without encryption, authentication, or authorization.
Lists of Commands
For a complete list of CLI commands, see Using the Command Line Interface in Oracle Java ME Embedded Developer's Guide.
An Example of Managing Application Life Cycle with AMS Commands
Here is a typical example of using the AMS to install, list, run, and remove an Oracle Java ME Embedded application on the board:
oracle>> ams-install file:///C:/some/directory/hello.jar hostdownload
<<ams-install,start install,file:///C:/some/directory/hello.jar
<<ams-install,install status: stage DONE, 0%
<<ams-install,install status: stage DONE, 100%
<<ams-install,OK,Install success

oracle>> ams-install http://www.example.com/netdemo.jar
<<ams-install,start install,http://www.example.com/netdemo.jar
<<ams-install,install status: stage DONE, 0%
<<ams-install,install status: stage DONE, 100%
<<ams-install,OK,Install success

oracle>> ams-install http://www.example.com/notthere.jar
<<ams-install,start install,http://www.example.com/notthere.jar
<<ams-install,FAIL,errorCode=103 (OTHER_ERROR)
Note that the final installation example failed with an error code and matching description.
Similarly, install an additional IMlet: rs232dem. After an IMlet is installed, verify it using the ams-list command. Each IMlet has been assigned a number by the AMS for convenience.
oracle>> ams-list
<<ams-list,0.hello|Oracle,STOPPED
<<ams-list,1.netdemo|Oracle,STOPPED
<<ams-list,2.rs232dem|Oracle,RUNNING
<<ams-list,OK,3 suites are installed
You can use the ams-remove command to remove any installed IMlet.
oracle>> ams-remove 0
<<ams-remove,OK,hello removed
The results can again be verified with the ams-list command.
oracle>> ams-list
<<ams-list,1.netdemo|Oracle,STOPPED
<<ams-list,2.rs232dem|Oracle,RUNNING
<<ams-list,OK,2 suites are installed
Finally, start the IMlet using the ams-run command. The application can be terminated with the ams-stop command.
oracle>> ams-run 1
<<ams-run,OK,started
oracle>> ams-list
<<ams-list,1.netdemo|Oracle,RUNNING
<<ams-list,2.rs232dem|Oracle,RUNNING
<<ams-list,OK,2 suites are installed
NetBeans and the Intel Galileo Gen2 Board
Topics:
Required Software for Using the Intel Galileo Gen2 Board with NetBeans
Running and debugging IMlet projects on the Intel Galileo Gen2 board using the NetBeans IDE 8.1 requires the following software:
-
NetBeans IDE 8.1 with Java ME 8.3 support
-
Oracle Java ME SDK 8.3
-
Oracle Java ME SDK 8.3 plugins
For complete instructions about installing Oracle Java ME SDK 8.3, the NetBeans IDE 8.1, and Oracle Java ME SDK 8.3 plug-ins for NetBeans, see Oracle Java ME SDK Developer's Guide.
Note:
This chapter assumes that the Intel Galileo Gen2 board is already set up and connected to the Windows or Linux platform running Oracle Java ME SDK8.3 and that NetBeans IDE 8.1 has already been started.

