4 Using Scene Builder with IntelliJ IDEA
This chapter gives information on how to download and use the JavaFX 2 plug-in that provides the JavaFX integration with the IntelliJ IDEA 13 Community Edition.
The JavaFX 2 plug-in enables you to create a new JavaFX Application project, start Scene Builder from within the IDE, and run the Scene Builder Login sample application. It is assumed that you have already installed Scene Builder before continuing with the rest of this chapter. Go to the JavaFX Scene Builder Installation Guide for installation information.
Downloading and Installing IntelliJ IDEA
Use the information from http://www.jetbrains.com/idea/download/ to download and install the latest IntelliJ IDEA 13 version that includes the JavaFX plug-in.
Creating a New JavaFX Application
The JavaFX plug-in for IntelliJ IDEA 13 enables you to create a new JavaFX application template.
-
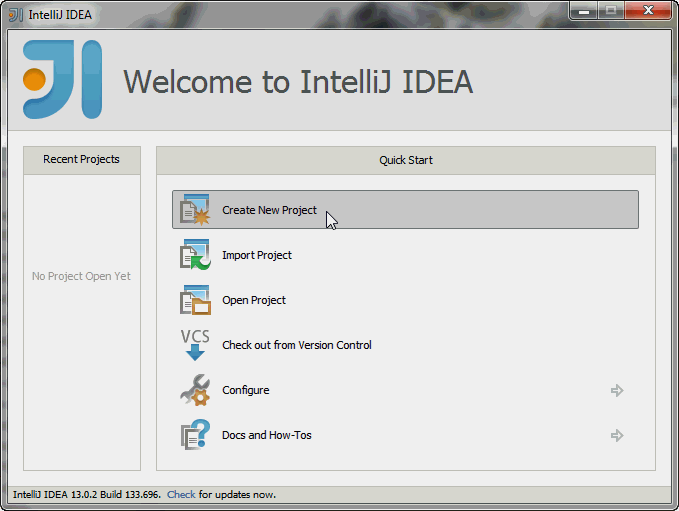
From the IntelliJ IDEA welcome window, click the Create New Project, as shown in Figure 4-1.
Figure 4-1 Select Create New Project in the Welcome Window
Description of "Figure 4-1 Select Create New Project in the Welcome Window"
-
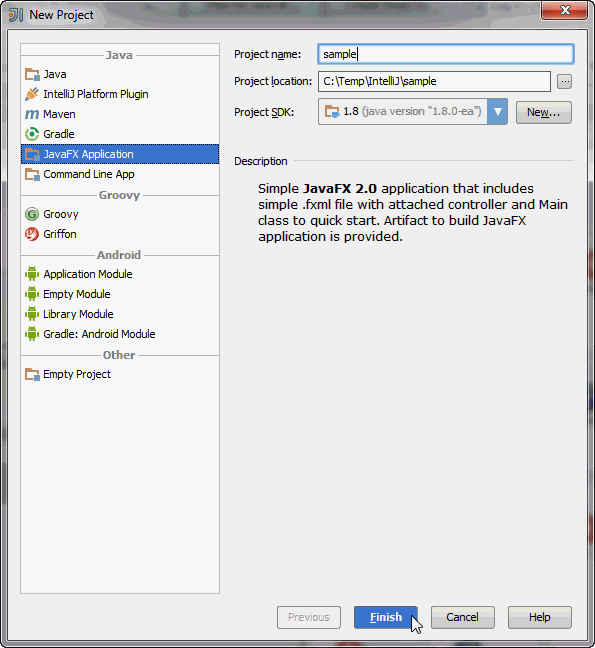
In the New Project dialog box, select JavaFX Application, specify the project information, as shown in Figure 4-2, and click Finish.
The node for a new JavaFX application template is added to the Project tab in the main window.Figure 4-2 Specify the Project Information for the New JavaFX Application Project
Description of "Figure 4-2 Specify the Project Information for the New JavaFX Application Project"
-
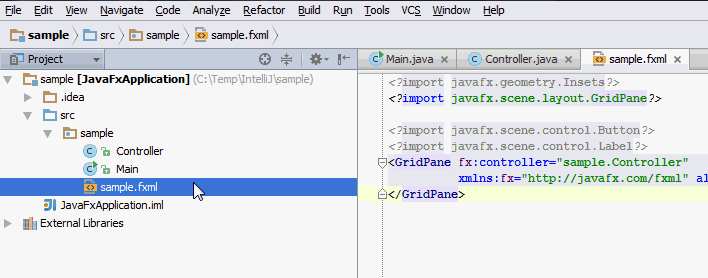
Expand the nodes for the project, as shown in Figure 4-3.
Figure 4-3 Expand the Nodes in the Project Window
Description of "Figure 4-3 Expand the Nodes in the Project Window"
Starting Scene Builder from IntelliJ IDE
Included in a newly created JavaFX Application template is the sample.fxml, which you can open and edit using Scene Builder.
-
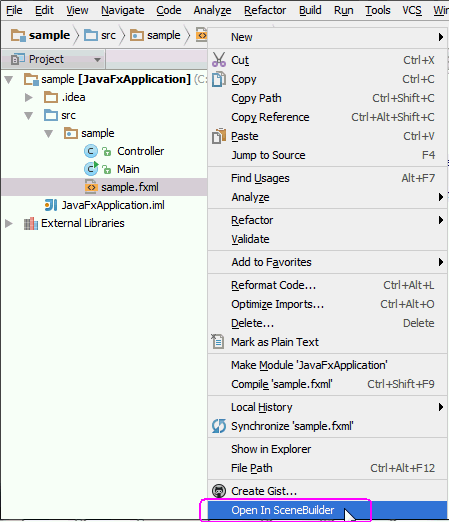
In the Projects tab, right-click the
sample.fxmlfile and select Open In Scene Builder, as shown in Figure 4-4.Figure 4-4 Open JavaFX Scene Builder to sample.fxml File
Description of "Figure 4-4 Open JavaFX Scene Builder to sample.fxml File"
-
In the Scene Builder Configuration dialog window, specify the path to your Scene Builder installation the first time you try to open Scene Builder from within IntelliJ IDEA and click OK, as shown in Figure 4-5.
Figure 4-5 Select Path to the Scene Builder Installation Folder
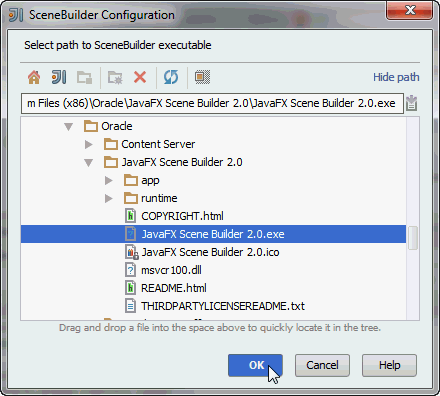
Description of "Figure 4-5 Select Path to the Scene Builder Installation Folder"
-
Use the JavaFX Scene Builder User Guide document to learn more about the available Scene Builder features and the Getting Started with JavaFX Scene Builder tutorial to create a simple issue tracking application.
Where to Go From Here
Now that you are familiar with the integration between the Scene Builder tool and IntelliJ IDEA, look at JavaFX Scene Builder User Guide to learn more about the available Scene Builder features. Also, use the Getting Started with JavaFX Scene Builder to create a simple issue tracking application.
You can also try running the sample applications provided with the Scene Builder release. These samples are Netbeans projects, so use the information in the following section to learn how to use one of the samples using the IntelliJ IDEA.
Running Scene Builder Samples from IntelliJ IDEA
Use the following steps to run the Login sample that is included in the JavaFX Scene Builder samples bundle:
-
Ensure that you have downloaded JavaFX Scene Builder Samples bundle file from the Additional Resources section of the Java SE Download page at
https://www.oracle.com/technetwork/java/javase/downloads/index.htmland extracted its contents. -
From the IntelliJ IDEA main window, click File and choose Import Project.
-
Navigate to the location where you extracted the JavaFX Scene Builder samples and expand the Login sample folder. Select the src folder and click OK.
-
In the Import Project wizard, keep the ”Create project from existing sources” option selected and click Next.
-
Type
Loginin the Project Name field, if it is not already filled in, and click Next. -
Leave the rest of the default choices and values specified in the Import Project wizard and continue to click Next until you see the Finish button. Click Finish.
-
Choose to open the new project in the current window or open a new window.
The new Login project is opened in the Project tab. -
In the Project tab, right-click the node for the Login project's Main class and choose Run Main.main() as shown in Figure 4-6.
Figure 4-6 Run the Main Class File for Login Sample Application
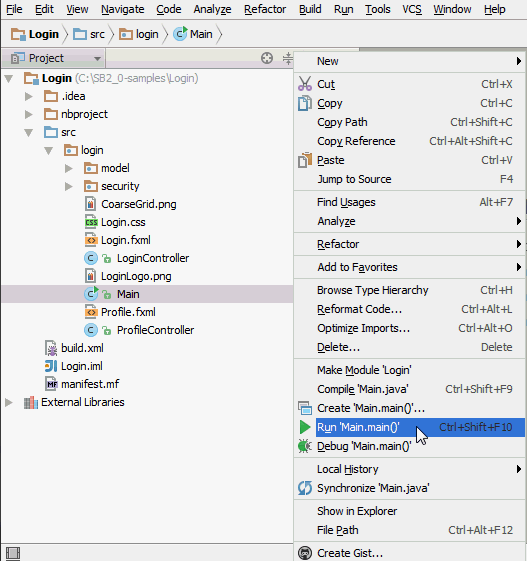
Description of "Figure 4-6 Run the Main Class File for Login Sample Application"
The window for the Login sample application appears on top of the IDEA window, similar to what is shown in Figure 3-10.

