5 Understanding BPEL Integration with Service Components (BPEL/Mediator)
This chapter includes these sections:
-
Section 5.2, "Configuring the CSF Key on Fusion Middleware Control Console"
-
Section 5.3, "Designing a Composite for Service Integration"
5.1 Overview
To integrate with Oracle BPEL Process Manager, the organization's enterprise WSDL must be available to the user. The underlying adapter services are exposed as WSDL files, which are generated during design time in the configuration wizard of the Oracle RightNow adapter.
Use the generated WSDL files to design the appropriate BPEL processes for outbound adapter services. A completed BPEL process must be successfully compiled in JDeveloper and deployed to an SOA Suite server. Upon deployment to a SOA Suite server, each newly-deployed process is viewable in the Oracle Enterprise Manager Fusion Middleware Control, where you can run, monitor, administer BPEL processes, and monitor adapter events.
5.1.1 Understanding the Account Object
You create an Account object and integrate the WSDL with the Oracle BPEL Process Manager. Account is one of the standard objects provided by RightNow, an account generated for a staff member in the RightNow Cx system. Customer service representatives, sales agents, and site administrators use Accounts.
Specifically, an Account object on RightNow Cx represents an individual or business associated with the business.
The Oracle RightNow adapter enables you to create an Account object on RightNow Cx.
5.2 Configuring the CSF Key on Fusion Middleware Control Console
For steps to configure the CSF key in Oracle Enterprise Manager Fusion Middleware Control, seeSection A, "Credential Store Configuration for Managing RightNow Credentials."
5.3 Designing a Composite for Service Integration
The next steps detail how to design a composite using the Oracle JDeveloper Studio Edition, a comprehensive tool for developing Oracle Fusion Middleware applications. It provides an easy-to-use Integrated Development Environment that enables you to create your integrations efficiently.
5.3.1 Defining Composite for BPEL and Mediator
To define a composite for BPEL and Mediator:
-
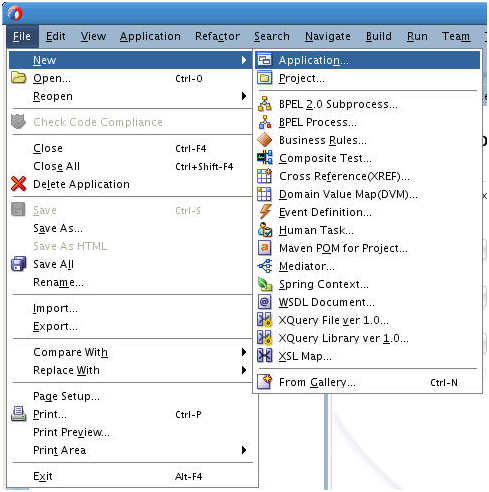
In the File menu of JDeveloper, click New and select Application.
JDeveloper displays the New Gallery page. Select SOA Application from the Items list.
-
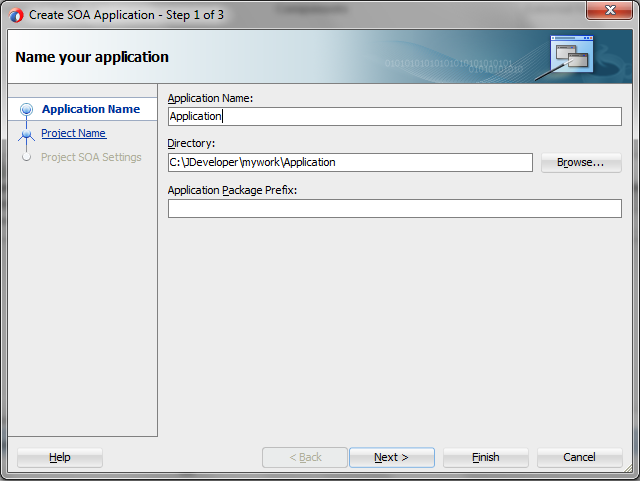
Provide a suitable name to your application.
-
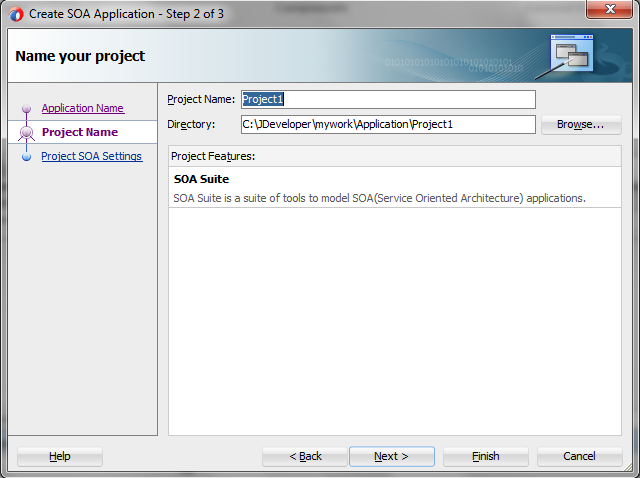
Click Next and provide a suitable name to your project.
Figure 5-4 Provide a Name for Your Project
Description of "Figure 5-4 Provide a Name for Your Project"
-
Click Next.
-
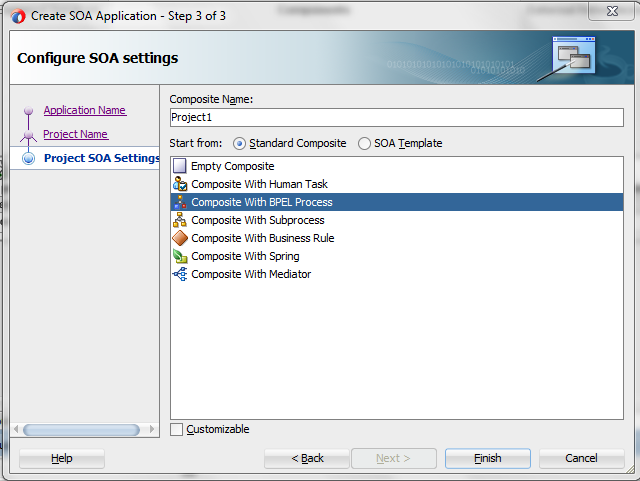
Select Composite With BPEL Process from the Standard Composite list.
-
Click Finish.
-
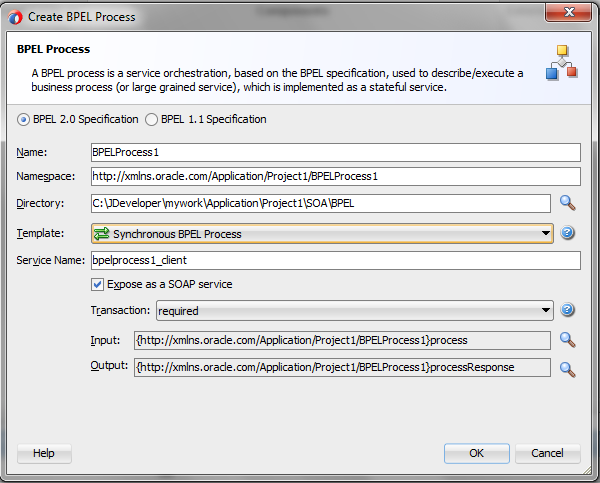
Select the Synchronous BPEL Process from the Template drop-down list and click OK.
The
composite.xmlappears. -
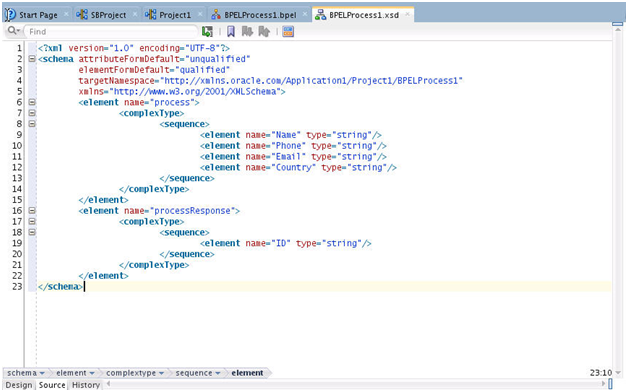
In the Application Navigator, under the Schemas folder, Oracle JDeveloper displays an XML schema file with the name
BPELProcess1.xsdafter BPEL process creation. -
Edit this schema file as your business needs require. It is the responsibility of the front-end application to enforce data validations and to ensure that the input sent to the Oracle RightNow Cx Server from SOA is error-free.
The structure of the schema used in this use case is as shown below.


5.4 Configuring the Oracle RightNow Adapter
To configure a new Oracle RightNow adapter:
-
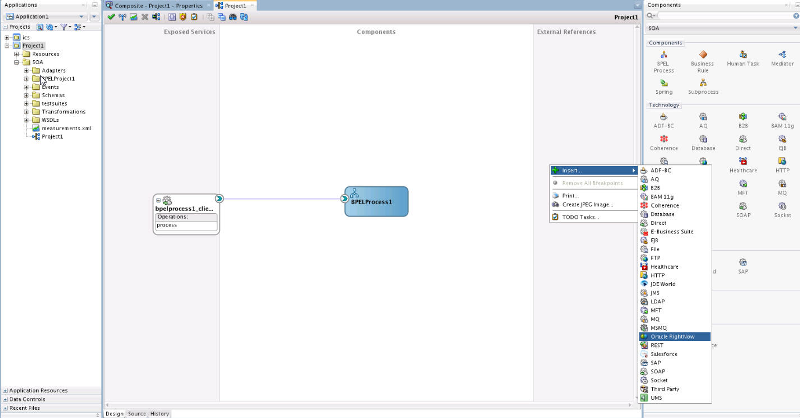
In the External References swimlane of the
composite.xmlfile, right-click and select Oracle RightNow Adapter.Figure 5-10 Oracle RightNow Adapter with composite.xml File
Description of "Figure 5-10 Oracle RightNow Adapter with composite.xml File"
-
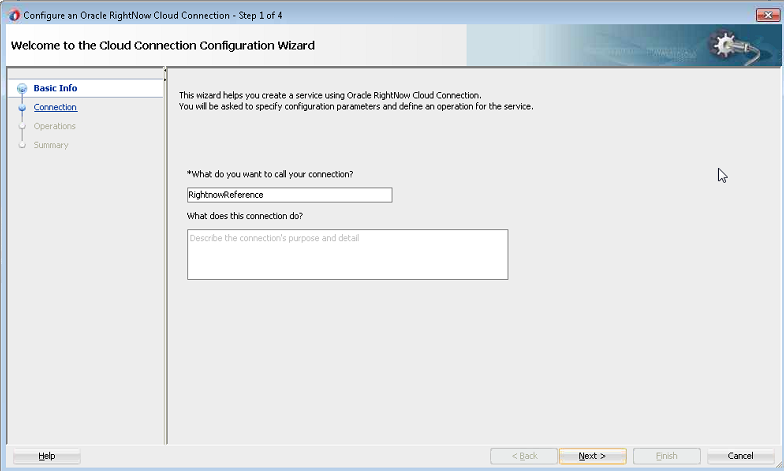
Oracle JDeveloper displays the Basic Info screen.
-
Enter a meaningful name and optional description.
-
Click Next.
Figure 5-11 Oracle RightNow Adapter Configuration Wizard Basic Info Screen
Description of "Figure 5-11 Oracle RightNow Adapter Configuration Wizard Basic Info Screen "
-
JDeveloper displays the Connection page. You must provide the WSDL URL/location, security policy, and authentication key details.
Figure 5-12 Oracle RightNow Adapter Configuration Wizard Connection Screen
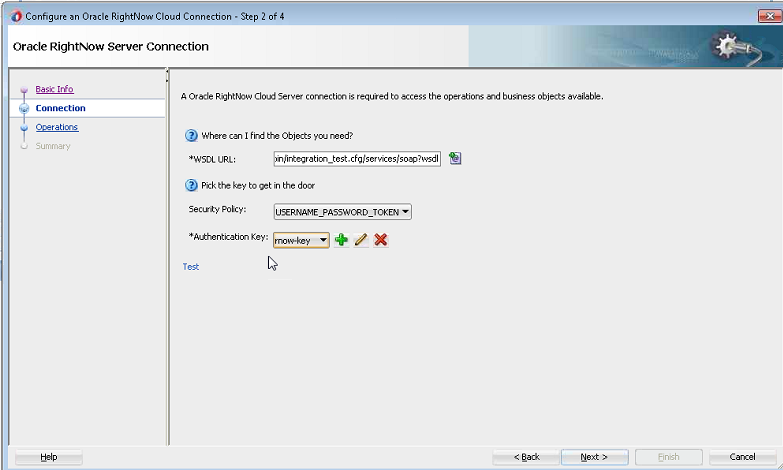
Description of "Figure 5-12 Oracle RightNow Adapter Configuration Wizard Connection Screen"
-
If you have the WSDL available in the file system, click the Find existing WSDLs icon, located to the right of the WSDL on the screen.
JDeveloper displays the WSDL Chooser dialog. Browse and select the downloaded Enterprise WSDL and click OK.
-
Click OK.
Figure 5-13 Oracle RightNow Adapter Configuration Wizard

Description of "Figure 5-13 Oracle RightNow Adapter Configuration Wizard "
-
Click OK. You are returned to the Connection page.
-
As an alternative, you can store WSDL at an MDS location and access it. The next screenshot shows you storing the WSDL at an MDS location.
Figure 5-14 Storing WSDL at an MDS Location
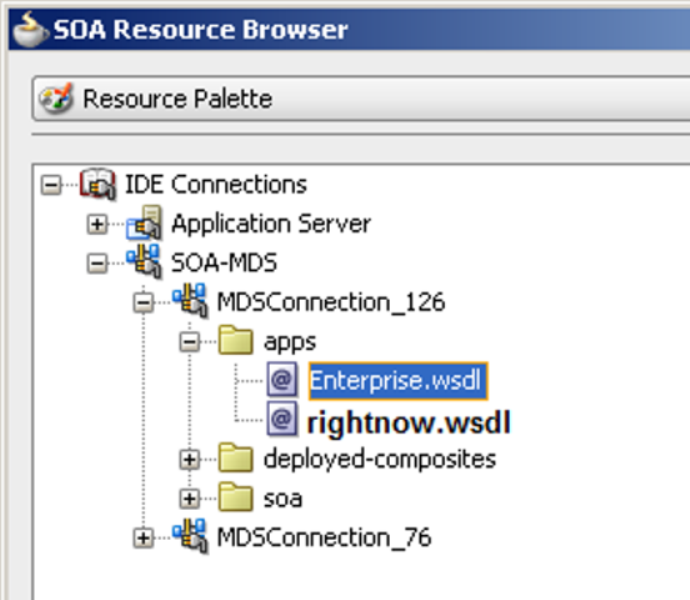
Description of "Figure 5-14 Storing WSDL at an MDS Location"
-
Navigate to IDE Connections-> SOA-MDS. Select the appropriate SOA-MDS connection where you placed the Enterprise WSDL. Select the WSDL file to be used in the adapter configuration and click OK.
-
Ensure that the WSDL is of the form:
oramds:/apps/SOA/WSDLs/Integration/rightnowAPI.wsdl
An alternative is to directly provide the https URL:
https://integration-test.rightnowdemo.com/cgi-bin/integration_test.cfg/services/soap?wsdl
-
Click OK.
-
Click ”+” button to create a new Authentication Key.
-
Provide a suitable name and the Right Now credentials and click OK.
-
Click the Test button to validate the Authentication Key.
-
Click Next.
Oracle JDeveloper displays the Operations page.
-
Figure 5-15 Oracle RightNow Adapter Operations Screen
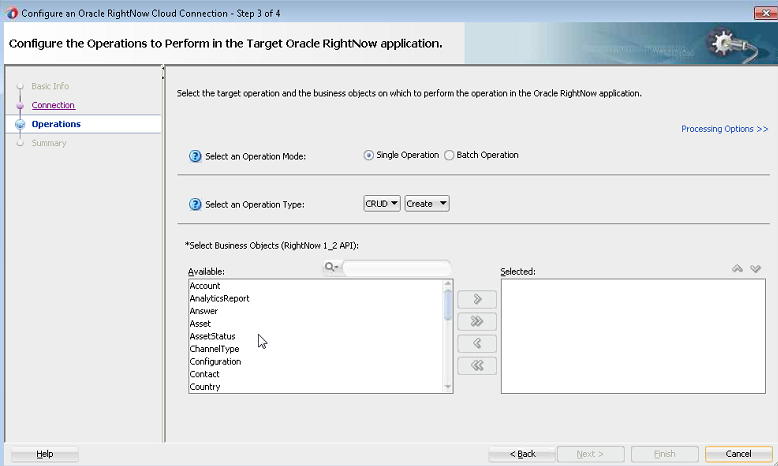
Description of "Figure 5-15 Oracle RightNow Adapter Operations Screen"
-
Because the requirement is to create an Account on RightNow, select the CRUD and Create options from the Select an Operation Type list.
On the same screen, move
Accountfrom the list of Available objects to the list of the Selected objects. -
Click the Processing Options link in the upper right corner of the screen.
-
Select the processing options for your requirement. Properties displayed in this page depend on the operation you selected in the previous page. In this case, the Suppress Response checkbox is selected, and suppressing a response is disabled, that is, made false. Once this is selected, the
Createoperation returns a valid ID for a a batch operation instance you are creating. -
Click Next. JDeveloper displays the Summary page, which provides a complete summary of the operation selected, the object on which the operation operates and the headers selected for that operation.
-
Click Done to complete the Oracle RightNow adapter Configuration wizard.
Figure 5-16 The Services, Components and External References Screen Showing the Adapter in External References Swimlane

Description of "Figure 5-16 The Services, Components and External References Screen Showing the Adapter in External References Swimlane"
5.5 Integrating with BPEL
Perform the following steps to provide integration with BPEL:
-
Connect
BPELProcess1andServiceCloudCreateAccountusing a wire.Figure 5-17 BPELProcess1 and RightNowAccount External Reference Connected Through a Wire

Description of "Figure 5-17 BPELProcess1 and RightNowAccount External Reference Connected Through a Wire"
-
After wiring your composite appears.
Figure 5-18 Composite Application with Service, BPELProcess and Reference Wired

Description of "Figure 5-18 Composite Application with Service, BPELProcess and Reference Wired"
-
Double-click and open
BPELProcess1. The Oracle RightNow adapter should be present as a part of the Partner Links.Figure 5-19 Oracle RightNow Reference Adapter Shown as Part of Partner Links
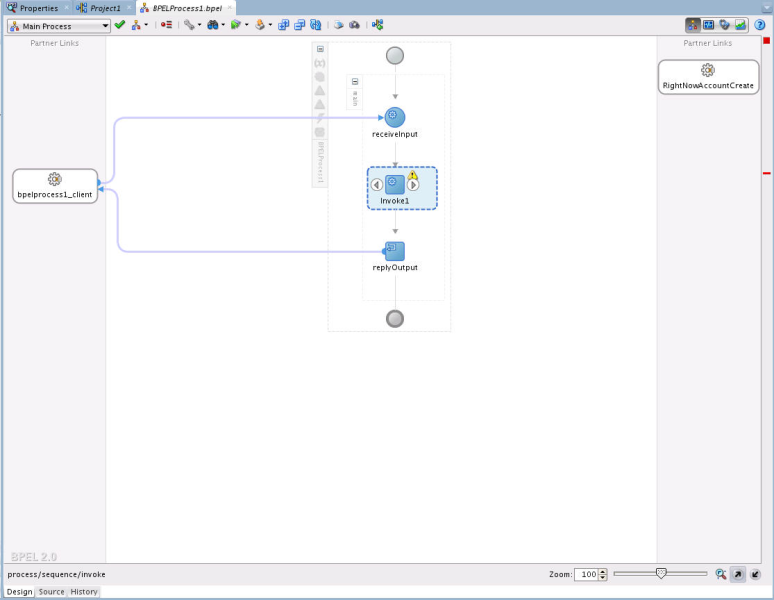
Description of "Figure 5-19 Oracle RightNow Reference Adapter Shown as Part of Partner Links"
-
Add an Invoke activity to invoke the
ServiceCloudCreateAccountPartner Link. To add the Invoke activity:-
Drag and drop the invoke activity from the BPEL constructs.
-
After dropping the Invoke property on the canvas, wire the Invoke activity to the
ServiceCloudAdapterpartner link.
-
-
Create an input variable to the partner link by clicking the + button adjacent to Input text box in the Variables section. JDeveloper displays the Create Variable dialog.
Figure 5-21 Create Variable Dialog to Create an Input Variable for the Partner Link

Description of "Figure 5-21 Create Variable Dialog to Create an Input Variable for the Partner Link"
-
Create an output variable from the partner link by clicking the + button adjacent to Output text box in the Variables section. The wizard displays the Create Variable dialog.
Figure 5-22 Create Variable Dialog to Create an Output Variable

Description of "Figure 5-22 Create Variable Dialog to Create an Output Variable"
-
Introduce two transform activities, one before the Invoke activity and another after it.
Figure 5-23 Two Transform Activities in Bpel Diagram
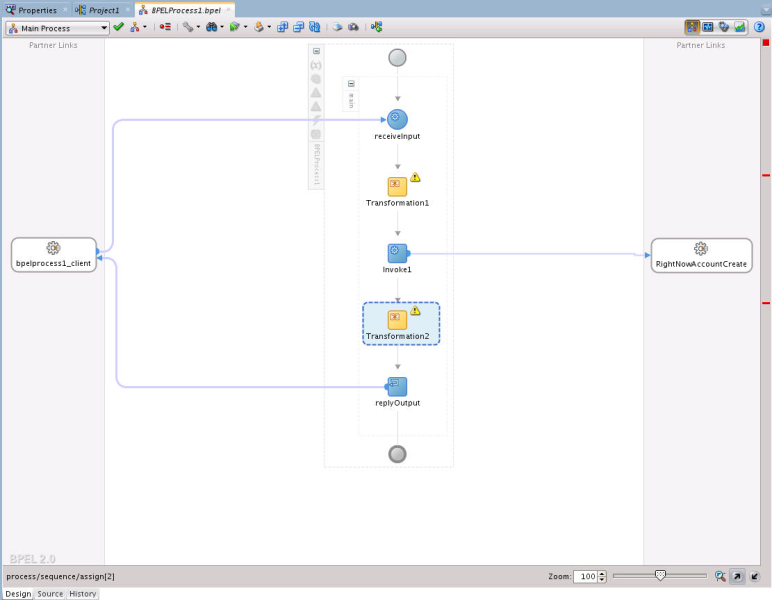
Description of "Figure 5-23 Two Transform Activities in Bpel Diagram"
-
Map Transform1 values from receive activity's input variable to the Invoke activity's input variable.
Figure 5-24 Mapping Transform1 Values from Receive Activity's Input Variable to Invoke Activity's Input Variable

Description of "Figure 5-24 Mapping Transform1 Values from Receive Activity's Input Variable to Invoke Activity's Input Variable"
-
Click the
+button adjacent to Mapper File text box to open the Transformation_1.xsl file. -
Map between inputVariable and Invoke1_create_InputVariable:
-
Map Account_Name with Name.
-
Map Phone with Phone.
-
Map Website with Website.
-
Map Description with Description.
Figure 5-25 Mapping between inputVariable and Invoke1_create_InputVariable

Description of "Figure 5-25 Mapping between inputVariable and Invoke1_create_InputVariable"
-
-
Map Transform2 values from the Invoke activity's output variable to the reply activity's input variable.
Figure 5-26 Mapping Transform2 values from Invoke Activity's Output Variable to Reply Activity's Input Variable
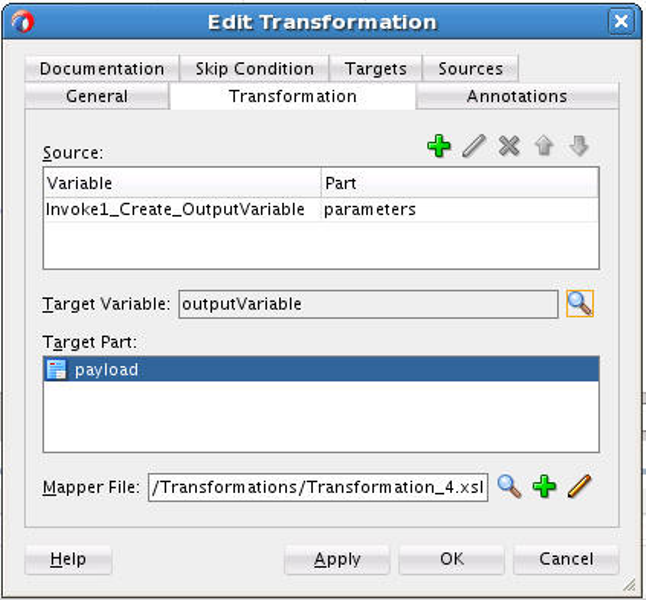
Description of "Figure 5-26 Mapping Transform2 values from Invoke Activity's Output Variable to Reply Activity's Input Variable"
-
Map the output variable.
This completes the project creation. JDeveloper displays the
composite.xml.


5.6 Deploying the Composite
To deploy the composite application:
-
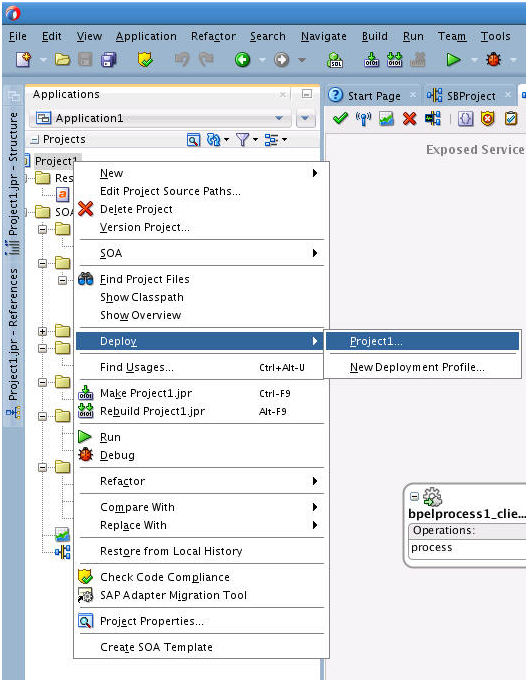
In the Application Navigator pane, right-click Project1 and select Deploy Project1.
-
Select the Deploy to Application Server option and follow the instructions. Using this option, you can deploy the composite on the Application server after providing the details of the server.
5.7 Testing the Composite
You can run and test the instances of deployed SOA composite applications from the Oracle Fusion Middleware Control Console. Doing so enables you to manage a composite application, initiate and track an instance of a composite and to view detailed component instance audit trails.
The following process shows you how to test the composite.
5.7.1 Testing the Outbound Process
To test the Outbound process:
-
Login to Fusion Middleware Console for the server on which you have deployed your project.
-
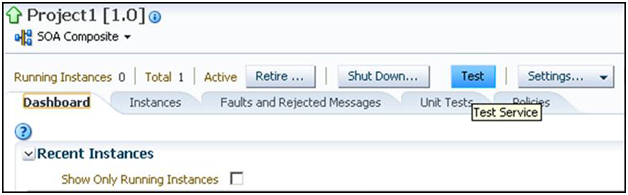
Open Project1 under the Default partition.
-
Click the Test button to test the Web service.
-
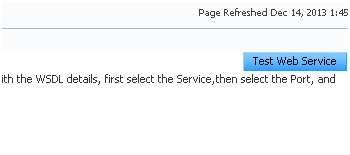
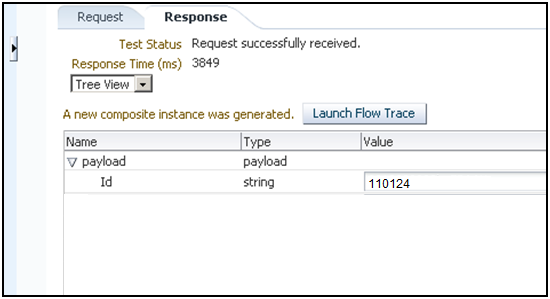
Provide the input payload and click the Test Web Service button.
After successful execution, the response contains the id of the account created on RightNow and Status as success.
Figure 5-32 Test Response Containing ID of the Account Created on RightNow Cx
Description of "Figure 5-32 Test Response Containing ID of the Account Created on RightNow Cx"