6 Developing Oracle Service Bus Integrations with the Oracle RightNow Adapter
This section explains how to create Oracle Service Bus projects using the Oracle Service Bus Console and Oracle JDeveloper. To create these projects, you first need to generate Oracle RightNow adapter artifacts using Oracle JDeveloper 12c, and subsequently, use those artifacts while creating Oracle Service Bus projects and services with the Oracle Service Bus Console.
This chapter contains the following topic:
6.1 Generating Oracle Cloud Adapter Artifacts
To create Oracle Service Bus projects using Oracle Service Bus Console, you must use Oracle RightNow adapter artifacts generated using Oracle JDeveloper. To create a BPEL composite, see the section Section 5.3, "Designing a Composite for Service Integration."
You use the artifacts generated in Section 5.4, "Configuring the Oracle RightNow Adapter" to create Oracle Service Bus business services in Oracle Service Bus Console.
Note:
You must configure the CSF key in Oracle Enterprise Manager Fusion Middleware Control. For an explanation of the steps to configure the CSF key, see Section A, "Credential Store Configuration for Managing RightNow Credentials."6.1.1 Creating Oracle Service Bus Projects Using Oracle Service Bus Console
To create Oracle Service Bus projects and services using Oracle Service Bus Console.
-
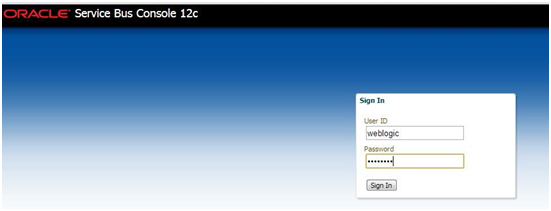
Log in to Oracle Service Bus Console:
http://hostname:port/servicebus -
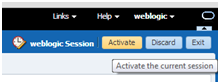
On right side of the page, click Create. This opens a new session in the Oracle Service Bus console to enable you to make changes.
Figure 6-1 Create an Oracle Service Bus Session

Description of "Figure 6-1 Create an Oracle Service Bus Session"
-
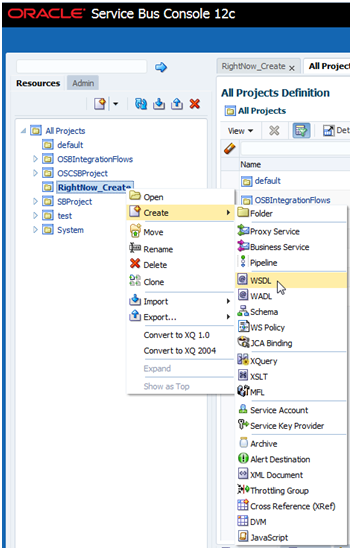
Right-click All Projects and click Create - Project.
Figure 6-2 Adding a New Project to Oracle Service Bus
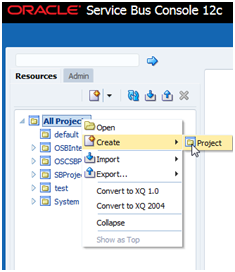
Description of "Figure 6-2 Adding a New Project to Oracle Service Bus"
-
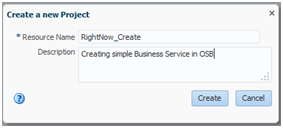
The Oracle Service Bus Console displays the Create a new Project dialog box.
-
Enter the project name in the Resource Name field, and provide the description in Description field.
-
Click Create. A new project named
RightNow Createappears under All Projects. -
Import the Oracle RightNow adapter artifacts in this project. Right-click the Project name just created. Select Create and select the WSDL.
The console displays the WSDL Creation page.
-
Click Browse and browse to the directory where you have stored the artifacts received from Oracle JDeveloper. Select the Oracle Cloud Adapter for RightNow WSDL.
-
Click Create.
-
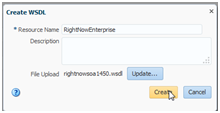
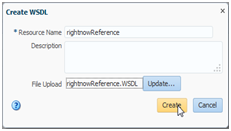
Right-click the Project name, from the menu, select Create, and then WSDL.
-
On the WSDL Creation page, browse for
rightnowReference WSDL. -
Click Create.
-
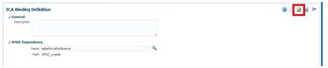
Select JCA Binding from the Create drop-down list under Project Name.
Figure 6-7 Selecting JCA Binding from Create Drop-Down List

Description of "Figure 6-7 Selecting JCA Binding from Create Drop-Down List"
The JCA Binding creation dialog box is displayed.
-
Click Browse and browse to the directory where the artifacts received from the Oracle JDeveloper 12c are stored. Choose the Oracle Cloud Adapter for RightNow JCA file.
Figure 6-8 Choosing the RightNow Adapter JCA File
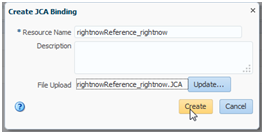
Description of "Figure 6-8 Choosing the RightNow Adapter JCA File"
-
Click Create. You are returned to the Project page. You might get an error message such as
The JCA Binding 'rightnowReference_rightnow' was successfully created with validation errors. View the JCA Binding/Conflicts to see detailed diagnostic messages.This error is thrown because the JCA binding cannot find the associated WSDL. To rectify the error if you receive it, click the JCA file you created and then click Edit.
-
Click Browse. Search for the WSDL you created and click Submit after choosing the WSDL.
-
Click Save.
-
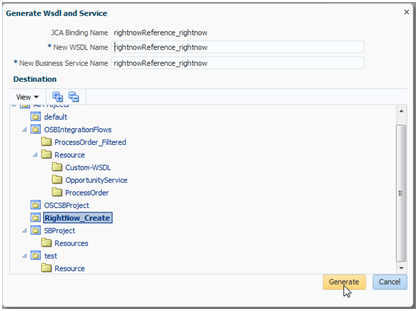
Navigate to the project folder. Right-click the JCA Binding just created, and click Generate WSDL and Service option.
Figure 6-10 Generate WSDL and Service from JCA Binding
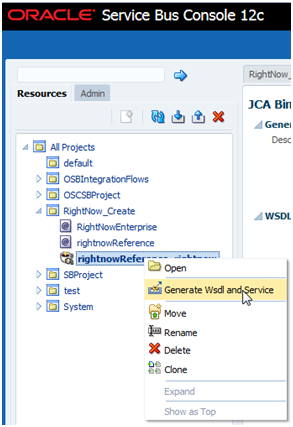
Description of "Figure 6-10 Generate WSDL and Service from JCA Binding"
-
Enter a new name for the WSDL name in the New WSDL Name field and the service name in the New Service Name field.
Note:
Choose the correct location for the new WSDL and service to be generated. -
Click Generate.
The console generates the new WSDL and the new business service.
-
Activate the Oracle Service Bus session by clicking Activate in the right corner.
The console displays the Confirm Session Activation dialog box.
-
Click Activate to activate the session.
Figure 6-13 Confirming Session Activation
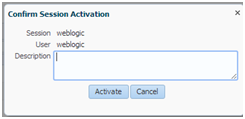
Description of "Figure 6-13 Confirming Session Activation"
-
Click Activate to activate a session.
6.1.2 Creating a Service Bus Project, and Generating the Oracle Service Bus JCA Business Service
This section describes how to create a Service Bus project using JDeveloper. It also includes information on generating an Oracle Service Bus JCA Business Service using the Oracle RightNow adapter. It includes: creating an empty composite for the Oracle Service Bus, then defining an Oracle Service Bus outbound process, and finally deploying that Oracle Service Bus project on a server.
6.1.2.1 Creating an Empty Console for the Oracle Service Bus and Creating a New Service Bus Project
To create an empty composite for the Oracle Service Bus:
-
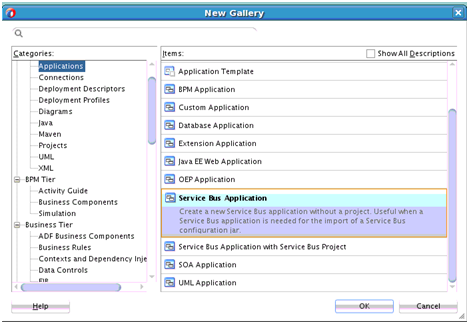
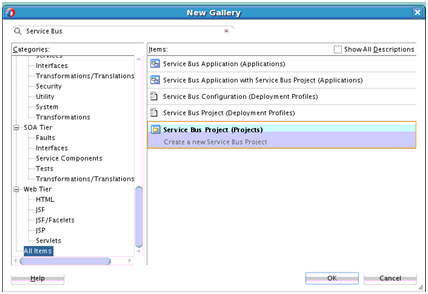
Create a new Oracle Service Bus application, Select File >New >Application. The New Gallery opens, where you can select application components to create.
-
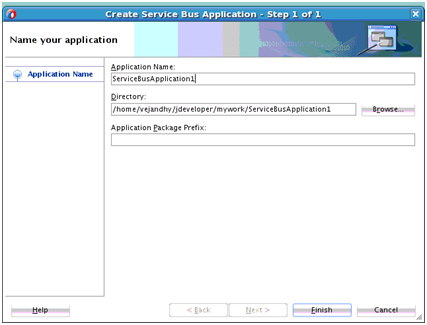
On the Name your Application page, optionally change the name and directory location for the application.
-
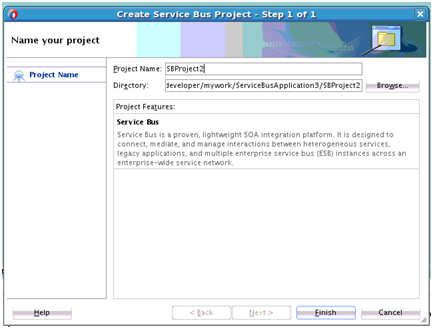
Create a new Oracle Service Bus project.
-
On the Name your Project page, optionally change the name of your Oracle Service Bus project. Make sure the project directory is in the application directory (this is the default).
-
Click Finish.
6.1.2.2 Defining a Service Bus Business Service with the Oracle RightNow Adapter
This section describes how to define an Oracle Service Bus business service for RightNow integration using the Oracle RightNow adapter, which consists of the following stages:
-
Section 6.1.2.2.1, "Configuring the Oracle RightNow Adapter Component"
-
Section 6.1.2.2.3, "Deploying the Outbound Oracle Service Bus Process"
6.1.2.2.1 Configuring the Oracle RightNow Adapter Component
To configure an Oracle RightNow adapter component:
-
Open the Service Bus Overview Editor.
-
Drag and drop the Oracle RightNow adapter component from the Components panel to the External Services swim lane.
Figure 6-18 RightNow Adapter Configuration Wizard Components Pane
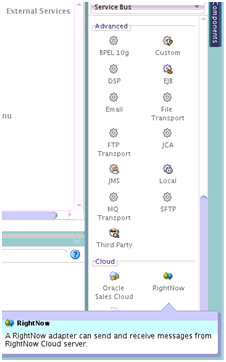
Description of "Figure 6-18 RightNow Adapter Configuration Wizard Components Pane"
The Basic Info page of the adapter configuration wizard is displayed.
Figure 6-19 RightNow Adapter Basic Info Page
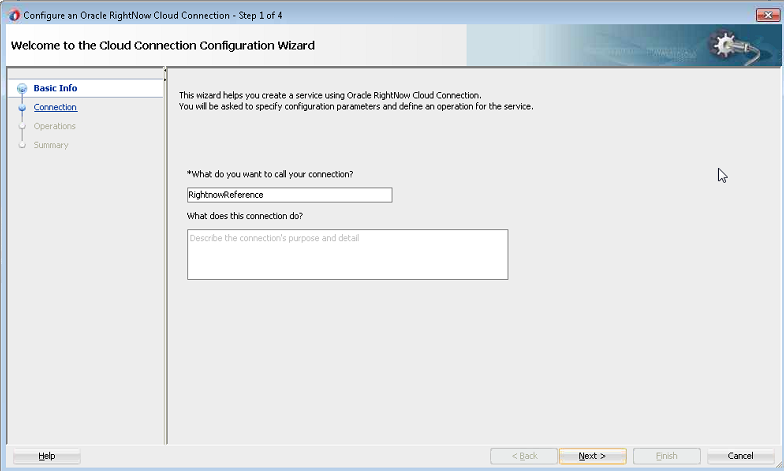
Description of "Figure 6-19 RightNow Adapter Basic Info Page"
-
Enter a connection name for the RightNow adapter in the Name field and then click Next.
-
On the Connection page, browse for the Enterprise WSDL location by clicking on the Browse button.
-
The WSDL Chooser dialog is displayed. Browse and select the downloaded Enterprise WSDL and click OK.
-
Click OK.
-
Click Next.
-
Click Finish. The wizard returns you to the Connection page.
-
Select an authentication key from the dropdown, if available, or create an Authentication key by clicking on + button.
-
Click the Test button to validate the authentication key.
Figure 6-21 Test Connection to Validate Connection Key
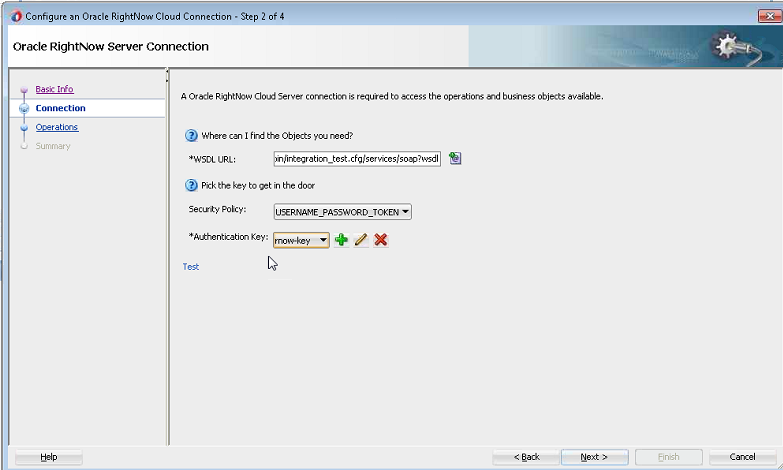
Description of "Figure 6-21 Test Connection to Validate Connection Key"
-
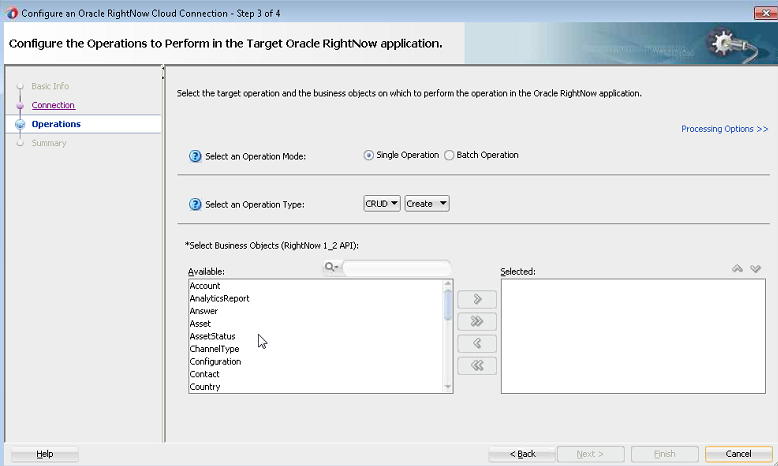
Click Next. The Operations page is displayed.
-
The operation by default is Create. You can change this operation by selecting an operation name suitable to your business requirement.
-
Select the Account business object from the Available list, and move to the Selected list.
-
Click Next, The Summary page is displayed.
6.1.2.2.2 Configuring a Proxy Service
To configure an Oracle Service Bus proxy service:
-
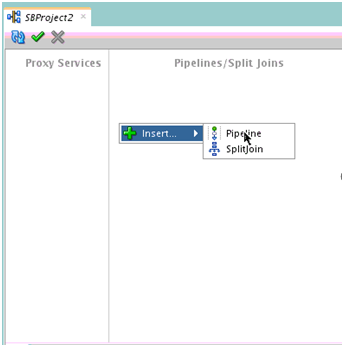
Using the Oracle Service Bus Overview Editor, right-click the Pipeline/Split Joins lane and click Insert and then Pipeline.
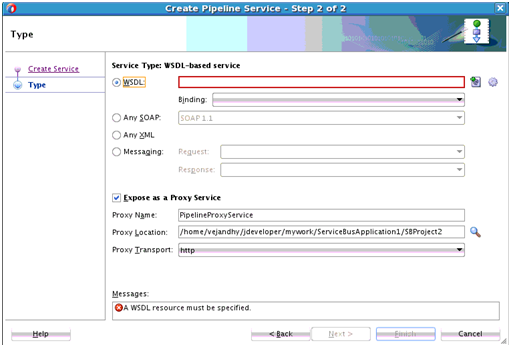
The Create Pipeline Service dialog is displayed.
-
Figure 6-24 Create Pipeline Service Dialog

Description of "Figure 6-24 Create Pipeline Service Dialog"
-
In the Service Name field, enter a name to identify the pipeline name and select the corresponding location of the project.
-
Click Next and select the Service Type as WSDL.
-
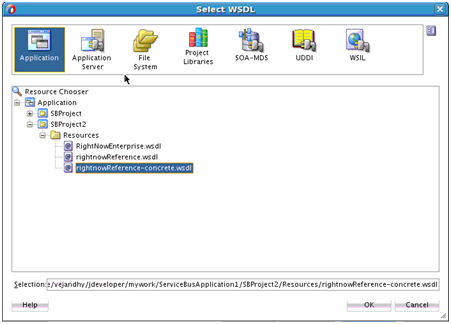
Click the Browse icon, which is located to the right of the WSDL URL, to select the WSDL from the file system.
-
Select the appropriate WSDL file from the Application -> Resources.
-
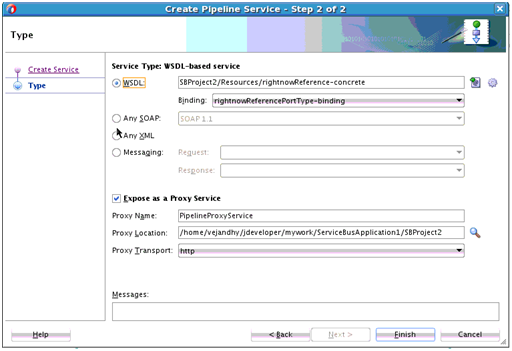
Click OK. The selected WSDL and corresponding binding is displayed. Ensure the check box for Expose as a Proxy Service is selected.
-
Select Proxy Transport as http.
-
Click Finish. The Pipeline component is displayed.
-
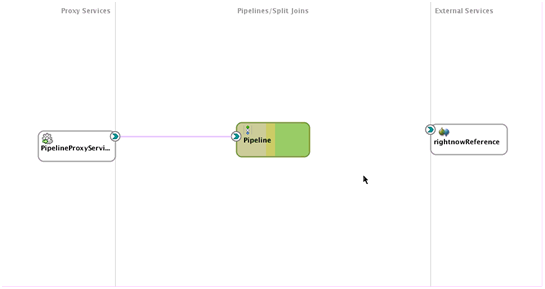
Connect the Oracle RightNow adapter in the External Services swimlane to the pipeline.
Figure 6-29 Connecting the rightnowReference to the Pipeline Component
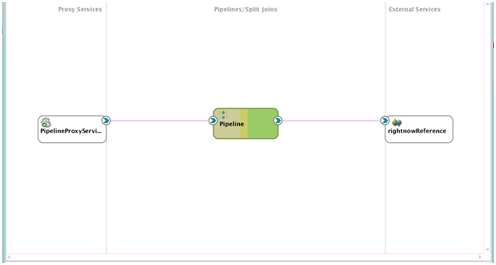
Description of "Figure 6-29 Connecting the rightnowReference to the Pipeline Component "
-
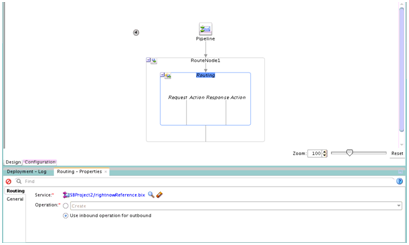
Open the pipeline which shows the default routing. Verify the service and corresponding operation will be displayed in the Routing Properties.
The outbound Service Bus Project is ready to be deployed
6.1.2.2.3 Deploying the Outbound Oracle Service Bus Process
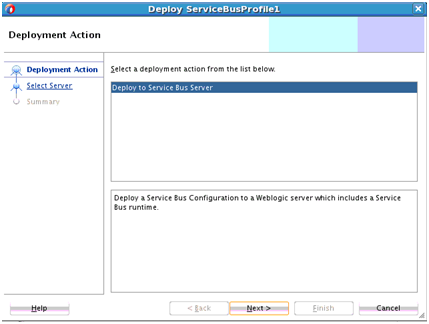
To deploy the outbound Oracle Service Bus Project:
-
Select the project and select Deploy to Service Bus Server.
-
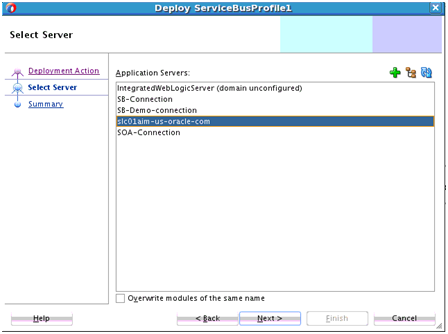
Select the already-configured Application Server and click Next.
-
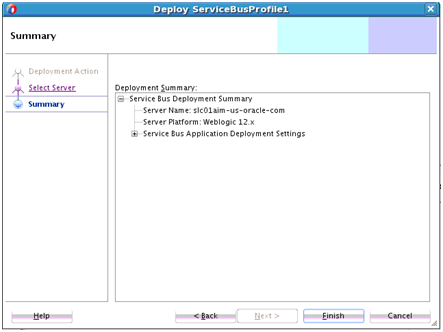
Check the deployment summary and click Finish.
-
The Success Message page indicates the Project is successfully deployed.
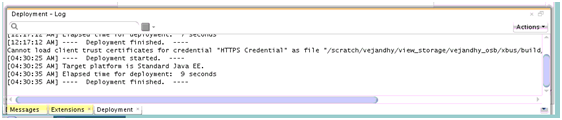
The successfully deployed project can be tested from Service Bus Console.
6.1.2.3 Testing the Oracle Service Bus Project from the Oracle Service Bus Console
To test the Oracle Service Bus project from the Oracle Service Bus Console:
-
Open the Oracle Service Bus Console and enter the user ID and password.
-
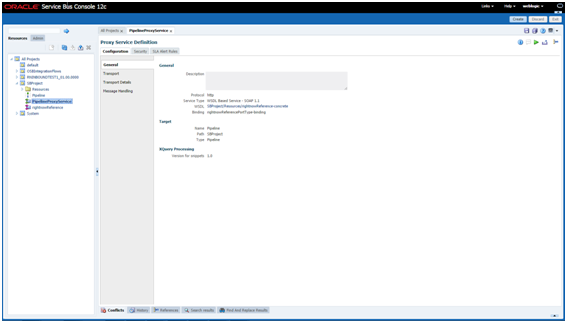
All the deployed projects are displayed under All Projects.
Figure 6-36 Service Bus Deployed Projects
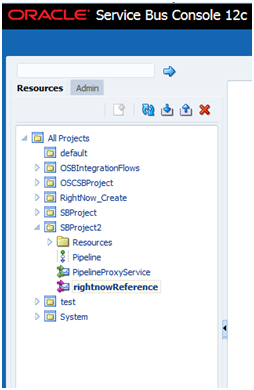
Description of "Figure 6-36 Service Bus Deployed Projects"
-
Open the project you want to test and click Proxy Service of that project. For example, PipelineProxyService in this case, as shown in the Figure below
-
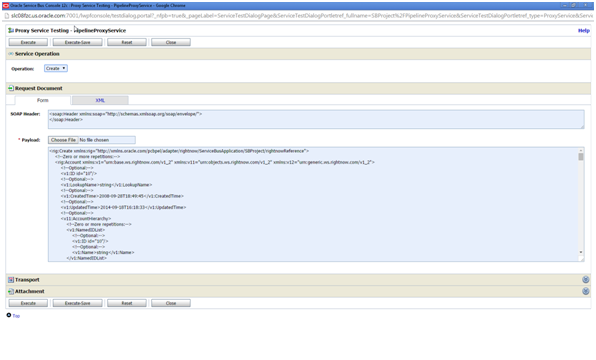
The Option for Launch Test Console (Green arrow button) is displayed for testing the outbound endpoint.
Figure 6-38 Option for Launching Test Console
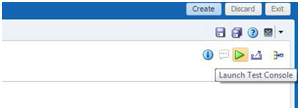
Description of "Figure 6-38 Option for Launching Test Console"
-
Launching Test Console opens new window displaying the Proxy Service and the operation to test along with Execute, Execute-Save, Reset and Close button.
The Request Document section contains the Request Payload.
-
Provide the input and click the Execute button. This sends the payload to Oracle RightNow Cx and the response is displayed under the Response Document section.