14 Extending the Domain with Business Process Management
This chapter describes the procedures for extending the domain to include Business Process Management.
This chapter contains the following sections:
-
Prerequisites for Extending the SOA Domain to Include Oracle BPM
-
Installing Oracle Business Process Management for an Enterprise Deployment
-
Running the Configuration Wizard on SOAHOST1 to Extend a SOA Domain to Include BPM
-
Propagating the Extended Domain to the Domain Directories and Machines
-
Restarting the WLS_SOA Managed Servers with Business Process Management
-
Adding the Enterprise Deployment Administration User to the Administrators Group
-
Configuring Oracle HTTP Server for Oracle Business Process Management
-
Validating Access to Business Process Management Through the Hardware Load Balancer
-
Enabling Whole Server Migration for Oracle Business Process Management
14.1 Variables Used in This Chapter
As you perform the tasks in this chapter, you will be asked to enter the following values for several directory variables defined in Section 7.4, "File System and Directory Variables Used in This Guide".
-
ORACLE_HOME
-
ASERVER_HOME
-
MSERVER_HOME
-
JAVA_HOME
In addition, you'll be referencing the following virtual IP (VIP) addresses defined in Section 5.2.3, "Physical and Virtual IP Addresses Required by the Enterprise Topology":
-
ADMINVHN
-
SOAHOST1VHN1
-
SOAHOST2VHN1
Actions in this chapter will be performed on the following host computers:
-
SOAHOST1
-
SOAHOST2
-
WEBHOST1
-
WEBHOST2
14.2 Prerequisites for Extending the SOA Domain to Include Oracle BPM
Before extending the current domain, ensure that your existing deployment meets the following prerequisites:
-
Back up the installation - If you have not yet backed up the existing Fusion Middleware Home and domain, Oracle recommends backing it up now.
To back up the existing Fusion Middleware Home and domain, see Section 18.2.6, "Performing Backups and Recoveries in the SOA Enterprise Deployments."
-
Existing WL_HOME and SOA ORACLE_HOME (binaries) are installed in previous chapters on a shared storage and are available from SOAHOST1 and SOAHOST2.
-
Node Manager, Admin Server, SOA Servers and WSM Servers exist and have been configured as described in previous chapters to run a SOA system.
-
You do not need to run RCU to load additional schemas for BPM. These are part of the SOA repository and are loaded into the DB in the SOA chapter
14.3 Installing Oracle Business Process Management for an Enterprise Deployment
The following sections describe how to install the Oracle SOA Foundation and Business Process Management software for an enterprise deployment:
14.3.1 Starting the Installation Program
To start the installation program, perform the following steps.
-
Log in to the target system.
-
Make sure certified JDK already exists on your system.
For more information, see Section 10.3.1, "Installing a Supported JDK".
-
Go to the directory where you downloaded the installation program.
-
Launch the installation program by running the
javaexecutable from the JDK directory on your system, as shown in the examples below.JAVA_HOME/bin/java -d64 -jar fmw_12.1.3.0.0_soa.jarBe sure to replace JDK location in these examples with the actual JDK location on your system.
When the installation program appears, you are ready to begin the installation.
14.3.2 Navigating the Installation Screens
The installation program displays a series of screens, in the order listed in Table 14-1.
If you need additional help with any of the installation screens, click the screen name.
Table 14-1 Oracle Business Process Management Install Screens
| Screen | Description |
|---|---|
|
On UNIX operating systems, this screen will appear if this is the first time you are installing any Oracle product on this host. Specify the location where you want to create your central inventory. Make sure that the operating system group name selected on this screen has write permissions to the central inventory location. For more information about the central inventory, see "Understanding the Oracle Central Inventory" in Installing Software with the Oracle Universal Installer. |
|
|
This screen introduces you to the product installer. |
|
|
Use this screen to specify the location of your Oracle home directory. For the Oracle Home, specify For more information about Oracle Fusion Middleware directory structure, see "Selecting Directories for Installation and Configuration" in Planning an Installation of Oracle Fusion Middleware. |
|
|
Use this screen to select the type of installation and consequently, the products and feature sets you want to install.
NOTE: The topology in this document does not include the examples, Oracle strongly recommends that you do not install the examples into a production environment. |
|
|
This screen verifies that your system meets the minimum necessary requirements. If there are any warning or error messages, you can refer to one of the following documents in Section 1.4. |
|
|
If you already have an Oracle Support account, use this screen to indicate how you would like to receive security updates. If you do not have one and are sure you want to skip this step, clear the check box and verify your selection in the follow-up dialog box. |
|
|
Use this screen to verify the installation options you selected. If you want to save these options to a response file, click Save Response File and provide the location and name of the response file. Response files can be used later in a silent installation situation. For more information about silent or command line installation, see "Using the Oracle Universal Installer in Silent Mode" in Installing Software with the Oracle Universal Installer. Click Install to begin the installation. |
|
|
This screen allows you to see the progress of the installation. Click Next when the progress bar reaches 100% complete. |
|
|
Review the information on this screen, then click Finish to dismiss the installer. |
14.3.3 Verifying the Installation
After you complete the installation, you can verify it by successfully completing the following tasks:
14.3.3.1 Reviewing the Installation Log Files
Review the contents of the installation log files to make sure that no problems were encountered. For a description of the log files and where to find them, see "Understanding Installation Log Files" in Installing Software with the Oracle Universal Installer.
14.3.3.2 Checking the Directory Structure
The contents of your installation vary based on the options you selected during the installation.
The addition of BPM will add the following directory and sub-directories to the ORACLE_HOME/soa/bpm directory:
helpsets
lib
modules
For more information about the directory structure you should see after installation, see "What are the Key Oracle Fusion Middleware Directories?" in Understanding Oracle Fusion Middleware. ls -lart
14.3.3.3 Viewing the Contents of Your Oracle Home
You can also view the contents of your Oracle home using the viewInventory script. For more information, see "Viewing the contents of an Oracle home" in Installing Software with the Oracle Universal Installer.
14.4 Running the Configuration Wizard on SOAHOST1 to Extend a SOA Domain to Include BPM
Run the Configuration Wizard from the ORACLE_COMMON_HOME directory to extend a domain containing an Administration Server, Oracle Web Services Manager and SOA to support BPM components.
14.4.1 Starting the Configuration Wizard
Note:
If you added any customizations directly to the start scripts in the domain, those will be overwritten by the configuration wizard. To customize server startup parameters that apply to all servers in a domain, you can create a file called setUserOverrides.sh and configure it to, for example, add custom libraries to the WebLogic Server classpath, specify additional java command line options for running the servers, or specify additional environment variables. Any customizations you add to this file are preserved during domain upgrade operations, and are carried over to remote servers when using the pack and unpack commands.To begin domain configuration:
-
Shut down the Administration Server to prevent any configuration locks, saves, or activations from occurring during the configuration of the domain.
For more information, see the instructions for shutting down the Administration Server with Node Manager in Section 11.3.1.
-
Navigate to the following directory and start the WebLogic Server Configuration Wizard.
ORACLE_HOME/oracle_common/common/bin
./config.sh
14.4.2 Navigating the Configuration Wizard Screens to Extend the Domain
Follow the instructions in this section to extend the domain for BPM.
Note:
This procedure assumes you are extending an existing domain. If your needs do not match the instructions given in the procedure, be sure to make your selections accordingly, or refer to the supporting documentation for additional details.Domain creation and configuration includes the following tasks:
-
Task 1, "Selecting the Domain Type and Domain Home Location"
-
Task 5, "Reviewing your Configuration Specifications and Configuring the Domain"
-
Task 6, "Writing Down Your Domain Home and Administration Server URL"
- Task 1 Selecting the Domain Type and Domain Home Location
-
On the Configuration Type screen, select Update an existing domain.
In the Domain Location field, select the value of the
ASERVER_HOMEvariable, which represents the complete path to the Administration Server domain home you created in Chapter 10, "Creating the Initial Infrastructure Domain for an Enterprise Deployment".For more information about the directory location variables, see Section 7.4, "File System and Directory Variables Used in This Guide"
Tip:
More information about the other options on this screen can be found in Configuration Type in Creating WebLogic Domains Using the Configuration Wizard. - Task 2 Selecting the Configuration Template
-
On the Templates screen, make sure Update Domain Using Product Templates is selected, then select the following templates:
-
Oracle BPM Suite - 12.1.3.0 [soa]
In addition, the following additional templates should already be selected, because they were used to create the initial domain and extend it to SOA:
-
Basic Weblogic Server Domain - 12.1.3.0 [wlserver]
-
Oracle SOA Suite 12.1.3.0 [soa]
-
Oracle HTTP Server (Colocated) 12.1.3.0 [ohs]
-
Oracle Enterprise Manager Plugin for WEBTIER 12.1.3.0 [em]
-
Oracle Enterprise Manager - 12.1.3.0 [em]
-
Oracle WSM Policy Manager - 12.1.3.0 [oracle_common]
-
Oracle JRF - 12.1.2.0 [oracle_common]
-
WebLogic Coherence Cluster Extension - 12 1.3.0 [wlserver]
Tip:
More information about the options on this screen can be found in Templates in Creating WebLogic Domains Using the Configuration Wizard. -
- Task 3 Specifying the Datasource Configuration Type
-
All fields are pre-populated, because you already configured the domain to reference the Fusion Middleware schemas that are required for the Infrastructure domain. BPM uses the existing DataSources for SOA and no new Datasources need to be added to the domain.
Note:
Any custom datasources that were created before the extension (like LEASING datasources) will show up before this screen. Check the Datasources row and click Next. The test datasource screen will verify its validity. Click Next. - Task 4 Selecting Advanced Configuration
-
To complete domain configuration for the topology, do not select any additional options on the Advanced Configuration screen and Click Next. BPM applications and required artifacts will be targeted automatically to the existing SOA servers
- Task 5 Reviewing your Configuration Specifications and Configuring the Domain
-
The Configuration Summary screen contains the detailed configuration information for the domain you are about to create. Review the details of each item on the screen and verify that the information is correct.
You can go back to any previous screen if you need to make any changes, either by using the Back button or by selecting the screen in the navigation pane.
Domain creation will not begin until you click Update.
Tip:
More information about the options on this screen can be found in Configuration Summary in Creating WebLogic Domains Using the Configuration Wizard. - Task 6 Writing Down Your Domain Home and Administration Server URL
-
The Configuration Success screen will show the following items about the domain you just configured:
-
Domain Location
-
Administration Server URL
You must make a note of both items as you will need them later; the domain location is needed to access the scripts used to start the Node Manager and Administration Server, and the URL is needed to access the Administration Server.
Click Finish to dismiss the configuration wizard.
-
- Task 7 Start the Administration Server
-
Start the Administration Server to ensure the changes you have made to the domain have been applied.
14.5 Propagating the Extended Domain to the Domain Directories and Machines
Oracle BPM Suite requires some updates to the WebLogic Server start scripts. Propagate these changes using the pack and unpack commands.
Table 14-2 summarizes the steps required to propagate the changes to all the domain directories and machines.
Note that there is no need to propagate the updated domain to the WEBHOST1 and WEBHOST2 machines, because there are no changes to the Oracle HTTP Server instances on those host computers.
Table 14-2 Summary of Tasks Required to Propagate the Domain Changes to Domain Directories and Machines
| Task | Description | More Information |
|---|---|---|
|
Pack up the Extended Domain on SOAHOST1 |
Use the Pack command to create a new template jar file that contains the new Oracle BPM Suite Managed Servers configuration. When you pack up the domain, create a template jar file called |
Section 11.4.1, "Packing Up the Extended Domain on SOAHOST1" |
|
Unpack the Domain in the Managed Servers Directory on SOAHOST1 |
Unpack the template jar file in the Managed Servers directory on SOAHOST1 local storage. |
Section 12.7.1, "Unpacking the Domain in the Managed Servers Domain Directory on SOAHOST1" |
|
Unpack the Domain on SOAHOST2 |
Unpack the template jar file in the Managed Servers directory on the SOAHOST2 local storage. |
14.6 Restarting the WLS_SOA Managed Servers with Business Process Management
For configuration changes and start scripts to be effective, you must restart the WLS_SOAn server to which BPM has been added.
Because BPM extends an already existing SOA system, the Administration Server and respective Node Managers are already running in SOAHOST1 and SOAHOST2.
To restart the WLS_SOA1 Managed Server:
-
Enter the following URL into a browser to display the Fusion Middleware Control login screen:
http://ADMINVHN:7001/em -
Log in to Fusion Middleware Control using the Administration Server credentials.
-
In the Target Navigation pane, expand the domain to view the Managed Servers in the domain.
Description of the illustration ''fmwc_soacluster.gif''
-
Select the WLS_SOA1 and WLS_SOA1 Managed Servers and click Shut Down on the Oracle WebLogic Server toolbar.
From the Shutdown drop-down menu, select When Work Completes or Force Shutdown, depending on whether or not you believe the affected Managed Servers are actively processing requests.
Note:
SOA Servers depend on the policy access service to be functional, so the WSM-PM Managed Servers in the domain need to be up and running and reachable before the SOA servers are started. -
When the shutdown operation is complete, make sure the server is still selected, and then click Start Up in the toolbar.
-
When the startup operation is complete, navigate to the Domain home page and verify that the WLS_SOA1 Managed Server is up and running.
14.7 Adding the Enterprise Deployment Administration User to the Administrators Group
Before you validate the Oracle Business Process Management configuration on the Managed Server, add the enterprise deployment administration user (weblogic_soa) to the Administrators group in the LDAP directory.
To perform this task, refer to Section 18.2.1, "Configuring Roles for Administration of Oracle SOA Suite Products".
Note that the first time you log in to the Business Process Management Composer or Business Process Management Worklist applications, you must log in as a user that is a member of the Administrators group. After the initial login, any user can be an administration user, as long as they are granted the following roles:
OracleBPMComposerRolesApp/BPMComposerAdmin
Also, after the first login, any authenticated user should be able to access the Business Process Management applications.
14.8 Configuring Oracle HTTP Server for Oracle Business Process Management
Make the following modifications to the Oracle HTTP Server instance configuration files to ensure that the Oracle HTTP Server instances in the Web tier can route Oracle Business Process Management requests correctly to the Oracle Business Process Management software.
To enable Oracle HTTP Server to route requests to the BPM Composer and BPM Workspace console:
-
Log in to SOAHOST1 and change directory to the configuration directory for the first Oracle HTTP Server instance (OHS_1):
cd ASERVER_HOME/config/fmwconfig/components/OHS/OHS_1/
-
Add the following directives inside the
<VirtualHost>tag in thesoa_vh.conffile:# BPM <Location /bpm/composer> SetHandler weblogic-handler WebLogicCluster SOAHOST1VHN1:8001,SOAHOST2VHN1:8001 WLProxySSL ON WLProxySSLPassThrough ON </Location> # BPM <Location /bpm/workspace> SetHandler weblogic-handler WebLogicCluster SOAHOST1VHN1:8001,SOAHOST2VHN1:8001 WLProxySSL ON WLProxySSLPassThrough ON </Location>
-
Change directory to the following location so you can update the configuration file for the second Oracle HTTP Server instance (OHS_2):
cd ASERVER_HOME/config/fmwconfig/components/OHS/OHS_2/
-
Open the
soa_vh.conffile and add the Oracle Business Process Management directives to the<VirualHost>tag. -
Restart the Administration Server.
-
After the Administration Server is running, review the files in the following directories on both WEBHOST1 and WEBHOST2 to be sure they contain the modifications made in the Administration Server domain directory:
MSERVER_HOME/config/fmwconfig/components/OHS/instances/OHS_1/MSERVER_HOME/config/fmwconfig/components/OHS/instances/OHS_2/ -
Restart Oracle HTTP Servers on WEBHOST1 and WEBHOST2.
14.9 Enabling SSL Communication Between Business Process Management Servers and the Hardware Load Balancer
After you extend the domain with Business Process Management, you must ensure that the Administration Server and Managed Servers can access the front-end, SSL URL of the hardware load balancer.
This will allow Business Process Management to use Web services to invoke callbacks and other communications with the front-end, secure URL.
If you already configured this communication for the Oracle SOA Suite (WLS_SOA) Managed Servers, then you should be able to validate this configuration using the validation procedures in Section 14.10.
If you have not yet configured SSL communication with the hardware load balancer, then see Section 18.1.2, "Enabling SSL Communication Between the Middle Tier and the Hardware Load Balancer" before you proceed to the validation steps.
14.10 Validating Access to Business Process Management Through the Hardware Load Balancer
Because the cluster address for the SOA_Cluster has already been set in the previous chapter, the Business Process Management system can be verified only after the Oracle HTTP Server configuration files have been modified to route the Business Process Management context URLs to the WebLogic Servers.
Use the following procedure to verify the Business Process Management URLs to ensure that appropriate routing and failover is working from the hardware load balancer to the Oracle HTTP Server instances to the Business Process Management Managed Servers:
-
While the WLS_SOA2 Managed Server is running, stop the WLS_SOA1 Managed Server using the Oracle WebLogic Server Administration Console.
-
Use your Web browser to access the following URLs:
https://soa.example.com/bpm/composer/
https://soa.example.com/bpm/workspace/
-
Log in using the
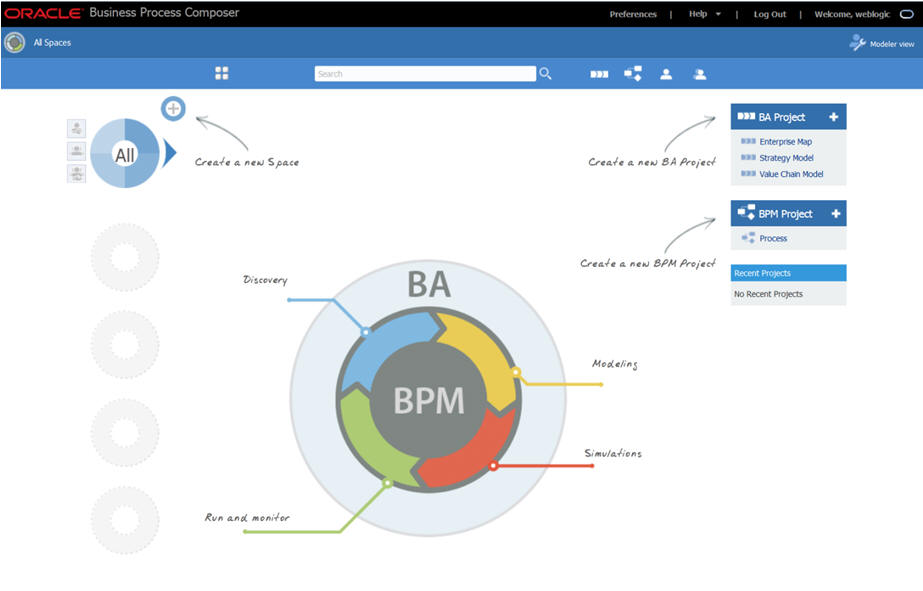
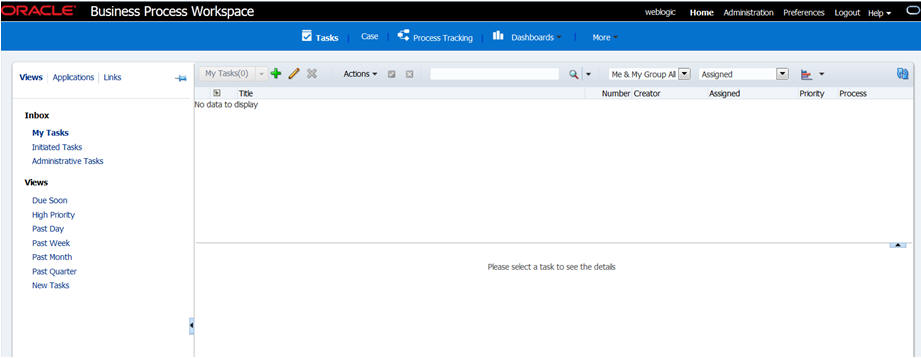
weblogic_soaadministration credentials.You should see the BPM Composer and BPM Workspace applications (Figure 14-1 and Figure 14-2)
-
Start WLS_SOA1 from the Oracle WebLogic ServerAdministration Console.
-
Stop WLS_SOA2 from the Oracle WebLogic Server Administration Console.
-
Access the same URLs to verify that the load balancer and Oracle HTTP Server instances can route the requests to the other Managed Server.
14.11 Configuring BPMJMSModule for the Oracle BPM Cluster
The BPMJMSModule JMS Module is deployed automatically when you configure Oracle Business Process Management in a Oracle WebLogic Server domain.
However, when you deploy Oracle Business Process Management Server as part of a Oracle WebLogic Server cluster, you must modify the default values for the quota and redelivery limits for specific JMS resources within the BPMJMSModule JMS module.
Specifically, you must modify the JMS topic resources listed in Table 14-3.
Table 14-3 JMS Resource Modifications Required for the BPMJMSModule JMS Module
| JMS Resource | Property | Description | Recommended Setting |
|---|---|---|---|
|
Measurement distributed topic in a cluster configuration:
|
Quota |
In cluster configuration, this property is set to None by default. This setting causes issues if a large number of messages are published to the measurement jms topic and the message consumption is relatively slow. When the JMS default threshold of maximum message size is reached, then additional messages cannot be published and any attempt at publishing fails with the following exception: ResourceAllocationException |
Set Quota to MeasurementQuota |
|
Measurement distributed topic in a cluster configuration:
|
Redelivery Limit |
In a cluster configuration, this property is set to -1 by default. This setting causes JMS to retry sending the message until it is successfully acknowledged. If the measurement topic consumers cannot process messages due to a system error that causes the transaction to rollback, then the system can experience performance issues and the filling up of logs with repeated exceptions. |
Set the redelivery limit to three ( |
To modify the BPMJMSModule Resource quota and redelivery settings:
-
Log in to the Oracle WebLogic Server Administration Console.
-
Select Services > Messaging > JMS Modules in the left navigation pane.
-
Click BPMJMSModule in the list of JMS Modules.
-
Select dist_MeasurementTopic_auto in the Summary of Resources table.
-
Click the Thresholds and Quotas tab.
-
Click Lock and Edit.
-
From the Quota drop-down menu, select MeasurementQuota and click Save.
-
Click the Delivery Failure tab.
-
Set the following fields to
3:-
Redelivery Delay Override
-
Redelivery Limit
-
-
Click Save.
-
Click Activate Changes.
14.12 Backing Up the Oracle BPM Configuration
It is an Oracle best practices recommendation to create a backup after successfully extending a domain or at another logical point. Create a backup after verifying that the installation so far is successful. This is a quick backup for the express purpose of immediate restoration in case of problems in later steps.
The backup destination is the local disk. You can discard this backup when the enterprise deployment setup is complete. After the enterprise deployment setup is complete, you can initiate the regular deployment-specific Backup and Recovery process.
For information about backing up your configuration, see Section 18.2.6, "Performing Backups and Recoveries in the SOA Enterprise Deployments."
14.13 Enabling Whole Server Migration for Oracle Business Process Management
To ensure that Oracle Business Process Management is configured for high availability, configure the Managed Servers with Whole Server Migration for failover and zero data loss.
For more information on enabling server migration, see Chapter 19, "Using Whole Server Migration and Service Migration in an Enterprise Deployment".