20 Working with Blogs
See Also:
For an overview of the different options available in WebCenter Portal for working with portal content and adding content to a portal, see Introduction to Adding Content to a Portal.
This chapter includes the following topics:
Permissions
The tasks described in this chapter are available only if the system administrator and portal manager have made blog functionality available in WebCenter Portal and the current portal, as described in Prerequisites for Enabling Blog Functionality in Building Portals with Oracle WebCenter Portal.
Note:
To perform the tasks in this chapter, you need the following permissions:
To create and manage with blog posts: in the Home portal, any authenticated user can add and manage their own blog posts in an existing blog; in other portals, you need the portal-level permission
Create Documents(which includes delete permissions on blog posts that you create). To delete blog posts that are not your own, you must haveDelete Documentspermission.To view or post comments on blog posts, you need only the
View Documentspermission.To view a blog page, you need the
View Pagepermission. This permission is granted to all authenticated users by default. To edit a blog page, you need to be grantedEditpermissions on the page.To create a personal page using the Blog page style, you need the application-level permission
Pages: Create. This permission is granted to all authenticated users by default, allowing them to create and manage their personal pages in the Home portal.
20.1 About Blogs
Blogs are typically personal records of an individual user's experience and opinions.
The word blog is a contraction of the term Web log. It was coined to describe the online diaries spawned in the late 1990s.
Blogs provide a useful tool for discussing and/or evangelizing any type of idea, strategy, or point of view. Blogs may be projected out to a select group of people or to a wider audience. Typically, each blog contains various blog posts, with the most recently added blog post displayed at the top. Blogs invite readers to comment on the overall concepts.
In Oracle WebCenter Portal, you can create blogs to group related blogs posts. For example, you can group posts by the same author or related topics. Use the Blog page style to create a dedicated blog page. See Understanding the Blog Page Style and Creating a Blog Page.
20.2 Understanding the Blog Page Style
Out-of-the-box, Oracle WebCenter Portal includes several page styles for selection when creating a new page. One of these page styles is the Blog page style, which enables you to create a dedicated blog page.
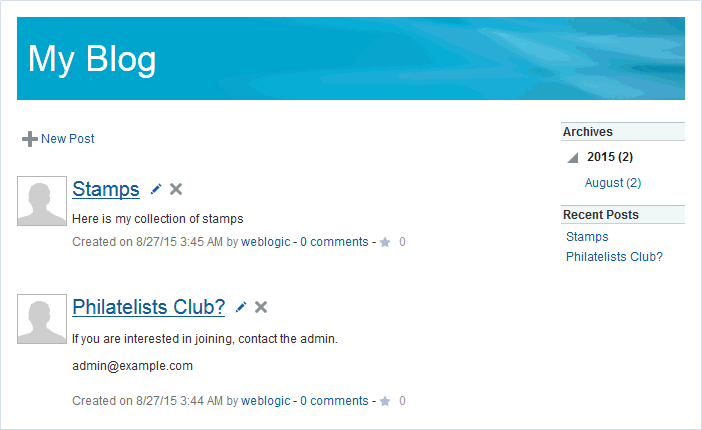
Figure 20-1 Blog Page Displaying Blog Post

Description of "Figure 20-1 Blog Page Displaying Blog Post"
On a blog page, the Archives section on the right provides links to blog posts by year and by month, including the current month. Clicking a month displays all blog posts created during that month. Every time you add a blog post, that post is added to the archive for the current month.
A blog page displays various details for each blog post. These include the blog post title, the blog post content, date of creation or modification, name of the user who created or last modified the post, and the number of comments on the blog post.
Authorized users can click the Edit Post (pencil) icon to edit a post and also add comments, tags, and links on the corresponding tabs at the bottom of the post. An authenticated user (logged in to WebCenter Portal) with view-only permissions can add comments to a blog post by clicking the comments link below the post. Public users can not comment on blog posts.
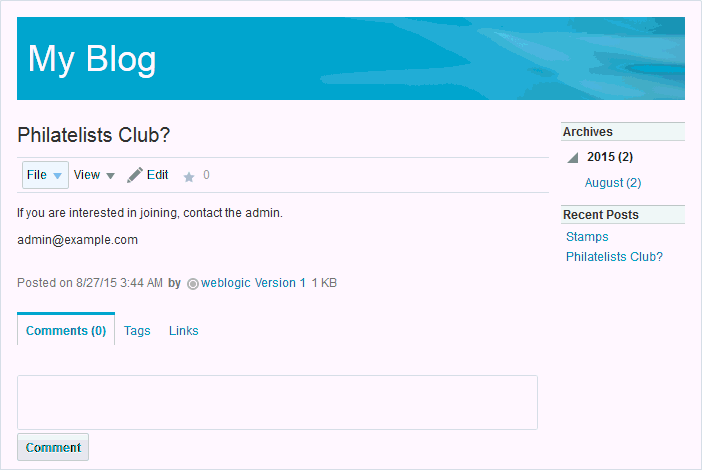
Clicking a blog post title opens the blog post to occupy the entire the blog page (Figure 20-2), providing controls to manage the blog post.
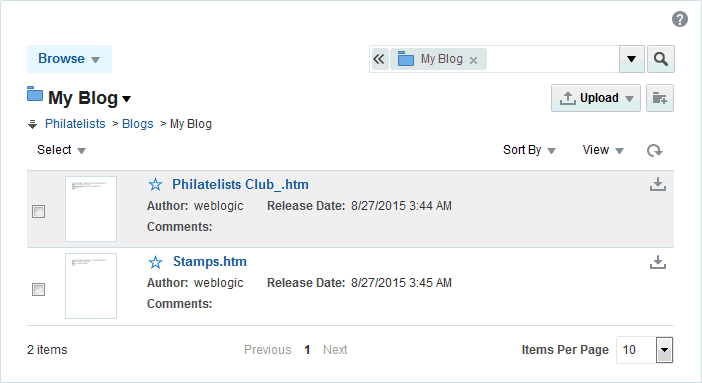
In a portal or the Home portal, blog pages are stored in a separate folder named Blogs under the root folder of the portal in the document hierarchy. When you create a new blog page, an empty folder is created for that blog under the Blogs folder. All blog posts that you create in that blog are stored in the blog's folder.
Figure 20-3 illustrates the directory structure for the example MyBlog, which contains two blog posts. The breadcrumb at the top shows that the blog posts are created in the MyBlog folder in the portal.
20.3 Creating a Blog Page
You can create a blog page to group related blog posts.
You can create a dedicated blog page using the Blog page style as either:
A personal page in the Home portal, selecting Blog as the page style. See Creating a Personal Page.
A page in a portal, selecting Blog as the page style. This is an advanced task, described in Creating a Page or Subpage in an Existing Portal in Building Portals with Oracle WebCenter Portal.
The initial blog page you create looks similar to Figure 20-4. For more information, see Understanding the Blog Page Style.
Figure 20-4 A New Blog Created Using the Blog Page Style

Description of "Figure 20-4 A New Blog Created Using the Blog Page Style"
20.4 Working with Blog Posts
The following sections describe how to add and manage blog posts.
20.4.1 About Blog Posts
For each blog post, you can use the controls to perform tasks such as edit, subscribe to, share, and comment on the post.
When you create a blog post, a file is created in the content repository with the same name as the blog post title. Subsequently, you can change the blog post title when editing the blog post, but keep in mind that this changes only the display title; the name of the file for the blog post remains the original name. Therefore, you cannot later create a new blog post with the same initial title as the original title, as that file name already exists.
You use the Rich Text Editor (RTE) to add the content and style elements to a blog post. The RTE provides features such as the ability to embed images, create new resources on the fly, and add content. For more information, see Using the Rich Text Editor (RTE).
20.4.2 Viewing a Blog Post
You can view a blog post by opening the page in which it resides.
To view a blog post:
20.4.3 Creating a Blog Post
You can create a blog post on a blog page.
To create a blog post:
The new blog post appears as the top-most entry in its blog page (Figure 20-3).
Figure 20-9 Blog Page Displaying Blog Post

Description of "Figure 20-9 Blog Page Displaying Blog Post"
In the content repository, the new blog post is saved as a document under its parent blog folder (MyBlog), which in turn, is stored under the Blogs folder, as shown in Figure 20-10.
Figure 20-10 Blog and Blog Post in the Document Hierarchy

Description of "Figure 20-10 Blog and Blog Post in the Document Hierarchy"
20.4.4 Editing a Blog Post
You use the Rich Text Editor (RTE) to add or revise the content of your blog posts.
When you open a blog post for editing, Oracle WebCenter Portal automatically checks the file out. If another user is already editing a blog post when you try to open it, the Documents tool displays a message that the blog post has already been checked out.
Whenever you save changes to a blog post, WebCenter Portal automatically checks the file in and creates a new version of the blog post. This means that the last saved version of a blog post appears as the current version.
To edit a blog post:
20.4.5 Deleting a Blog Post
If you no longer want a blog post to be available, you can delete it.
Open the blog page that includes the blog post and click the Delete Post icon (Figure 20-11) for the required blog post.


