Getting Started Tutorials

     Previous  Next    Open TOC in new window    View as PDF - New Window  Get Adobe Reader - New Window
Content starts here

Tutorial 3: Creating an Application and Resources

This section contains the following sections:


Overview

In order to secure an application using Oracle Entitlements Server, the application must be defined using the Entitlements Administration Application. Once the application is defined, you can specify the application resources to which you want to assign policies, actions that may be performed on these resources, application roles that may be granted access to the resources, and policy definitions that are enforced when users access the secured application.


Scenario

This tutorial leads you through the steps of creating an application named AdmissionsSystem and the resources, actions, and roles as described in Table 4-1.

Table 4-1 Application Objects
Object
Description
Application
The AdmisssionsSystem application contains the web-based patient roster.
Resource
A resource named url is created to serve as the parent resource of the patient roster (roster_index.jsp).
Resource
A resource named roster_index.jsp is created to represent the JSP page in the Admissions System that users access to administer and view the patient roster.
In tutorial 4, we will show how to assign policies to this resource so as to determine who may access the roster.
Actions
The following actions that correspond to web-based requests are defined:
GET, POST
After defining these actions, they may be used in policy definitions.
Application Role
A application role name HealthProviders is created. In tutorial 4, a role policy is used to assign this role to John Kildaire.


Create the Application

  1. If you have not already done so, start the Administration Server and launch the Entitlements Administration Application.
  2. In the left pane, select the ParkerHospital organization and click New Application at the bottom of the pane.
  3. On the New Application dialog, enter AdmissionsSystem in the Name field and click OK. The AdmissionsSystem application appears as a child of the ParkerHospital organization as shown in Figure 4-1.
  4. Note: The SSM Bound field is not used in these tutorials. This field is used to bind an application to an SSM.
    Figure 4-1 AdmissionsSystem Application


    AdmissionsSystem Application


Create the Resources

  1. Select the AdmissionsSystem application in the left pane. Then click on Resources in the right pane as shown in Figure 4-2.
  2. Figure 4-2 Selecting Resources


    Selecting Resources

  3. On the Resources page, click New at the bottom.
  4. On the New Resource dialog, enter url in the Name field and click OK.
  5. Note: When you select a resource’s Allow Virtual Resource field, any policies applied to the resource will also apply to any child resources in the actual application. This dispenses with the need to define these child resources in the Entitlements Administration Application.

    When you click OK the url resource displays in the resources list as shown in Figure .

    Figure 4-3 URL Resource
  6. Select the url resource and click New at the bottom of the list.
  7. On the New Resource dialog, enter roster_index.jsp in the Name field and click OK.
  8. Note: The resource name must be the same as the name of actual application resource.


Create the Actions

  1. With the AdmissionsSystem application selected in the left pane, click on the Actions tab and select the Actions sub-menu as shown in Figure 4-4.
  2. Figure 4-4 Selecting Actions


    Selecting Actions

Tip: You will notice that the any action is automatically provided.
  1. On the Actions page, click New at the bottom of the page.
  2. On the New Action dialog, enter GET in the Name field and click OK. The GET action then appears in the list of existing actions as shown in Figure 4-5.
  3. Figure 4-5 Actions List


    Actions List

  4. Repeat step 2 to create the POST action.
Notes:


Create an Application Role

Application roles are distinct from admin roles, which are not covered in this tutorial. For more information, see the Entitlements Administration Application help system.

  1. With the AdmissionsSystem application selected in the left pane, click on the Roles tab.
  2. On the Roles page, click New at the bottom.
  3. On the New Role dialog, enter HealthProviders and click OK.
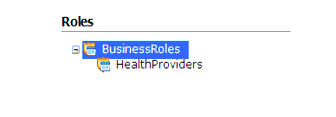
  4. The HealthProviders role appears in the list as shown in Figure 4-6.

Tip: You could assign users or groups to the HealthProviders role by selecting it and clicking New under the list of Role Policies. We also show a different method of accomplishing the same thing in Tutorial 5: Creating a Role Policy on page 6-1.
Figure 4-6 HealthProviders Role

HealthProviders Role


Save Your Work

If autosave is not enabled, save your work as follows:

  1. Click Save & Distribute as shown in Figure 4-7.
  2. Figure 4-7 Save Changes


    Save Changes

  3. On the Save and Distribute window, make sure No, just save changes is selected and click OK.
  4. Note: The Yes, save changes and distribute option is used when you have made changes to policy definitions. Selecting it saves your changes and also distributes the policies to the SSM securing the application.


Summary

This tutorial showed how to create the following objects:


  Back to Top       Previous  Next