3 Setting Up the Accounts Payable System for Automatic Payment Processing
This chapter contains the following topics:
-
Section 3.1, "Understanding the Setup for Automatic Payment Processing"
-
Section 3.3, "Setting Up Payment Instruments and Print Programs"
-
Section 3.5, "Setting Up Payment Information by Business Unit"
-
Section 3.6, "Preventing the Company Name from Printing on Payments"
|
Note: Country-specific setup for automatic payment processing exists for Argentina, Germany, Great Britain, Japan, Norway, and Sweden. |
3.1 Understanding the Setup for Automatic Payment Processing
Before processing automatic payments, you must set up:
| Setup Feature | Description |
|---|---|
| UDCs. | (DEU) Set up the Replaced Character (04/RC) UDC. This UDC enables you to specify acceptable characters that the system uses to replace unacceptable characters in a text file. |
| Bank account information. | Set up each bank account that you use for payment processing. When you set up your company's bank accounts, you must provide information such as:
|
| Payee control. | Set up the system for payee control to prevent users from performing fraudulent payment activities. |
| Payment instruments. | Set up payment instruments and assign them to payment programs. |
| Print sequences. | Set up print sequences for payments to specify the order in which payments print. |
| Set up payment information by business unit. | Set up payment information by business unit if you produce payments by business unit. |
| Prevent your company name from printing on payments. | Prevent the system from printing your company name if your preprinted checks already contain your company name. |
If you use deferred payment processing, EFT, or EDI payments, you must also perform additional setup tasks.
3.2 Setting Up Payee Control
This section provides an overview of payee control, lists the form that is used to set up payee control, and discusses how to set processing options for A/P Payee Control Server - Processing Options (X0450).
3.2.1 Understanding Payee Control
Payee control is an audit feature that helps to ensure that one person cannot commit and conceal an error or act of fraud of selected, critical payee information. When monitored changes are made, this feature holds payments to the payee pending review and approval of changed information. You use payee control to control changes that are made to selected, critical payee and bank account information. One person enters the change and another approves it. Thus, the involvement of two people is required to make changes that affect payments.
Until a change is approved, the system prevents automatic payments to a payee for whom controlled information has been changed. The program for creating payment groups bypasses payees that have unapproved payee control records and prints an error message on the edit report. The program for writing payments prints an error message if the payee's alpha name, mailing name, or SWIFT code changes are unapproved.
The system does not prevent you from writing manual payments if the controlled information has changed.
3.2.1.1 Limitations
Payee control does not eliminate all risk. It is intended for use in conjunction with management controls to prevent error and fraud. You must implement security for these elements of Payee Control:
-
The Payee Control (F0450) table.
Deleting this table disables the audit trail.
-
A/P Payee Control Server - Processing Options Only program.
Changing the processing options for this server affects the way that the system monitors changes.
-
A/P Manual Payments program and Voucher Entry with Manual Payment program.
You can write manual payments to payees for whom controlled information has been changed.
3.2.1.2 Setup
Setting up payee control consists of setting processing options for the A/P Payee Control Server - Processing Options Only program (X0450). Depending on how you set the processing options for the A/P Payee Control Server - Processing Options Only program, you can control changes, or additions and changes, to each of these fields:
When the system detects a change to a controlled field, it writes a record to the F0450 table. This record includes the original information, the changed information, the date and time that the change was made, and the user ID of the person who made the change.
For example, Universal Incorporated has a supplier number of 4344 and an alternate payee number of 3610. You add a voucher for supplier number 4344 and enter an alternate payee number of 5910. If you have the payee control feature activated, the system creates a payee control record because the voucher's payee number (5910) does not match the supplier number (4344) or alternate payee number (3610). This record must be approved by another person before payment can be issued.
|
Note: ZJDE0001 is the only version that controls Payee Control. |
3.2.2 Form Used to Set Up Payee Control
| Form Name | FormID | Navigation | Usage |
|---|---|---|---|
| Accounts Payable Constants | W0000E | Accounts Payable Setup (G0441), Accounts Payable Constants
On the System Setup form, select Accounts Payable Constants. On the Accounts Payable Constants form, select Payee Control from the Form menu. |
Access the A/P Payee Control Server program. |
3.2.3 Setting Processing Options for A/P Payee Control Server - Processing Options (X0450)
Processing options enable you to specify the default processing for programs and reports.
3.2.3.1 Levels
- A/P Ledger (F0411): Payee
-
Specify the level of control that you want for each table. Enter 1 for changes only or 2 for adds and changes. If you leave this processing option blank, no control records are written.
- Bank Accounts (F0030): Account, Transit, SWIFT Code
-
Specify the level of control that you want for each table. Enter 1 for changes only or 2 for adds and changes. If you leave this processing option blank, no control records are written.
- Address Book (F0101): Alpha Name, Special Payee
-
Specify the level of control that you want for each table. Enter 1 for changes only or 2 for adds and changes. If you leave this processing option blank, no control records are written.
- Who's Who (F0111): Mailing Name
-
Specify the level of control that you want for each table. Enter 1 for changes only or 2 for adds and changes. If you leave this processing option blank, no control records are written.
3.2.3.2 Option
- Supplier Master Edit
-
Enter 1 to create payee control records regardless of whether a Supplier Master (F0401) record exists. Leave this processing option blank to limit the payee control records to addresses with a supplier master record.
3.3 Setting Up Payment Instruments and Print Programs
This section provide an overview of the assignment of print programs to payment instruments, lists prerequisites, and discusses how to assign print programs to payment instruments.
3.3.1 Understanding the Assignment of Print Programs to Payment Instruments
Payment instruments can be checks, tapes, drafts, BACS, and so on. The system provides several payment instruments in the Payment Instrument (00/PY) UDC table. You can use the existing instruments, or you can add your own. If you conduct business with other countries, you should verify that all of the payment instruments that are country-specific have been set up. You control the format of each payment instrument by choosing programs and versions of the programs that produce each component of a payment. These components include:
-
Payment
This is the printed copy or tape table for the payment.
-
Payment register
-
Attachment
This is a printed report that contains the detail information that does not fit on a payment stub.
-
Debit statement
This is a printed list of debit balances that indicates that you have overpaid a supplier. It shows net amounts that are either a credit or that zero out a voucher. By assigning a program to the debit statement component, you can print a separate debit statement form with a payment.
|
Note: This process does not close the vouchers. You should use the Manual Payment With Voucher Match program to close vouchers with zero or negative payments. The system allows you to close vouchers with negative payments only when you set the value as 1 in theAllow Negative Payments processing option of the Manual Payment With Voucher Match program. |
The Payment Instrument Defaults program (P0417) includes all of the default programs that are associated with each component. The system stores default program information in the A/P Payments - Default Print and Update (F0417) table.
Assign a program number to each component of a payment instrument. For example, you might assign program P04573 (for print standard attachments) to the attachments component of a payment instrument. The system accesses this program and produces the appropriate type of attachment.
You are not limited to using the preassigned programs for each payment instrument. For example, if the default method of payment for your company is to print a check that is in a French format, you can change the payment print program for the blank payment instrument from the Print Payments - Standard (P04572) program to the Print Automatic Payment - Check - France (P04572F2) program.
You are able to narrow your selections for each component even further by selecting a version of each program that will write the components. The advantage of this is that you can use different processing options or data selection in the versions, based on your needs.
You can limit the use of a payment instrument by assigning it a specific bank account. For example, you can set up two types of payment instruments for drafts with each type drawn on a different bank account.
When you print payments, the system uses the payment instrument that is assigned to the voucher. Typically, you set up the most commonly used payment instrument as the default value, so you do not have to define a payment instrument for each supplier. The system uses the payment instrument that is assigned to the supplier, unless you override it when you enter a voucher.
3.3.2 Prerequisites
Before you complete the tasks in this section:
-
Set up additional payment instrument codes in the Payment Instrument (00/PY) UDC, if necessary.
-
Set up additional print programs in Produce Bank File (04/PP) UDC, if necessary.
-
Assign payment instruments to suppliers.
3.3.3 Forms Used to Set Up Payment Instruments and Print Programs
| Form Name | FormID | Navigation | Usage |
|---|---|---|---|
| Work With Payment Instrument Defaults | W0417A | Automatic Payment Setup (G04411), Payment Instrument Defaults | Review existing payment instruments and their default programs. |
| Set Up Payment Instrument Defaults | W0417B | Click Select or Add on the Work With Payment Instrument Defaults form. | Assign print programs to existing payment instruments.
Assign print programs to new payment instruments. |
3.3.4 Assigning Print Programs to Payment Instruments
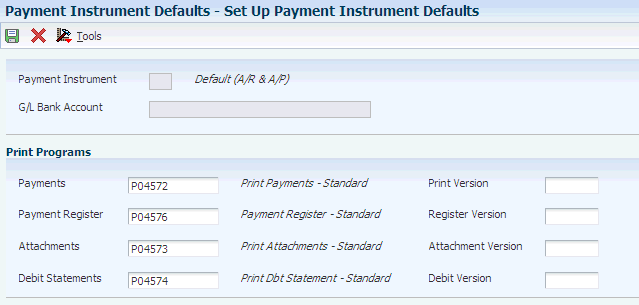
Access the Set Up Payment Instrument Defaults form.
Figure 3-1 Set Up Payment Instrument Defaults form
Description of "Figure 3-1 Set Up Payment Instrument Defaults form"
- Payments
-
Enter the program to use to print AP payments. The value that you enter must exist in the Produce Bank File (04/PP) UDC table.
- Payment Register
-
Enter the program to use to print the AP payment register. The value that you enter must exist in the Produce Bank File (04/PP) UDC table.
- Attachments
-
Enter the program to use to print attachments in AP payment processing. The value that you enter must exist in the Attachments Program - Payments (04/PA) UDC table.
- Debit Statements
-
Enter the program to use to print debit statements in AP payment processing. The value that you enter must exist in the Debit Statement Pgm - Payments (04/PD) UDC table.
3.4 Setting Up a Print Sequence for Payments
This section provides an overview of print sequences and discusses how to set up a print sequence.
3.4.1 Understanding Print Sequences
The payment sequence option enables you to control the order in which your payments print. You can print payments in a sequence that is meaningful to your needs. For example, you might want payments to print in descending order by amount so that the largest payment amounts print first, or you might want to print payments alphabetically. You control the payment sequence by setting up sequence IDs on the Automatic Payment Setup menu. The sequence IDs establish the printing order and can contain up to six data items from fields in the AP payments worktable.
You must define a sequence ID for each different print sequence that you use. When you create your payment groups, you specify which sequence to use in the sequence ID processing option and whether the values for the sequence should print in ascending or descending order.
To print payments based on criteria that is outside of the JD Edwards EnterpriseOne Accounts Payable system, use special handling codes. Special handling codes are user-defined and assigned at the time of voucher entry. Use them to sort payments by including them in your sequence ID.
3.4.2 Form Used to Set Up a Print Sequence for Payments
| Form Name | FormID | Navigation | Usage |
|---|---|---|---|
| Set Up Payment Sequence | W0415B | Automatic Payment Setup (G04411), Payment Sequence
Click Add on the Work With Payment Sequences form. |
Set up a payment sequence. |
3.4.3 Setting Up a Payment Sequence
Access the Set Up Payment Sequence form.
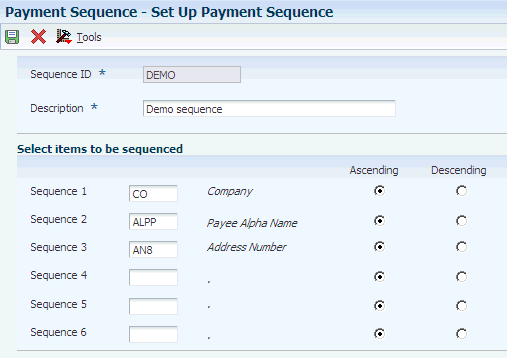
- Sequence ID
-
Indicates a value that is used during Accounts Payable payment processing to specify the order in which payments should be processed. This is the name that is given to the user-defined sequence.
- Sequence 1
-
Enter the value that the system uses to sequence AP payment output.
Note:
If Payment Handling Code (CRC) is the first field in your print sequence, you must assign vouchers a UDC (00/HC) that is meaningful to your organization.
3.5 Setting Up Payment Information by Business Unit
This section provides an overview of how to print payment information by business unit and discusses how to set up payment information to print by business unit.
3.5.1 Understanding How to Print Payment Information by Business Unit
You might need to set up payment information by business unit if you produce payments by business unit. If you do so, payments are processed using:
-
Business unit information from the voucher.
-
Bank account information from the business unit.
When you create payment groups, the system uses business-unit payment information only if you set a processing option to process payments by business unit. Otherwise, it uses the bank account information that you set up for payments on the Work With G/L Bank Accounts form.
You can assign your business units the same bank account provided that each business unit has a different value, such as a different next payment number, assigned to it.
3.5.2 Forms Used to Set Up Payment Information by Business Unit
| Form Name | FormID | Navigation | Usage |
|---|---|---|---|
| Work With Business Unit Payment Information | W0030BA | Automatic Payment Set Up (G04411), Business Unit Information | View existing records. |
| Set Up Business Unit Payment Information | W0030BB | Click Add on the Work With Business Unit Payment Information form. | Set up payment information to print by business unit. |
3.5.3 Setting Up Payment Information to Print by Business Unit
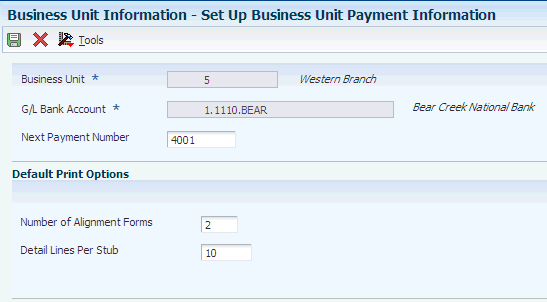
Access the Set Up Business Unit Payment Information form.
Figure 3-3 Set Up Business Unit Payment Information form
Description of "Figure 3-3 Set Up Business Unit Payment Information form"
- Next Payment Number
-
Enter the number that represents the next payment number to be processed for the specified bank account. The system updates this field during Accounts Payable payment processing.
- Number of Alignment Forms
-
Enter the number of checks that are needed at the start of check printing for the printer operator to align the check stock properly.
- Detail Lines Per Stub
-
Enter the number of detail lines that can appear on an accounts payable payment stub.
3.6 Preventing the Company Name from Printing on Payments
This section provides an overview of how to prevent the company name from printing on payments and discusses how to prevent the company name from printing on payments.
3.6.1 Understanding How to Prevent the Company Name from Printing on Payments
You can prevent a company name from printing on your payments, one by one, by setting a processing option in the Auto Payments Write/Reset program (P04572) to print company names on payments. The processing option directs the Auto Payments Write/Reset program to print the company name on payments.
By activating the option on the Automatic Payment Setup program (P0410), you can exclude individual company names from printing on payments even when the processing option on the P04572 is set to print company names. The system stores company payment information in the Company Constants (F0010) table.
3.6.2 Form Used to Prevent the Company Name from Printing on Payments
| Form Name | FormID | Navigation | Usage |
|---|---|---|---|
| Revise A/P Payment Company Information | W0410B | Automatic Payment Setup (G04411), Company Information
Select a record on the Work with A/P Payment Company Information form and click Select. |
Specify that the company name be omitted from the payment. |
3.6.3 Preventing the Company Name from Printing on Payments
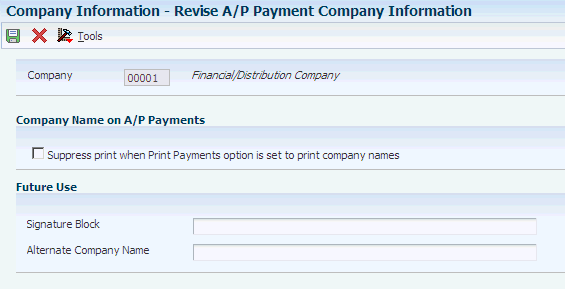
Access the Revise A/P Payment Company Information form.
Figure 3-4 Revise A/P Payment Company Information form
Description of "Figure 3-4 Revise A/P Payment Company Information form"
- Suppress print when Print Payments option is set to print company names
-
Select to specify that the system suppress the printing of the company for this company even if the Company Name processing option for the Print Automatic Payments - Standard Format program (R04572) is set to 1.
3.7 Setting Up the System for EFT Payments
This table describes the additional setup that you must perform to process EFT payments:
|
See Also: |
3.8 Setting Up the System for EDI Payments
When you create AP payment transactions for outbound EDI processing, you must create them in the standard X12 format. Additionally, you must set up your system for EDI payment processing. This table describes the additional setup that you must perform to process EDI payments:
| Program | Required Setup |
|---|---|
| Supplier Master Information (P04012) |
|
| Bank Account Information (P0030G) |
|
| Bank Account Cross-Reference (P0030A) | Enter the bank account information for the supplier in the Bank Transit Number and Bank Account Number fields. |
| Payment Instrument Defaults (P0417) | To produce electronic payments in the X12 format that EDI processing requires, verify that payment instruments X, Y, and Z (or the values that you specified) are set up to use P47052T as the payment print program. If you do not assign this print payment program, payment information is not written in the X12 format that EDI requires. |
| Next Numbers (P0002) | Assign a next number for the EDI Document Number in system 47, line 1. |
| Create Payment Control Groups program (R04570) | Set the processing options on the Bank Tape tab of the Create Payment Control Groups program (R04570) to cause the system to return errors if the payee bank account or X12 bank account information is not correct. |