| C H A P T E R 9 |
|
Using Removable Media Storage Devices |
This chapter contains basic information about how to use removable media storage devices.
The following tasks are covered in this chapter:
Other information covered in this chapter includes:
The Sun Fire V890 server provides front-panel access to three mounting bays. One bay houses an IDE DVD-ROM drive, which is standard in all system configurations.
The other two bays accommodate an optional wide (68-pin) SCSI removable device, which must be ordered separately. The tape drive option also requires a SCSI cable (Sun part number X912A) and a SCSI adapter card (Sun part number X6758A); both must be ordered separately.
You can easily convert the two SCSI device bays into a single full-height bay by removing the metal shelf divider.
The digital versatile disc-read only memory (DVD-ROM) drive in your system ships with a specification sheet that contains the following information:
1. Push the Eject button on the DVD-ROM drive to release the drive tray.
2. Place a CD or DVD into the drive tray, label side up.
A disc is a single-sided or double-sided storage medium. Place it into the tray with the appropriate label side up, as shown.
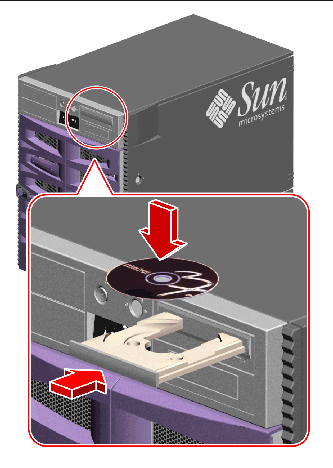
3. Gently push the tray back into the drive.
The drive has an automated closing mechanism that retracts the tray into the drive.
You can eject a CD or DVD from the drive by using one of three methods:
If the server is set up without a system console, you need to set up one in order to issue software commands; see:
1. From the system console device, change directories to a directory that is not in the /cdrom hierarchy.
2. Type the following command to eject the CD or DVD:
3. If the disc does not eject, kill any processes accessing the DVD-ROM drive and repeat Step 2.
The disc will not eject while the drive is in use. To kill any processes accessing the DVD-ROM drive, become superuser and type the following:
You can also eject a disc by using one of these methods:
If the server is set up without a system console, you need to set up one in order to issue software commands; see:
1. From the system console device, change directories to a directory that is not in the /cdrom hierarchy.
2. Press the Eject button on the front panel.
The drive should eject the tray so that you can remove the disc.
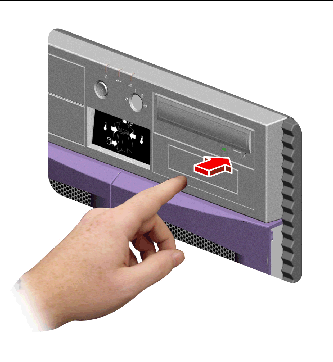
3. If the disc does not eject, kill any processes accessing the DVD-ROM drive and repeat Step 2.
The disc will not eject while the drive is in use. To kill any processes accessing the DVD-ROM drive, become superuser and type the following:
You can also eject a disc by using one of these methods:
Use the emergency ejection procedure only in emergency situations; for instance, if you unmount the disc and the Eject button does not function.

|
Caution - If this procedure is used while a disc is mounted, you can degrade or destroy data in your system. |
1. Turn off the power to your system.
See How to Power Off the System.
2. Unfold and straighten one end of a large wire paper clip.
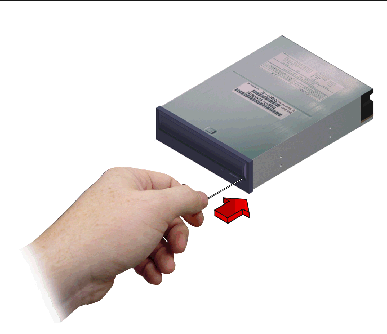
3. Insert the straightened end of the clip into the emergency eject hole and press firmly.
4. Pull the tray from the drive after the clip is inserted into the hole.
You can also eject a disc by using one of these methods:
Eject the CD or DVD and remove it from the tray; see:
|
Note - If the drive cannot read a disc, you may have a dusty or dirty disc. |
1. Clean the disc with compressed air.
Compressed air can remove most accumulations of dust and large dirt particles. If you have access to the drive's read head, verify that it is also dust free.
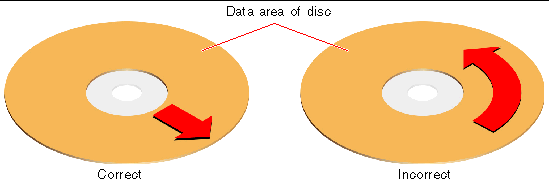
2. If spraying with compressed air fails to remove the dirt on a disc, wipe the disc using a soft, clean, lint-free, dry cloth.
The figure below shows the correct and incorrect way to clean a CD or DVD.
To insert a CD or DVD into the drive, see:
There are a number of different tape drives offered by Sun Microsystems for your system. Each tape drive is shipped with a specification sheet that contains the following information:
The following general handling and storage information applies to cartridges for any of the tape drives offered for your system:
To ensure proper thermal conditioning, keep the tape cartridge at the same temperature as the drive for 24 hours. This applies to cartridges for any of the tape drives offered for your system.
1. Verify that the tape cartridge write-protect switch is set correctly.
If the lock window is open, the tape is write-protected.
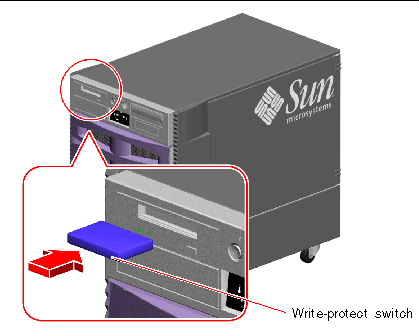
2. Insert the cartridge into the drive, label side up.
3. Push gently on the cartridge until it is pulled into the drive.
To remove a tape cartridge from the drive, see:
The information in this section applies to a DDS-3 tape drive. If you have a different type of tape drive installed, see the specifications shipped with the drive for information.
1. Check that there is no drive activity.
The green activity LED should be unlit. A flashing LED indicates drive activity.

|
Caution - Do not eject the tape cartridge when the drive is active, or you may incur data loss or equipment damage. |
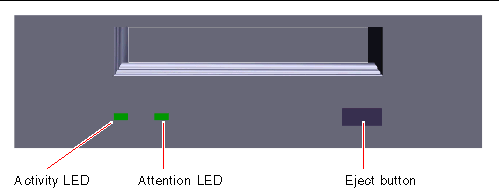
2. Push the Eject button and remove the tape cartridge.
To insert a tape cartridge into the drive, see:
For information about software commands needed to read and write data with your tape drive, refer to the Solaris Handbook for Sun Peripherals or the Solaris User's Guide.
Observe these rules about when to clean a tape drive:
1. Clean the drive after the first four hours of use with a new tape.
2. After that, clean the tape drive after every 25 hours of use to maintain reliable operation.
3. Clean the drive twice as often if you use it in a dusty environment or operate it infrequently.
 Insert a cleaning cartridge into the drive.
The tape should play for a short while, and then eject automatically.
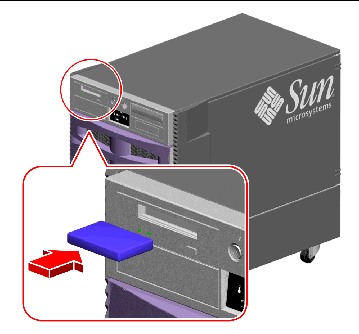
Do not use any cartridge other than a DDS-approved cleaning tape cartridge to clean your tape drive.
Copyright © 2005, Sun Microsystems, Inc. All Rights Reserved.