| C H A P T E R 2 |
|
Catalog Manager |
This chapter describes how to administer the Catalog Manager. Following are some of the responsibilities of the Catalog Manager administrator:
The Content section of the Catalog Manager displays content submitted by developers and published. The Categories section enables you to create custom catalogs of content. The MIME Types section enables you to define the types of content that you want the Content Delivery Server to manage.
The following content management tasks are described in this section:
When an operation is performed (editing, deleting, adding, and so on), the Content Deliver Server puts a background job notification in the main menu bar. You can click on the notice to see details of jobs that were or are running in the current session. See Getting Job Status for more information.
Content categories are central to content management. They are logical containers that hold the content that has been submitted to the Content Delivery Server. Your first task as an administrator is to create appropriate categories for your enterprise. As an administrator, you use content categories to control Vending Manager access to content.
A default set of categories is provided with the Catalog Manager. You can edit or delete these categories. You can also add categories and subcategories.
|
1. From the Catalog Manager administration console, click Content on the main menu bar.
The Content Database Management page is displayed.
The Categories page displays a list of the main categories defined.
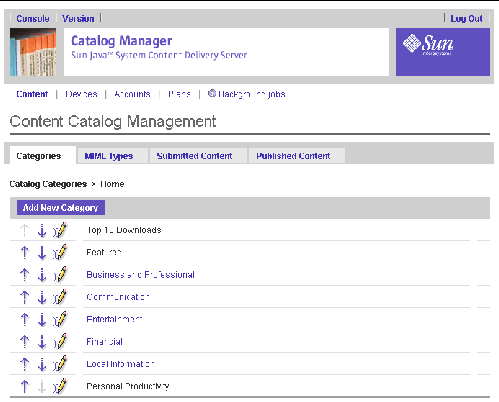
3. Click a category to view its subcategories.
The Categories page displays a list of the subcategories for the selected category. The menu bar at the top of the page displays the hierarchy level of the selected category.
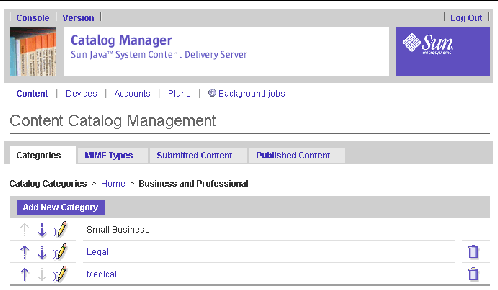
To return to the list of main categories, click Home in the category navigation bar. To display any level of your current category hierarchy, click the category name in the category navigation bar.
4. Click the arrow keys to move a category up or down the list to change the display order.
|
1. From the Categories page, navigate to the level to which you want to add the category.
For example, if you want to add a game subcategory to the Entertainment category, click Entertainment.
The Edit Category page is displayed.
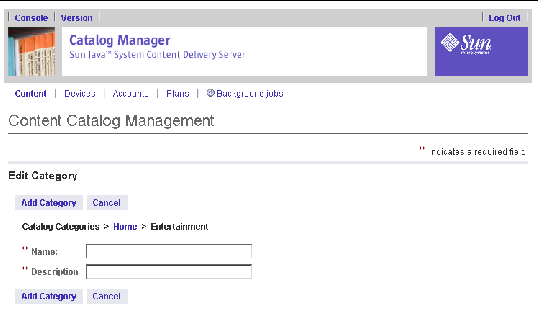
3. Enter a name and short description of the category.
The name must be unique within the category. You cannot have two categories of the same name under the same level of hierarchy.
The Add New Category confirmation page is displayed.
|
1. From the Categories page, navigate to the category you want to edit.
2. Click the Edit Category button  .
.
The Edit Category page is displayed.
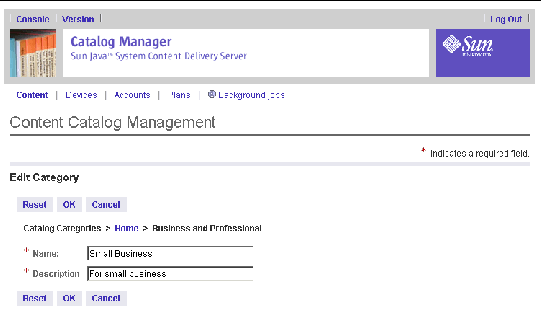
3. Modify the name or short description as needed, and click OK.
The category is updated in the database.
|
1. From the Categories page, navigate to the category you want to delete.
You can only delete categories that do not contain content. You must either move or delete content in an undesired category before you can delete that category.
2. When the category is displayed, click the Delete Category button  .
.
If the category contains content, the delete icon is not present.
The category and all its subcategories are deleted and removed from all plans and content that they are associated with.
4. Click OK to close the confirmation page.
The default content types supported by the Content Delivery Server are MIDlets, ring tones, and images. You can define additional content types as needed. Each content type must be associated with one or more MIME types.
MIME types specify the format of the content and enable information to be exchanged between applications. The Content Delivery Server provides support for a default set of common MIME types, each of which is associated with one of the default content types. You can modify or delete these MIME types, register additional MIME types, or associate the MIME type to a different content type as needed.
In addition, each content type needs to be associated with digital rights management (DRM). The following section discusses the DRM options supported in the Content Delivery Server and their association with content types.
The Catalog Manager administrator configures the Content Delivery Server to setup either separate or single content type submission. By default, the Content Delivery Server is configured for separate content type submissions. The two setups are described as follows:
For example, a content provider submits a screen saver image, Sunset, of content type image and makes a separate submission of Sunset that has that content type sms_picture. Each format of Sunset has its own metadata and price.
For example, a content provider has a ring tone, Melody, to submit. The content is submitted with the ringtone content type. After the content is submitted, the content provider then submits an edition of Melody that has a monophonic format. The monophonic version of Melody is automatically assigned the metadata and price of the initial submission.
Previously the Content Delivery Server offered digital rights protection of content with Sun Java System Content Delivery Server Digital Rights Management (CDS DRM) agents. The current version of the Content Delivery Server offers additional DRM agents that can be applied to content, as described in TABLE 2-1.
The system administrator determines which DRM types are available in the Content Delivery Server at deployment time. The system administrator can choose one or more of the following DRM options:
To use OMA DRM 1.0 in the Content Delivery Server, you must have an OMA DRM 1.0 provider. See the Sun Java System Content Delivery Server Installation Guide for details.
Short Messaging Service (SMS) content types (monophonic ringtone, operator logo, group logo, and sms picture) are supported in the Content Delivery Server. Due to the delivery format for SMS content, DRM protection cannot be applied. The No DRM option is associated by default for all SMS content types.
Remotely hosted copyrighted content also cannot have DRM associated with it. Attempts to submit remotely hosted content items that have content types that are associated with one of the DRM options (other than No DRM) fail.
See Pricing Content for information on the pricing models that can be used for these types of content.
The Content Delivery Server provides you with CDS DRM Agents and CDS OMA DRM 1.0 Forward Lock. CDS DRM Agents can only be used for MIDlet content types while CDS OMA DRM 1.0 Forward Lock can be used for any supported content type in the Content Delivery Server. CDS DRM has several agents that verify a subscriber's license. TABLE 2-2 describes the CDS DRM Agents.
When no DRM agent is selected, only the download-based (free always, first download only, and every download) pricing model is supported. No code is added.
Each agent handles license validation differently. For further details of these types, see the Sun Java System Content Delivery Server Installation Guide.
CDS OMA DRM 1.0 Forward Lock is simply the OMA DRM 1.0 Forward Lock format (no Combined or Separate Delivery) only and can be used with any content type. It provides basic copy protection with the content and it does not allow content to be forwarded to another device.
The default setting of Enabled is used for CDS DRM Agents and CDS OMA DRM 1.0 Forward Lock and when no DRM is selected. You can disable one or more of these options or enable OMA DRM 1.0 with the cdsi db command, see the Sun Java System Content Delivery Server Installation Guide for information on this command.
OMA DRM 1.0 offers three different formats for applying protection, as described in TABLE 2-3.
For a thorough discussion of OMA DRM 1.0, go to http://www.openmobilealliance.org/. The default setting for OMA DRM 1.0 in the Content Delivery Server is Disabled. You can enable this DRM after deployment (see Enabling and Disabling a DRM for more information).
If OMA DRM 1.0 is selected as an available DRM type, the system administrator can set a preference for the type of rights delivery format, as follows:
The last preference option provides flexibility in providing digital rights protection with content. Work with your system administrator to determine what rights delivery preference to use, if desired. The preference is set in the configuration properties file for the Content Delivery Server.
Content with Forward Lock or Combined Delivery is available to compliant devices that support Combined Delivery. Compliant devices that do not support Separate Delivery cannot receive content that has Separate Delivery unless the delivery preferences are set to allow compliant devices to receive content using Separate Delivery by using Combined Delivery.
The possible associations of DRM types to content types are listed in Appendix B. See Adding a Content Type for information on how to assign DRM types to content types.
For devices that are not compliant with OMA DRM 1.0, the Catalog Manager administrator can configure the Content Delivery Server with one of the following options to deliver content with a free always, first download only, or every download pricing model:
For a discussion of pricing models, see Pricing Content.
To support the OMA DRM 1.0 formats, a device must support the MIME types listed in TABLE 2-4.
|
application/vnd.oma.drm.rights+xml |
These MIME types are used to determine the OMA DRM 1.0 format supported on a device. Support for these MIME types must be added to device profiles for devices capable of receiving OMA DRM 1.0 protected content.
When assigning a DRM type to a content type, be aware that CDS DRM can only be used with MIDlets. Be aware also that SMS content types and remotely hosted copyrighted content cannot be assigned a DRM. Other than these restrictions, the choice of no DRM, CDS OMA DRM 1.0 Forward Lock, and OMA DRM 1.0 can be used with any content type.
This release of the Content Delivery Server contains the default associations of DRM types to content types shown in TABLE 2-5.
|
none[1] |
||
You can assign a DRM through the MIME types page in the Catalog Manager. During deployment only one DRM can be associated with a particular content type. That means that even though None, CDS OMA DRM 1.0 Forward Lock, and OMA DRM 1.0 are all enabled, only one of them can be associated with the picture content type. The Content Delivery Server provides six CDS DRM Agents. Only one agent can be used per deployment. See Appendix B for a list of DRMs and content type associations. See TABLE 2-2 for agent descriptions.
You can assign the DRM options to the associated content types given in TABLE 2-5 but you are not restricted to those combinations, for instance, you can apply None to all content types if you wish. For steps on how to assign a DRM, see Adding a Content Type.
You can change the DRM option for a content type after deployment if needed. See Enabling and Disabling a DRM for more information.
You can change the DRM selection for a content type after the Content Delivery Server is running by switching DRMs. You can also enable or disable DRMs after deployment. For example, if None is assigned to content type, image, and you later choose to use OMA DRM 1.0, you can enable that DRM during runtime and assign that DRM to the image content type.
If you decide you no longer want to support the CDS DRM Agent, you can disable that agent during runtime and assign another option, such as None to MIDlets content. Use caution when disabling a DRM. Make sure that the DRM you are disabling is not currently associated with a content type. Follow this sequence:
1. Change the DRM assigned to the content type.
Even though the DRM is disabled, content protected under that DRM can still exist in the Content Delivery Server. Content submitted after a new DRM is assigned is protected under the new DRM. Another factor affected by changing the DRM is the pricing model associated with the content type. Changing DRMs can change which pricing models are available. The following section discusses pricing content in more detail.
The Catalog Manager administrator must associate one or more pricing models for each content type. A pricing model is the condition of purchase (per download, per periods of uses, and per number of uses) associated with content. The pricing models supported in the Content Delivery Server are defined in TABLE 2-10.
|
No charge for downloading content. Content can be downloaded any number of times for however long content is available. |
|
|
No charge for content on initial download. Subscriber must purchase content for subsequent downloads. |
|
|
Subscriber is charged for initial download of content. Subscriber is not charged for subsequent downloads. |
|
|
Every download[2] |
|
|
Subscriber can download content once after purchase and is charged for N uses. |
|
|
Subscriber can download content once after purchase and is charged for running content for the specified length of time, for example, 3 days, 2 weeks, or 1 month. |
|
|
Subscriber can download content an unlimited number of times during the subscription period and is automatically charged for the next period of use when the current period expires. |
|
|
Subscriber can download content an unlimited number of times during the interval and is charged for running content from the specified start date to the specified end date. |
The former usage pricing model of X downloads in Y days is no longer available by default. That pricing model is now used, optionally, as a grace period. A grace period, if configured at deployment, can be attributed to the Every Download pricing model (see TABLE 2-10). Upon purchase, a grace period allows additional numbers of downloads or extends the download period. The system administrator can set the properties pricing.model.recurringDownload.numberOfDays and pricing.model.recurringDownload.numberOfTimes to enable a grace period. See the Sun Java System Content Delivery Server Installation Guide for information on setting a grace period.
Each DRM supports some set of the pricing models available in the Content Delivery Server. The pricing models that you can assign to a content type are dependent on the DRM that is associated with the content type.
The Content Delivery Server supports the combinations of DRM options and pricing models as shown in TABLE 2-7.
You determine whether to enable all the available pricing models for a content type or just a subset. For instance, if you associate a CDS DRM Agent with MIDlets, you can elect to enable all the available pricing models possible with that DRM or a subset, such as first download only, per use, and per period.
You make the DRM selections and the pricing model selections for a content type on the MIME Types page in the Catalog Manager. All the pricing models supported by the Content Delivery Server are listed. Non applicable pricing models are not selectable. Therefore, if you selected None for the image content type, you cannot select the Per Use pricing model because it is not available without DRM protection.
Previously, a content item, such as a MIDlet, could have a combination of pricing models such as charge on first download only and charge per subscription. Such combinations are not possible with the use of digital rights management. To simplify management of content, all content items can have only one pricing model. For preexisting content items that have a pricing model combination, the first download only and recurring download models are no longer applicable.
At the same time that you select a pricing model, you have the option of creating pricing options for it. Having predefined pricing options gives you more control over the pricing of content and can make managing content easier. You can set up predefined pricing options for content providers to choose from instead of having them decide content pricing and usage terms.
Another benefit to creating predefined pricing options is that it enables you to apply the same purchase criteria to all contents with the same content type. For instance, all image content types can have the pricing option of $0.50 for every download. By changing the purchase price of a pricing option, you change the purchase price for all content using that pricing option at once. You always have the ability to edit a pricing option or create custom prices for specific content items as needed.
A pricing option consists of a unique ID for the pricing option, an option name, and the purchase characteristics of the content. The pricing option consists of the following elements:
A pricing option looks like this, for example:
1222 Ringtones-Jazz $.99 1st Download Only.
Pricing options cannot be deleted, you can only enable or disable them once they are created. Regardless of whether a pricing option is enabled or disabled, you can still edit the option through the Catalog Manager.
As the Catalog Manager administrator, you determine whether content providers are required to use the pricing options you enable for the content type or create a custom price based on the available pricing model. An option on the MIME types page allows you to restrict the content type to the pricing options you enabled. Content providers submitting content of that type must use the assigned pricing option.
You can change the pricing of content in the following ways:
Changing the pricing of content is dependent on several factors, such as the content item status, the DRM assigned, and whether the content item is copyrighted.
For a copyrighted content item, the pricing options you can choose from are dependent on the item's content type preferences alone because copyrighted content cannot have a DRM associated with it.
For a submitted content item that has a status of new, pending, or denied and is not copyrighted, the pricing options you can choose from are dictated by the DRM associated with the item's content type.
For a content item with a status of published or testing, the pricing options you can choose from depend on the following factors:
For example, suppose SpruceDraw, a content item of type midlet is published. At the time it is published, midlet has no DRM assigned and the pricing model of first download only. Therefore, SpruceDraw has no DRM assigned to it and uses the first download only pricing option. If no change occurs to the content type, the Edit Content page for SpruceDraw allows you to choose either first download only or every download.
Later, the content type preferences are edited so that midlet now uses OMA DRM 1.0 and the pricing models are changed to first download only and per interval. Because SpruceDraw is already published, its DRM option does not change, it is still None. While the available pricing models for midlet are now first download only, every download, and per interval, the per interval model is not available to content without DRM protection. So the Edit Content page for SpruceDraw does not list per interval in the Catalog Price list. When editing SpruceDraw, you can choose from first download only or every download.
If a content item uses OMA DRM 1.0 and one of the trials, per use, per period, or per interval pricing models, the pricing model cannot be changed because the content item would require reprotection, that is, a reapplication of the DRM. You can change the purchase price of the item, but not whether it has or does not have trial usage or its pricing model.
Sometimes you or a Vending Manager administrator might want to change the purchase price of a specific item of content. By doing so, you disassociate a content item from its pricing option. For example, suppose an item of content named Roses has the content type picture and a pricing option of $0.75 for first download only. You determine that Roses is priced at $.50 for first download only. When you edit the content and change its price, Roses becomes disassociated from other content of type picture with that pricing option. If the purchase price for picture content changes later, Roses is unaffected by the change because it is no longer associated with its original pricing option. Roses is considered to have a custom price. Any future changes to the purchase price for Roses must be made explicitly to that content item.
1. From the Catalog Manager administration console, click Content on the main menu bar.
The MIME Types page is displayed. This page shows the content types that are defined and the MIME types that are currently associated with each content type.
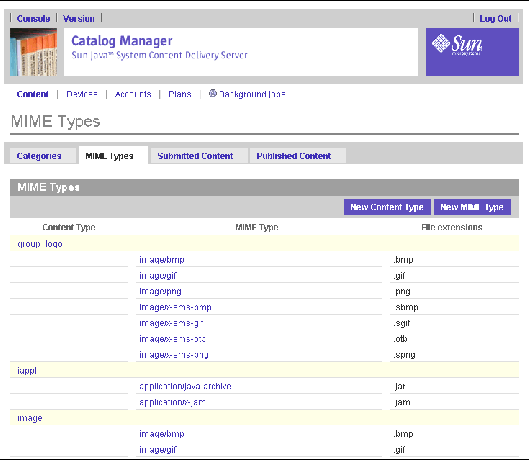
The following information is displayed for each MIME type:
1. Click the string in the MIME Type column on the MIME Types page.
The properties page for the MIME type is displayed.
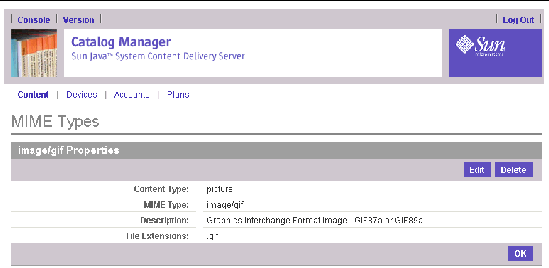
In addition to providing the Content type, MIME type, and File Extensions, the Properties page also provides a brief description of the MIME type.
2. Click OK to close the properties page.
1. From the Catalog Manager administration console, click Content on the main menu bar.
The New Content Type definition page is displayed.
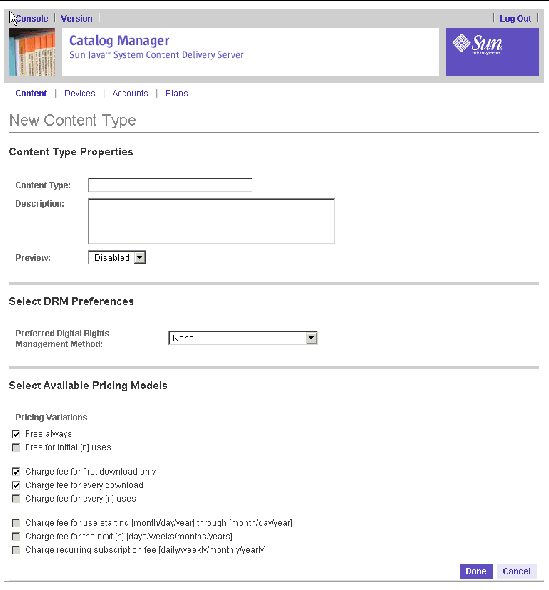
4. Enter the following information:
If you disable the Preview feature, the Preview field is not displayed in the Content Properties page.
Administrators must know which DRMs are applicable for specific content types. See Appendix B for a table of DRMs and associated pricing models. If an inapplicable DRM is assigned, submission of content with that DRM fails.
For instance, if you erroneously assign CDS DRM Agent to the image content type and a content provider attempts to submit a content item of type image, the content provider receives an error message that the submission failed.
See Content Protection for a discussion of DRMs.
6. Select the pricing models you want available for the content type.
All the pricing models appropriate for the selected DRM are available for selection.
See Appendix B for a table of DRMs and associated pricing models to be sure you are selecting an appropriate pricing model for the DRM selected.
8. Click OK to close the confirmation page.
1. From the Catalog Manager administration console, click Content on the main menu bar.
The MIME Types page is displayed.
3. Click the content type that you want to edit.
The Content Type Preferences page is displayed.
Make the necessary changes to the content type and description:
Only newly published content items have the new DRM and any new pricing options. Existing content items still have the previously assigned DRM and pricing option and are still available to subscribers.
If you unselect a pricing model, existing content retains their pricing options. For unpublished content items that used that pricing model, you must choose another pricing model when editing that content item.
Clicking the option restricts content providers to selecting the predefined pricing options you have enabled.
If you do not check Require Pricing, content providers can create custom pricing for the content being submitted. Note that content submitted with custom pricing must be manually edited.
If the list of pricing options requires no change or no pricing options exist yet, you can go directly to Step 4.
To create predefined pricing options, see Creating a Pricing Option for instructions. For a discussion of pricing options and why you would want to create them, see Pricing Options.
All changes to the content type are saved.
1. From the Catalog Manager administration console, click Content on the main menu bar.
The New Pricing Option page is displayed.
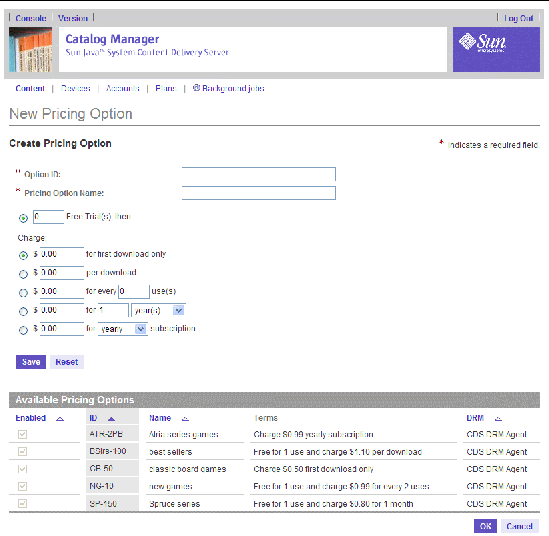
The fields displayed are relevant to the selected pricing models on the previous page. If no existing pricing options exist yet for the content type, the Available Pricing Options section is not displayed.
The Option ID identifies this specific pricing option for this content type.
6. Enter a unique Pricing Option Name.
The Option Name is an identifier that external systems can use to identify the pricing option for this content type.
7. Select free usage or non-free usage or enter the number of free trials.
The fields shown are dependent on the pricing models you made available for this content type when creating or editing the content type. TABLE 2-6 lists and defines the supported pricing models.
8. Select the Charge option you want to apply to the content type.
Unless the pricing model is Always Free, enter a monetary value and enter values for other fields in the option as required.
9. Click Save to add the new option to the list of available pricing options.
You can continue to add more options. Click Save after each option to add it to the pricing options list. Click Reset to clear all the fields on the page.
Clicking OK before clicking Save cancels the pricing option creation and clears the fields in the page. You are returned to the Content Type Preferences page.
Clicking Cancel terminates the operation and cancels any saved pricing options
You are returned to the Content Type Preferences page.
11. Click Done to complete the operation.
Clicking Cancel terminates the operation being performed on this page and returns you to the MIME Types page.
You can edit attributes of an existing pricing option other than the pricing model. All content items that use that pricing option are changed immediately both in the Catalog and Vending Managers and on subscriber devices.
1. From the Catalog Manager administration console, click Content on the main menu bar.
The Content Type Preferences page is displayed.
4. In the Available Pricing Options section, click Edit for the option you want to change.
The Content Type - Edit Pricing page is displayed.
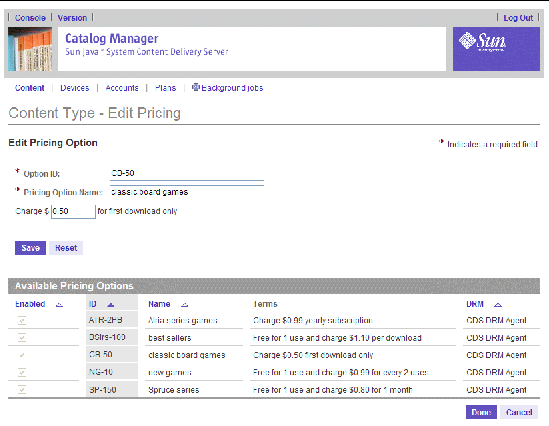
5. Change the following fields as needed:
6. Click Save to save your changes.
The Content Type Preferences page is displayed. Changes to the pricing option are immediate and content using that pricing option are updated in the Catalog Manager. If auto-updating of prices is selected in the Vending Manager, any change to the purchase price to both the pricing option itself and to content using the pricing option is automatically updated in the Vending Manager. Otherwise, the Vending Manager administrator must manually update the purchase price of the pricing option and the affected content.
8. Click OK to close the Confirmation page.
To create a custom price for an individual item of content, see Editing Content. To create a custom price for multiple content items at once, see Setting Custom Prices for Published Content.
Deleting a content type removes that content type and its associated pricing options from the current deployment of the Content Delivery Server. Use caution when using this command because it cannot be undone.
Content types with associated MIME types cannot be deleted unless the associated MIME types are deleted first (see Deleting a MIME Type). The only supported content types that cannot be deleted at all are midlet and iappli. Content types with existing pricing options cannot be deleted.
To delete a content type before a MIME type is associated, follow these steps:
1. From the Catalog Manager administration console, click Content on the main menu bar.
The MIME Types page is displayed.
3. Click the content type that you want to delete.
The Content Types Preferences page is displayed.
You are prompted to confirm the deletion.
A page is displayed indicating that the content type is deleted.
6. Click OK to close the Confirmation page.
Pricing options cannot be deleted, but you can disable a content type's pricing option. When an option is disabled, content providers do not see that pricing option in the list of predefined pricing options when submitting content of that content type. Existing content in the catalog that use that pricing option are not affected. Subscribers can see the existing content and can purchase the content with the original price. You can enable the pricing option at a later time if desired.
1. From the Catalog Manager administration console, click Content on the main menu bar.
The MIME Types page is displayed.
3. Click the content type with the pricing option you want to disable.
The Content Type Preferences page is displayed.
4. In the Available Pricing Options section, clear the check box under the Enabled column for the pricing option you want to disable.
You can clear more than one option at a time. If you clear all the available pricing options, the Require Pricing Options feature is unchecked. Content providers are forced to create custom prices for content being submitted.
An alternative to disabling a pricing option is to make it unavailable by editing the content type and clearing one or more of the checked pricing models. Once the pricing model is made unavailable, content providers do not see any predefined pricing options that use that model when submitting content.
6. Click OK to close the Confirmation page.
1. From the Catalog Manager administration console, click Content on the main menu bar.
The MIME Type definition page is displayed.
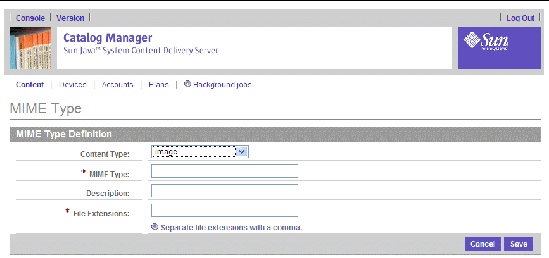
4. Enter the following information:
5. Click Save to save the MIME type.
A Confirmation page is displayed.
The list of MIME types is displayed.
When associated with MIDlets, the following MIME types are required by the Content Delivery Server and cannot be edited or deleted:
When associated with iAppli applications, the following MIME types are required by the Content Delivery Server and cannot be edited or deleted:
When associated with other content types, the MIME types previously listed are treated as any other MIME type.
To edit a MIME type, follow these steps:
1. From the Catalog Manager administration console, click Content on the main menu bar.
The MIME Types page is displayed.
3. Click the MIME type that you want to edit.
The properties page for the MIME type is displayed.
The MIME Types Definition page is displayed. An asterisk (*) beside a field indicates that it is a required field.
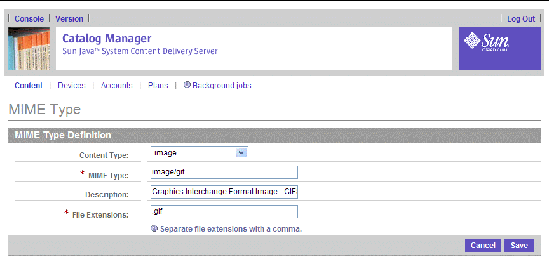
5. Make the necessary changes.
A Confirmation page is displayed.
The MIME Type Properties page is displayed.
8. Click OK to close the confirmation message.
You cannot delete a MIME type if content with that MIME type is submitted or if a device references it. You cannot delete the following MIME types under the conditions listed:
When associated with other content types, the MIME types previously listed are treated as any other MIME type.
To delete a MIME type, follow these steps:
1. From the Catalog Manager administration console, click Content on the main menu bar.
The MIME Types page is displayed.
3. Click the MIME type that you want to delete.
The MIME Types properties are displayed.
You are prompted to confirm the deletion.
A page is displayed indicating that the MIME type is deleted.
The list of MIME types is displayed.
Developers submit content in packages that consist of their created content and XML files with support and description information. Developers submit content through the Developer portal. When content is submitted to the Catalog Manager, the Catalog Manager runs an automated validation process on the content to ensure there is no malicious content and the content matches the Catalog Manager's supported devices.
The Submitted Content page displays all content submitted to the Catalog Manager. This is the default page displayed when you first log in to the Catalog Manager.
Use the Submitted Content page to review content before you publish it to your Vending Managers. The page provides the total number of submitted contents. These items can consist of content undergoing review as well content whose status has changed from Published to Pending, Testing, or Denied. The total number of items in a particular state are displayed to the left of each state.
Submitted content can have one of the statuses described in TABLE 2-8.
The Submitted Content page displays the total number of submitted content, so you know what the manager's workload is and what to expect. You can view a list of all content in any state.
To view submitted content by state, follow these steps:
1. From the Catalog Manager administration console, click Content on the main menu bar.
The Content Database Management page is displayed for submitted content.
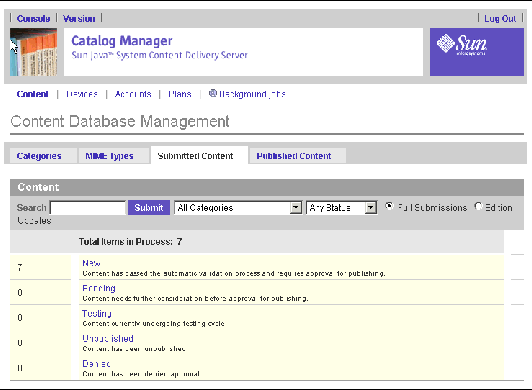
2. Click the title of the state that you want to view.
For example, click New to view all new content.
The Browse and Search Results page shows all submitted content for the selected state.
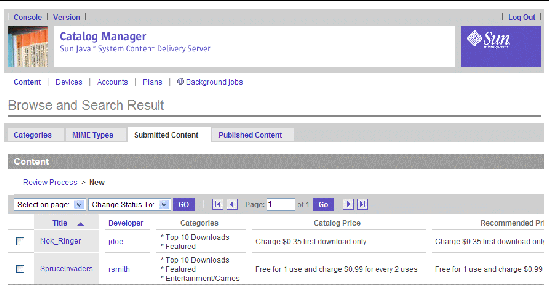
The following information is displayed for each item:
If the content was submitted for free, the Catalog Price and Cost shows Charge Free always.
3. Click Review Process on the navigation bar or click Content in the main menu bar to display the list of submitted content.
To view all submitted content, use the search feature. Leave the search field blank and select All Categories and Any Status. When searching for content, you can enter a part of a content title or the full title in the Search text field. A list of all content containing an exact match of the search entry is displayed.
To view the properties for an item, click the title of the item. The View Application Properties page is displayed. If icons, documentation, or screen shots were submitted with the content, you can click the View button for the item to see what was submitted. If the item is a ring tone and a preview was submitted, you can click the Listen button to hear the preview.
The Editions Database Management page displays the total number of submitted editions, and, of that total, how many editions are in a New, Pending, or Denied state.
1. From the Catalog Manager administration console, click Content on the main menu bar.
The Content Database Management page is displayed for submitted content.
The Editions Database Management page is displayed.
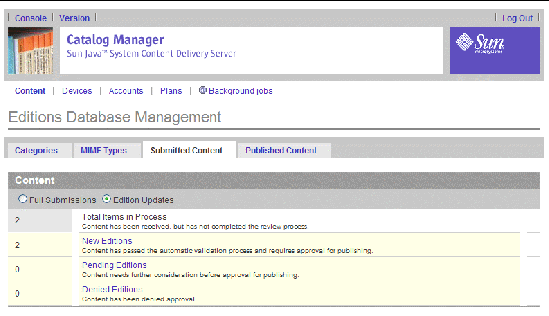
3. Click the status that you want to view.
For example, click New Editions to view all new editions. The Browse and Search Results page shows all submitted editions for the selected status.
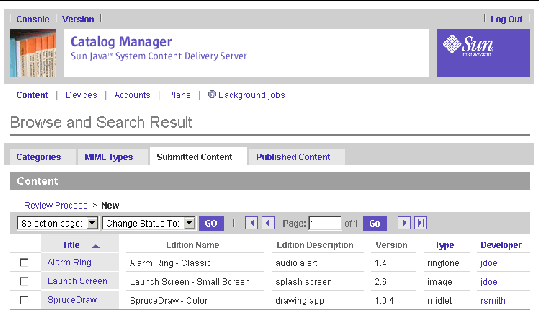
The following information is displayed for each edition:
To view the properties for a specific edition, click the title of the desired edition.
The properties for the edition are displayed in the View Content Edition page. Clicking OK displays the View Content Properties page for the original content. Click Back on the View Content Properties page to return to the list of editions.
For content that is defined to have one or more supporting devices, you might need to add additional supporting devices as they become available. To add devices to existing content, see Adding Supported Devices to Existing Content.
To return to the main page for Submitted Content, click Review Process in the navigation bar.
You can remove an edition by making it unavailable for use by subscribers by specifying that no devices are matched to the edition.
To make an edition unavailable to subscribers, follow these steps:
1. From the Submitted Content page, select the status of the edition you want to disable.
2. Click the title of the content.
3. Go to the Editions section of the View Content Properties for the selected content.
4. Click on the instrumented version of the edition.
5. Click Select on the Supported Devices field of the View Content Edition page.
6. Select the option, Force no devices to be selected for this edition (disable edition).
No devices are associated with the selected edition. The edition does not appear in the subscriber's content list but does appear in the list of submitted content. The View Content Edition page for the edition shows no devices listed in the Capable Device Models and Matched Devices fields.
To find a specific item of content, follow these steps:
1. From the Submitted Content (or the Published Content) tabbed page, enter either the content name or a part of a content title or the full title in the Search text field.
You can refine your search by selecting the category and status that you want to search from the drop-down lists. From the Published Content tabbed page, search in categories for content.
Searching in Submitted Content shows matches for all submitted content, including content that is published. Searching in Published Content shows matches only for published content.
Note that you can only search for content and not editions.
A list of all content containing an exact match of the search entry is displayed.
To show all submitted content, leave the search field blank and select All Categories and Any Status. You can click on a highlighted column title to alphabetically sort the content for that information type.
You can change that status of submitted content to one of the types described in TABLE 2-9.
|
Content requiring further review before being made available. |
|
When a content's status is changed, a notification of the change in status is sent to the content provider. For more information on notifications sent to the provider, see the Sun Java System Content Delivery Server Content Developer Guide.
To change the status of content, follow these steps:
1. From the Catalog Manager administration console, click Content on the main menu bar.
The Content Database Management page is displayed for submitted content.
3. Click the title of the status that contains the content with which you want to work.
For example, click New to work with new content.
4. Select the items that you want to change.
To select all the items in the list, select Select All from the Select on Page drop-down list.
5. From the Change Status To drop-down list, select the status that you want to assign to the item.
You can select either Published, Pending, Denied, Deleted, or Testing.
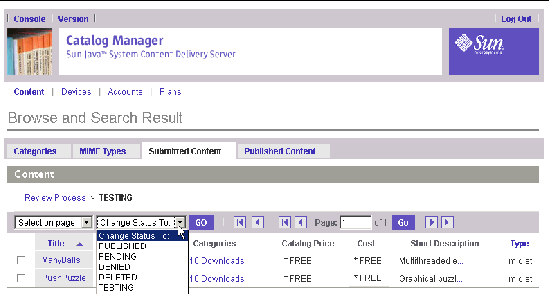
The Confirm: Change Status page is displayed. You can enter a message to the developer to provide an explanation of the status of the content.
7. Click OK in the Change Status page to confirm the status change.
The status of the content is updated. If there are content items remaining in the selection list, clicking OK displays the Browse and Search Result with the list of content items. Repeat Steps 4 through 6 until you have changed the status of all the remaining content items.
When a status change is made to the last content items, the Browse and Search Result page displays a confirmation message.
8. Click Done in the Browse and Search Result page to close the confirmation message.
If the vending server is busy at the time you change the content status, instead of a confirmation page, you are notified that the server is busy and the Vending Manager did not receive the change yet.
If an error occurs when communicating with the Vending Manager, an error message appears instead of the confirmation page.
You can also change the status of content from the Edit Application Properties page. See Editing Content.
1. From the Catalog Manager administration console, click Content on the main menu bar.
The Content Database Management page is displayed for submitted content.
The Editions Database Management page is displayed.
3. Click the title of the status that contains the edition with which you want to work.
For example, click New Editions to work with new editions.
4. Select the editions that you want to change.
To select all the editions in the list, select Select All from the Select on Page drop-down list.
5. From the Change Status To drop-down list, select the status you want to assign to the edition.
You can select either Published, Pending, Denied, Deleted, or Testing.
A confirmation page is displayed. You can enter a message to the developer to provide an explanation of the edition status.
7. Click OK to confirm the status change.
You can use the Edit Content page to change one or more properties of a content item. For instance, you can change which categories contain the content item. You can also use this page to change the pricing option for submitted content on an individual basis if the pricing option currently set for the content is not desired
1. Locate the content on one of the status lists or perform a content search to locate the content.
2. Click the title of the content that you want to edit.
The View Content Properties page is displayed. This information is taken from the content originally submitted by the developer. All editable fields are displayed with a white background. You can also view and edit the content developer's profile by clicking View Profile next to the developer's name. See Editing a Developer Account for more information.
If icons, documentation, or screen shots were submitted with the content, you can view the items by clicking on the View button for the item. If the item is a ring tone and a preview was submitted, you can click the Listen button to hear the preview.
3. Click Edit from the View Content Properties page.
The Edit Content page is displayed. An asterisk (*) beside a field indicates that it is a required field.
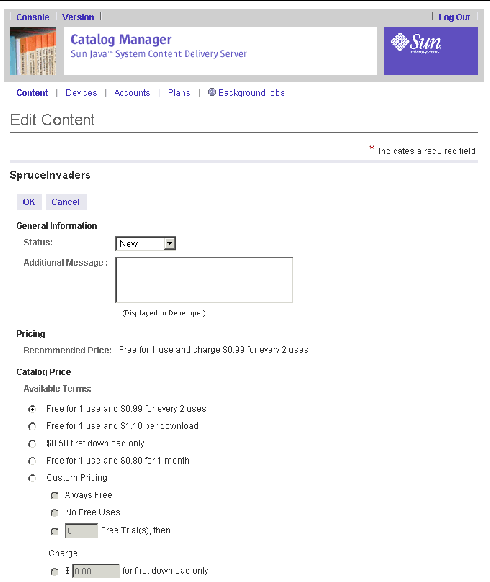
This page allows you to edit the following fields:
The pricing options designated by the content provider are displayed just above the Catalog Price section. You can change the purchase price in the Catalog Price section. TABLE 2-10 describes the pricing options.
|
No charge for downloading content. Content can be downloaded any number of times for however long content is available. |
|
|
No charge for content on initial download. Subscriber must purchase content for subsequent downloads. |
|
|
Subscriber is charged for initial download of content. Subscriber is not charged for subsequent downloads. |
|
|
Every download[3] |
|
|
Subscriber can download content once after purchase and is charged for N uses. |
|
|
Subscriber can download content once after purchase and is charged for running content for the specified length of time, for example, 3 days, 2 weeks, or 1 month: |
|
|
Subscriber can download content an unlimited number of times during the subscription period and is automatically charged for the next period of use when the current period expires: |
|
|
Subscriber can download content an unlimited number of times during the interval and is charged for running content from the specified start date to the specified end date. |
Once the content is published, the only attribute that can be changed later without disassociating the content from its pricing option is the purchase price. See Changing the Pricing of Content for more information.
Be aware that by creating a custom price, you are disassociating this item for its pricing option. If you need to reapply a pricing option to the content later, you can do so, however, you must select a pricing model that is compatible with the pricing model used with the custom price.
For example, if the custom price used a download pricing model (for instance $0.99 for every download), the pricing option you reapply must also use a download pricing model (first download only, every download, or free always).
If other descriptive fields are present for the content, edit those fields as necessary.
4. Edit the content as needed, then click OK.
The View Content Properties page displays the updated content.
To set the pricing characteristics for multiple content items at once, see Setting Custom Prices for Published Content.
The Published Content section displays all content that is published to the Vending Managers. The administration tasks associated with Published Content are the same as those associated with managing Submitted Content. This section describes viewing published content and published editions. See Managing Submitted Content for information on searching for, changing the status of, and editing content.
|
Note - If you change a content's status from Published to another state, the content is removed from the Published Content list and is not included in the list of published categories. |
1. From the Catalog Manager administration console, click Content on the main menu bar.
2. Click the Published Content tab.
The Published Content page displays a list of the main categories defined. A number beside each category indicates the number of published content packages.
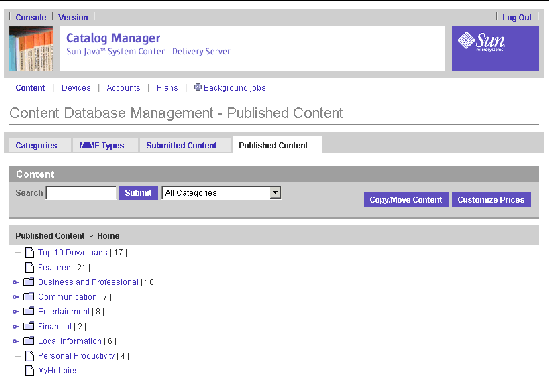
3. If a category has subcategories, click the category name to expand the category.
For categories without subcategories, click the name to display the list of content in that category.
To view the properties for an item, click the title of the item. The View Content Properties page is displayed. If icons, documentation, or screen shots were submitted with the content, click the View button for the item to see what was submitted. If the item is a ring tone and a preview was submitted, you can click the Listen button to hear the preview.
You can either make content temporarily unavailable or remove content from the catalog by changing its status.
1. From the Catalog Manager administration console, click Content on the main menu bar.
2. Click the Published Content tab.
3. Navigate to the content you want to unpublish.
4. Select one or more content items.
5. Select Unpublished or Deleted from the Change Status To drop-down list.
Note that for unpublished content using OMA DRM 1.0, you can change the purchase price but not the pricing model. You can change the pricing option of content with any other DRM type, including No DRM.
You might want to provide an explanation for removing the content item in the message field.
1. From the Catalog Manager administration console, click Content on the main menu bar.
2. Click the Published Content tab.
3. Navigate to the item that you want to work with.
You can use the search feature or view the list of content for the category that contains the item.
You can sort the display of the content items by clicking on a highlighted column title on the Browse and Search Result page.
4. Click the title of the item.
The View Content Properties page is displayed. The list of editions available are shown in the Editions section at the end of the page.
5. Click the name of the edition that you want to view.
The edition properties are displayed in the View Content Edition page. Click OK to return to the View Content Properties page of the original content. Click an instrumented edition version and you can select supported devices for it. See Adding Supported Devices to Existing Content for details.
You can make a published edition unavailable to subscribers by disabling the edition, that is, by specifying that no devices are matched to the edition. To disable an edition, click on the instrumented edition you want to disable in the Editions section of the View Content Properties page and follow steps 5-7 in Removing an Edition.
You can move or copy whole categories of content at a single time in the Catalog Manager saving you considerable time and effort. By copying or moving one or more categories, you are copying or moving all the content items within those categories.
|
Note - When scheduling a copy or move operation, be aware that if large numbers of categories and content are being copied or moved, the operation can take some time to complete. |
You can also selectively move or copy individual items of content, see Copying or Moving Content Items for more information.
1. From the Catalog Manager administration console, click Content on the main menu bar.
2. Click the Published Content tab.
The Copy/Move Content page is displayed. The default selection is Category/Categories.
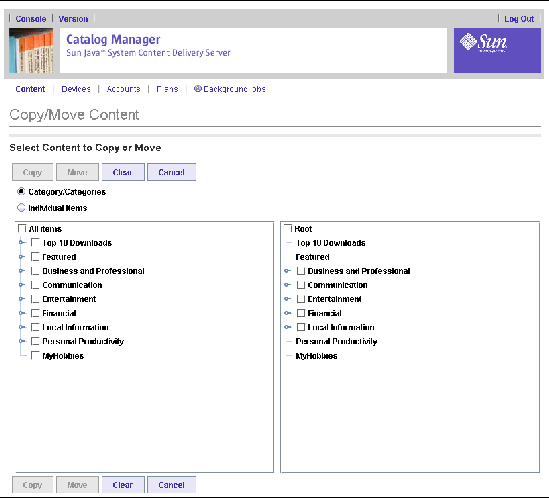
Category and content item names change from gray to black as the categories and content items are loaded. Wait until all items are loaded before making a selection.
4. Select the categories you want to copy or move.
Under the source column on the left, select one or more categories to copy or move. If you select a higher level category, all of its subcategories, including their content items, are also copied or moved. You cannot select individual items of content. Also, you cannot copy or move a parent category into one of its child categories. You must click the check box to select an item in the tree. See Copying or Moving Content Items for more information.
Note that an X indicates a selected category. A dot (.) indicates that at least one category has been selected in the column. A higher level category with a dot indicates that at least one of its subcategories is selected.
5. Select one or more destination categories.
Under the destination column on the right, select one or more higher level categories. The destination category you select cannot be a terminal category. A terminal category is the lowest level category and contains only content items. You must click the check box to select an item in the tree.
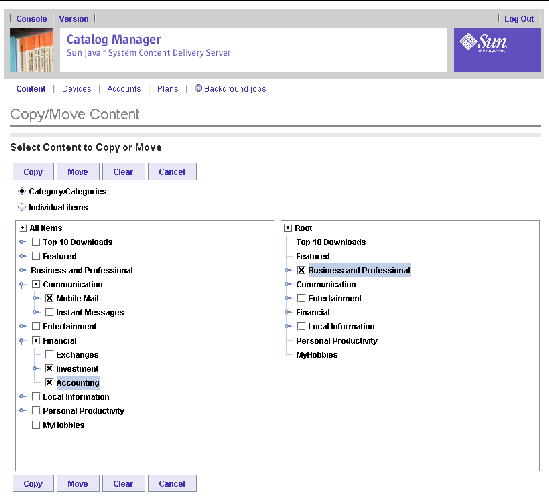
The Copy and Move buttons only become active when at least one selection is made in both the source and destination trees. If one category tree does not have a selection, for instance, if you clear all selections in a tree, the buttons are inactive.
7. Confirm or cancel the operation.
If copied, categories and their associated content are duplicated under each destination category. If moved, categories and their content are removed from the original location and placed in the destination category. If more than one destination category is selected, categories and content are duplicated under each destination category.
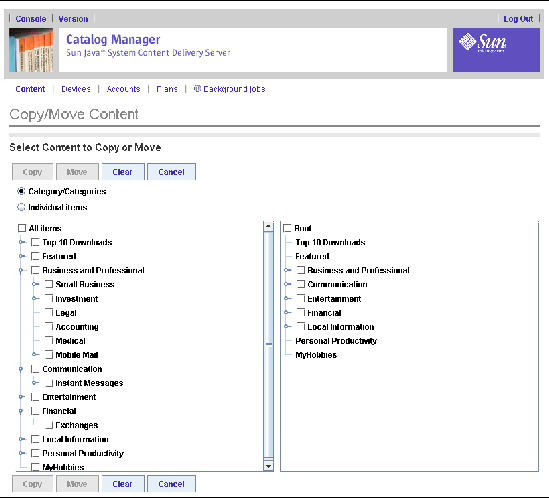
The preceding figure shows the results of moving the Mobile Mail, Investment, and Accounting categories to the Business and Professional category. All content items in Mobile Mail, Investment, and Accounting were also moved.
If you copy or move a category to another category and decide you no longer want that category in its new location, you can take one of the following actions:
By selecting Individual items on the Copy/Move Content page, you can select specific content items to copy or move to other categories.
|
Note - When scheduling a copy or move operation, be aware that if large numbers of categories and content are being copied or moved, the operation can take some time to complete. |
1. From the Catalog Manager administration console, click Content on the main menu bar.
2. Click the Published Content tab.
The Copy/Move Content page is displayed.
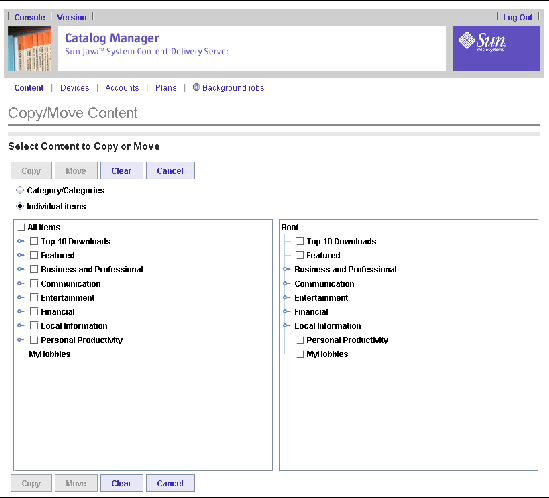
Category and content item names change from gray to black as the categories and content items are loaded. Wait until all items are loaded before making a selection.
5. Select the content items in one or more categories that you want to copy or move.
Under the source column on the left, you can select one or more content items to copy or move but you cannot select categories. You can expand a category to see its content items. You must click the check box to select an item in the tree. See Copying or Moving Categories of Content for more information.
Note that an X indicates a selected content item. A dot (.) indicates that at least one content item has been selected in the column. A category with a dot indicates that at least one of its content items is selected.
6. Select one or more destination categories.
Under the source column on the right, the destination categories you select must be terminal categories. A terminal category is the lowest level category and contains only content items. You must click the check box to select an item in the tree.
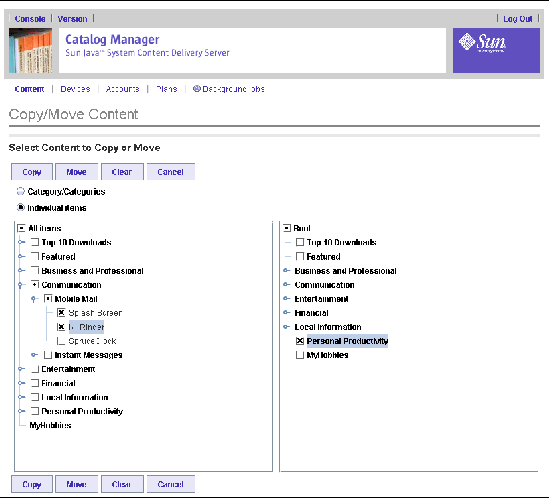
The Copy and Move buttons only become active when at least one selection is made in both the source and destination trees. If one category tree does not have a selection, for instance, if you clear all selections in a tree, the buttons are inactive.
8. Confirm or cancel the operation.
If copied, content is duplicated under each destination category. If moved, content is removed from the original location and placed in the destination category. If more than one destination category is selected, content is duplicated under each category.
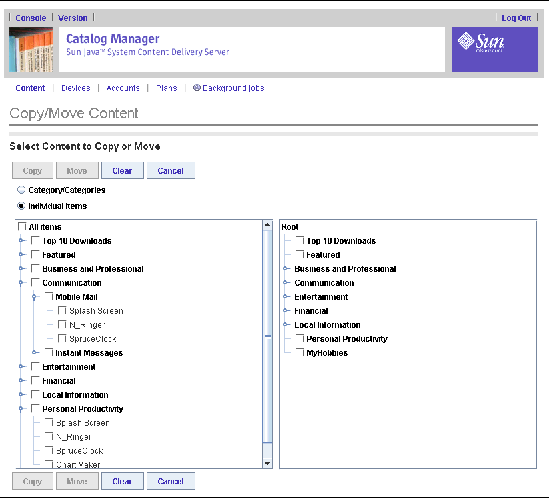
The preceding figure shows the results of copying the content items, N_Ringer and Splash Screen to the Personal Productivity category. The content items are still available in the Mobile Mail category.
If you copy a content item to a category and decide that you do not want the item in that category, you can edit the content to change the category assignment. See Editing Content for information.
Another way for you to manage content pricing is to set the price for multiple content items at once. You can change the purchase price for content in one ore more categories. Note that while you can change the purchase price, you cannot change the pricing model.
For instance, if you select the Featured and Entertainment categories, you can change the purchase price for all the content in those categories or specific content items in those categories. You set a specific purchase price, apply a percentage increase or decrease, or increase or decrease the price by a set amount.
Pricing for content published as Free cannot be changed using the Customize Prices feature.
1. Click Content from the Catalog Manager's main menu.
2. Click the Published Content tab.
The Customize Prices page is displayed. An asterisk (*) beside a field indicates that it is a required field.
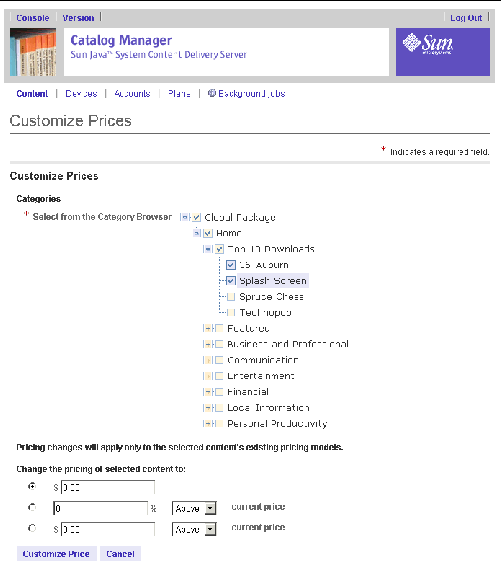
4. Select the category or subcategories of content or specific contents.
To change the purchase price of all the contents of a category, simply click the category itself.
To change the purchase price of specific content items in a category, navigate through the category to select individual content items.
5. Change the purchase price in one of the following ways:
The price is applied to all selected content regardless of their pricing models. For example, if SpruceDraw is $5.00 per monthly subscription and Launch Screen is $0.50 per download, increasing the purchase price by 10% results in SpruceDraw being offered at $5.50 per monthly subscriptions and Launch Screen at $0.55 per download.
7. Click OK in the confirmation dialog box to establish the change.
This procedure has no Undo operation. Carefully check that your pricing changes will affect only the desired contents before you click OK. Otherwise, you must manually reset the pricing for erroneously affected content.
The Catalog Manager manages the devices supported by the Content Delivery Server. A device in the Catalog Manager refers to a specific mobile device model.
Device capabilities are the criteria that the Catalog Manager uses to define which devices can download specific content. When a developer submits content to the Content Delivery Server, device capabilities are matched to the content submitted.
|
Note - When capability matching is run for all content for a device and one or more items of content fail verification, the process completes but the Background Jobs list shows a failed job. You cannot retry this job. The failed content items must be corrected. Another capability matching process then starts for those items. You can check the Background Job Detail page for the failed job to see which content failed verification. See Getting Job Status for information on background jobs. |
Device capabilities include the following:
To determine which devices can access the submitted content, the Content Delivery Server performs a capability match comparing the capabilities of the devices defined in the Catalog Manager with the capabilities required by the content submitted by the developer. Only subscribers with devices capabilities that match the capabilities required by the content can access the content.
Define the devices that you want to support before you make the Content Delivery Server available to developers and subscribers.
The following device management tasks are described in this section:
When an operation is performed (editing, deleting, adding, and so on), the Content Deliver Server puts a background job notification in the main menu bar. You can click on the notice to see details of jobs that were or are running in this session. See Getting Job Status for more information.
Device libraries identify the APIs that are supported by a device. Libraries are also used in Developer Profiles to define the set of APIs that developers can use in the applications that they submit. See Managing Developer Plans for information on plans and profiles.
Device libraries are based on the Java class library. When you define a device library to the Content Delivery Server, you submit the JAR or ZIP file that contains the APIs that you want to support.
1. From the Catalog Manager administration console, click Devices on the main menu bar.
The Device Libraries page is displayed, showing the submitted libraries.
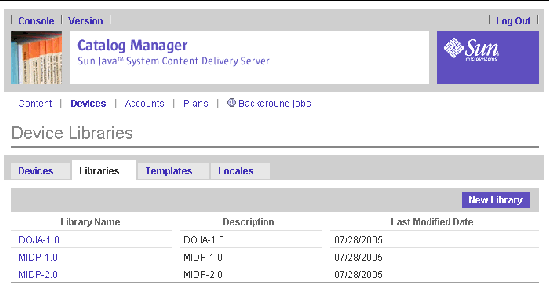
The following information is displayed for each library:
To view the properties for a specific device library, follow these steps:
The properties page shows the name, description, date last modified, and the APIs allowed for devices and profiles that include the library.
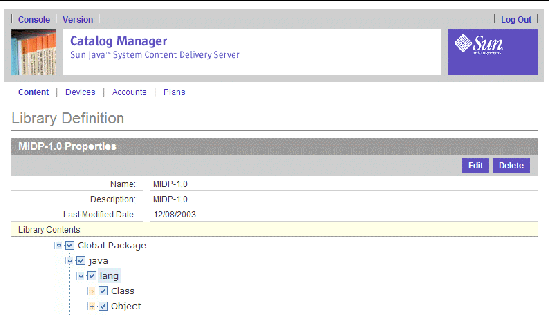
2. When you are done viewing the properties, click OK to close the properties page.
1. From the Catalog Manager administration console, click Devices on the main menu bar.
The list of libraries is displayed.
The Library Definition page is displayed.
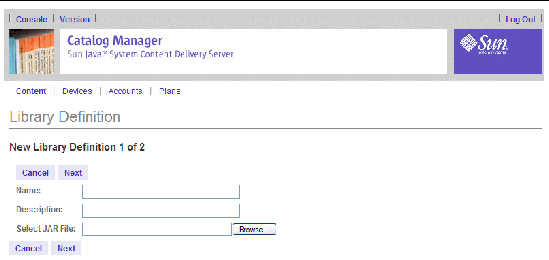
4. Enter the following information:
The second page of the library definition process is displayed.
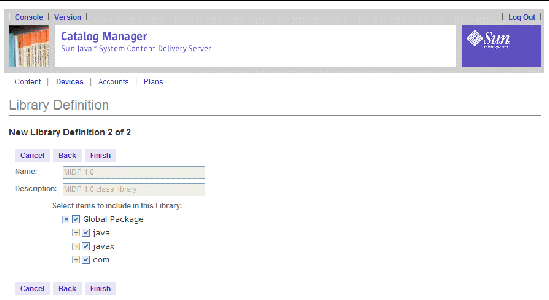
6. Select the items in the tree that you want to include in the library.
Clear any items that you do not want to include.
To select individual methods, expand the package by clicking the plus sign (+) next to the check box for the package.
7. Click OK to save the new library.
A confirmation page is displayed.
8. Click OK to return to the list of libraries.
1. From the Catalog Manager administration console, click Devices on the main menu bar.
The Device Libraries page is displayed.
3. Click the name of the library that you want to edit.
The Library Definition page is displayed.
5. Make the necessary changes.
You can edit only the name and description of a library that is in use. A library is in use if it is assigned to a device or a Developer Profile.
A confirmation page is displayed.
7. Click OK to display the library properties.
You cannot delete a library that is in use. A library is in use if it has been assigned to a device or a Developer Profile.
To delete a device library, follow these steps:
1. From the Catalog Manager administration console, click Devices on the main menu bar.
The Device Libraries page is displayed.
3. Click the name of the library that you want to delete.
The Library Definition page is displayed.
You are prompted to confirm the deletion of the library.
6. Click OK to display the list of libraries.
Content descriptor templates are used to describe content other than MIDlets (such as ring tones, pictures, and Symbian applications) similar to the way Java Application Descriptor (JAD) files are used to describe MIDlets. The templates are also used to describe the download mechanism used by a device.
Content descriptor templates are required for two step downloading of content to a device. You specify one step or two step downloading when you assign capabilities to a device. See Specifying Device Capabilities for additional information.
The Content Delivery Server provides descriptor templates for Content Object Descriptor (COD) and General Content Descriptor (GCD). You can define other templates as needed.
TABLE 2-11 shows the Content Delivery Server content attributes that you can use to customize the template for your needs.
The following code shows a sample content descriptor template.
1. From the Catalog Manager administration console, click Devices on the main menu bar.
The Content Descriptor Templates page is displayed, showing the currently defined templates.
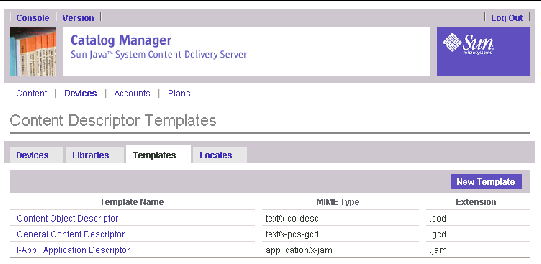
The following information is displayed for each template:
To view the properties for a specific template, click the template name. The properties page shows the name, MIME type, extension, and XSL description of the template.
1. From the Catalog Manager administration console, click Devices on the main menu bar.
2. Click the Templates tab to display the list of templates.
The Content Descriptor Template Definition page is displayed.
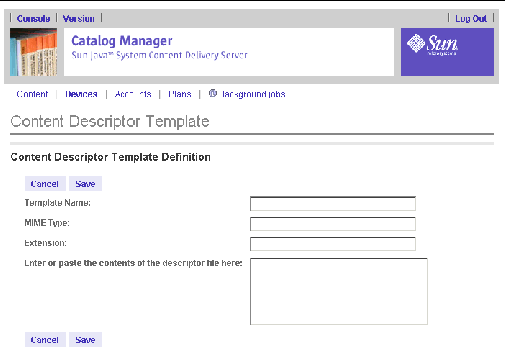
4. Enter the following information:
5. Click Save to save the new template.
A confirmation page is displayed.
6. Click OK to display the list of templates.
1. From the Catalog Manager administration console, click Devices on the main menu bar.
The list of templates is displayed.
3. Click the name of the template that you want to edit.
The template properties are displayed.
5. Make the necessary changes to the template properties.
The fields are the same as those described in Adding a Content Descriptor Template.
A confirmation page is displayed.
7. Click OK to display the template properties.
Device definitions identify the devices supported by the Content Delivery Server and describe the capabilities of the device. You can add devices as needed and remove devices that are not being used.
To view the devices defined for your enterprise, click Devices from the main menu bar. The Device Management page lists the models in the order in which they were created in the system.
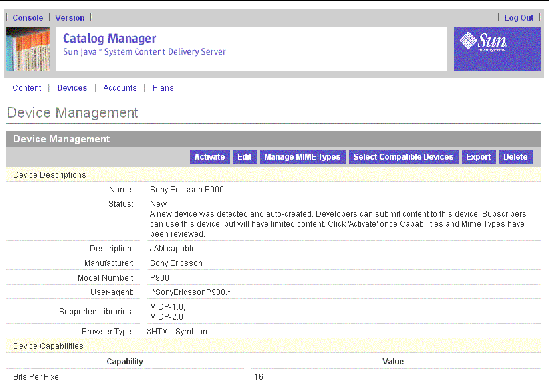
Periodically, the Content Delivery Server might detect that a new device exists. The new device is added to the list of devices but has a status of new or quarantined. Auto-detection and provisioning of detected devices is only possible if the property, autoCreate.newDevice, is set to true in the Subscriber Portal properties file.
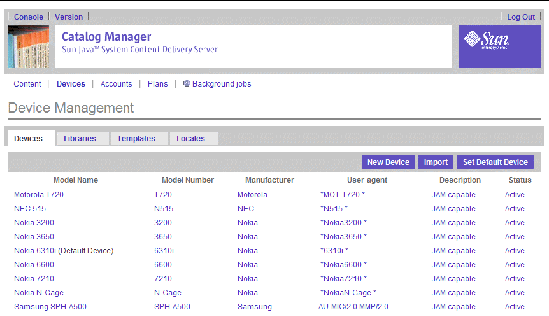
The following information is displayed for each device.
You can change the status of a device from New to Active by clicking the Activate button on the selected new device's Device View page.
Change the status of a device from Quarantined to Active by clicking the Activate button on the selected quarantined device's Device View page.
Use the New Device command to add a device to the Content Delivery Server database. An XML file of the device definitions is created for you. If you have an existing device, you can import it directly into the Content Delivery Server, see Importing Devices.
1. On the Device Management page, click New Device.
The Device Management page is displayed. An asterisk (*) beside a field indicates the field is required.
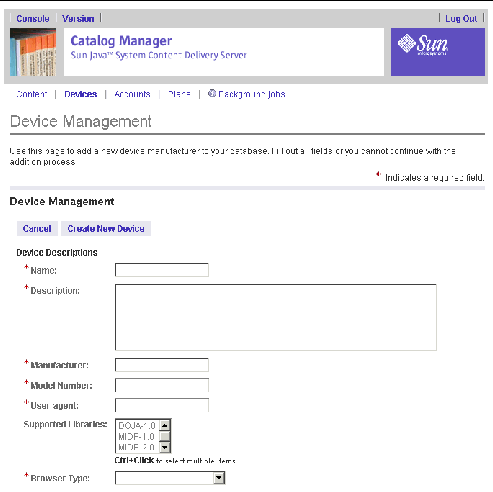
2. Specify the following fields:
The regular expression you enter must match the entire user-agent expression given by the device. You can specify wildcards in the string as .* but be careful where you place it. For example, if the user-agent from a device is SAMSUNG-SGH-E700-OLYMPIC2004/1.0 UP.Browser/6.1.0.6 (GUI) MMP/1.0 (Browser WAP Proxy/1.0), the user-agent regular expression pattern, SAMSUNG-SGH-E700.*, matches it. The expressions, SAMSUNG-SGH-E700 and .*SAMSUNG-SGH-E700, do not match as they only partially match the user-agent coming from the device.
If you do not see the browser type you need in the list, update the browser.config file in $CDS_HOME/deployment/deployment-name/conf directory. For information on how to add new browser templates, see Chapter 7, "Device-Specific User Interface Framework" in the Sun Java System Content Delivery Server Integration Guide.
For MicroEdition Configuration and MicroEdition Profile, you must select all applicable libraries. For example, if you have content that supports CLDC 1.0 and content that supports CLDC 1.1, you must select both libraries so that content supporting each library runs on the device.
If the Push Type is SMS, you must also select an SMS delivery type. You can choose NSM, EMS, or None. See Appendix A for more information on device capabilities.
The Device Management page is displayed that shows the properties of the new device. A device definitions XML file is created for the device. You can click on the device name in the list of devices and click Export to see the contents of the file.
The Device Management page is displayed that shows the list of devices.
After you add a device, you must specify the device capabilities. See Specifying Device Capabilities.
Once the new device is added, you also need to configure the device's MIME type mappings, see Mapping MIME Types to a Device.
1. From the Device Management page, click the device name to select it.
The properties page for the device is displayed.
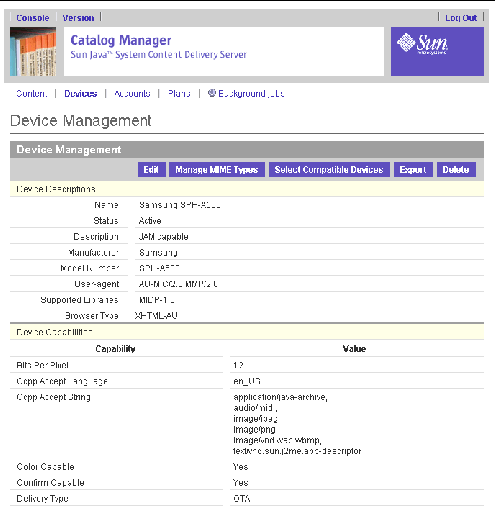
The Device Management page for editing device capabilities is displayed. An asterisk (*) beside a field indicates that it is a required field.
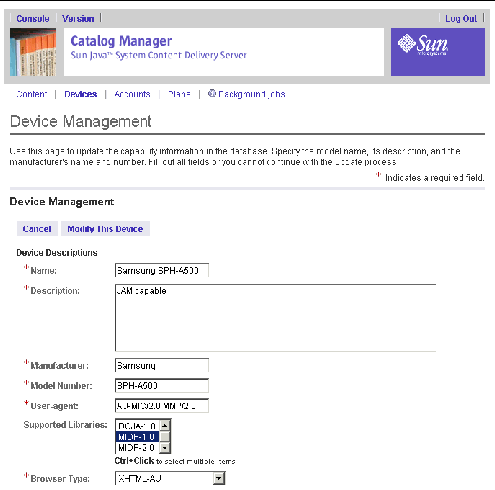
If the Edit button is not available, wait a few minutes for the previous edit request to complete before attempting to make more changes. When you change the capabilities of a device, the capability matching process is run to update the list of content that matches the device. If there is a lot of content to check, the process can take a while.
3. Check the capabilities required for the device and edit the properties as needed.
If the Push Type is SMS, you must also select an SMS delivery type. You can choose NSM, EMS, or None.
See Appendix A for information on device capabilities.
The Device Management page is displayed that shows the properties of the new device.
The Device Management page is displayed that shows the list of devices.
When you are sure a newly detected device is capable of supporting content, you can make that device available to developers and subscribers by changing its status from New or Quarantined to Active.
To activate new or quarantined devices, follow these steps:
1. Click Devices from the Catalog Manager menu bar.
2. Click the new or quarantined device from the list of devices.
3. Click the Activate button in the Device Management page for the selected device.
Each device has specific requirements for the content that it can support. You must specify the MIME types supported for each device that you define. For each MIME type supported by the device, do the following:
You can select OTA - One Step, OTA - Two Step, Nokia Smart Messaging (NSM) or Enhanced Messaging (EMS).
One step download occurs when all information associated with the content is downloaded in a single step. One step download is valid for any content type other than MIDlets. If a descriptor file is associated with the content, the download is performed in two steps: first the descriptor file is downloaded, then the content is downloaded. MIDlets always use two step downloads.
To map MIME types, follow these steps:
1. From the Device Management page, click the device name.
The properties page for the device is displayed.
The Device/MIME Types Mappings page is displayed and shows the list of MIME types registered with the Content Delivery Server.
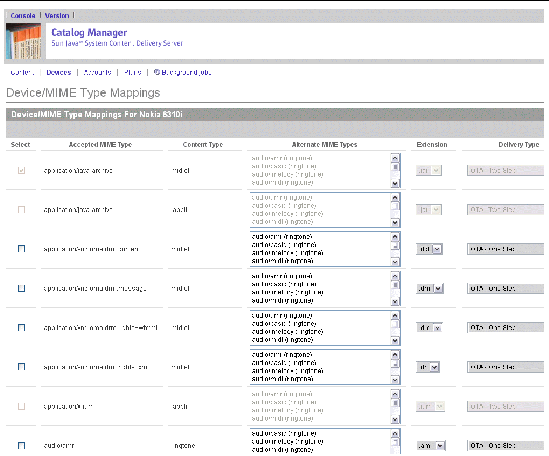
If the Manage MIME Types button is not available, wait a few minutes for the previous edit request to complete before attempting to make more changes. When you change the MIME types supported by a device, the capability matching process is run to update the list of content that matches the device. If a lot of content must be checked, the process can take a while.
3. Select the MIME types that this device supports.
If the device can support a MIME type that is not in the list, you can register the MIME type, then remap MIME types. See Registering a MIME Type.
4. For each MIME type selected, provide the following information:
a. Alternative MIME types to be handled as if they were the MIME type supported for the device.
For example, if the device supports ZIP files with the MIME type application/zip, you can specify application/x-compressed as an alternative MIME type. Content that specifies either MIME type is passed to the device with application/zip specified in the content header.
b. The extension that the device uses for content of that MIME type.
c. The delivery type used for that MIME type.
If you choose a two step download for content other than MIDlets, you must specify a content descriptor template when you set the capabilities of the device. See Managing Content Descriptor Templates for more information.
For SMS content, you must choose either NSM or EMS as the delivery mechanism.
If a delivery type was previously chosen, that delivery type is displayed in the Delivery Type field.
d. Whether the MIME type selected supports MMS.
A message is displayed that tells you that the MIME type mapping selections are saved and that capability matching is in process.
The Device Management page is displayed that shows the capabilities of the device.
The Device Management page is displayed that shows the list of devices.
When a device becomes available that can run content supported by an existing device, you can specify that the device is compatible to the existing device. Subscribers can see content designated for either device.
To define a device as compatible, follow these steps:
1. From the Device Management page, click the new device name to select it.
2. Click Select Compatible Devices in the Device Descriptions page.
3. Select the devices known to be compatible with the new device.
To select multiple compatible devices, press Control and click on the desired devices.
To deselect a single device, press Control and click on the unwanted selected device. To deselect all devices, click the Remove All button.
4. Click OK to save your changes.
5. Click OK in the confirmation page.
When a new device is available that can support existing content, the content can be edited to include the new device as one of its supported devices.
To add a device as a supported device to existing content, follow these steps:
1. Click Content in the Catalog Manager's main menu.
2. Select the desired content from the content list.
3. Click on an instrumented edition of the content in View Content Properties page.
4. Click Select for Supported Devices on the View Content Edition page.
5. Select one or more compatible devices and click OK.
Selecting the option, Force no devices to be selected for this edition, results in no devices being associated with the content edition. The edition is no longer available to subscribers.
6. Click OK again to confirm your selections.
1. From the Device Management page, click the device name to select it.
The Device Management page displays the properties of the device.
The properties page for the device is displayed. The fields that you can edit are the same as those described in Adding a Device. To edit the capabilities of the device, see Specifying Device Capabilities. To edit the settings for MIME types, see Mapping MIME Types to a Device.
A confirmation dialog box asks you to confirm that you want to update the device.
The Device Management page is displayed that shows the capabilities of the device.
The Device Management page is displayed that shows the list of devices.
The Catalog Manager automatically assigns the default device to all new Subscriber Accounts. When you create a Subscriber Account, you can override the default device by assigning one of the defined devices to it.
To set the default device, follow these steps:
1. On the Device Management page, click Set Default Device.
The Set Default Device page is displayed.
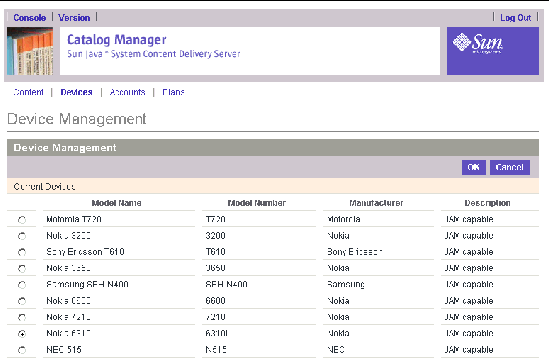
2. Select the device from the list of available devices.
4. Click OK to close the confirmation message.
The device is now set as the default device in the database. All new Subscriber Accounts will be assigned this device as a default upon creation.
You cannot delete the default device. You also cannot delete a device that a subscriber account references.
To delete a device, follow these steps:
1. On the Device Management page, click the name of the device model you want to delete.
The Device Management page for the selected device is displayed.
A delete confirmation dialog box asks you to confirm that you want to delete the device.
The device is deleted from the database.
4. Click OK again to close the confirmation page.
If you already have a device definition file (in .xml format) for a device you want to add, you can import the device directly to the Content Delivery Server without manually adding it. Capability matching, for devices with Active status, is done at the time of import.
The Content Delivery Server provides some device definitions that you can import if you choose. Device definition files are located at $CDS_HOME/dist/cds/handset_definitions, where $CDS_HOME is the directory where the Content Delivery Server is installed.
To import a device, follow these steps:
1. From the Catalog Manager administration console, click Devices on the main menu bar.
2. Click Import on the Device Management page.
3. Click Browse on the Import Device page and select the .xml file containing the data for the device you want to import.
If you want to review the device capabilities before making it available, select the option, Quarantine this device.
The device is listed on the Device Management page. Unless the Quarantine option was selected, the device has a status of Active.
|
To export a device, that is to create a device definition file (in .xml format) for an existing device:
1. From the Catalog Manager administration console, click Devices on the main menu bar.
2. Click the desired device from the list on the Device Management page.
An XML file that defines the properties for the device is displayed. Use the window's File menu to save the file to your preferred location.
A locale is a collection of information necessary to adapt software to a specific geographical location. Some operations are locale sensitive and require a specified locale to tailor information for users, such as:
Content and devices can have one or more locales. You can add or edit locales to the server as needed. See Deleting a Locale for restrictions on removing locales from the server.
1. From the Catalog Manager administration console, click Devices on the main menu bar.
The list of locales is displayed.
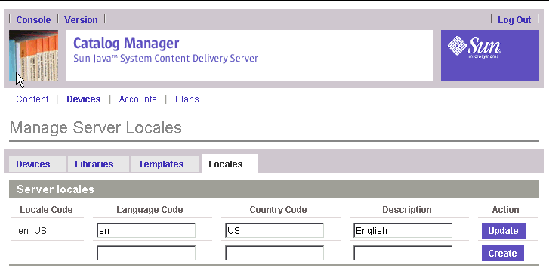
3. Enter the language code, the country code, and the name of the language in the empty row for the new locale.
A locale code is comprised of the language code and the country code separated by a dash (-), for example, en-US is the locale designation for English, United States while en-AU is the designation for English, Australia. The locale code is created or updated for you.
You must enter a valid ISO Language Code. These codes are the lower-case two-letter codes as defined by ISO-639. You can find a full list of these codes at http://www.ics.uci.edu/pub/ietf/http/related/iso639.txt.
You must also enter a valid ISO Country Code. These codes are the upper-case two-letter codes as defined by ISO-3166. You can find a full list of these codes at http://www.chemie.fu-berlin.de/diverse/doc/ISO_3166.html.
Enter the language in the Description field.
4. Click Create to add the locale.
The new locale is added to the list and the server is updated. The new locale is then available for selection for use by content and devices.
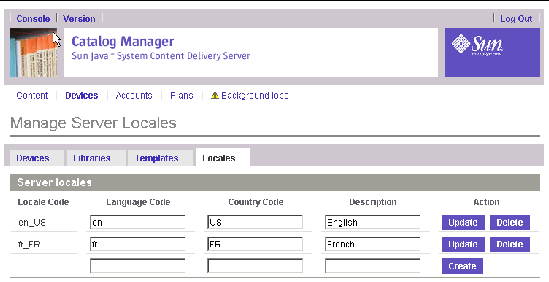
To edit or update a locale or locale information, follow these steps:
1. Select the value for the locale you want to change and enter the new value.
For instance, to change the English to Australian English, replace the Country Code with AU and replace the Description with Australian or Australian English.
To remove a locale from the server, click Delete for the locale you want to remove.
Do not delete locales that are being used by content or devices. An error message appears if an attempt is made.
The Catalog Manager is responsible for managing three types of accounts:
The Catalog Manager does not administer subscriber accounts; these are administered through the Vending Manager. See Managing Subscriber Accounts for more information.
TABLE 2-12 describes the purpose each account type serves:
The following account management tasks are described in this section:
When an operation is performed (editing, deleting, adding, and so on), the Content Delivery Server puts a background job notification in the main menu bar. Click on the notice to see details of jobs that were or are running. See Getting Job Status for more information.
|
1. From the Catalog Manager, click Accounts in the main menu.
By default, the Accounts page displays the list of Vending Manager accounts.
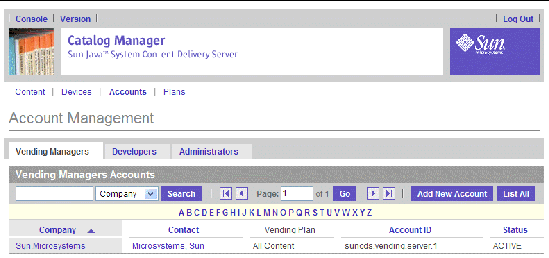
2. Click Developers or Administrators.
The list of defined Developer or Administrator accounts is displayed.
Each account type has its own page or view. TABLE 2-13 describes the operations you can perform on any of the three views.
Vending Manager accounts define the Vending Managers to which the Catalog Manager publishes content. Because a single Catalog Manager can serve multiple Vending Managers, you can have many Vending Manager accounts.
Each Vending Manager account must be assigned to one or more vending plans. Vending Managers are generally configured to serve separate enterprises, so each account generally has a specific Vending Plan. Before you begin creating a Vending Manager account, you might want to create the vending plan that you want to assign to the account. You can assign accounts to the default vending plan and edit the account later.
For information on vending plans, see Managing Vending Plans.
1. From the Catalog Manager, click Accounts in the main menu.
By default, the Accounts page displays the list of Vending Manager accounts.
The Vending Manager account page displays the properties of the selected account.
1. From the Catalog Manager, click Accounts in the main menu bar.
The Vending Managers page is displayed.
The Add New Vending Manager page is displayed.
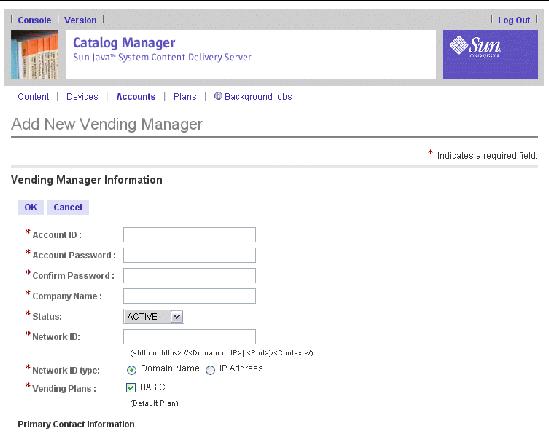
3. Enter the required information.
An asterisk (*) beside a field indicates that it is a required field.
Select the radio button to specify whether the URI contains a domain name or IP address. Use the format hostname:port for domain names. Use the format xxx.xxx.xxx.xxx:port for IP addresses.
To avoid data inconsistency or notification failure, ensure that the Network ID specified is a valid address.
If the Content Delivery Server is running behind a firewall, set the Network ID to the internal IP address of the host running the web server. To verify that the Catalog Manager can access the Vending Manager, open a browser on the host running the Catalog Manager and point the browser to http://vending_manager_ip. If the page cannot be displayed, correct the IP address specified for Network ID.
If you do not specify a vending plan, the Vending Manager account is automatically assigned to the default vending plan. See Managing Vending Plans for information.
4. Click OK to add the new Vending Manager account.
A confirmation message is displayed.
5. Click OK to confirm the addition.
6. Click OK to close the confirmation message.
1. From the Catalog Manager, click Accounts in the main menu bar.
The Vending Manager page is displayed.
2. Click the Vending Manager account you want to modify.
The Vending Manager Account details page is displayed.
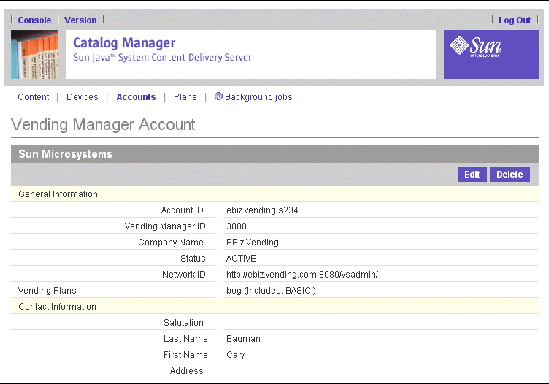
The Edit Account Details page displays the same fields as those described in Adding a Vending Manager Account.
4. Modify the fields as required, then click OK.
A confirmation page asks whether you want to save the changes.
5. Click OK to close the Confirmation page.
1. From the Catalog Manager, click Accounts in the main menu bar.
The Vending Manager page is displayed.
2. Click the Vending Manager account you want to delete.
The Vending Account Details page is displayed.
You cannot delete the account for a Vending Manager with stocked content. You must first unstock all content.
A Confirmation page is displayed asking you to confirm that you want to delete the account.
The account is deleted and it is removed from any vending plan with which it was associated.
Developer accounts are for corporations or individuals that submit content to the Catalog Manager. Each developer is associated with one or more Developer plans. Before you begin creating a Developer account, you might want to ensure an appropriate Developer plan exists that you can assign to the account.
For information on Developer plans, see Managing Developer Plans.
1. From the Catalog Manager, click Accounts in the main menu, then click Developers.
The Accounts page displays the list of Developer accounts.
The Developer Account Details page displays the properties of the account.
1. From the Catalog Manager, click Accounts in the main menu bar, then click Developers.
The Accounts page displays a list of Developer accounts.
The Add New Developer page is displayed.
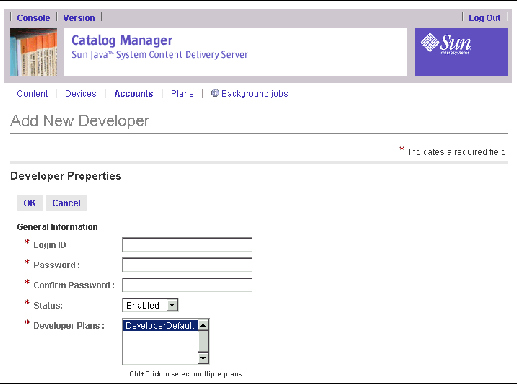
3. Enter the required information.
An asterisk (*) beside a field indicates that it is a required field.
If you do not specify a developer plan, the developer account is automatically assigned to the default developer plan. See Managing Developer Plans for more information.
4. Click OK to add the Developer account.
A confirmation message asks you to confirm you want to add the account.
5. Click OK to confirm the addition.
6. Click OK again to close the confirmation message.
1. From the Catalog Manager, click Accounts in the main menu bar, then click Developers.
The Accounts page displays a list of Developer accounts.
2. Click the Developer account you want to modify.
The Developer Account Details page is displayed.
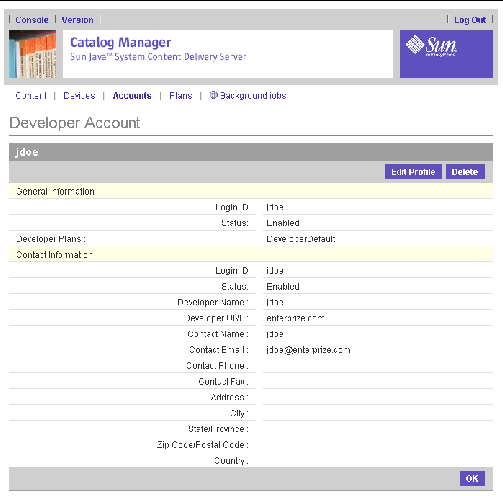
The Edit Account Details page displays the same fields as those described in Adding a Developer Account.
4. Modify the fields as required, then click OK.
A confirmation page is displayed asking whether you want to save the changes.
1. From the Catalog Manager, click Accounts in the main menu bar, then click Developer.
The Accounts page displays a list of Developer accounts.
2. Click the developer account you want to delete.
The Developer Account Details page is displayed.
A Confirmation page is displayed asking you to confirm you want to delete the account.
The developer account is deleted from the database and is removed from any Developer plans with which it was associated.
5. Click OK to close the information message.
Administrator accounts are for administrators who have access to the Catalog Manager. There are no tiers of access, thus every administrator has full access. If you do not want an individual to access the Catalog Manager, you can disable the Administrator account. This keeps the account information in the system but does not allow the user ID access.
1. From the Catalog Manager, click Accounts in the main menu, then click Administrators.
The Accounts page displays the list of Administrator accounts.
The Administrator Account Details page displays the properties of the account.
1. From the Catalog Manager, click Accounts in the main menu bar, then click Administrators.
The Accounts page displays a list of Administrator accounts.
The Add New Administrator page is displayed.
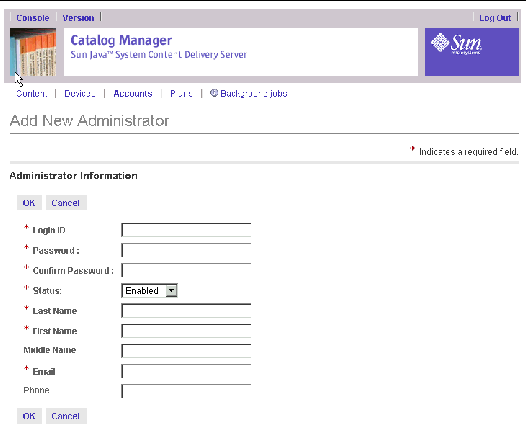
3. Enter the required information.
An asterisk (*) beside a field indicates that it is a required field.
4. Click OK to add the Administrator account.
A confirmation message asks you to confirm you want to add the account.
5. Click OK to confirm the addition.
6. Click OK to close the confirmation message.
1. From the Catalog Manager, click Accounts in the main menu bar, then click Administrators.
The Accounts page displays a list of Administrator accounts.
2. Click the Administrator Account you want to modify.
The Administrator Account Details page is displayed.
3. Click Edit in the top, right corner.
The Edit Account page displays the same fields as those described in Adding a Catalog Manager Administrator Account.
4. Modify the fields as required.
For example, if you want to disable the Administrator account, set the status to Inactive. Then click OK.
A confirmation page is displayed asking whether you want to save the changes.
5. Click OK to confirm the changes.
1. From the Catalog Manager, click Accounts in the main menu bar, then click Administrators.
The Accounts page displays a list of Administrator accounts.
2. Click the Administrator account you want to delete.
The Administrator Account Details page is displayed.
A confirmation page is displayed asking you to confirm you want to delete the account.
The administrator account is deleted from the database and the administrator no longer has access to the Catalog Manager.
5. Click OK again to close the confirmation message.
Vending Manager and Developer accounts are assigned to plans. The Catalog Manager uses plans to control content submission for developers and content access for Vending Managers. TABLE 2-14 describes the two types of plans used by the Catalog Manager.
The following device management tasks are described in this section:
When an operation is performed (editing, deleting, adding, and so on), the Content Deliver Server puts a background job notification in the main menu bar. You can click on the notice to see details of jobs that were or are running. See Getting Job Status for more information.
The Vending Manager handles the selling of content. Since a single Catalog Manager can serve multiple Vending Managers, you can potentially have many Vending plans. A Vending Manager can be assigned to more than one Vending plan, so ensure your Vending plans are limited enough to give you the control you need.
1. From the Catalog Manager, click Plans in the main menu bar.
The Vending Plan Management page displays a list of the Vending plans.
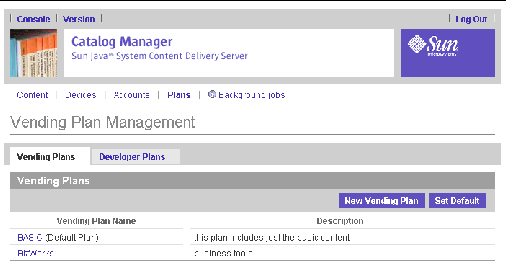
2. Click a Vending plan name to view the properties of the plan.
The Vending Plan Properties page displays the properties of the plan. From this page you can edit, delete, add, or remove members from the Vending plan.
1. From the Catalog Manager, click Plans in the main menu bar.
The Vending Plans page is displayed by default.
The New Vending Plan page is displayed.
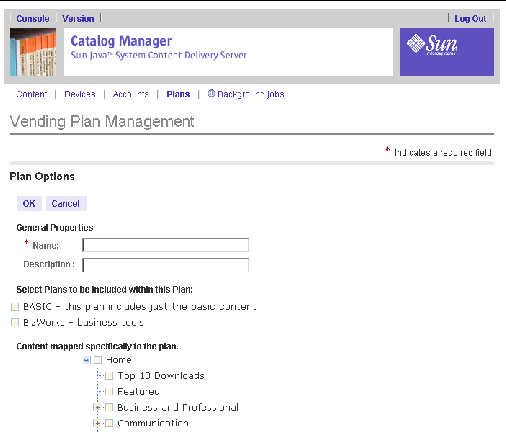
3. Enter the name of the plan and a short description of the plan.
4. Select any existing plans that are to be included in this plan.
5. Specify the categories you want to offer to the Vending Managers that are assigned to this plan.
|
Note - When you select a category, all subcategories for the category are included. |
The new Vending plan is updated to the database.
|
Note - After you create the Vending Plan, you can add Vending Manager accounts to it. See Adding a Member to a Vending Plan. |
Before you edit a plan, you might want to review the Vending Manager accounts that are assigned to the plan. See Viewing Vending Plan Members.
To edit a Vending plan, follow these steps:
1. From the Catalog Manager, click Plans in the main menu bar.
The Vending Plans page is displayed by default.
2. Click the plan that you want to modify.
The Vending Plans Management page is displayed.
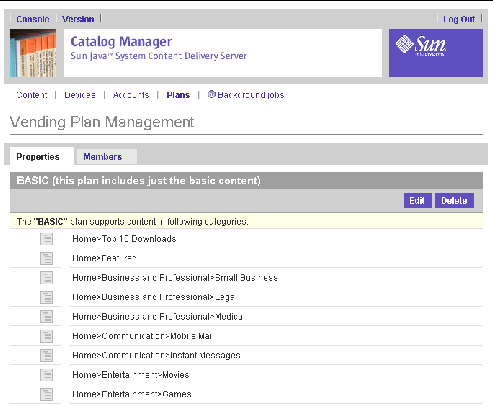
The Edit Vending Plans page displays the same fields as those described in Adding a Vending Plan.
4. Modify the fields as required, then click OK.
The Properties page appears displaying the changed information.
The Vending Plan is updated in the database.
Members are the Vending Manager accounts assigned to a vending plan. You can add and remove members from a Vending plan.
To view the members associated with a Vending plan, follow these steps:
1. From the Catalog Manager, click Plans in the main menu bar.
The Vending Plans page is displayed by default.
2. Click the plan you want to view.
The Vending Plans Properties page is displayed.
The list of Vending Manager accounts associated with the Vending plan is displayed.
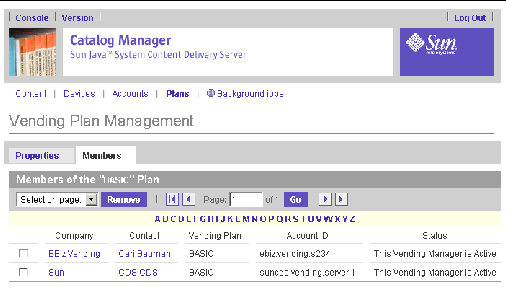
1. From the Catalog Manager, click Plans in the main menu bar.
The Vending Plan Management page is displayed by default.
2. Click the plan you want to view.
The Vending Plan Management page is displayed.
The list of Vending Manager accounts associated with the Vending plan is displayed.
A list of Vending Manager accounts is displayed. Vending Manager accounts that are already assigned to the account are not displayed.
5. Check one or more Vending Manager accounts that you want to assign the Vending Plan to, then click OK.
The Vending Manager account is added as a member of the Vending plan.
1. From the Catalog Manager, click Plans in the main menu bar.
The Vending Plans page is displayed by default.
2. Click the plan that you want to view.
The Vending Plans Properties page is displayed.
The list of Vending Manager accounts associated with the Vending plan is displayed.
4. Select the members you want to remove from the plan, then click Remove.
A Confirmation page confirms that the members will be removed from the plan.
|
Note - If you remove a member that has no other Vending plan assigned to it, the default plan is assigned. |
The default Vending plan is automatically assigned to new Vending Manager accounts until alternative assignments are made.
To set the default vending plan, follow these steps:
1. From the Catalog Manager, click Plans in the main menu bar.
The Vending Plans page is displayed.
The Set Default Vending Plan page displays a list of all Vending plans.
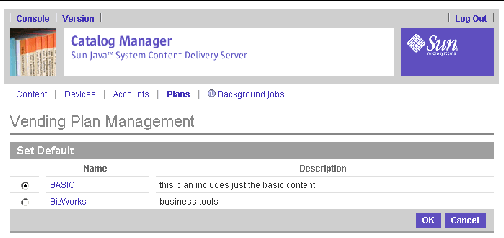
3. Select the plan that you want to set as the default.
The default plan is assigned to all new Vending Manager accounts until a new Vending plan is assigned.
1. From the Catalog Manager, click Plans in the main menu bar.
The Vending Plans page is displayed by default.
2. Click the plan that you want to delete.
The Vending Plans Properties page is displayed.
The following plans cannot be deleted:
A Confirmation page confirms that you want to remove the plan from the database.
4. Click OK to confirm the deletion.
The Vending plan is deleted from the database and from any Vending Manager accounts associated with it. If this is the only Vending plan assigned to a Vending Manager account, the default vending plan is assigned to the account until a new Vending plan is assigned.
Developer plans define the set of APIs that developers can use in applications that they submit. Profiles define the classes in a specific library that developers can use. A Developer plan contains one or more profiles.
The Content Delivery Server provides a default Developer plan. You can customize this default Developer plan for your needs, or you can assign a different plan as the default. New Developer accounts are automatically assigned to the default Developer plan. You can edit the account at any time to assign a different plan.
Developer plans control developer access to the Catalog Manager. You can assign more than one Developer plan to a developer account, so you can make the Developer plans as specific as you need for control within your enterprise.
For example, as an administrator, you can create a set of profiles that include various API sets. Using these profiles, you can create developer plans that provide varying levels of access to developers. The Basic Profile could include the basic API set required to run an application, such as user interface and MIDlet APIs. Other profiles could include various API sets, such as timer classes and storage information. From the set of profiles defined, you could then create the following developer plans:
1. From the Catalog Manager administration console, click Plans in the main menu bar.
2. Click the Developer Plans tab.
3. Select Profiles from the drop-down list.
The list of profiles is displayed.
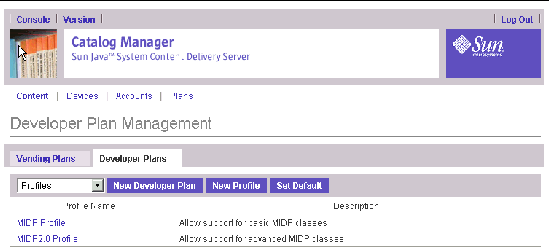
The Profile Definition page is displayed.
1. From the Catalog Manager administration, click Plans in the main menu bar.
2. Click the Developer Plans tab.
The Developer Plan Management page is displayed.
The Profile Definition page is displayed. An asterisk (*) beside a field indicates that it is a required field.
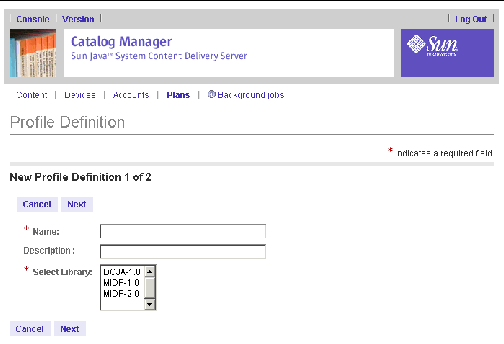
4. Provide the information requested.
The second page for defining a profile is displayed.
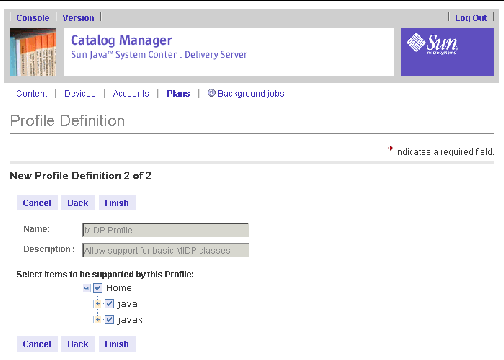
6. Select the items from the library that you want this profile to support.
To select individual methods, expand the package by clicking the plus sign (+) next to the check box for the package.
The new profile is added to the database.
8. Click OK to close the Confirmation page.
1. From the Catalog Manager administration console, click Plans in the main menu bar.
2. Click the Developer Plans tab.
The Developer Plan Management page is displayed.
3. Select Profiles from the drop-down list.
4. Click the profile that you want to modify.
The Properties page for the profile is displayed.
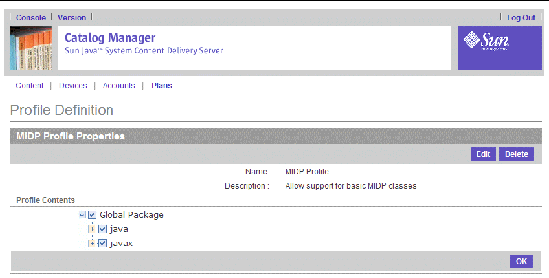
The edit page displays the same fields as those described in Adding a Profile.
6. Modify the profile as required and click OK.
7. Click OK to close the Confirmation page.
The Properties page for the profile is displayed.
The list of profiles is displayed.
1. From the Catalog Manager administration console, click Plans in the main menu bar.
2. Click the Developer Plans tab.
The Developer Plan Management page is displayed.
3. Select Profiles from the drop-down list.
4. Click the profile that you want to delete.
The Properties page for the profile is displayed.
A confirmation message asks you to confirm that you want to delete the profile.
The profile is deleted from the database and from any developer plans in which it was included.
7. Click OK to close the confirmation message.
1. From the Catalog Manager administration console, click Plans in the main menu bar.
2. Click the Developer Plans tab.
3. Select Developer Plans from the drop-down list.
The list of Developer plans is displayed.
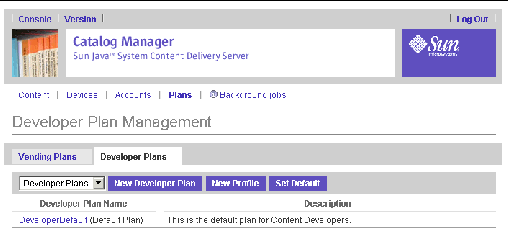
The Developer Plan Definition page is displayed.
1. From the Catalog Manager administration console, click Plans in the main menu bar.
2. Click the Developer Plans tab.
The Developer Plan Management page is displayed.
The Developer Plan Definition page is displayed.
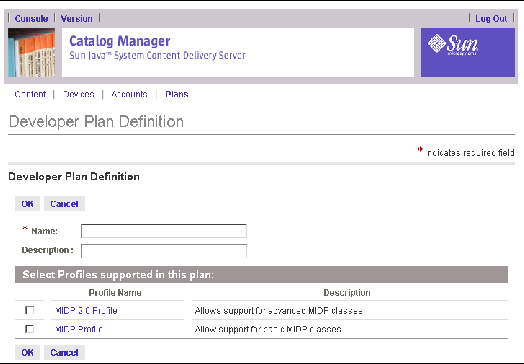
4. Specify a name and description for the Developer plan and select the profiles to be included in this plan.
5. Click OK to save the new Developer plan.
A confirmation message is displayed.
6. Click OK to close the confirmation message.
You can now add Developer accounts to the plan. See Adding a Developer Licensee to a Developer Plan.
Before you edit a Developer plan, you might want to view the Developer accounts associated with the plan. See Viewing Developer Licensees.
To edit a Developer plan, follow these steps:
1. From the Catalog Manager, click Plans in the main menu bar.
2. Click the Developer Plans tab.
The Developer Plan Management page is displayed.
3. Select Developer Plans from the drop-down list.
4. Click the Developer plan that you want to modify.
The Developer Plan Definition page is displayed.
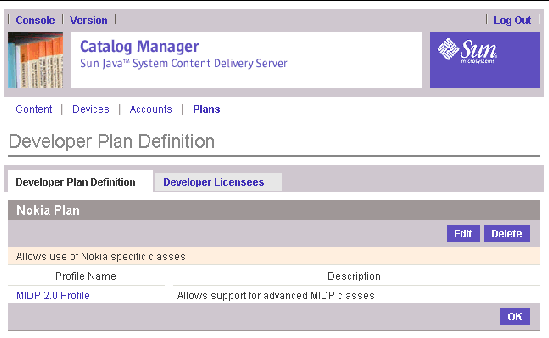
The Developer Plan Definition page displays the same fields as those described in Adding a Developer Plan.
6. Change the information as required, then click OK.
Developer licensees are the developer accounts assigned to a Developer plan. You can add and remove members from a developer plan.
To view the Developer licensees associated with a Developer plan, follow these steps:
1. From the Catalog Manager administrator console, click Plans in the main menu bar.
2. Click the Developer Plans tab.
The Developer Plan Management page is displayed.
3. Select Developer Plans from the drop-down list.
4. Click the Developer plan that you want to view.
The Developer Plan Definition page is displayed.
5. Click the Developer Licensees tab.
The list of Developer accounts associated with the Developer plan is displayed.
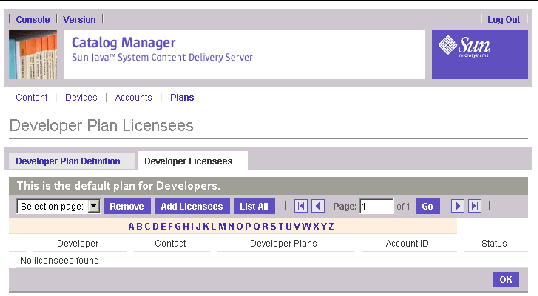
1. From the Catalog Manager administration console, click Plans in the main menu bar.
2. Click the Developer Plans tab.
The Developer Plan Management page is displayed.
3. Select Developer Plans from the View drop-down list.
4. Click the Developer plan that you want to view.
The Developer Plan Definition page is displayed.
5. Click the Developer Licensees tab.
The list of Developer accounts associated with the Developer plan is displayed.
A list of Developer accounts is displayed. The list contains only accounts that are not already associated with the selected plan.
7. Check the Developer accounts that you want to assign to the Developer plan.
The Developer accounts are added as licensees of the Developer plan.
9. Click OK to confirm the addition.
1. From the Catalog Manager administration console, click Plans in the main menu bar.
2. Click the Developer Plans tab.
The Developer Plan Management page is displayed.
3. Select Developer Plans from the View drop-down list.
4. Click the Developer plan that you want to view.
The Developer Plan Definition page is displayed.
5. Click the Developer Licensees tab.
The list of Developer accounts associated with the Developer plan is displayed.
6. Select the Developer accounts that you want to remove.
A confirmation page confirms that the Developer accounts are removed from the plan. If the Developer account that you remove has no other Developer plan assigned, the default Developer plan is assigned.
8. Click OK to confirm the deletion.
The default Developer plan is automatically assigned to new Developer accounts until alternative assignments are made.
To set the default Developer plan, follow these steps:
1. From the Catalog Manager administration console, click Plans in the main menu bar.
2. Click the Developer Plans tab.
The Developer Plan Management page is displayed.
The Default Developer page displays a list of all Developer plans.
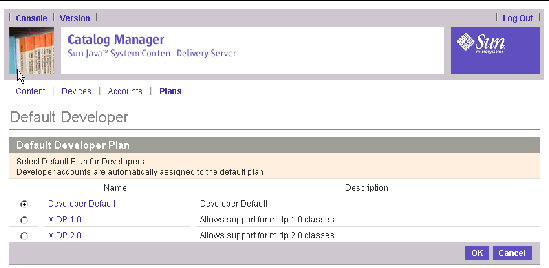
4. Select the plan that you want to set as the default.
The default plan is automatically assigned to new Developer accounts until alternative assignments are made.
Before you delete a Developer plan, you might want to review the Developer accounts that are associated with the plan. See SViewing Developer Licensees.
To delete a Developer plan, follow these steps:
1. From the Catalog Manager administration console, click Plans in the main menu bar.
2. Click the Developer Plans tab.
The Developer Plan Management page is displayed.
3. Select Developer Plans from the View drop-down list.
4. Click the Developer plan that you want to delete.
The default plan cannot be deleted. To delete the plan currently assigned as the default, you must first assign a different plan as the default.
A confirmation message asks you to confirm that you want to delete the Developer plan.
6. Click OK to close the confirmation message.
The Developer plan is deleted from the database, and the plan is deleted from the Developer accounts to which it was assigned. If a Developer account is not assigned to any other Developer plan, the default Developer plan is assigned.
The time it takes for an operation or job such as changing status or editing device characteristics, to complete can vary greatly. Processing time can be lengthy due to several factors, for instance:
The Content Delivery Server provides you with a means to keep informed of the status of submitted jobs. TABLE 2-15 describes the job indicators that are displayed at the end of the Catalog Manager's main menu when a job is submitted.
|
 Click on the Background Jobs notice in the main menu bar.
The Background jobs listing pages lists the completed, pending, and failed background jobs.
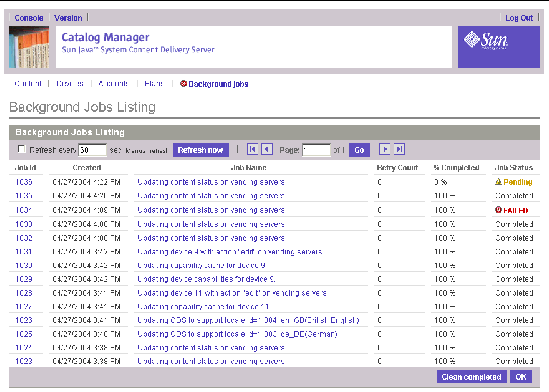
The following information for each job is available:
To clear the listing of successfully completed jobs, click Clean completed. Only pending jobs and failed jobs remain in the list. Pending job status changes when the job successfully completes or fails. Clear the jobs listings regularly to reduce memory usage and to make it easier to review the most recent jobs.
Clicking OK leaves the job listings as is and displays the list of submitted contents.
You can refresh the browser to see the updated status for a pending job when viewing the Background jobs listing page or the Background job detail page.
You can set the job listings page to refresh every 1 to 99 seconds by selecting the Refresh button and entering the number of seconds at which the listing page is to be refreshed. Click the Refresh now button to immediately refresh the page.
Use the forward and back arrows or specify a page in the Background Jobs listing to examine jobs when the list is extensive.
To examine the details of a specific job, click on the Job Id or the Job Name.
Information for the job includes the information shown in the jobs listing page. Any additional information relevant to the specific of job is given under the Detailed Information section at the bottom of the page. Examples of additional information include:
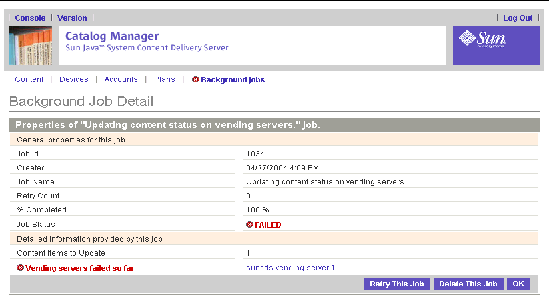
If a job has no additional information, the Detailed Information section states that no other information is available.
Failed jobs remain on the jobs listing page until they are manually cleared. You can do this in the following ways:
The intended job is not completed.
The job you submitted is run again. If you know what caused the failure and you can resolve it, fix the problem and then retry the operation.
Copyright © 2005, Sun Microsystems, Inc. All Rights Reserved.