2.8 Set Up a Front End-Back End Deployment Screen for Calendar Server 6.3
Choose whether to configure this server as a single server deployment, or a front-end, back-end deployment. If you choose to have a single server instance of Calendar Server, then do not select the checkbox on this screen. If you want to put your Calendar Server databases on one or more servers, while keeping the processes that communicate with the client on a different server, select the checkbox.
This section covers the following topics:
2.8.1 Single Server Deployment for Calendar Server 6.3
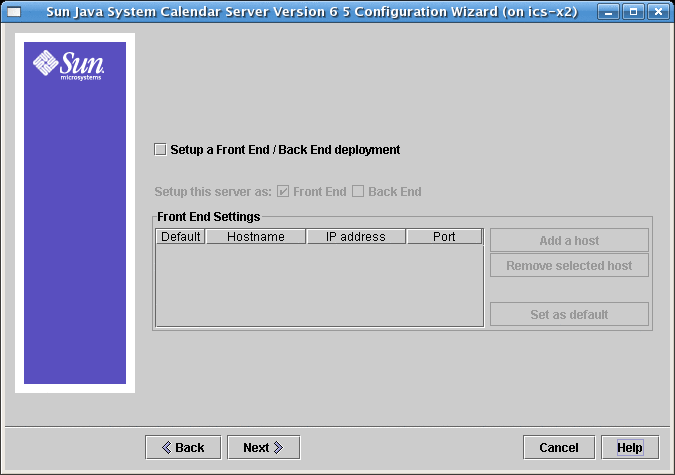
Figure 2–7 Single Server Deployment

Do not change any part of this screen if you want a single server deployment where both the administrative processes and the databases reside on one server. Click Next to continue.
If you wish to deploy separate Front End and Back End machines, click the checkbox labeled: Setup a Front End/Back End deployment. The screen will change and you will be allowed to configure the front-end and back-end servers separately, as shown in the following two screen shots.
2.8.2 Front-End and Back-End Deployment for Calendar Server 6.3
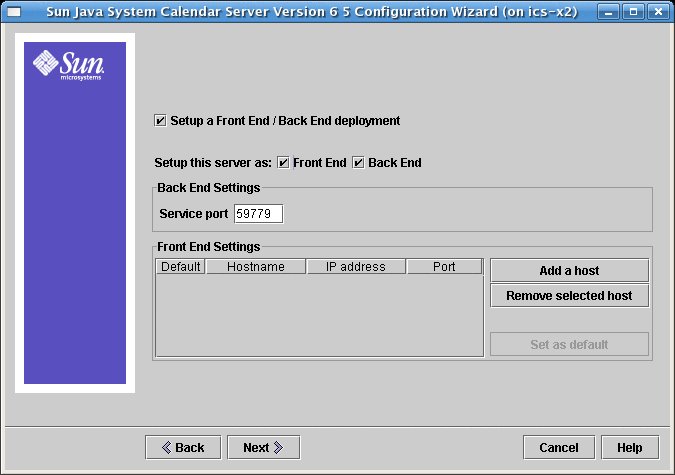
Figure 2–8 Set Up a Front-End and Back-End Server

To complete this screen, perform the following steps:
-
To configure the back-end server, that is, the server on which to store calendar databases, you need only specify the service port.
The service port entry box is pre-filled with the port named in the ics.conf parameters service.dwp.server.hostname.port and service.dwp.port.
If you want to change the port number, enter the desired port number in the Service Port entry box.
-
To configure the front-end server, click Add a Host and then enter the host name and IP address of the server you are configuring.
Note –Add only the server you are currently configuring to the list. If you plan to configure other front-end servers, add them at the time you configure them. (You must run the configuration program on each server you add to your configuration.)
-
If this server is the default front-end server, select the Default checkbox.
-
Click Next.
Note –You may also remove servers from this list by clicking Remove Selected Host.
- © 2010, Oracle Corporation and/or its affiliates
