Basic Proxy Cache Configuration
The procedure described here presumes you have started the proxy cache administration server on your administrative host, as instructed in "Starting the Proxy Cache Administration Server".
To Configure the Proxy Cache Service
For the following procedure, use the data you gathered in Table 1-4 and Table 1-5.
When configuring the proxy cache service for the first time, use the basic proxy cache configuration link. After you have completed first-time configuration, you can use the advanced proxy cache configuration pages to fine-tune properties, such as access lists, timeouts, and object size limits.
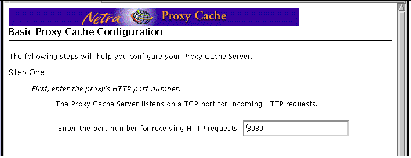
The Basic Proxy Cache Configuration page is displayed, the top part of which is shown in Figure 3-4.
Figure 3-4 Basic Proxy Cache Configuration: Step One

-
In the Step One segment, shown in Figure 3-4, enter an HTTP port number or accept the default of 8080.
-
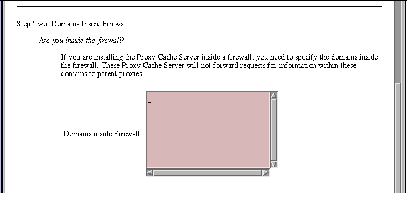
Scroll down (if necessary) to the Step Two segment of the page, shown in Figure 3-5.
Figure 3-5 Basic Proxy Cache Configuration: Step Two

-
If the Netra Proxy Cache Server is inside a firewall, you can list the domains that are inside the firewall.
For URLs containing domains not in this list, the Netra Proxy Cache Server always tries to fetch the object from a parent or sibling cache, if it does not have the object in its local cache. Domains added to this list are also added to the Local Domains property, described in Chapter 4 of the Netra Proxy Cache Array User's Manual.
-
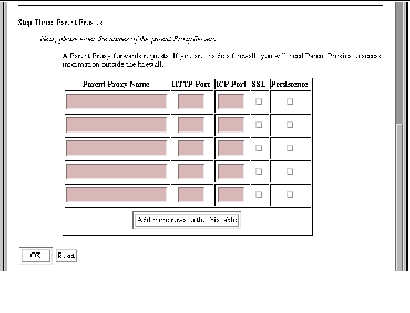
When you are finished entering domain names or if your server is outside of a firewall, scroll down to display the Step Three segment, shown in Figure 3-6.
Figure 3-6 Basic Proxy Cache Configuration: Step Three

-
If your Netra Proxy Cache Server has one or more parent proxy servers, enter the following data in the fields provided:
-
Name of parent proxy server
-
Port number at which the parent listens for HTTP requests
-
Port number at which the parent listens for Inter Cache Protocol (ICP) requests (if the parent supports ICP--a 0 in the field indicates non-support for ICP)
-
Whether the parent supports the tunneling of the Secure Socket Layer protocol
-
Whether the parent supports persistent connections
Use the data you gathered in Table 1-5 to fill in the parent proxy information. Note that Netra Proxy Cache Servers support ICP, SSL tunneling, and persistent connections. If you are unsure whether a given proxy cache server supports SSL tunneling or persistence, do not click the check boxes.
If you have more than five parent proxies, click the button to add additional rows to the table.
-
-
After adding all parent proxies, click OK.
If you make an error, either the same page or a special error page is displayed. In both cases, the error is cited on the page. If the same page is displayed, correct the error and click OK to proceed. If an error page is displayed, correct the error, the use the browser's back button to return to the Basic Proxy Cache Configuration page. In this page, click OK to proceed.
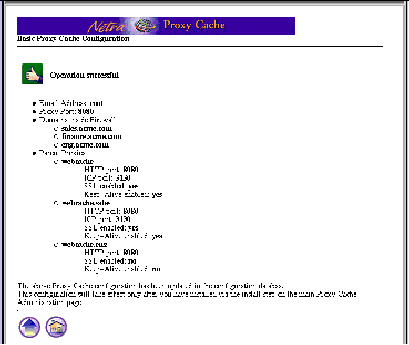
After you have submitted a correct set of proxy cache properties, a page is displayed indicating success and displaying your selections. An example of such a page is shown below.
Figure 3-7 Successful Basic Proxy Cache Configuration

-
In the success window, click the up-arrow icon to return to the Proxy Cache Administration page.
At this point, your proxy cache configuration is recorded in a configuration database. Later, you will install your configuration. Proceed to basic proxy cache array configuration.
- © 2010, Oracle Corporation and/or its affiliates
