Setting Up a Serial Connection to a PPP Server on Windows NT
If your computer has a network adapter card installed and you plan to use the computer to make both serial and LAN connections, create a separate Windows NT hardware profile for each configuration. Refer to Windows NT on-line Help for instructions on setting up hardware profiles.
Setting up a serial connection to a PPP server on a Windows NT computer includes five steps.
To Add Remote Access Service
-
Right-click Network Neighborhood icon, then click Properties.
The Network properties dialog box opens.
-
Click the Services tab, click Add, select Remote Access Service, and then click OK.
The Remote Access Setup program opens the Add RAS Device dialog box.
-
Follow the instructions on the screens to install your modem.
When you have installed your modem, it is listed in the Remote Access Setup dialog box.
-
Click Continue.
Remote Access Service is added to the list of services.
-
Click Close to close the Network dialog box.
-
Click Yes when asked if you want to restart your computer.
To Create a Dial-Up Connection
-
Double-click the My Computer icon, and then double-click Dial-Up Networking.
-
Click New.
The New Phonebook Entry Wizard starts. Fill in the information asked for on each screen with information provided by your Internet Service Provider.
-
Type a name for the connection and then click Next.
Answer questions about how you dial the Internet and then click Next.
-
Type the telephone number of the service provider, and then click Next.
-
Click Finish.
-
(Optional) Click More and choose from the menu to customize modem properties and dialing preferences.
-
Click Close.
To Configure an Authentication Server
-
Right-click Network Neighborhood and then click Properties.
The Network dialog box opens.
-
Click the Services tab, select Solstice NFS Client, and then click Properties.
The Solstice NFS Client Configuration page opens.
-
Click the Security tab.
-
In the Authentication field, select Use A Specific Authentication Server, type the IP address of your authentication server, and then click OK.
When you connect to a PPP server, only the client and the PPP server are considered hosts on the local subnet. You must specify the IP address of the authentication server if it is outside the local subnet.
-
Click Close to close the Network dialog box.
-
Click Yes when asked if you want to restart your computer.
To Grant Dialin Permission to a User
A Windows NT user must have dialin permission to log in to a network over a serial connection.
-
From the Start menu, select Programs, select Administrative Tools, and then click User Manager.
-
Double-click the user's name to open the User Properties dialog box.
-
Click Dialin.
-
Select Grant Dialin Permission To User, choose a Call Back option, and then click OK.
-
Click OK to close the User Properties dialog box.
To Log In and Connect to a PPP Server
-
Press Ctrl+Alt+Delete to log in to Windows NT.
-
Type your Windows NT user name and password, and then click OK.
You will see a message stating that the Solstice NFS Client was not started because a local network was not detected. You cannot successfully log in to the network and be authenticated until you establish a connection to the Solaris server.
-
Click OK.
The Windows NT desktop opens.
-
Double-click the Network Neighborhood icon, double-click Entire Network, and then double-click Solstice_NFS_Client.
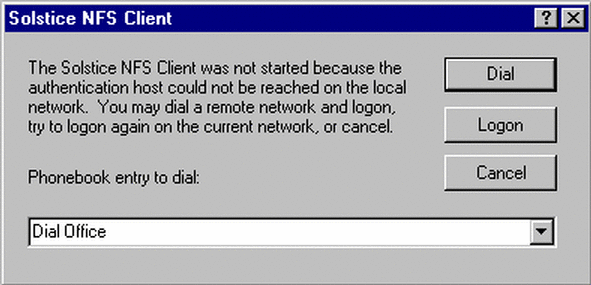
The Solstice NFS Client dialog box (Figure 2-3) opens.
Figure 2-3 Solstice NFS Client Dialog Box

-
Select a number to dial from the phonebook entries listed and click Dial to dial a network connection.
-
Log in to the PPP server.
You might need to type a string such as ppp to start the PPP server. The message, Registering Your Computer on the Network, means your computer has successfully connected to the PPP server. The message, Authenticated, means the PPP server has verified your user name and password.
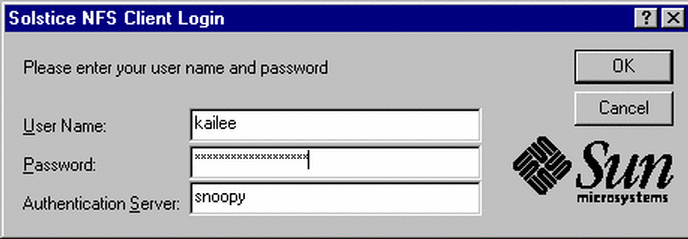
The Solstice NFS Client Login dialog box (Figure 2-4) opens.
Figure 2-4 Solstice NFS Client Login Dialog Box

-
Type your Solstice user name and password, type the name of an authentication server, and then click OK.
You are now logged in to the network and can use NFS to connect to network files.
To Log In to the Solstice Network
If you have set up an automatic dial-in connection, your computer might start dialing the remote server before you click Dial on the Solstice NFS Client dialog box. You are connected to the remote PPP server, but not yet logged in to the network. Logging in to the Network Provider allows you to access NFS files and printers.
-
Double-click the Network Neighborhood icon, double-click Entire Network, and then double-click Solstice_NFS_Client.
The Solstice NFS Client dialog box (Figure 2-5) opens.
Figure 2-5 Solstice NFS Client Dialog Box

-
Select a number to dial from the phonebook entries listed and click Dial to dial a network connection.
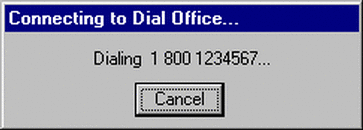
Your computer dials the number you selected.

-
Log in to the PPP server.
You might need to type a string such as ppp to start the PPP server. The message, Registering Your Computer on the Network, means your computer has successfully connected to the PPP server. The message, Authenticated, means the PPP server has verified your user name and password.
The Solstice NFS Client Login dialog box (Figure 2-6) opens.
Figure 2-6 Solstice NFS Client Login Dialog Box

-
Type your Solstice user name and password, type the name of an authentication server, and then click OK.
You are now logged in to the network and can use NFS to connect to network files.
- © 2010, Oracle Corporation and/or its affiliates
